Have you ever hung a picture, stepped back, and thought, “Why does this look wrong?” You measure, hammer the nail, hang the frame, and still feel something is off. The art looks too high.
Or maybe it feels awkwardly placed, even though you followed “eye level” advice. But what does eye level even mean? Yours? Mine? Someone six feet tall? And when people say “hang it above the furniture,” how far above are we talking?
I used to copy layouts from other homes, only to realize they didn’t work in mine. Different ceilings, different furniture heights, different wall space. That’s when it clicked.
The problem wasn’t my taste. It was that I didn’t know the actual measurements that made picture placement work. Once you understand the real numbers, those frustrating “something feels off” moments stop happening. Let’s walk through that together and get it right.
What is the Standard Picture Hanging Height?
The standard hanging height follows the 57-inch rule, which positions the center of your picture 57 inches above the floor. This measurement is based on average human eye level and serves as the universal standard used by professional galleries, museums, and interior designers.
The key to applying this correctly is understanding that you measure from the floor to the center point of your artwork, not to the top or bottom edge of the frame.
To find this center, measure your piece’s total height, divide by two, and mark that line. Then measure 57 inches up from the floor and align your art’s center mark with that wall point. This consistent approach ensures your piece sits at the most comfortable and visually balanced viewing position.
Why the 57-Inch Rule Works So Well
The 57-inch rule works because it aligns pictures with the natural resting point of human vision, where your eyes land when looking straight ahead without tilting your head.
Museums and galleries worldwide use this standard to create comfortable viewing experiences for all visitors without physical strain. This creates the best visual balance in rooms with standard 8 to 10-foot ceilings, particularly on blank walls, hallways, and living spaces with typical furniture arrangements.
When centered at this height, art maintains proper proportion with surrounding elements like sofas and doorways, creating a professionally curated look that feels naturally integrated rather than floating too high or sitting too low.
How High to Hang Pictures in Different Rooms
While the 57-inch rule provides a solid foundation, different rooms require specific adjustments based on furniture placement, ceiling height, and how you use the space.
1. Living Room Wall Art Height

The living room requires flexibility with the 57-inch rule, especially when styling living room art around sofas, consoles, or side tables. For standalone walls without furniture below, stick to the standard center height.
However, when hanging above sofas or consoles, you’ll need to adjust your approach to create visual harmony between the art and furniture.
Key measurements:
- Position artwork 6-8 inches above sofas, consoles, or side tables
- Raise placement a few inches for ceilings above 10 feet
- Remember that seated viewing is primary; art may feel slightly high when standing
2. Bedroom Picture Hanging Height
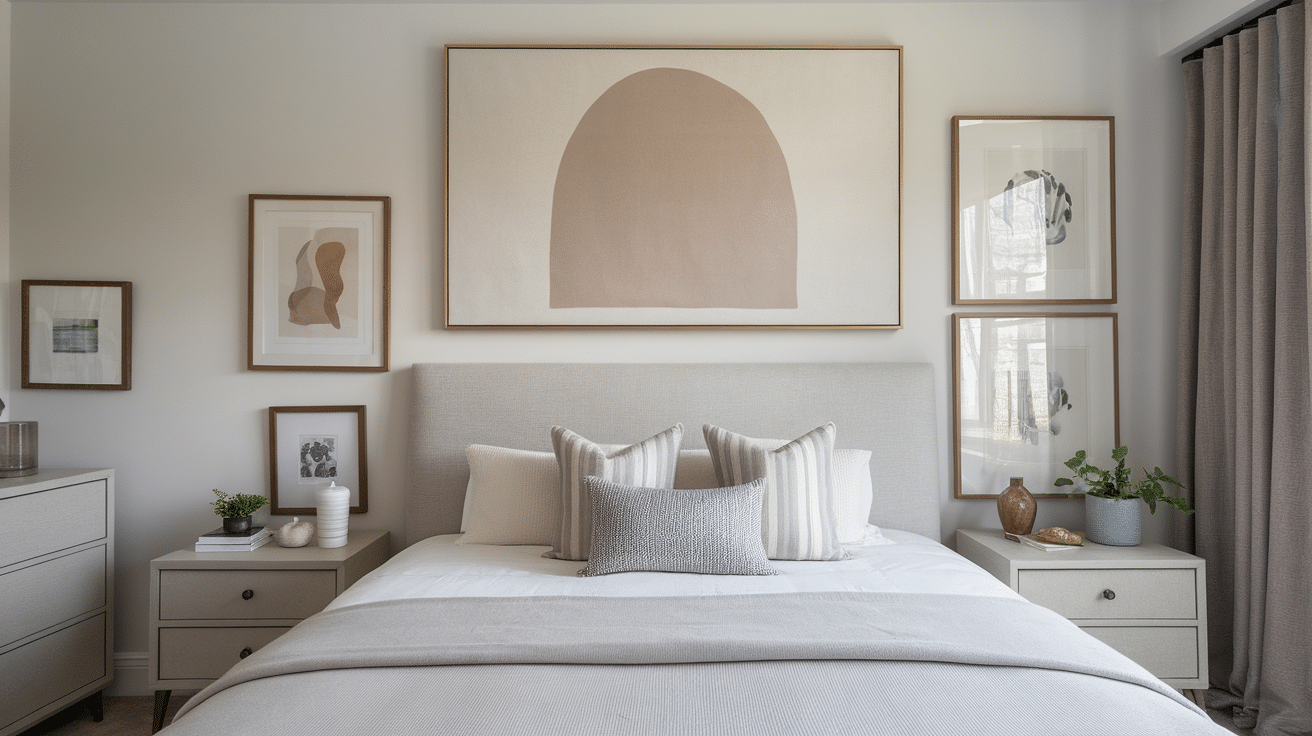
Bedrooms blend relaxation with personal style, so your hanging height should feel comfortable and balanced.
The standard rule works for open walls, but furniture placement requires specific spacing to avoid a disconnected or crowded appearance.
Guidelines for bedroom walls:
- Hang 5-9 inches above headboards for visual unity
- Maintain 6-8 inches of clearance above dressers and nightstands
- Space multiple pieces 3-6 inches apart to prevent clutter
- Statement pieces should span roughly 2/3 of your headboard’s width
3. Hallway and Staircase Art Height
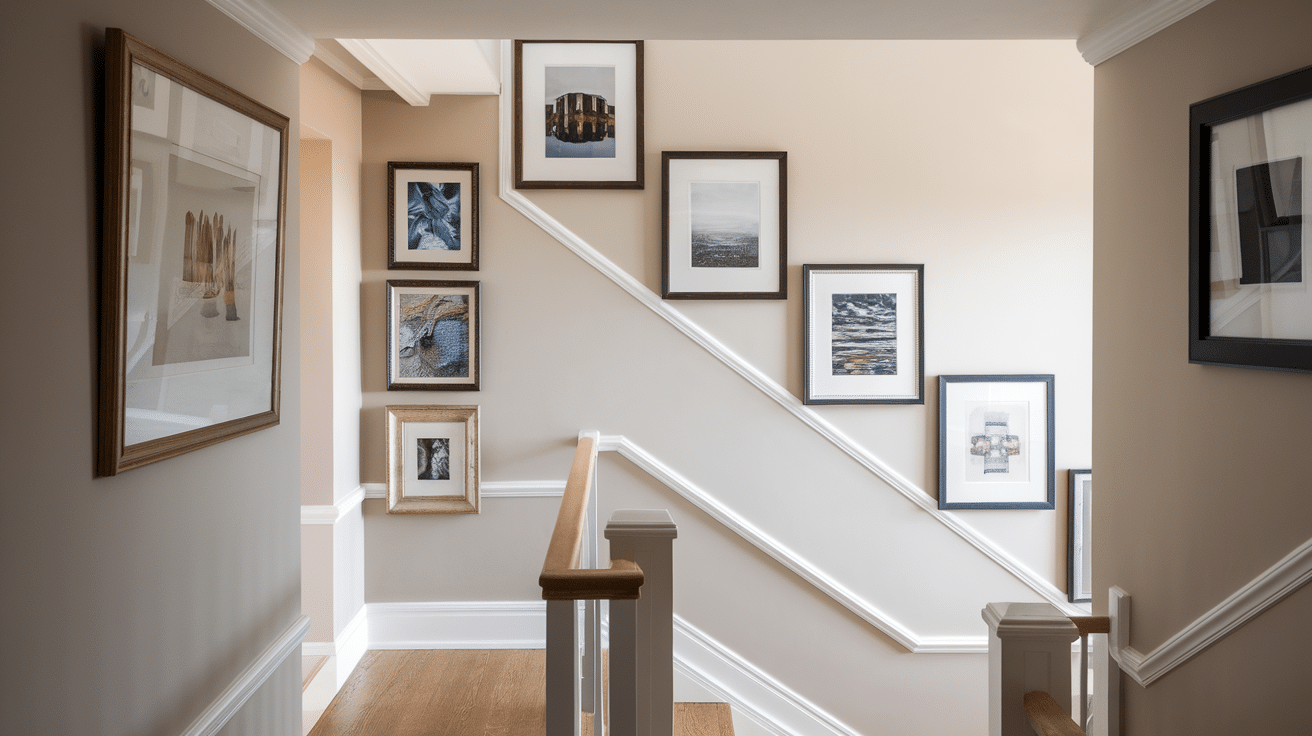
Hallways are straightforward; maintain the 57-inch center height throughout to create consistent eye-level flow as you move through the space.
Staircases present a unique challenge since your floor level constantly changes, requiring a different measurement approach.
Hanging on stairs:
- Measure 60-65 inches from each step’s edge to the art’s center
- Follow the stair angle in a diagonal arrangement
- This keeps frames aligned with your ascending or descending eye level
- For narrow hallways (under 4 feet), choose smaller pieces or vertical arrangements
Exceptions to the 57-Inch Rule
Some situations require adjustments to the standard 57-inch rule based on architectural features and room constraints.
| Exception | Adjustment Needed |
|---|---|
| Chair Rails & Wainscoting | Hang 2-3 inches above molding; never overlap architectural lines |
| Low Ceilings (Under 8 ft) | Lower center to 52-54 inches for proportion |
| Gallery Walls | Center entire grouping at 57 inches, not individual frames; space pieces 2-4 inches apart |
| Horizontal vs Vertical Pieces | Wide pieces may sit 2-3 inches lower; tall pieces extend up/down, check clearance |
These exceptions refine the standard rule for specific situations, start with 57 inches, and adjust only when needed.
How to Measure and Hang Pictures Accurately
The math for finding your hanging point is straightforward, but you need to account for how your artwork actually hangs on the wall. Most pieces hang from a wire or D-ring that sits below the frame’s top edge, which affects your final nail placement.
Follow these steps:
- Step 1: Measure your artwork’s total height from top to bottom.
- Step 2: Divide this measurement by two to find the center point.
- Step 3: Pull the hanging wire taut (as if it’s on the wall) and measure from the frame’s top edge down to where the wire sits. This is typically 2-4 inches.
- Step 4: Subtract your center point (Step 2) from 57 inches, then add back the wire distance (Step 3). This gives you your nail placement height.
- Step 5: Mark this final measurement on your wall; this is precisely where your nail or hook should go.
Example calculation:
- Artwork height: 24 inches
- Center point: 24 ÷ 2 = 12 inches
- Wire distance from top: 3 inches
- Nail placement: 57 – 12 + 3 = 48 inches from floor
Tools that Make It Easier
Having the right tools turns picture hanging from guesswork into a precise process. You don’t need expensive equipment; just a few basics will handle most hanging projects.
Essential hanging tools:
- Tape measure: For accurate wall and artwork measurements
- Level: Ensures frames hang straight (laser levels work great for multiple pieces)
- Painter’s tape: Mark your hanging point and test layouts without damaging walls
- Stud finder: Required for pieces over 20 pounds to find secure anchor points
- Pencil: Light marks that erase easily after hanging
Optional but helpful: Picture hanging strips for renters, wire cutters for adjusting hanging hardware, and a small hammer or drill, depending on your wall type.
Common Picture Hanging Mistakes to Avoid
Even with the best intentions, certain hanging errors can undermine your entire display. Recognizing these common pitfalls helps you create polished, professional-looking walls from the start.
| Mistake | The Problem | The Fix |
|---|---|---|
| Hanging Art Too High | Breaks visual connection; causes neck strain | Follow the 57-inch center rule; art relates to eye level, not the ceiling |
| Artwork Too Small for Wall | Gets lost on large walls; looks unintentional | Choose pieces spanning 2/3 of the wall width or create gallery groupings |
| Poor Gallery Wall Spacing | 6+ inches looks accidental; under 2 inches feels crowded | Maintain 2-4 inches between frames for a cohesive look |
| Ignoring Lighting | Window glare washes out art; glass reflections obscure the piece | Avoid direct sunlight; add picture lights; position perpendicular to windows |
Take your time during installation, measuring twice and hanging once prevents wall damage and ensures your artwork makes the impact it deserves.
Final Thoughts
Now that you know the correct picture hanging height, hanging art doesn’t have to feel like guesswork anymore. When you understand how high to hang pictures, your walls start to feel balanced and intentional.
I use these same guidelines every time I hang artwork, and they save me time and frustration on every wall. Small height changes do make a big difference once you see them in place.
If you want more simple, practical tips like this, I’ve shared helpful guides on wall decor layout, gallery wall spacing, and art placement above furniture. You’ll find ideas for tricky rooms, frames, and mixed wall sets. Take a look at those next and keep building a home that feels right to you.