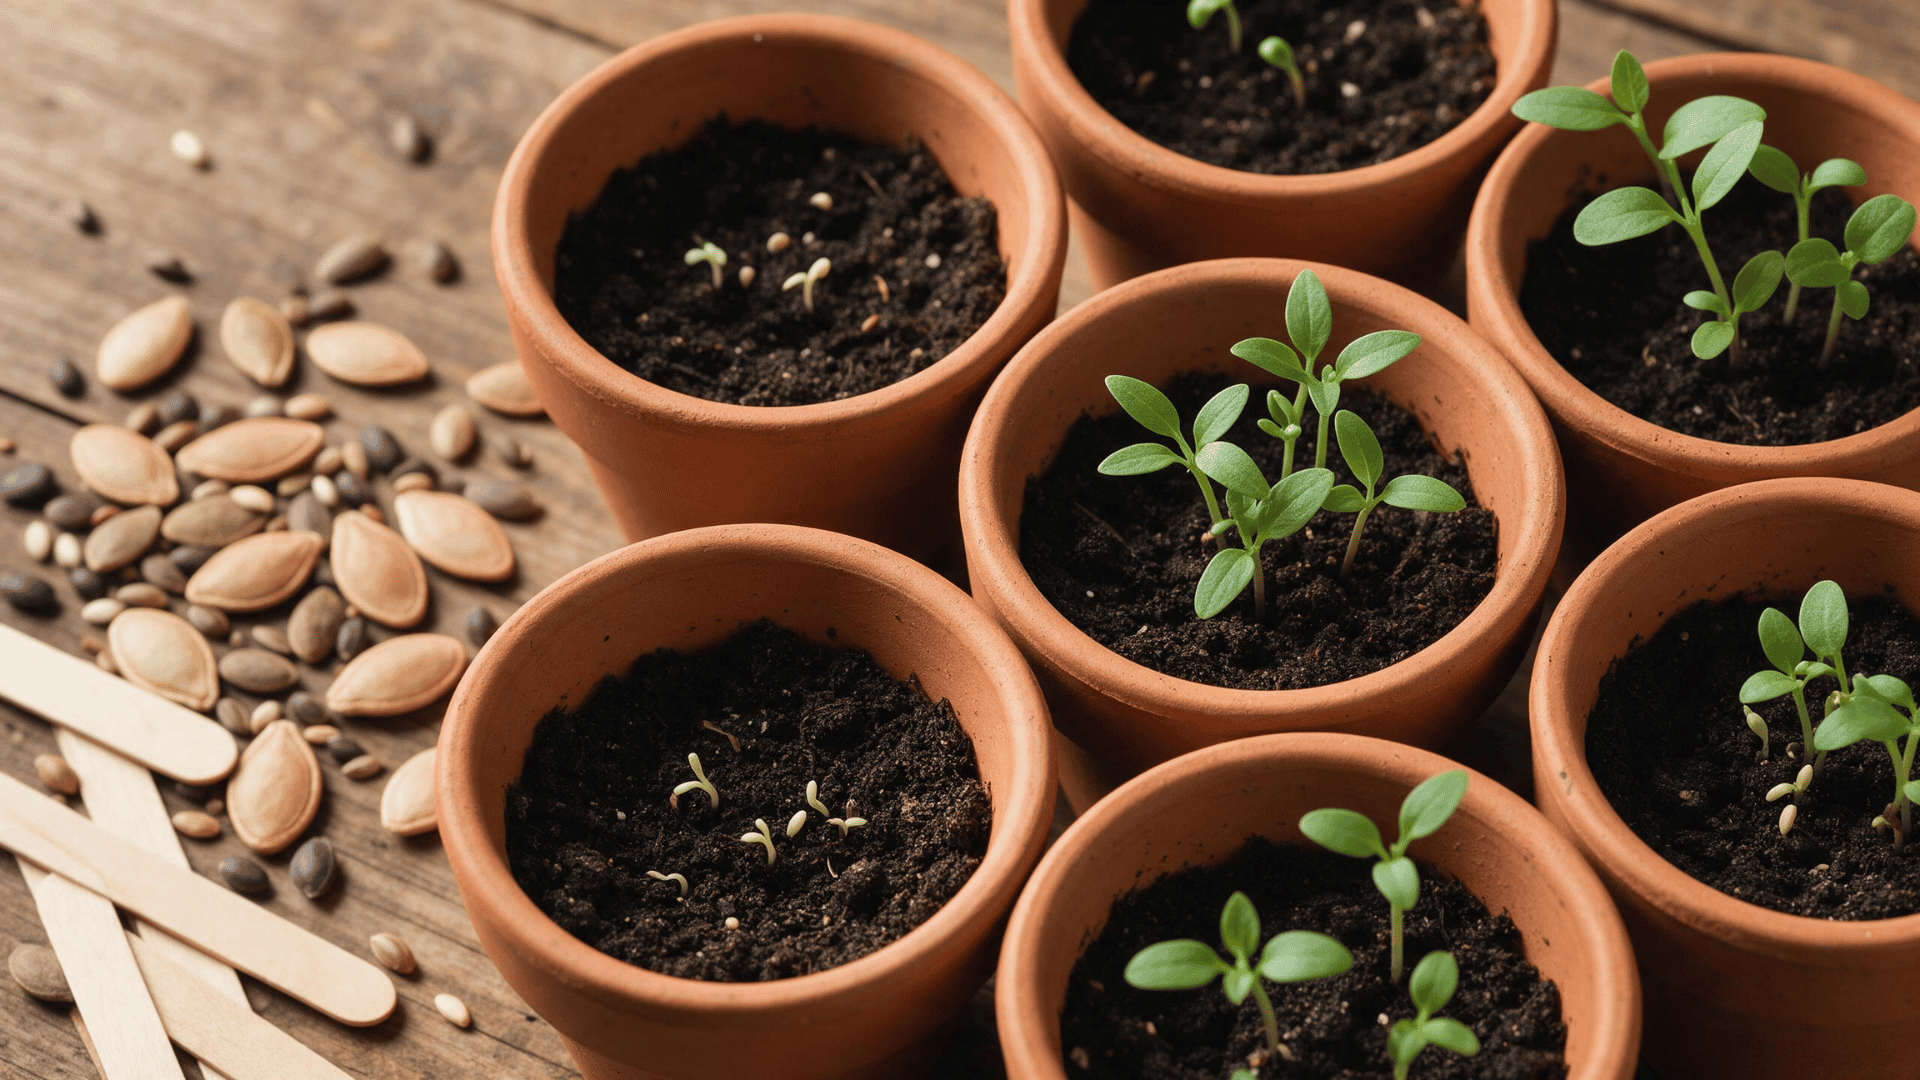
I used to think seed starting was just following whatever the packet said, until I spent two springs replanting tomatoes that outgrew their pots before the soil outside was even workable.
A few seed packets, pots, and a sunny windowsill seem simple until the planting dates on each packet start to differ. One says six weeks before the last frost, another says eight, and suddenly you need a calendar just to get started.
When to start seeds indoors comes down to three things I check every year: my local frost date, the plant itself, and my climate.
Once those line up, planning tomatoes, peppers, herbs, and flowers gets a lot less confusing, and every seed packet in the pile finally makes sense.
Why Start Seeds Indoors?
Starting seeds indoors gives your plants a head start while the weather outside is still too cold to work the soil.
It matters most for vegetables and flowers with a longer growing season, like tomatoes, peppers, and many annual flowers that need eight to ten weeks of growth before they can handle an outdoor bed.
Indoors, seedlings are protected from frost, wind, and temperature swings while getting steady light and moisture.
It also opens up a wider range of varieties than what typically shows up as started plants at the garden center; I’ve found heirloom tomato and pepper varieties from seed catalogs that I’ve never once seen sold as transplants nearby.
By the time outdoor conditions catch up, your seedlings are already growing, roots established, and ready for the garden well before anything at the store.
How to Calculate When to Start Seeds Indoors?
- Find your average last frost date: Check when the final spring frost typically happens in your area through your local extension office, NOAA’s last spring freeze data, or a few years of your own garden notes, since a single almanac estimate can be off by a week or more depending on your microclimate.
- Read the seed packet: Look for directions such as “start indoors 6 to 8 weeks before the last frost.” Different plants need very different lead times, so don’t assume one timeline works for the whole tray.
- Count back from your frost date: If your last frost falls on April 20 and the packet calls for 6 to 8 weeks indoors, plan to sow in late February to early March, then mark it on your calendar so you don’t lose track.
- Adjust for your climate: Cooler springs, higher elevations, and late cold snaps can push transplanting back, while warmer regions can often move ahead of schedule; I push my own dates back most years because I get a surprise frost in early April.
Seed Starting Chart: How Early to Start Seeds Indoors
Vegetables
|
Seed or Crop |
Start Indoors Before Setting Out |
Suggested Outdoor Timing |
|---|---|---|
|
Artichoke |
8–12 weeks |
On frost-free date |
|
Beets |
5–6 weeks |
2 weeks before |
|
3–4 weeks |
2 weeks before |
|
|
Brussels sprouts |
4–6 weeks |
2 weeks before |
|
Cabbage |
4–6 weeks |
4 weeks before |
|
Cauliflower |
4–6 weeks |
2 weeks before |
|
Celery and celeriac |
10–12 weeks |
1 week after |
|
Collards |
4–6 weeks |
4 weeks before |
|
Cucumber |
3–4 weeks |
1–2 weeks after |
|
6–8 weeks |
2–3 weeks after |
|
|
Kale |
4–6 weeks |
4 weeks before |
|
Kohlrabi |
4–6 weeks |
4 weeks before |
|
Leeks |
8–10 weeks |
2 weeks before |
|
Lettuce |
4–5 weeks |
3–4 weeks before |
|
Melons |
3–4 weeks |
2 weeks after |
|
Okra |
4–6 weeks |
2–4 weeks after |
|
Onions |
8–10 weeks |
4 weeks before |
|
8 weeks |
2 weeks after |
|
|
Pumpkins |
3–4 weeks |
2 weeks after |
|
Spinach |
4–6 weeks |
3–6 weeks before |
|
Squash |
3–4 weeks |
2 weeks after |
|
Swiss chard |
5–6 weeks |
2 weeks before |
|
5–6 weeks |
1–2 weeks after |
|
|
Watermelon |
3–4 weeks |
2 weeks after |
Herbs
|
Herb |
Start Indoors Before Setting Out |
Suggested Outdoor Timing |
|---|---|---|
|
Basil |
6 weeks |
1 week after frost-free date |
|
Chamomile |
4–6 weeks |
1 week after |
|
Oregano |
8–10 weeks |
1 week after |
|
Parsley |
9–10 weeks |
1 week after |
|
Rosemary |
10–12 weeks |
1 week after |
|
Sage |
6–8 weeks |
1 week after |
|
Thyme |
8–10 weeks |
1 week after |
Flowers
|
Flower |
Start Indoors Before Setting Out |
Suggested Outdoor Timing |
|---|---|---|
|
Ageratum |
6–8 weeks |
On frost-free date |
|
Agrostemma |
4–5 weeks |
On frost-free date |
|
Alyssum |
4–5 weeks |
1 week after |
|
Amaranthus |
4–6 weeks |
1 week after |
|
Ammi |
4–6 weeks |
On frost-free date |
|
Ammobium |
5–6 weeks |
1 week after |
|
Artemisia |
5–6 weeks |
On frost-free date |
|
Asclepias |
7–9 weeks |
On frost-free date |
|
China aster |
6–8 weeks |
On frost-free date |
|
Atriplex |
4–6 weeks |
1 week after |
|
Bells of Ireland |
6–8 weeks |
On frost-free date |
|
Calendula |
4–5 weeks |
On frost-free date |
|
Carthamus |
4–5 weeks |
On frost-free date |
|
Celosia |
6–8 weeks |
1 week after |
|
Centaurea |
3–4 weeks |
On frost-free date |
|
Cerinthe |
6 weeks |
1 week after |
|
Clarkia |
4 weeks |
1 week after |
|
Columbine |
8–10 weeks |
1 week after |
|
Cosmos |
5–7 weeks |
On frost-free date |
|
Craspedia |
6–8 weeks |
On frost-free date |
|
Dahlia |
4–5 weeks |
1 week after |
|
Delphinium |
10–16 weeks |
On frost-free date |
|
Dianthus |
6–8 weeks |
1–2 weeks before |
|
Didiscus |
4–6 weeks |
1 week after |
|
Digitalis |
10–12 weeks |
On frost-free date |
|
Dusty Miller |
8–10 weeks |
1 week after |
|
Echinacea |
8–10 weeks |
1 week after |
|
Echinops |
6–8 weeks |
1 week after |
|
Eryngium |
10–16 weeks |
1 week after |
|
Eucalyptus |
8–10 weeks |
On frost-free date |
|
Euphorbia |
4–6 weeks |
On frost-free date |
|
Forget-me-not |
3–4 weeks |
On frost-free date |
|
Geranium |
7–9 weeks |
1 week after |
|
Gomphrena |
6–8 weeks |
On frost-free date |
|
Gypsophila |
6–8 weeks |
1 week after |
|
Helipterum |
6–8 weeks |
1 week after |
|
Hibiscus |
6–8 weeks |
1 week after |
|
Larkspur |
5–7 weeks |
On frost-free date |
|
Lisianthus |
12–13 weeks |
On frost-free date |
|
Lupine |
4–8 weeks |
2 weeks before |
|
4–6 weeks |
1 week after |
|
|
Matricaria |
5–7 weeks |
1 week after |
|
Morning glory |
3–4 weeks |
1 week after |
|
Nasturtium |
3–4 weeks |
1 week after |
|
Nicotiana |
5–6 weeks |
1 week after |
|
Nigella |
4–6 weeks |
On frost-free date |
|
Petunia |
4–6 weeks |
1 week after |
|
Portulaca |
4–6 weeks |
1 week after |
|
Phlox |
4–6 weeks |
1–2 weeks before |
|
California poppy |
2–3 weeks |
On frost-free date |
|
Iceland poppy |
6–8 weeks |
On frost-free date |
|
Rudbeckia |
5–7 weeks |
On frost-free date |
|
Salvia |
6–8 weeks |
On frost-free date |
|
Scabiosa |
4–8 weeks |
On frost-free date |
|
Snapdragon |
8–10 weeks |
On frost-free date |
|
Statice |
5–6 weeks |
On frost-free date |
|
Stock |
5–6 weeks |
On frost-free date |
|
Strawflower |
4–6 weeks |
On frost-free date |
|
2–3 weeks |
On frost-free date |
|
|
Sweet pea |
4–6 weeks |
1–2 weeks before |
|
Tithonia |
6 weeks |
1 week after |
|
Verbena |
8–12 weeks |
On frost-free date |
|
Viola |
7–9 weeks |
1–2 weeks before |
|
Yarrow |
8–10 weeks |
On frost-free date |
|
Xeranthemum |
5–8 weeks |
1 week after |
|
Zinnia |
4 weeks |
1 week after |
Ornamental and Dual Purpose Plants
|
Plant |
Type |
Start Indoors Before Setting Out |
Suggested Outdoor Timing |
|---|---|---|---|
|
Cardoon |
Ornamental/edible |
6–8 weeks |
On frost-free date |
|
Hyacinth bean |
Ornamental vine |
4–6 weeks |
1 week after |
|
Maximilian sunflower |
Ornamental flower |
8–10 weeks |
On frost-free date |
|
Monarda |
Flower/herb |
7–9 weeks |
On frost-free date |
|
Ornamental kale |
Ornamental |
4–6 weeks |
On frost-free date |
|
Scarlet runner bean |
Edible/ornamental |
2–3 weeks |
When soil reaches about 60°F |
These are general starting windows, not fixed dates. Always check the instructions on your seed packet, since different varieties may need slightly different timing. Your local weather and growing conditions can also affect when seedlings are ready to move outside.
What You Need to Start Seeds Indoors Successfully
You do not need a complicated setup to start seeds indoors. A few basic supplies can create the right environment for germination and early growth.
- Seeds: Choose fresh seeds suited to your garden and growing season, and check each packet for planting instructions.
- Seed trays or small pots: Use containers with drainage holes to prevent excess water from collecting around young roots.
- Seed-starting mix: Choose a light, loose mix designed for seedlings rather than heavy garden soil.
- Grow lights: A bright window may work for some plants, but grow lights can provide more consistent light for seedlings.
- Watering bottle or small watering can: Gentle watering helps keep the mix moist without washing tiny seeds away.
- Plant labels: Label each container with the plant variety and sowing date so seedlings don’t get mixed up.
- Optional heat mat: Some warm-season seeds may germinate better with extra warmth, especially when your indoor space is cool.
How to Start Seeds Indoors (Step-by-Step)

Step 1: Prepare Your Containers and Seed-Starting Mix
Choose seed trays, cell packs, or small pots with drainage holes so extra water can escape.
Fill them with a fresh, sterile seed-starting mix instead of garden soil, which holds too much moisture and can carry disease straight into your trays.
Lightly dampen the mix before planting so it feels evenly moist, never soaked or muddy. I mix mine in a bucket first so every cell gets the same consistency, which has cut down on uneven germination in my own trays.
Step 2: Sow the Seeds at the Right Depth
Check the seed packet for the recommended planting depth, since it varies quite a bit by plant. Place the seeds in the mix and cover them as directed, keeping tiny seeds like lettuce or petunias barely covered rather than buried.
Label each container with the plant variety and sowing date right away, before you move to the next tray. Skipping this step is the fastest way to lose track of what’s growing once every seedling starts looking the same.
Step 3: Keep the Seeds Warm and Moist
Water gently right after sowing so the seeds settle into place instead of washing to one side.
Keep the containers somewhere warm enough for whatever you’re growing, using a heat mat for warm-season crops if your space runs cool.
Check the mix daily and add water once the surface starts to dry, aiming for steady dampness without ever letting it turn soggy, which is what usually causes seeds to rot before they sprout.
Step 4: Give Seedlings Enough Light
Once the first seedlings appear, move them to a bright spot or under grow lights right away; even a day or two of delay is often when seedlings start stretching.
Follow your grow light’s directions for height and daily run time. If you’re relying on a window, rotate the containers every day or two, so seedlings grow upright instead of leaning hard toward the glass.
Step 5: Care for Seedlings as They Grow
Keep checking moisture as seedlings develop, but hold off watering while the mix is still visibly damp.
Once true leaves appear and the tray starts feeling crowded, thin the weaker seedlings or move plants into larger containers so roots have room to spread.
Giving seedlings enough space, light, and airflow now is what keeps them sturdy instead of thin and floppy by the time they’re ready to head outdoors.
Step 6: Harden Off Before Transplanting
Seedlings raised indoors need time to adjust to real outdoor conditions before they go in the ground.
Start by setting them outside in a sheltered spot for an hour or two, then gradually add more time and direct sun over a week to ten days.
Protect them from harsh midday sun, strong wind, and any lingering cold at first. I’ve lost whole trays to skipping this step, so I treat it as non-negotiable now, even when I’m eager to get plants in the ground.
What Gardeners on Reddit Recommend for Starting Seeds Indoors?
Gardeners on Reddit commonly point out that your local last frost date matters more than the USDA hardiness zone when deciding when to start seeds indoors.
Several recommend working backward from that date and checking each seed packet because plants grow at different rates.
For example, tomatoes may be started around six weeks before the last frost, while peppers often need closer to eight weeks.
Gardeners also stress providing seedlings with plenty of light, since weak lighting can produce tall, stretched plants. Local planting calendars can be helpful when you need more specific timing for your area.
What Happens If You Start Seeds Indoors Too Early or Too Late?
|
If You Start Too Early |
If You Start Too Late |
|---|---|
|
Seedlings may outgrow their trays before it’s time to plant outdoors. |
Seedlings may still be small when it is time to transplant. |
|
Plants can become root-bound if they remain in small containers for too long. |
Plants may take longer to become established in the garden. |
|
Seedlings may become tall, weak, or leggy without enough light and space. |
Flowering and harvest times may be pushed later into the season. |
|
You may need to repot seedlings into larger containers more than once. |
Warm-season crops may have less time to mature before cool fall weather arrives. |
|
Keeping large seedlings healthy indoors can require more space, light, and care. |
You may lose some of the early-harvest advantage of starting seeds indoors. |
How Temperature Affects Seed Germination
When the growing mix runs too cold, seeds can take much longer to sprout or fail to germinate at all. Temperatures that run too warm can just as easily slow things down for certain plants, so warmer isn’t always better.
Each seed type has its own preferred range: warm-season crops like tomatoes, peppers, and eggplant generally want more heat, while cool-season crops like lettuce and broccoli germinate fine at lower temperatures.
Always check the seed packet for specific guidance rather than guessing.
Air temperature and soil temperature aren’t the same thing, which trips up a lot of new gardeners, myself included the first year I tried this.
If your space runs cool, a seedling heat mat adds steady warmth for seeds that need it, though I pull mine once seedlings emerge, since their needs shift once they’re up and growing.
How to Know When Seedlings Are Ready to Go Outside
A date on the calendar does not always mean your seedlings are ready for the garden. Check the plants and outdoor conditions together before transplanting.
- They have true leaves: Seedlings should have developed several true leaves beyond the first small seed leaves.
- The stems look sturdy: Healthy seedlings should be strong enough to handle gentle movement without looking weak or stretched.
- The roots are established: Roots should hold the growing mix together without being tightly tangled or circling the container.
- Outdoor temperatures are suitable: Make sure daytime and nighttime temperatures suit the particular plant you are growing.
- Frost risk has passed when required: Don’t put tender warm-season plants outside while frost remains a risk.
- They have been hardened off: Gradually introduce seedlings to outdoor sun, wind, and temperature changes before planting them permanently.
Common Seed-Starting Timing Mistakes to Avoid
- Starting every seed at the same time: Different plants grow at different speeds, so tomatoes, peppers, lettuce, and cucumbers should not automatically share the same starting date.
- Ignoring your last frost date: Using a general month instead of your local frost date can leave seedlings ready too early or too late.
- Skipping the seed packet instructions: Each variety may have slightly different timing, planting depth, and temperature needs.
- Starting fast-growing plants too early: Cucumbers and other quick growers can become oversized or root-bound while waiting to go outside.
- Relying only on your growing zone: Your zone is useful, but local frost dates and current weather conditions matter when planning spring planting.
- Transplanting as soon as the frost date arrives: Check soil and air temperatures, upcoming weather, and the needs of the plant before moving seedlings outside.
- Forgetting to harden off seedlings: Even when the timing is right, indoor-grown plants need gradual exposure to outdoor conditions before transplanting.
Ready to Grow?
Seed starting gets much easier once you stop treating every packet the same. If you know when to start seeds indoors, you can work backward from your last frost date and give each plant the head start it actually needs.
So, pull out those seed packets and grab your calendar. Tomatoes may be ready for their little pots while cucumbers still have a few weeks to wait.
Keep the light, moisture, and temperature in check, and don’t rush seedlings outside before they are ready.
Before long, those tiny seeds on your windowsill will be sturdy little plants waiting for their spot in the garden. And when planting day finally arrives, you’ll be glad you got the timing right.
Frequently Asked Questions
Is it better to germinate seeds in paper towel or soil?
Soil is usually better because seedlings can continue growing without being moved. Paper towels are more useful for testing if seeds are viable.
Does hydrogen peroxide make seeds germinate faster?
Not necessarily. Hydrogen peroxide is sometimes used for seed treatment, but it is not needed for normal germination, and improper concentrations can damage seeds.
Can I germinate old seeds?
Yes, old seeds may still germinate, although their success rate can decline with age and storage conditions.
What to do with seeds that won’t germinate?
Check the moisture, temperature, planting depth, and expected germination time. If conditions are right but nothing sprouts, consider starting again with fresh seeds.