I still remember staring at my empty yard, wanting fresh vegetables but having no clue where anything should go.
If you’re searching for a beginner-friendly basic vegetable garden layout, you’re likely in the same spot, wanting clear steps instead of guesswork. It’s easy to feel stuck on spacing, plant choices, and how big to start.
A simple layout can save you time, money, and stress while still giving you good harvests.
In this guide, I’ll walk you through easy layouts, tools, and common mistakes, so your beginner basic vegetable garden layout feels simple to plan and even easier to use.
So let’s start with layouts you can actually follow and enjoy.
Before You Pick a Layout
Choosing a layout feels easier when you take a moment to look at your space and daily routine.
If you’re new to gardening, starting with the easiest vegetables to grow for new gardeners can make planning your layout far less stressful and much more rewarding.
Start by checking where the sun hits during the day, since most vegetables grow best with steady light. Then, think about how much time you want to spend on care each week.
A small garden fits busy days, while a slightly larger one works if you enjoy regular tasks like watering and trimming. Make sure the spot stays easy to reach so you don’t step on the soil.
Pick an area that drains well and feels comfortable to walk around. With these simple checks done, the layout ideas ahead will fit your yard with far less effort.
Beginner Basic Vegetable Garden Layout Ideas
These layouts give you simple ways to set up a beginner garden. Each one is easy to understand, space-friendly, and low-stress.
1. 4×8 Square Foot Garden

A 4×8 square foot garden is great for beginners because it breaks the bed into sixteen small sections you can manage without stress.
Put tall crops like tomatoes or pole beans along the back so they don’t block the sun. Use the middle squares for peppers or herbs.
Keep the front squares for greens, radishes, or carrots. This setup works well in small yards, and the clear grid pattern helps you control spacing, reduce wasted room, and keep everything easy to reach for planting and harvesting.
2. Beginner 10×10 Grid

A 10×10 grid gives you more planting room while staying beginner-friendly. Divide the area into ten short rows or a simple block pattern.
Place your tall crops, such as tomatoes or okra, along the back. Use the center for peppers, bush beans, or herbs.
Keep the front rows for greens, carrots, or beets. This design is straightforward to manage and gives you enough space to grow a wide mix of vegetables without feeling overwhelmed.
The layout also makes watering, weeding, and harvesting simple.
3. Small Patio With Pots
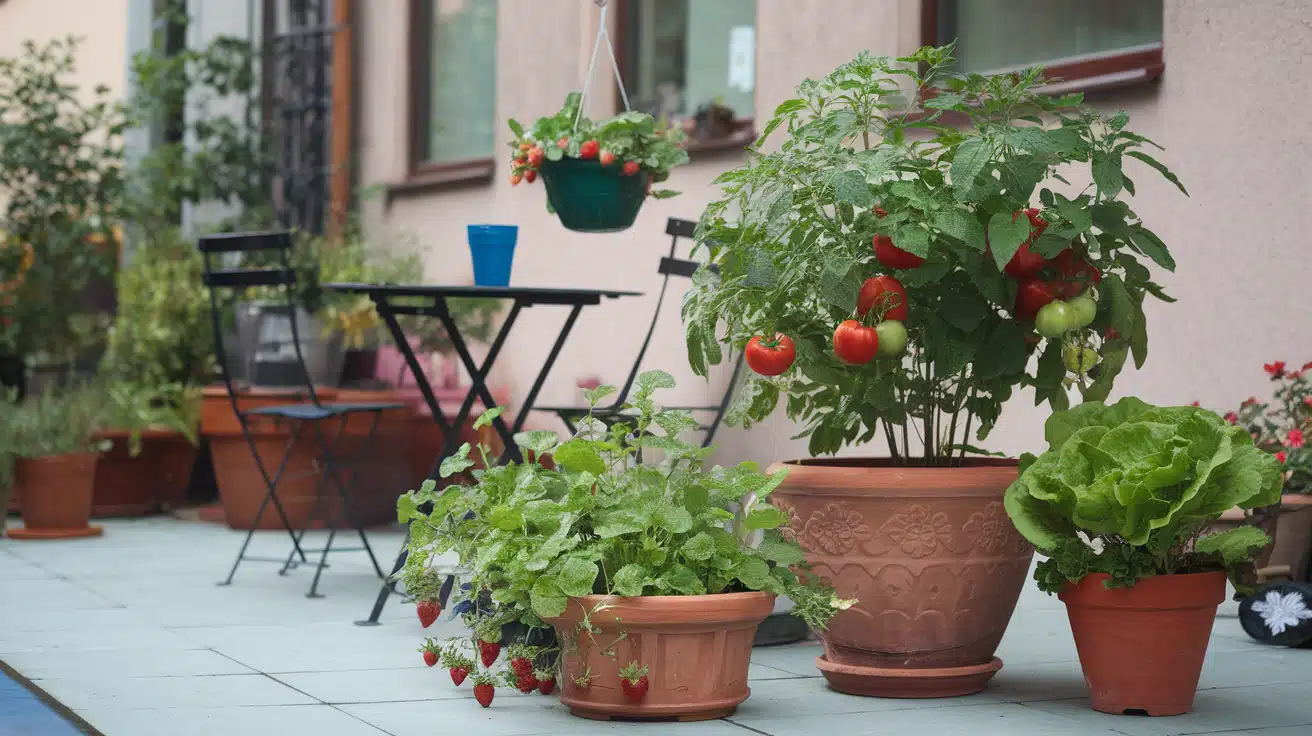
This layout works well if you only have a patio, balcony, or small concrete area. Choose large containers for tomatoes and peppers since they need more soil.
Use medium containers for herbs, lettuce, and compact greens. Hang baskets for strawberries or use a rail planter for small crops.
This setup lets you move pots when the sun shifts, which helps plants grow well in tight spaces. It’s also easier to water and maintain because everything stays close together.
You can expand or reduce the number of pots depending on your needs.
4. Salad Layout

A salad layout focuses on fast-growing greens and vegetables you can harvest often. Use one section for lettuce, another for spinach, and a third for arugula or similar greens.
Add a row of radishes or carrots for variety. Include a small corner for herbs like chives or parsley. This design helps you keep a steady supply of fresh salad ingredients without using much space.
Because most crops mature quickly, you can replant several times through the growing season. It’s one of the easiest layouts for new gardeners.
5. Salsa Layout
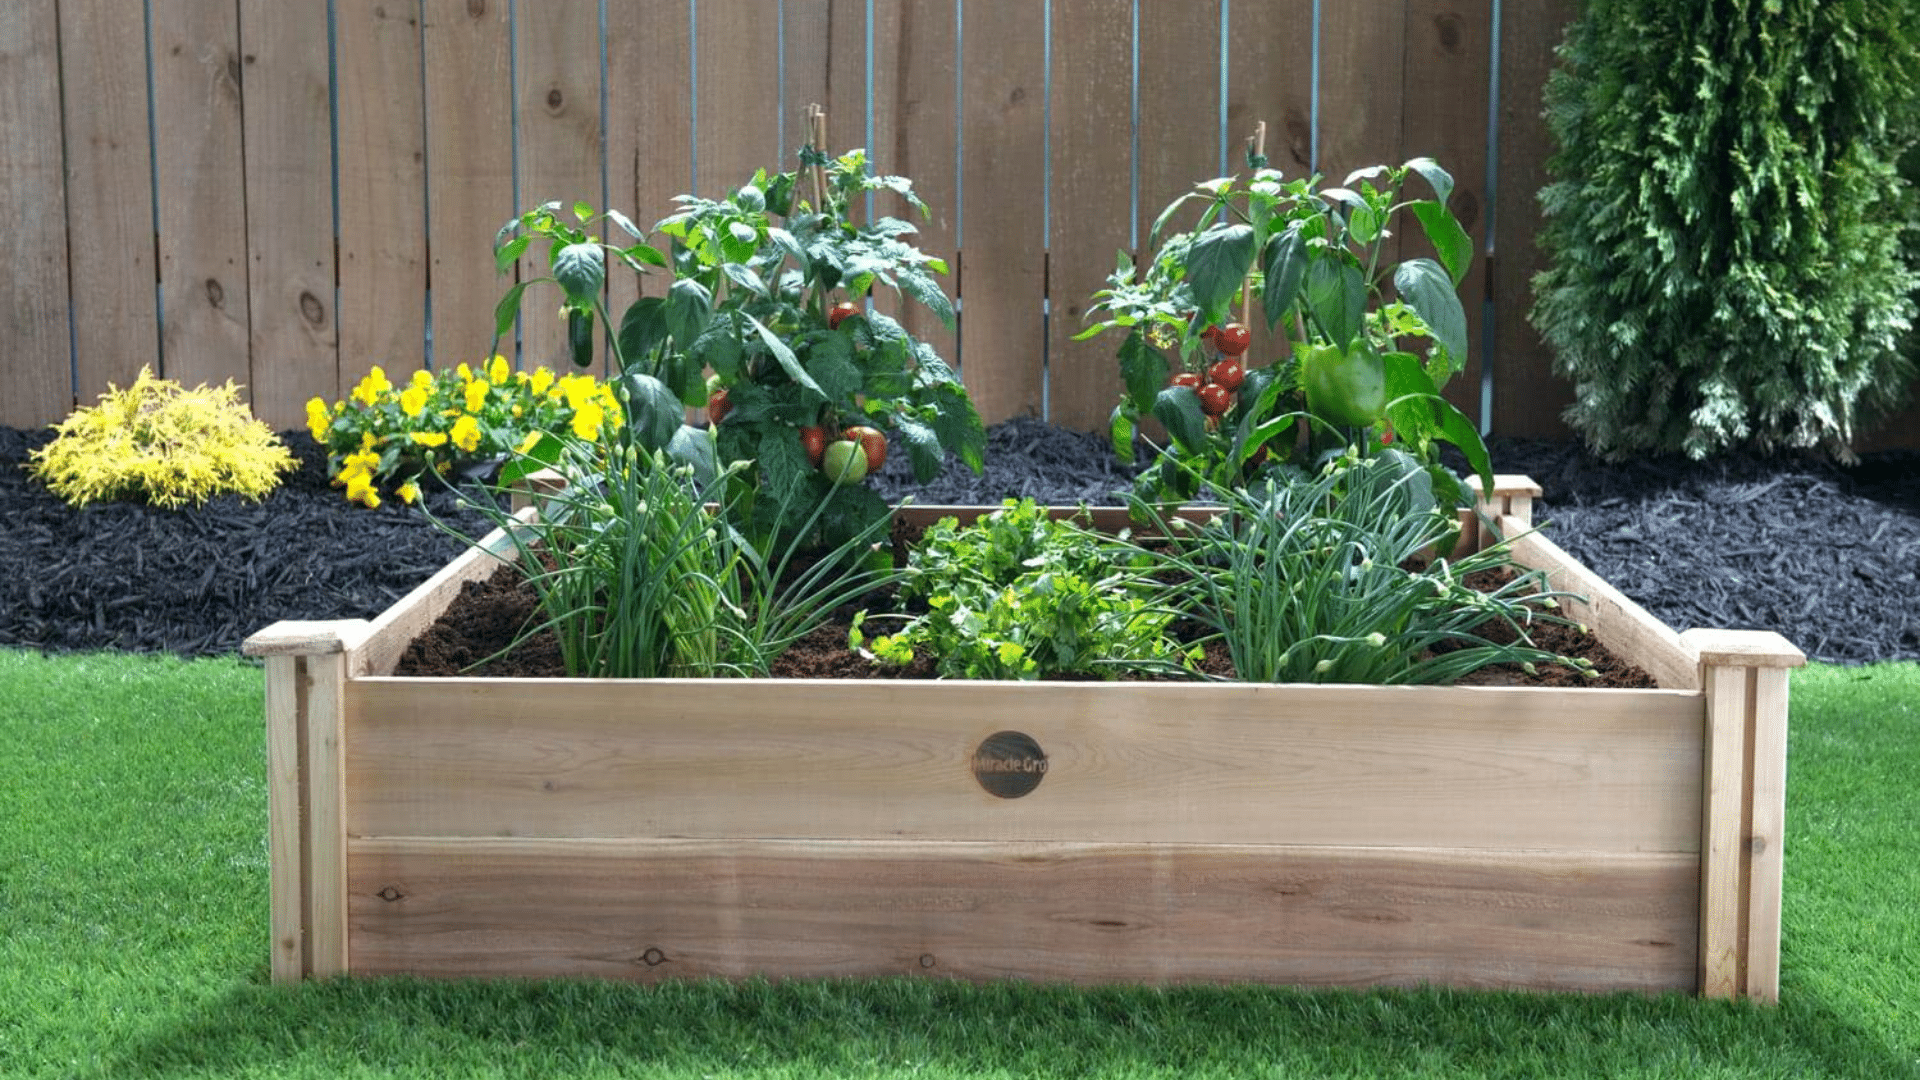
A salsa layout groups the vegetables you need for fresh salsa. Place tomatoes along the back since they grow tall. Add peppers in the middle, using mild or hot varieties based on your preference.
Plant onions or green onions near the front so they get full sun without blocking other plants.
Include a small patch of cilantro in a corner where you can reach it easily. This layout keeps all related crops together, makes care simple, and gives you the pieces you need to harvest fresh ingredients through the season.
6. Stir-Fry Layout

A stir-fry layout focuses on crops that cook well together and grow at different heights. Put snow peas or pole beans along a trellis at the back. Use the middle for bok choy, peppers, or small cabbage.
Keep carrots or green onions in the front so they stay easy to reach. This layout helps you use vertical space while keeping plenty of room for low, leafy crops.
Everything grows quickly, so you can harvest often. It’s a good option for small yards or raised beds.
7. Two Raised Bed Layout

This layout uses two 4×8 raised beds. Use one bed for tall or fruiting crops like tomatoes, peppers, and cucumbers. Add simple support for plants that climb.
Use the second bed for greens, carrots, beets, or herbs. Splitting your crops helps you manage watering and prevents shading issues.
You also get clear walking space between the beds, which makes maintenance easier. This setup is helpful for beginners who want more growing room without dealing with a large in-ground garden.
8. L-Shaped Corner Layout

An L-shaped layout fits neatly into the corner of a yard or patio. Place tall crops, like tomatoes or trellised beans, along the long side of the “L.” Use the shorter side for medium crops like peppers or herbs.
Keep the inside corner for greens, carrots, or any small plants. This design uses awkward or unused spaces well and still gives you walking room.
The shape also helps sunlight reach every section because the crops are spread out instead of crowding one straight line.
9. 4×4 Starter Bed
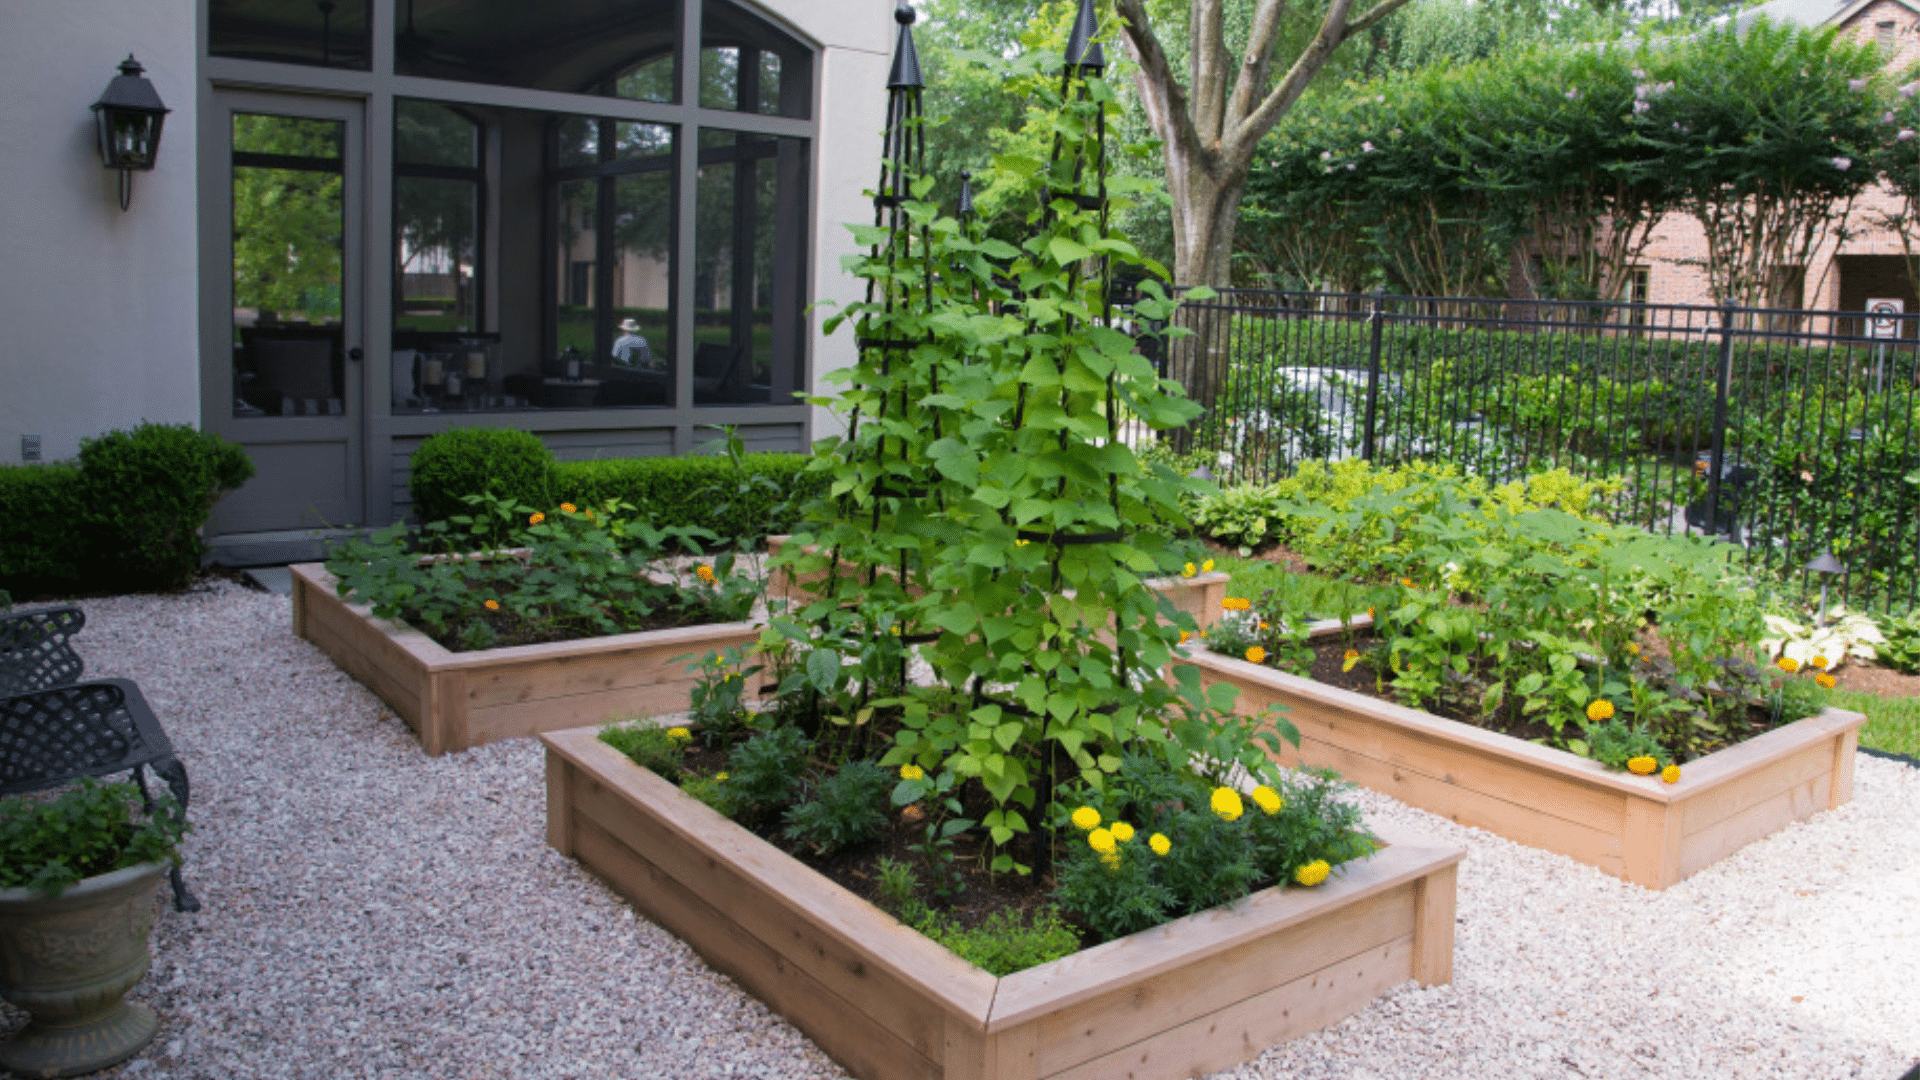
A 4×4 bed is perfect for beginners because it’s small, clear, and easy to manage. Divide it into sixteen small squares.
Use the back squares for one or two tall plants like a compact tomato variety. Put herbs or bush beans in the center squares.
Fill the front squares with greens or quick crops like radishes. This layout requires very little bending or stretching, and it gives you a good understanding of spacing while keeping everything close and simple to reach.
10. Simple Vertical Layout

A simple vertical layout helps you grow more food in tight spaces. Place a tall trellis, netting, or post at the back of the bed for cucumbers, beans, or small melons.
Use the middle section for medium crops like peppers or basil. Keep the front open for greens, carrots, or short herbs. This setup improves airflow, supports healthy growth, and prevents sprawling vines from taking over the ground.
It’s a great choice if you want a productive garden but don’t have much horizontal space.
Medium Difficulty Level Layouts for Better Yield
These layouts help you grow more types of vegetables in one space while keeping everything simple enough for steady care and easy harvests.
11. Three-Bed Rotation Layout

A three-bed rotation layout uses three beds of the same size so you can move crops each season.
One bed holds fruiting crops like tomatoes and peppers. The second bed holds root crops such as carrots and beets. The third bed holds greens and herbs.
Rotating these groups each year helps reduce pest pressure and supports soil balance without extra work.
This setup works well for gardeners who want more food without adding more beds or dealing with complicated planning every season.
12. Companion Layout
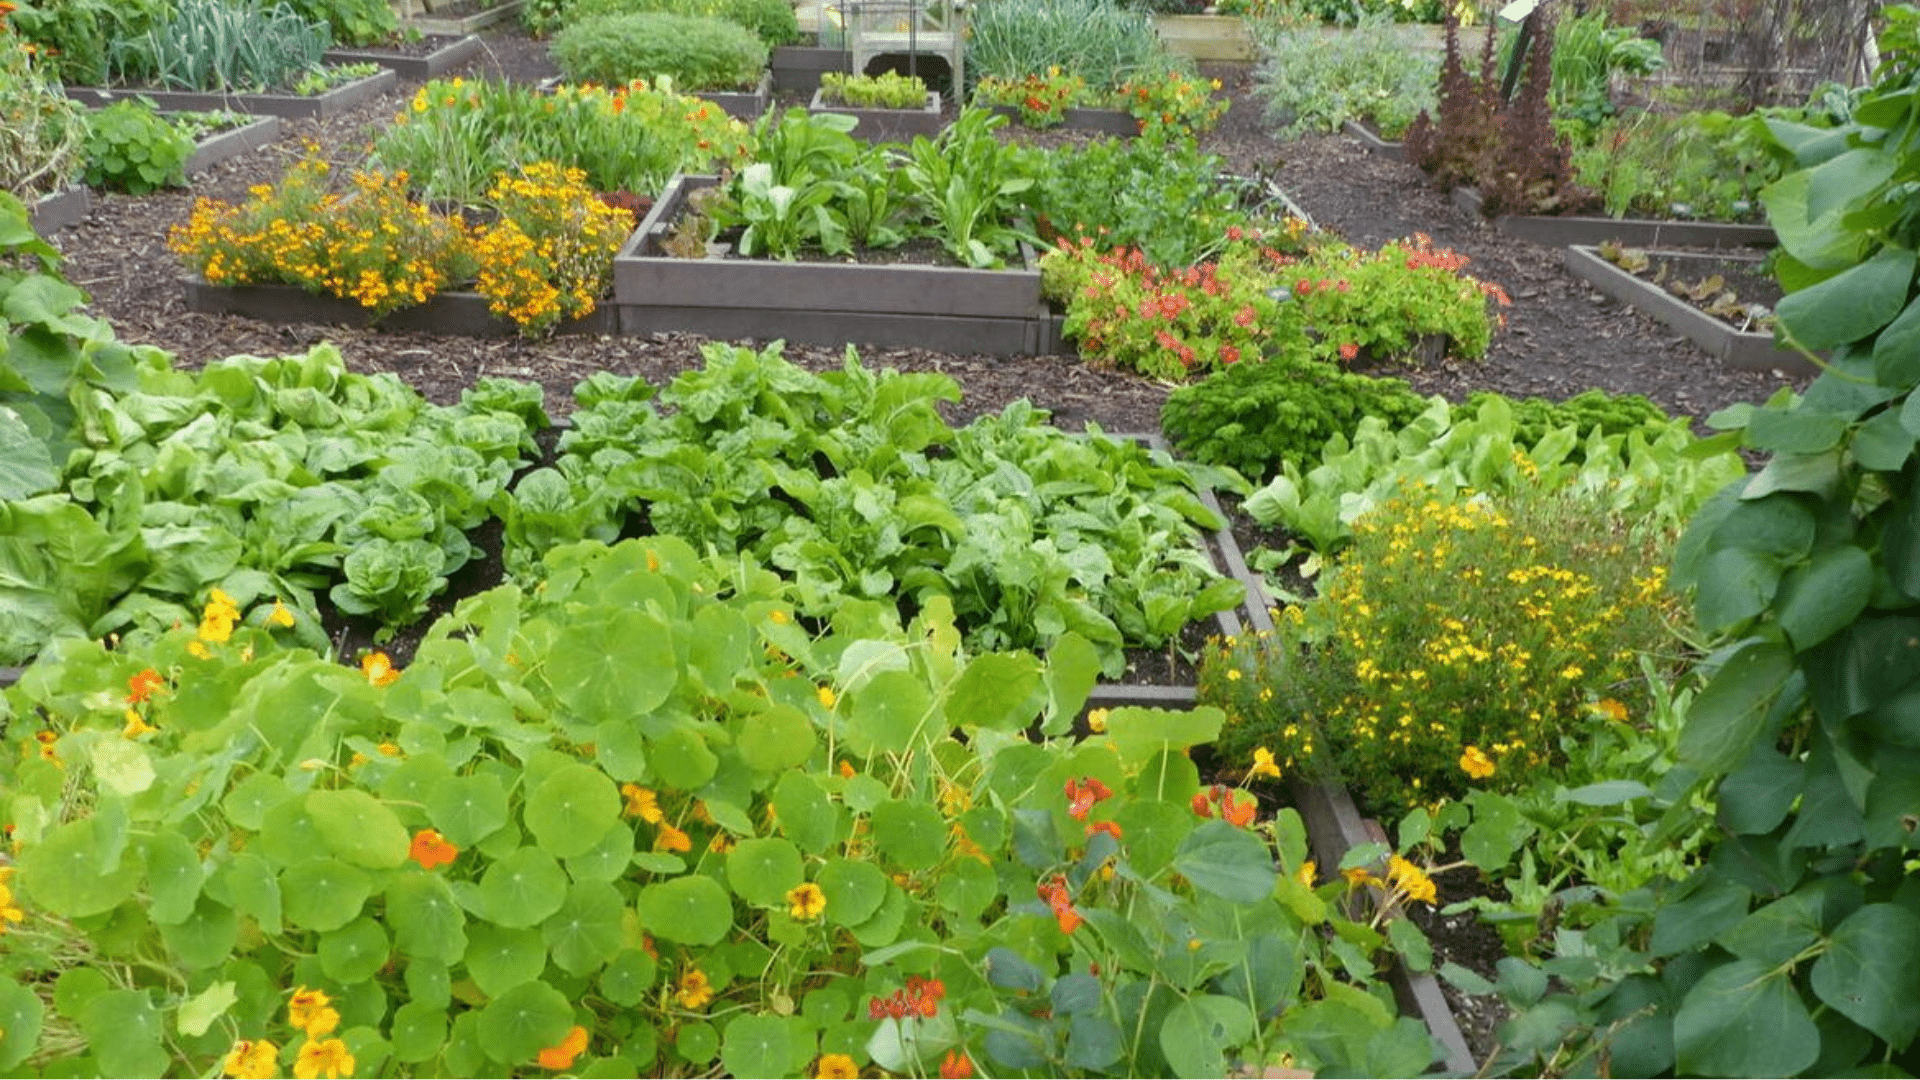
A companion layout groups vegetables that grow well together and keeps apart those that conflict.
Tomatoes can sit near basil or onions. Carrots can sit near onions or lettuce. Beans stay away from onions but grow well near corn.
This approach helps you save space, support healthy growth, and make watering easier because plants with similar needs stay close. You also reduce the chance of issues caused by placing the wrong crops together.
The layout stays simple and clear for beginner and medium-level gardeners.
13. Herb Border Layout

An herb border layout places herbs around the edges of the main vegetable bed.
The center holds crops like tomatoes, peppers, or greens. Herbs such as parsley, chives, dill, or thyme sit along the border. This keeps helpful scents close, supports healthy growth, and makes cutting herbs easy because they remain within reach.
The border also helps define the planting area and leaves the center open for larger crops. It’s a good choice for gardeners who want easy access to herbs without giving up core planting space.
14. High-Yield Vertical Layout
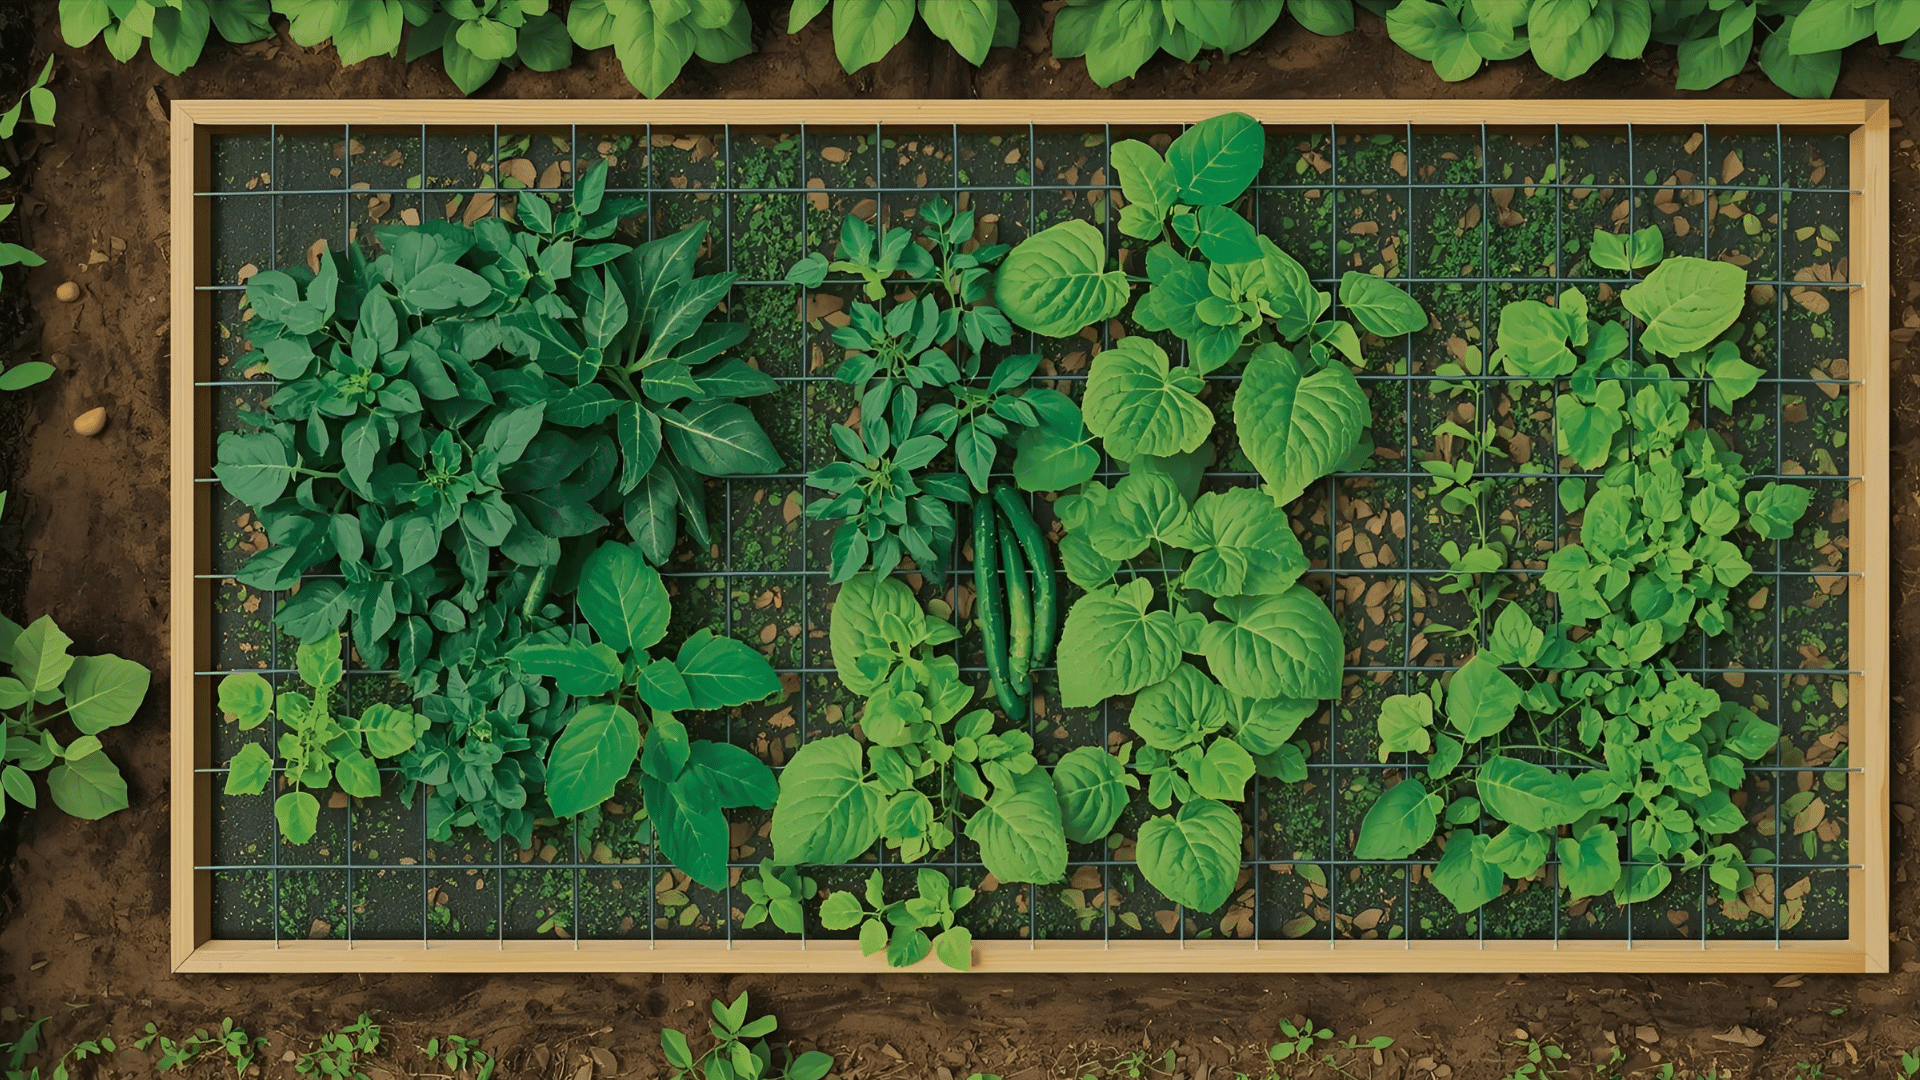
This layout uses height to expand your growing space. A long trellis runs along the back of the bed for cucumbers, pole beans, or peas.
Below the trellis, medium crops like peppers or small tomatoes fill the center. The front stays open for carrots, lettuce, or other quick crops. This setup allows vines to climb instead of taking up ground space.
It’s useful for yards with tight planting areas because it helps you fit more vegetables into one bed while keeping everything easy to reach and maintain.
15. 20×20 Row Layout

A 20×20 row layout suits gardeners with more room and a desire for steady production. Each row holds one crop type, such as corn, beans, squash, tomatoes, or greens.
The straight rows create clear walking areas and make watering simple.
Because the space is larger than a basic raised bed, you can grow both warm-season and cool-season vegetables in the same area.
This layout works well if you want to grow larger plants like corn or winter squash without shading smaller crops.
16. U-Shaped Raised Bed
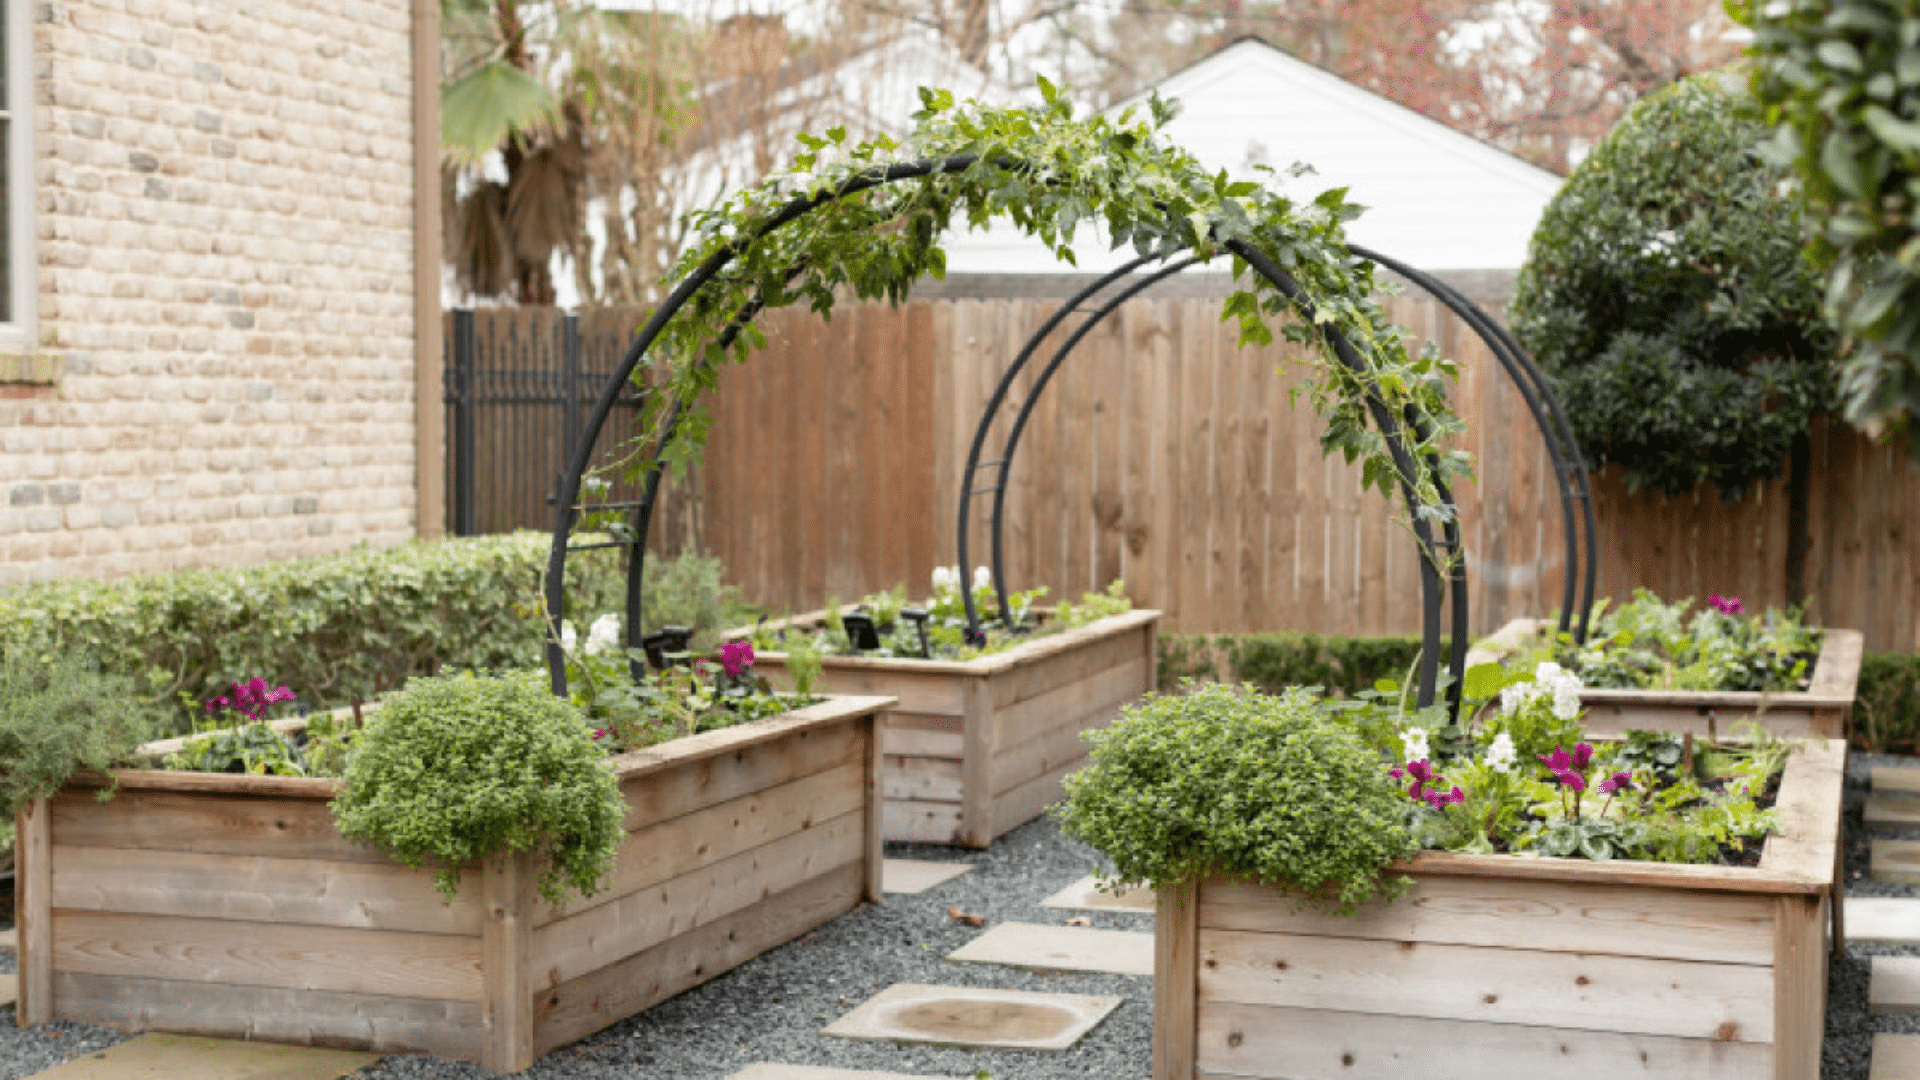
A U-shaped layout uses three raised beds arranged in a U pattern. The back bed holds tall plants so they do not block the others. The two side beds hold medium and low crops that need full sun.
The open space in the center gives you easy access from all directions without stepping into the soil. This layout is helpful for gardeners who want a compact but productive growing area with simple reach and clear paths.
It also works well in small yard corners.
17. Pollinator Layout
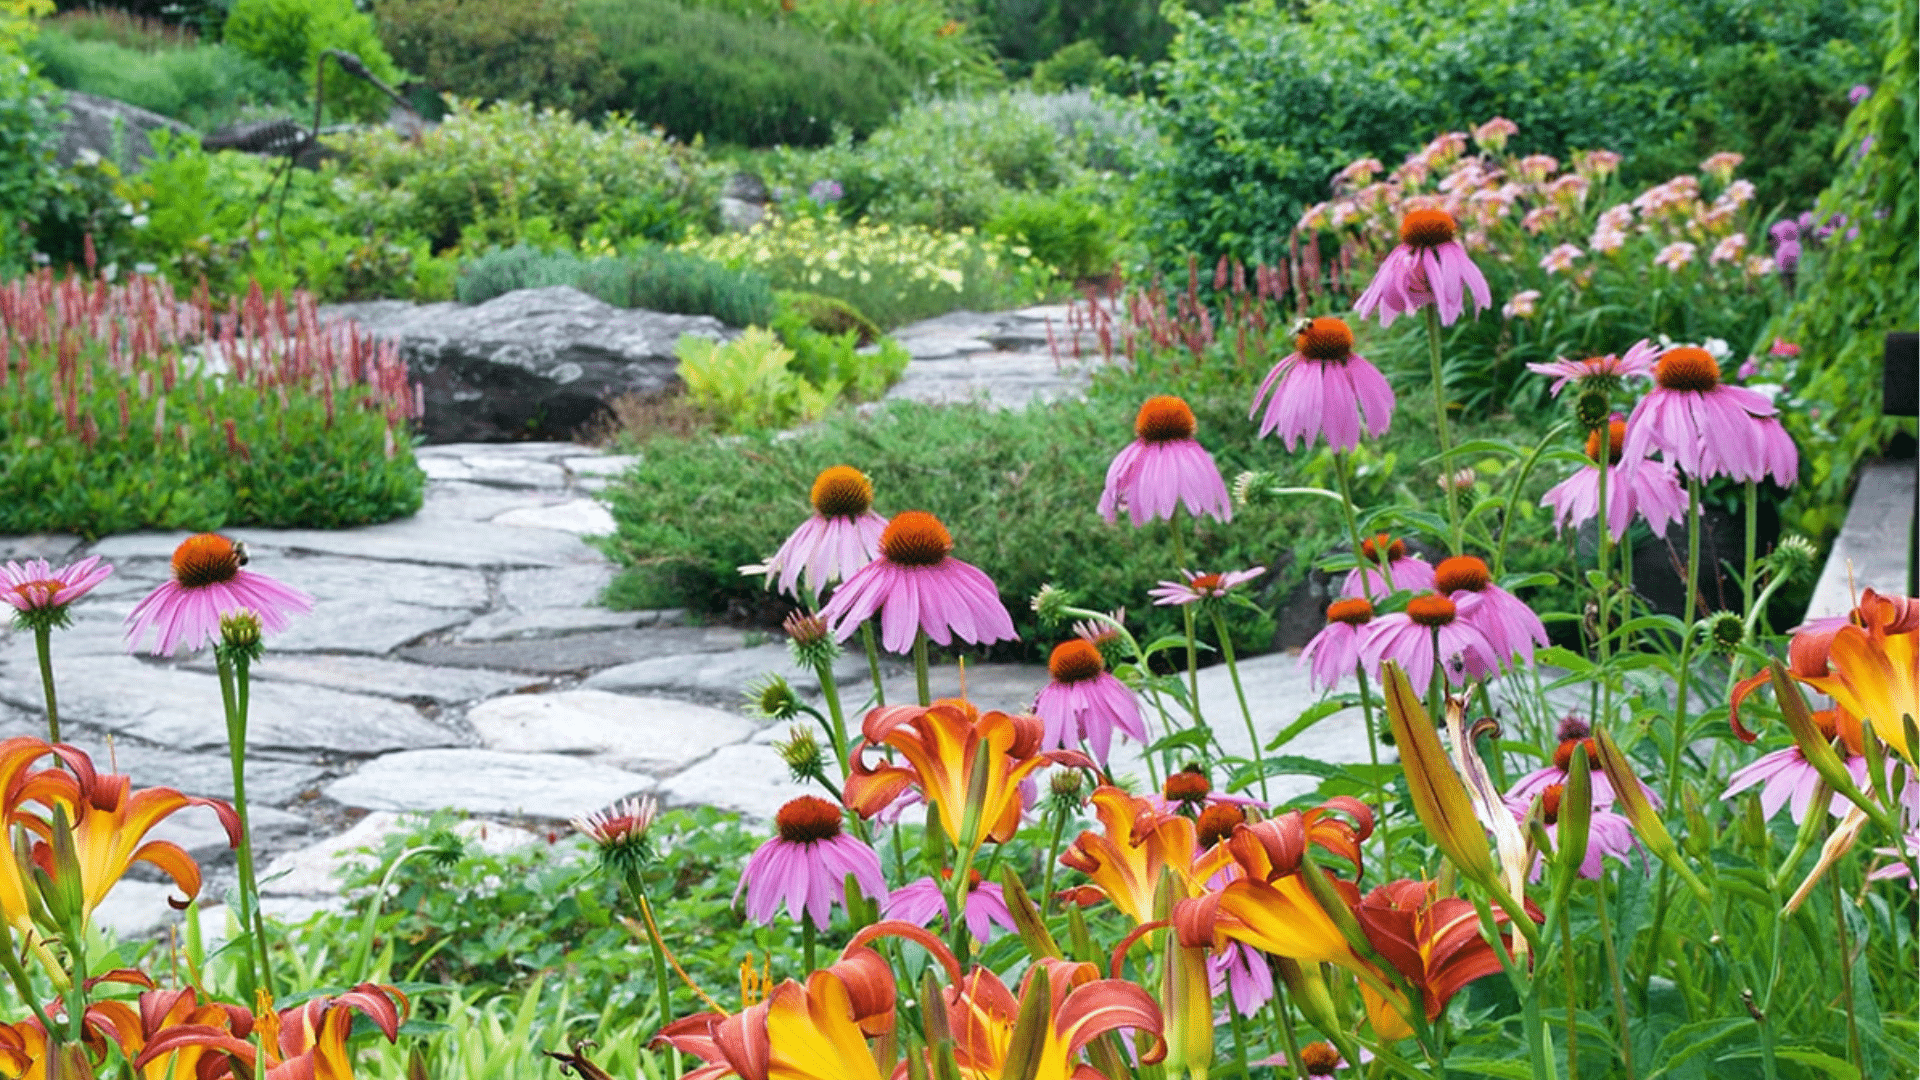
A pollinator layout mixes vegetables with flowers that draw helpful insects. Place your main vegetables in rows or blocks in the center.
Add flowers like marigolds along the edges to attract helpful insects. If you’re unsure where to start, learning how to grow marigolds step by step makes them an easy addition for beginners. These flowers help guide insects to your garden so tomatoes, peppers, squash, and beans receive better pollination.
The layout also supports steady growth because the flowers stay at the edges and do not crowd your vegetables. It’s a good method for gardeners who want reliable harvests with simple upkeep.
18. Hybrid Square-and-Row Layout
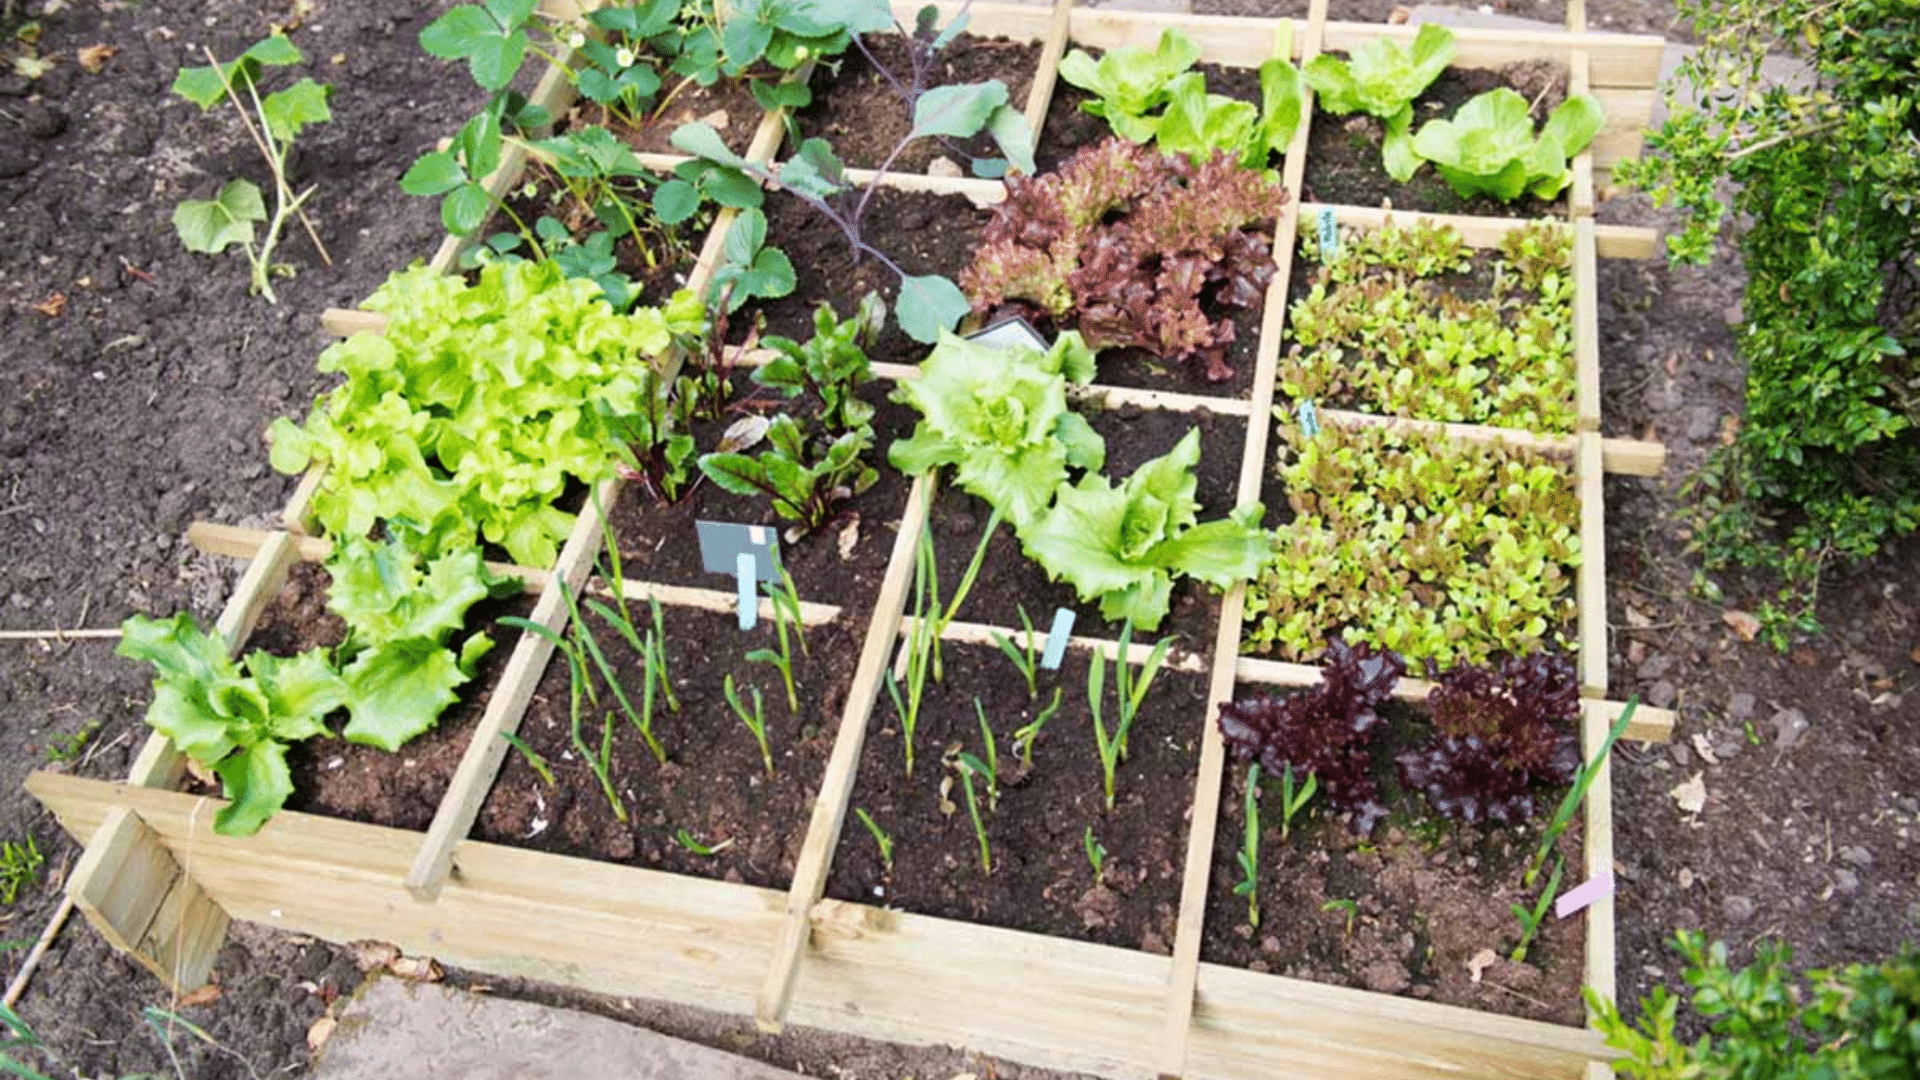
A hybrid layout combines small square sections with straight rows. Use squares for greens, herbs, or compact crops that benefit from tighter spacing.
Use straight rows for larger plants such as beans, tomatoes, or squash. This mix gives you tight spacing where it’s useful and clear reach for crops that need more room.
It also helps you adjust watering and planting schedules because each section has its own needs. This layout works well for gardeners who like structure without giving up flexibility.
19. Perimeter Layout
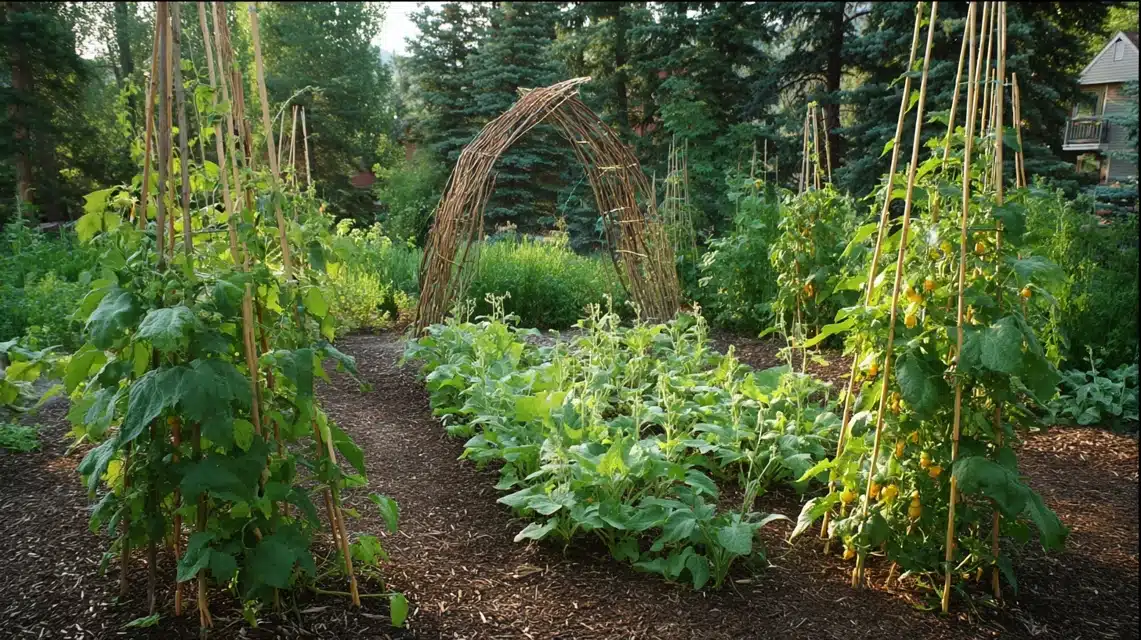
A perimeter layout places climbing or tall crops around the edges of the garden. Use the back and sides for trellised cucumbers, pole beans, or tall tomatoes.
Keep the center open for peppers, carrots, lettuce, or similar crops. This approach lets you use vertical space around the border while keeping the inside easy to reach.
The open center also gets steady sun because tall crops stay at the edges. It’s a good layout for maximizing space in medium-sized gardens.
20. Succession Layout

A succession layout focuses on planting new crops as older ones finish. Set up the bed in simple rows or blocks. Use fast growers like radishes, lettuce, or spinach in the front.
When they finish, replace them with beans, carrots, or herbs. The middle and back rows can hold longer-season crops like tomatoes or peppers. This approach keeps your garden productive from spring to fall without expanding your space.
It’s helpful for medium-level gardeners who want steady harvests and simple planning.
Layouts for Special Conditions
These layouts help you grow healthy vegetables when your yard has limited sun, high heat, tight spaces, colder seasons, or areas designed for young gardeners.
21. Shade Layout

A shade layout works in areas that only get a few hours of direct sun. Use the brightest section for crops like peas or bush beans.
Keep the rest for greens such as lettuce, spinach, and arugula, since they stay productive in cooler spots.
Add herbs like parsley or mint along the edges. This design helps you grow food even when your yard has trees, fences, or buildings that block light. It stays simple, steady, and easy to care for through the season.
22. Hot-Climate Layout
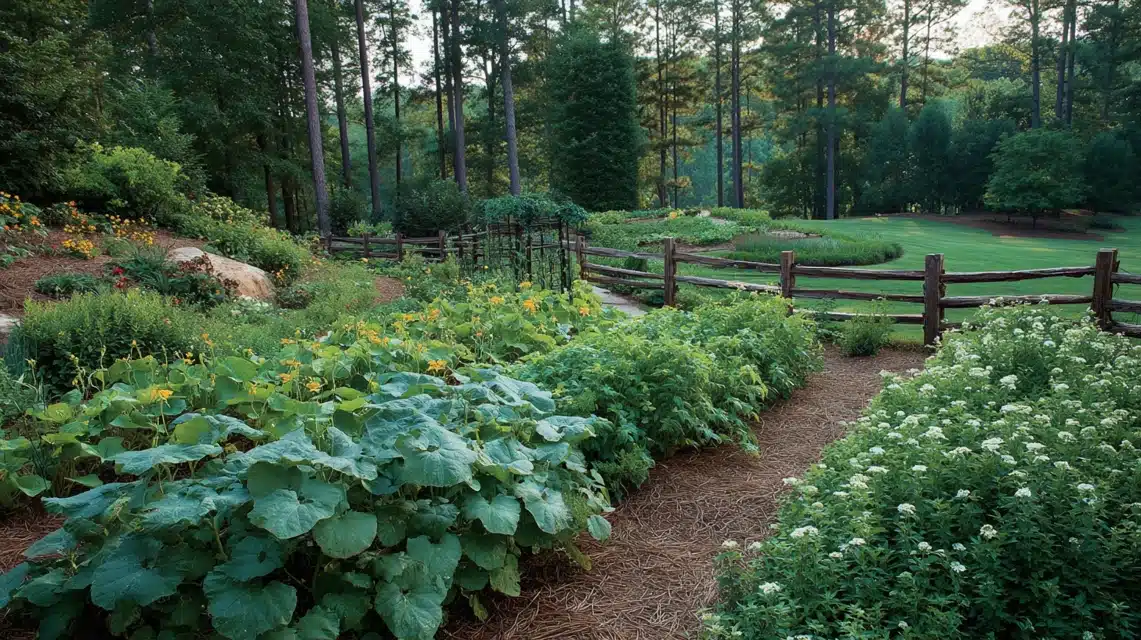
A hot-climate layout supports crops that handle strong sun and high heat. Use the sunniest section for peppers, okra, and eggplant.
Add sweet potatoes or cucumbers along a back trellis to save ground space and increase airflow. Keep the front area for herbs like basil or heat-tolerant greens.
Mulch the soil to hold moisture and help roots stay cool. This layout handles long summers well and keeps plants healthy even when daytime temperatures stay high for weeks.
23. Balcony Layout
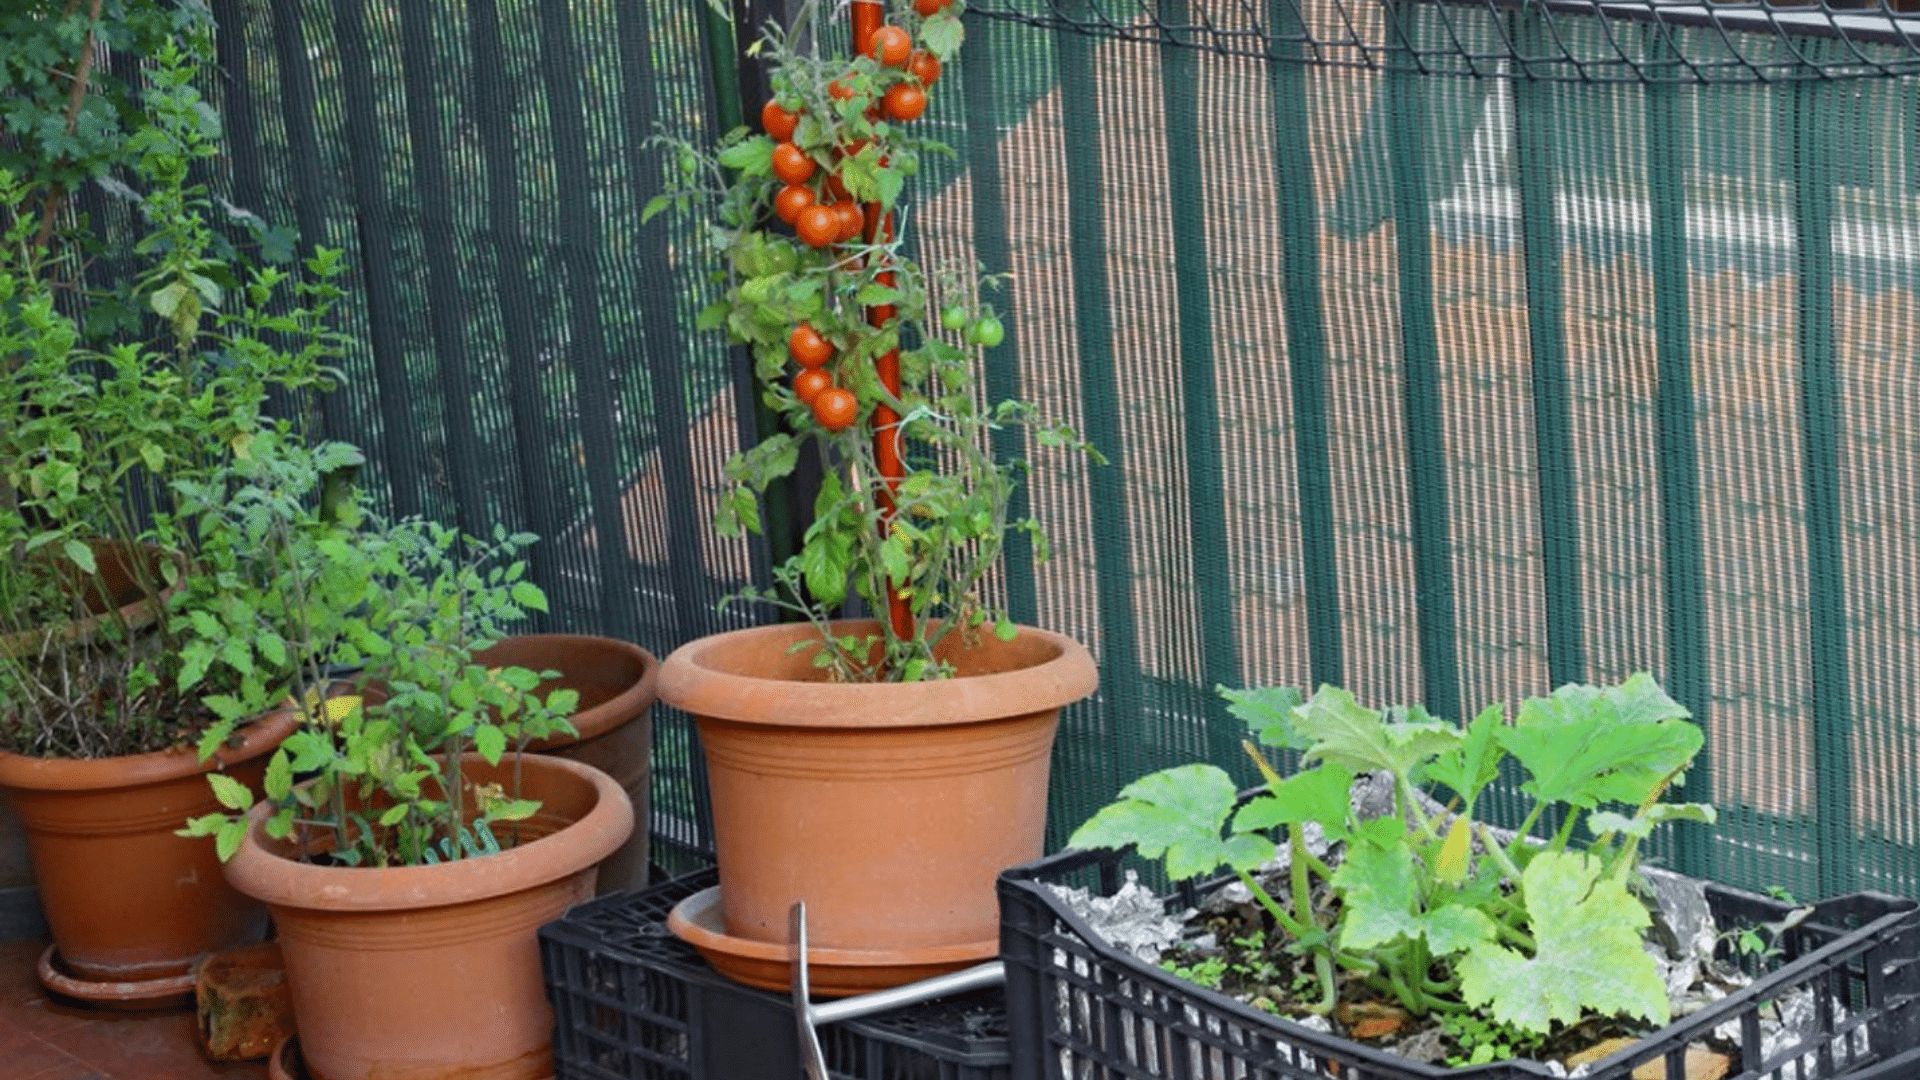
A balcony layout uses containers and vertical supports to make the most of limited space.
Place tomatoes or peppers in large pots along one side. Use narrow containers or rail planters for greens, small herbs, or green onions. Hang a few baskets for strawberries or compact flowers.
A simple trellis or netting against the wall works for peas or small cucumbers. This layout keeps everything close, easy to water, and simple to move when the sun shifts during the day.
24. Cold Frame Layout
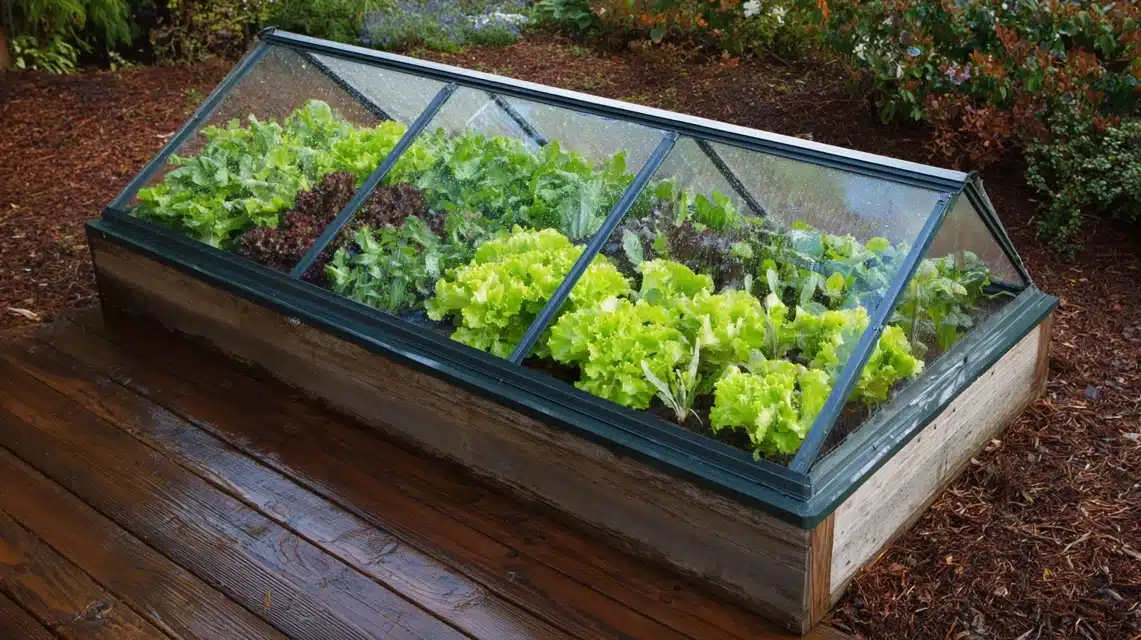
A cold frame layout helps you plant earlier in spring and keep growing later into fall. Place the cold frame on the south side of your yard so the clear top gets steady light.
Use it for greens, radishes, carrots, and young seedlings that need protection from cold nights.
Keep warm-season crops outside the frame once temperatures rise. This setup extends your growing window without adding much work. It’s helpful if you live in a place with short seasons or early frosts.
25. Kids’ Mini Layout
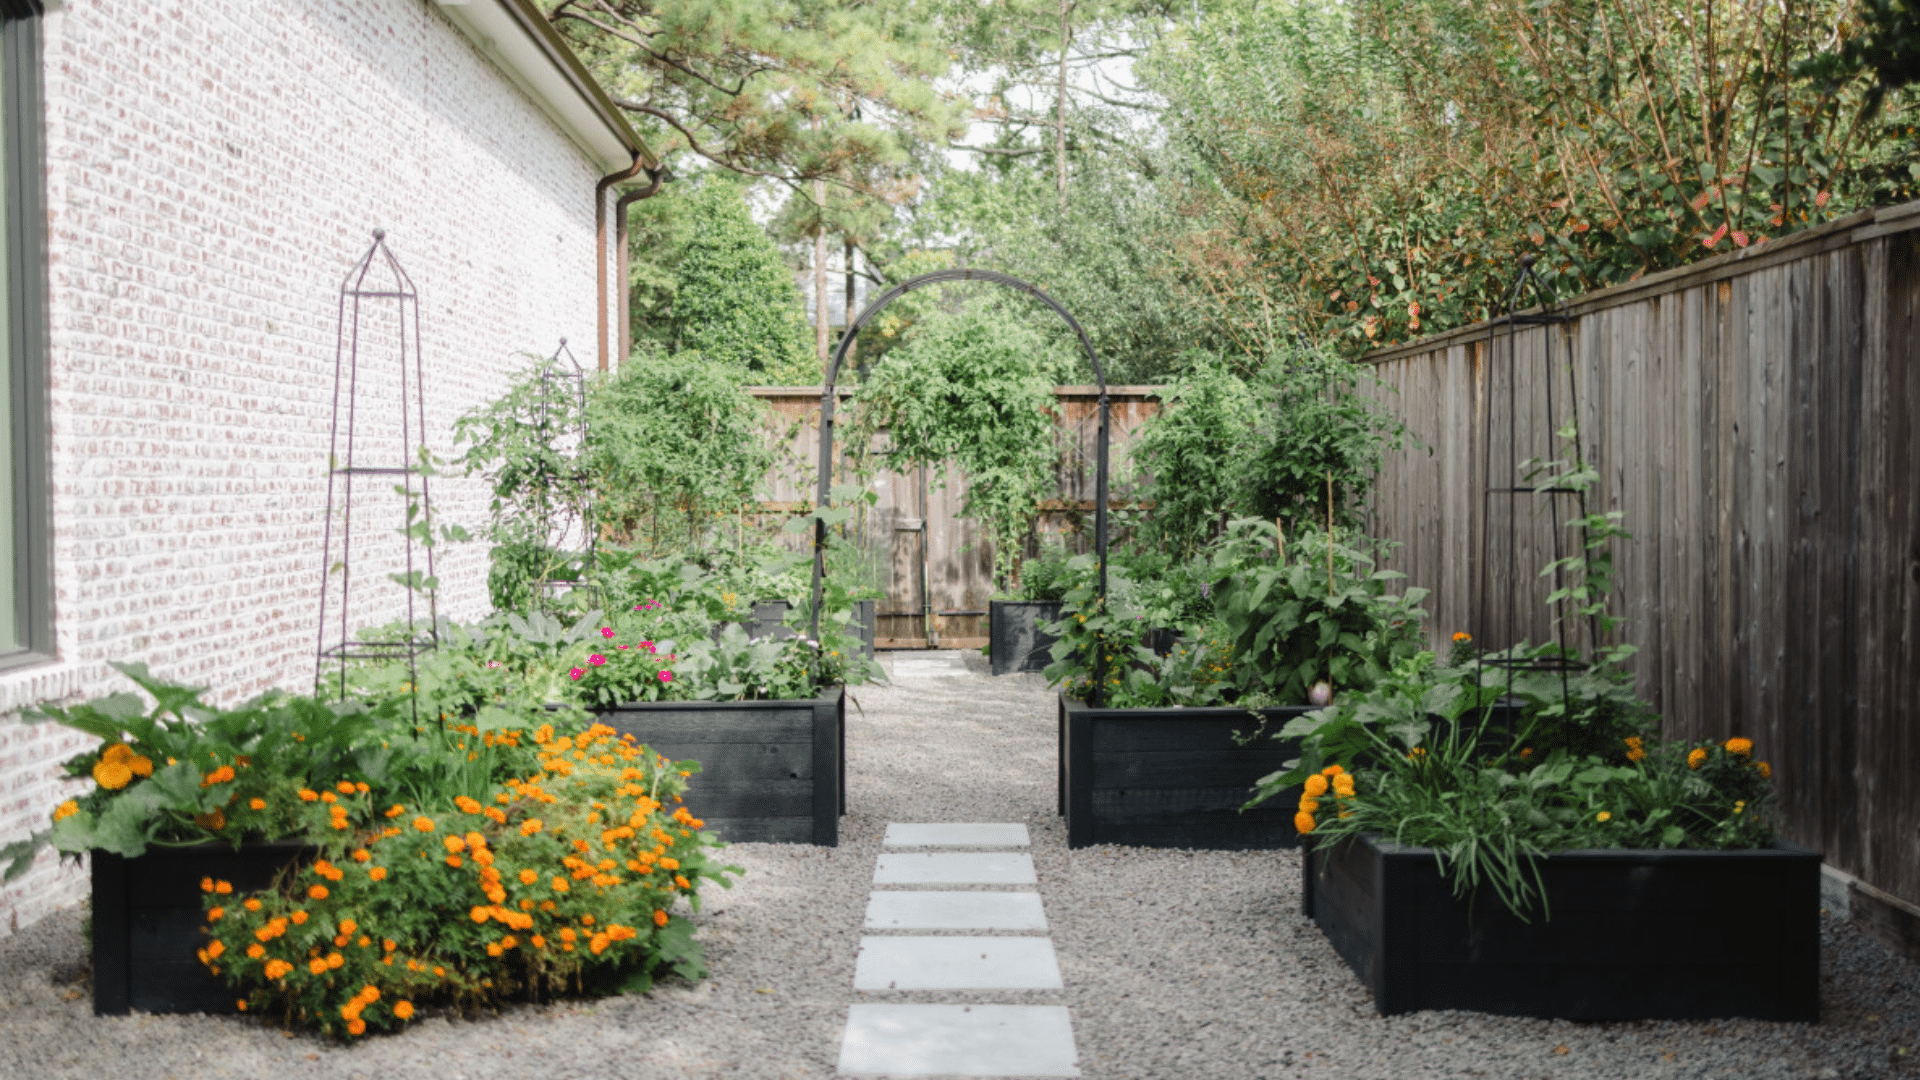
A kids’ mini layout creates a simple, fun space for young gardeners. Use a small square or circular bed that they can reach from every side.
Plant easy crops like cherry tomatoes, carrots, bush beans, lettuce, and a few herbs. Add one tall support for beans so kids can watch the vines climb.
Keep the layout clear and open so they can see progress and help with watering. This design builds confidence, teaches simple care steps, and keeps the garden manageable for both kids and adults.
How to Build Your Layout Step by Step
Start with simple early sowing, add protection during shifting weather, support climbing crops, keep moisture steady, and maintain smooth growth through the season.
Step 1: Sow fast greens, onions, radishes, or seedlings in small trays to protect young plants from cold weather and early-season pests.
Step 2: Move young plants outdoors once temperatures settle, and use row cover to keep them warm and protected from birds or early cold.
Step 3: Place greens in light shade during heat, or keep early plantings under row cover or a cold frame in cooler regions.
Step 4: Use a trellis or simple frame for beans, peas, or cucumbers so they grow upward neatly instead of sprawling across the ground.
Step 5: Water greens and early crops often to support smooth growth and prevent slow development during dry stretches or sudden warm spells.
Step 6: Start another tray of greens before finishing the first batch to keep beds full and avoid empty gaps between plantings.
Step 7: Plant strawberries, garlic, potatoes, or beans in nearby beds for easy harvests with very little daily care through the season.
Step 8: Set tomatoes, peppers, zucchini, and cucumbers outdoors only after warm nights return to prevent cold damage and support strong early growth.
Step 9: Place basil, parsley, calendula, or nasturtiums along edges to draw helpful insects and support steady vegetable growth all season.
Step 10: Line your paths with cardboard and wood chips to prevent weeds and create clean walking areas without extra trimming or upkeep.
Budget Tools for First-Time Gardeners
Starting a garden doesn’t require a long list of supplies. A few basic tools are enough to handle planting, watering, and simple upkeep. A hand trowel helps you dig small holes for seedlings.
A hand fork loosens soil and removes weeds with little effort. A small watering can or hose keeps plants hydrated without wasting water. Gardening gloves protect your hands during daily tasks.
Mulch or cardboard helps keep weeds down and holds moisture in the soil. If you’re deciding what type to use, comparing rubber mulch vs wood mulch can help you choose the right option for your garden.These low-cost items keep your garden running smoothly and give you everything you need for a steady first season.
Common Beginner Mistakes
Many new gardeners run into simple problems that slow growth. These points help you avoid wasted space, weak plants, and extra work.
- Overcrowding Plants: Packed beds block airflow and sunlight, causing weak growth and stress while reducing harvests throughout the growing season.
- Beds Too Wide: Wide beds make reaching the center difficult, which leads to uneven care, missed harvests, and compacted soil from stretching.
- Ignoring Sun Direction: Tall crops placed in front block sunlight from shorter plants, reducing growth and causing poor results across the garden.
- Planting Too Many Crops: Growing too many types at once increases workload, complicates care, and makes watering and scheduling far more confusing.
- No Walking Paths: Stepping on soil without clear paths causes compaction, slows root growth, and makes basic garden care harder every week.
Conclusion
It’s clear now that simple layouts, steady tools, and a few small choices can turn any empty area into a productive garden.
You don’t need a large space or expensive supplies to get started. What matters most is choosing a layout you can manage and giving each plant room to grow.
As you plan or improve your beginner basic vegetable garden layout, keep things small, leave space to walk, and place crops where they get the light they need. These small details make the whole season easier.
I hope you try one layout and see how much it helps. When you’re ready for more ideas, check out the other blogs here and keep building your garden with confidence.