You pull a beautiful chicken breast off the pan, cut into it, and dry. Tough. Chewy. Or worse, you cut into it and it’s still pink in the middle, so back it goes, and by the time it’s “safe,” it tastes like shoe leather.
If this sounds familiar, you are not alone. Every home cook starts somewhere, and the struggle with meat is practically a rite of passage. The good news? There’s one simple tool that fixes almost all of these problems and it’s not expensive, complicated, or hard to use.
In this guide, you’ll know exactly why your meat keeps turning out dry or undercooked, how to fix it, and why a simple instant-read food thermometer is the single best investment you can make in your cooking.
Why Does Cooking Meat Feel So Hard for Beginners?
Most recipes tell you to cook chicken for “X minutes per side” or until “juices run clear.” Steak recipes say to use the “finger test” or cook until it “feels” right. Burgers? Just “until browned.” The problem? These methods are guesses. And guessing doesn’t work when you’re new to cooking.
Here are the most common struggles beginners face:
Overcooking (The #1 Problem)
You’re terrified of undercooked meat—and rightfully so. Food safety is important. But in your effort to make sure it’s safe, you leave it on the heat way too long. The result? Dry, tough, flavorless meat. Overcooking is the most common cause of dry meat.
Undercooking (The Other Extreme)
On the flip side, you pull it off too early because you’re afraid of drying it out. Now you’ve got a steak that’s raw in the middle or chicken that’s unsafe to eat. Back to the pan it goes—and now you’re overcooking it anyway.
Not Knowing When It’s Done
You cut into the meat to check. Juice runs out. You lose moisture. You cut again. More juice lost. By the time you serve it, all the good stuff has drained onto the cutting board.
Cooking Cold Meat Straight from the Fridge
When meat starts cold, the outside cooks much faster than the inside. By the time the center reaches a safe temperature, the exterior is already overdone and dry.
Skipping the Rest
You slice into the meat the second it comes off the heat. All those juices that were pushed to the center during cooking? They run right out onto your plate.
The Simple Fix: Stop Guessing, Start Measuring
Here’s the secret that professional chefs have known forever: temperature is the only reliable way to know when meat is done.
Not time. Not color. Not feel. Temperature.
The U.S. Department of Agriculture (USDA) recommends using a food thermometer to ensure foods reach a safe minimum internal temperature. And the USDA isn’t alone—every serious cook, from home kitchen heroes to Michelin-starred chefs, relies on one.
When you cook by temperature, two things happen:
- You never overcook: You pull the meat exactly when it hits your target.
- You never undercook: You know with 100% certainty that it’s safe to eat.
No more cutting into meat to check. No more guessing. No more dry chicken or raw centers.
How Do You Measure Meat Temperature
For beginner cooks, the TempPro TP620 Instant-Read Meat Thermometer is the perfect choice. It’s affordable, incredibly easy to use, and packed with features that make cooking meat foolproof.
ThermoPro is now TempPro! This is simply a brand update, the product lineup, and customer service are unchanged, so you can keep grilling with the same confidence you always have.
Here’s why it’s ideal for new cooks:
Ultra-Fast Readings in 0.5 Second: The TempPro TP620 uses a professional-grade thermocouple sensor that delivers accurate readings in just 0.5 second with an accuracy of ±0.9°F. No waiting around, no second-guessing. Stick it in, read it, and know instantly where you stand.
Auto-Rotating Display: The large LCD display is easy to read from any angle. And the screen automatically rotates 180° so you can read it clearly whether you’re left-handed or right-handed. No squinting, no twisting your wrist into weird positions.
Motion-Sensing On/Off: Wakes up instantly when you pick it up and goes to sleep after a period of inactivity.
IP65 Waterproof & Easy to Clean: The probe is IP65-rated waterproof, so you can rinse it right under running water after use. No complicated cleaning routines, just wash and go.
Temperature Lock Feature: Press the lock button, and the TempPro TP620 holds the temperature reading so you can safely read it away from the heat. Perfect for when you’re pulling meat off a hot grill or out of a sizzling pan.
Recommended Temperatures Printed on the Back: The recommended temperatures for common meats are conveniently printed right on the back of the food thermometer. No need to memorize charts or pull out your phone, just flip it over and check.
Meat Temperature Guide: Your Cheat Sheet
Here are the USDA-recommended safe minimum internal temperatures for common meats:
- Beef, Pork, Veal, Lamb – Steaks, Chops, Roasts: 145°F, and rest 3 minutes
- Ground Meats (Beef, Pork, Veal, Lamb): 160°F
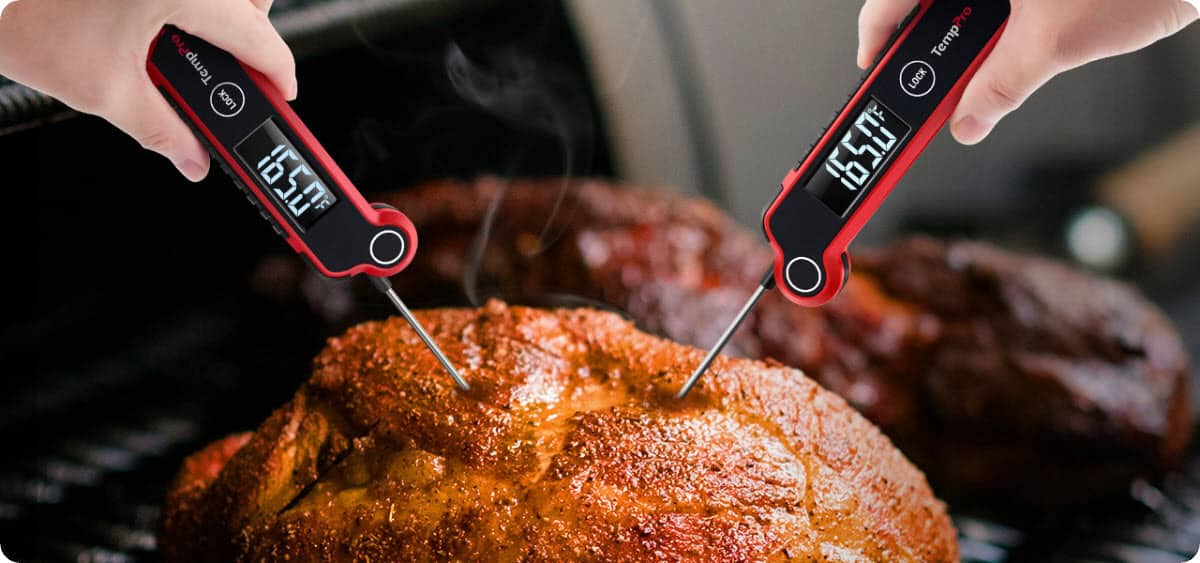
- All Poultry (Chicken, Turkey – whole or ground): 165°F
- Fresh Ham (uncooked): 145°F (rest 3 minutes)
- Fully Cooked Ham (reheat): 140°F
Pro tip for beginners: If you prefer your steak medium-rare, aim for 130°F-135°F and let it rest. it will rise a few degrees as it sits.
How to Use a Meat Thermometer Correctly
Using a meat thermometer is easy, but there’s a right way and a wrong way. Here’s how to do it right:
Step 1: Insert into the Thickest Part
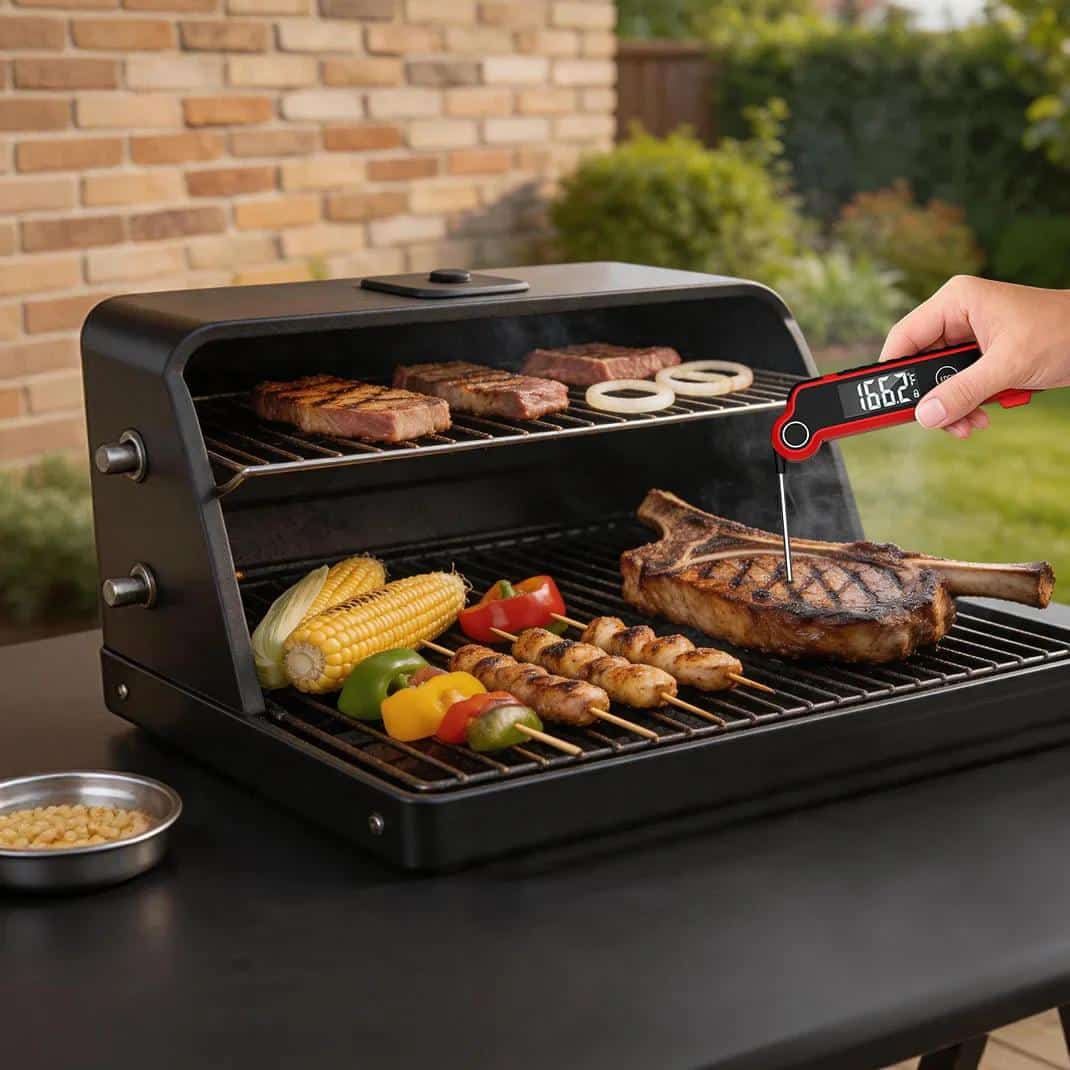
Always insert the meat thermometer like TempPro TP620 into the thickest part of the meat, that’s the last place heat reaches, so it gives you the most accurate reading of doneness.
Step 2: Avoid Bone and Fat
Bone conducts heat differently than meat, and fat doesn’t cook the same way either. Insert the probe into the fleshy center, avoiding any bones or large pockets of fat.
Step 3: Pull Before It Reaches Your Target
Pull the meat off the heat when it’s 5-10°F below your target temperature. Why? The meat continues to cook from residual heat after it’s off the pan. By the time it rests, it will hit the perfect temperature.
Step 4: Clean Between Uses
Always wash your food thermometer probe with hot soapy water between uses, especially when checking different meats, to avoid cross-contamination.
5 More Beginner-Friendly Tips for Perfect Meat
Bring Meat to Room Temperature Before Cooking
Take your meat out of the fridge about 20-30 minutes before cooking. This helps it cook more evenly and reduces the chance of an overcooked exterior and undercooked center.
Pat It Dry
Before seasoning, pat the surface dry with a paper towel. Excess moisture prevents browning and can make meat steam instead of sear.
Season Generously
Salt and pepper go a long way. Don’t be shy, season both sides well before cooking.
Let It Rest After Cooking
This is non-negotiable. Let meat rest for 5–10 minutes after cooking (longer for larger cuts). This allows juices to redistribute throughout the meat. Cut into it too soon, and all that flavor ends up on your cutting board.
Don’t Over-Flip
Flip your meat only once or twice during cooking. Constant flipping interrupts the sear and can dry out the surface.
Final Thoughts
Cooking meat doesn’t have to be stressful. The difference between a dry, disappointing dinner and a juicy, delicious one often comes down to one simple tool. The TempPro TP620 Instant-Read Meat Thermometer takes all the guesswork out of cooking. Fast readings, easy-to-read display, motion-sensing on/off, and temperatures printed right on the back, it’s literally designed for beginners who want to cook with confidence.
Stop cutting into your meat to check if it’s done. Stop serving dry chicken and overcooked steaks. Grab a thermometer, learn the temperatures, and start cooking meat the right way.
FAQs About Cooking Meat with a Thermometer
Q1. Do I really need a meat thermometer?
Yes. If you’re guessing when meat is done, you’re gambling with your dinner. An intant-read meat thermometer is the single most important tool for cooking meat perfectly and safely.
Q2. Where do I insert the thermometer?
Always insert it into the thickest part of the meat, avoiding bone and fat.
Q3. Should I pull meat off the heat at my target temperature?
No, pull it off when it’s about 5-10°F below your target temperature. The meat will continue to cook as it rests (carryover cooking) and will reach the perfect temperature.
Q4. How long should meat rest?
5-10 minutes for smaller cuts, 10-15 minutes for larger roasts.
Q5. Can I save meat that’s already dry?
Yes! Slice it and pour warm broth over it, mix it with BBQ sauce, or use it in sandwiches. But the best solution is to prevent dryness in the first place with a food thermometer.
Q6. Is the TempPro TP620 good for grilling?
Absolutely. The TempPro TP620 is designed for kitchen, BBQ, and grill use. The waterproof design and fast readings make it perfect for outdoor cooking.