I can’t stop thinking about Italian sliders lately, and for good reason. If you’ve been scrolling through social media, you’ve probably noticed those gorgeous chopped Italian sliders taking over everyone’s feed.
There’s something irresistible about these little sandwiches: they’re savory, cheesy, and packed with herbs that make your kitchen smell like an Italian deli.
Whether I’m hosting friends, prepping for game day, or just need a fast weeknight dinner, this Italian sliders recipe delivers every single time.
They’re melty perfection on a bun, and trust me, once you try them, you’ll understand the obsession.
So, What Exactly are Italian Sliders?
Let me break it down for you. Traditional sliders are just mini burgers or sandwiches, but Italian sliders take things to a whole new level.
We’re talking layers of salami, provolone, and sometimes pepperoni or ham, all stuffed into soft slider buns. The real magic happens when you add giardiniera, that tangy, pickled veggie mix, and a drizzle of Italian herbs and oil.
Now, chopped Italian sliders are where things get fun. Instead of neat layers, everything gets chopped together into a flavorful mixture before being piled onto the buns.
You can serve them baked until golden and melty, pressed like a panini, or even cold for a quick bite. Each style hits differently, but they’re all delicious.
The Best Ingredients for Your Italian Sliders Recipe
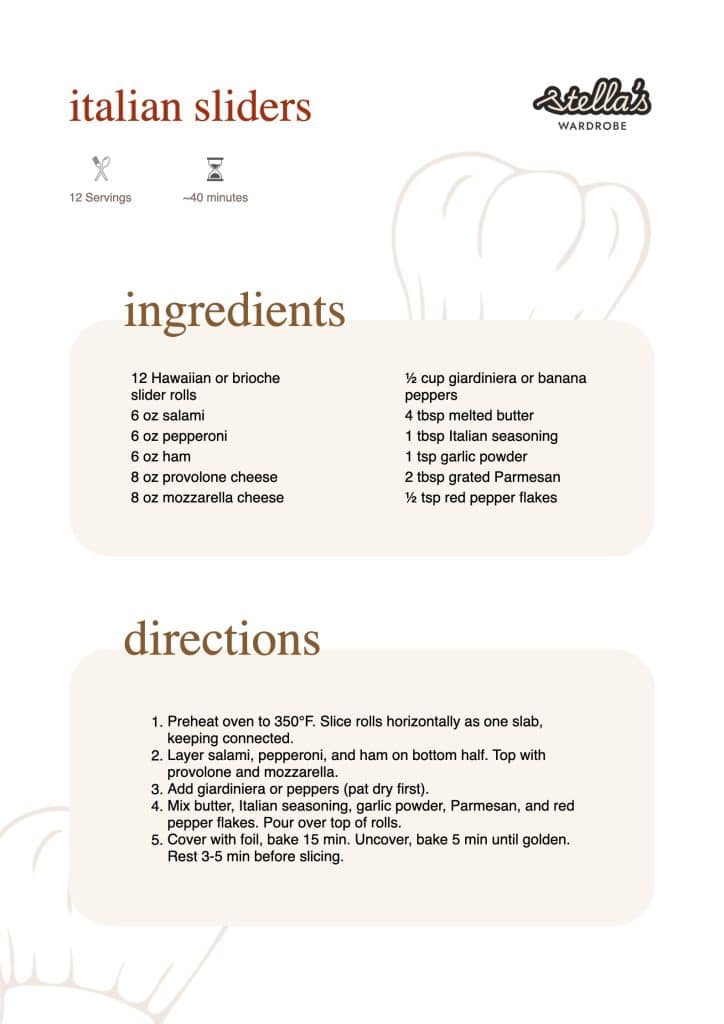
Before we get cooking, let’s talk ingredients. The beauty of this Italian sliders recipe is that you can customize it based on what you love, but some essentials really make these shine. Here’s what I always keep on hand:
Slider Base
- Hawaiian rolls or brioche rolls
- Alternative options: ciabatta sheet, mini focaccia, or sourdough pull-apart
Meats
- Salami
- Pepperoni
- Ham
- Capicola
- Prosciutto (if you’re feeling fancy)
Cheeses
- Provolone
- Mozzarella
- Fontina or Havarti (for that extra melty goodness)
Add-ins
- Giardiniera
- Banana peppers
- Fresh basil
- Roasted peppers
- Red onion
- Olive spread
Seasoned Butter Topping
- Melted butter
- Italian seasoning
- Garlic powder
- Parmesan
- Red pepper flakes
How to Make Classic Italian Sliders: Step-by-Step
Alright, let’s get into it. I’m walking you through exactly how I make Italian sliders from start to finish. Trust me, once you nail this process, you’ll be making them on repeat.
Step 1: Prep the Rolls
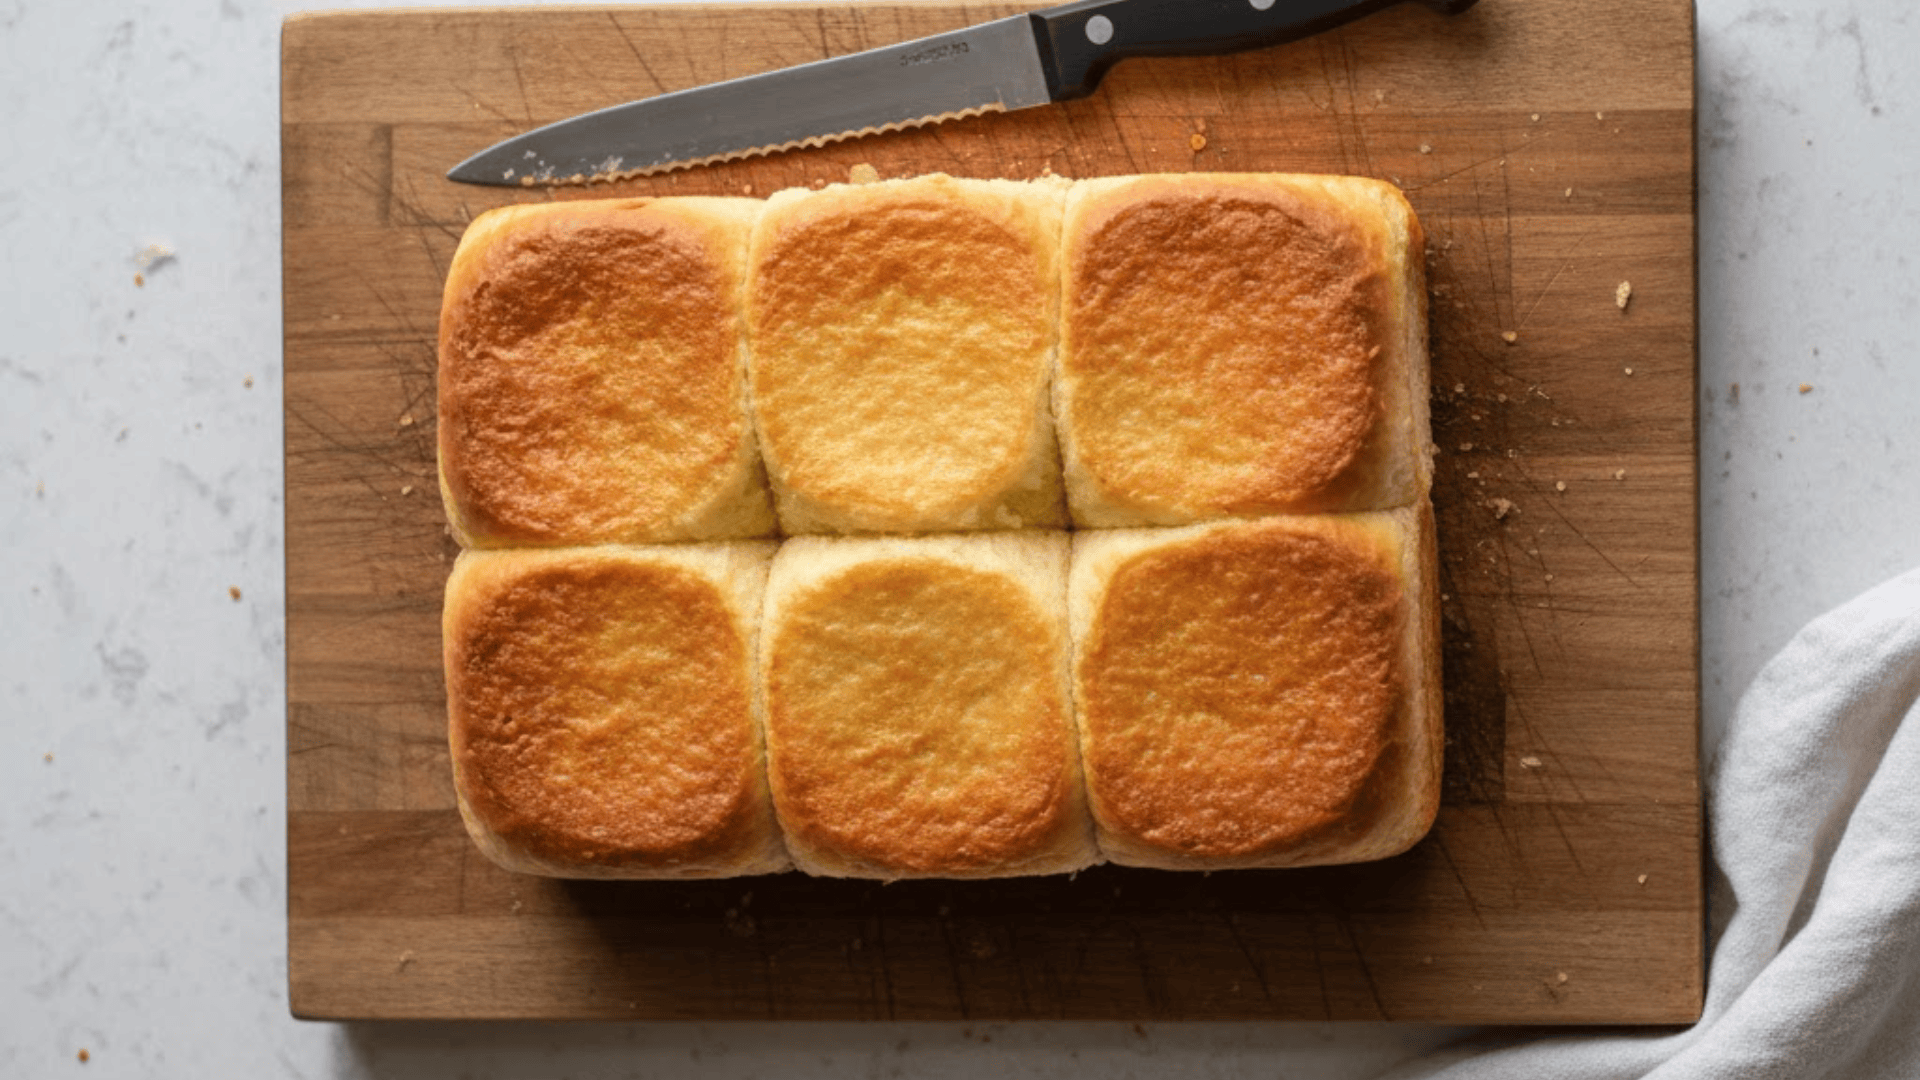
Start by slicing your Hawaiian rolls or brioche as one complete slab; don’t separate them yet. Keep the top and bottom connected like a sandwich sheet.
If you want extra stability and a bit of crunch, toast the bottom layer lightly in the oven before building. This helps prevent sogginess later.
Step 2: Layer the Meat and Cheese
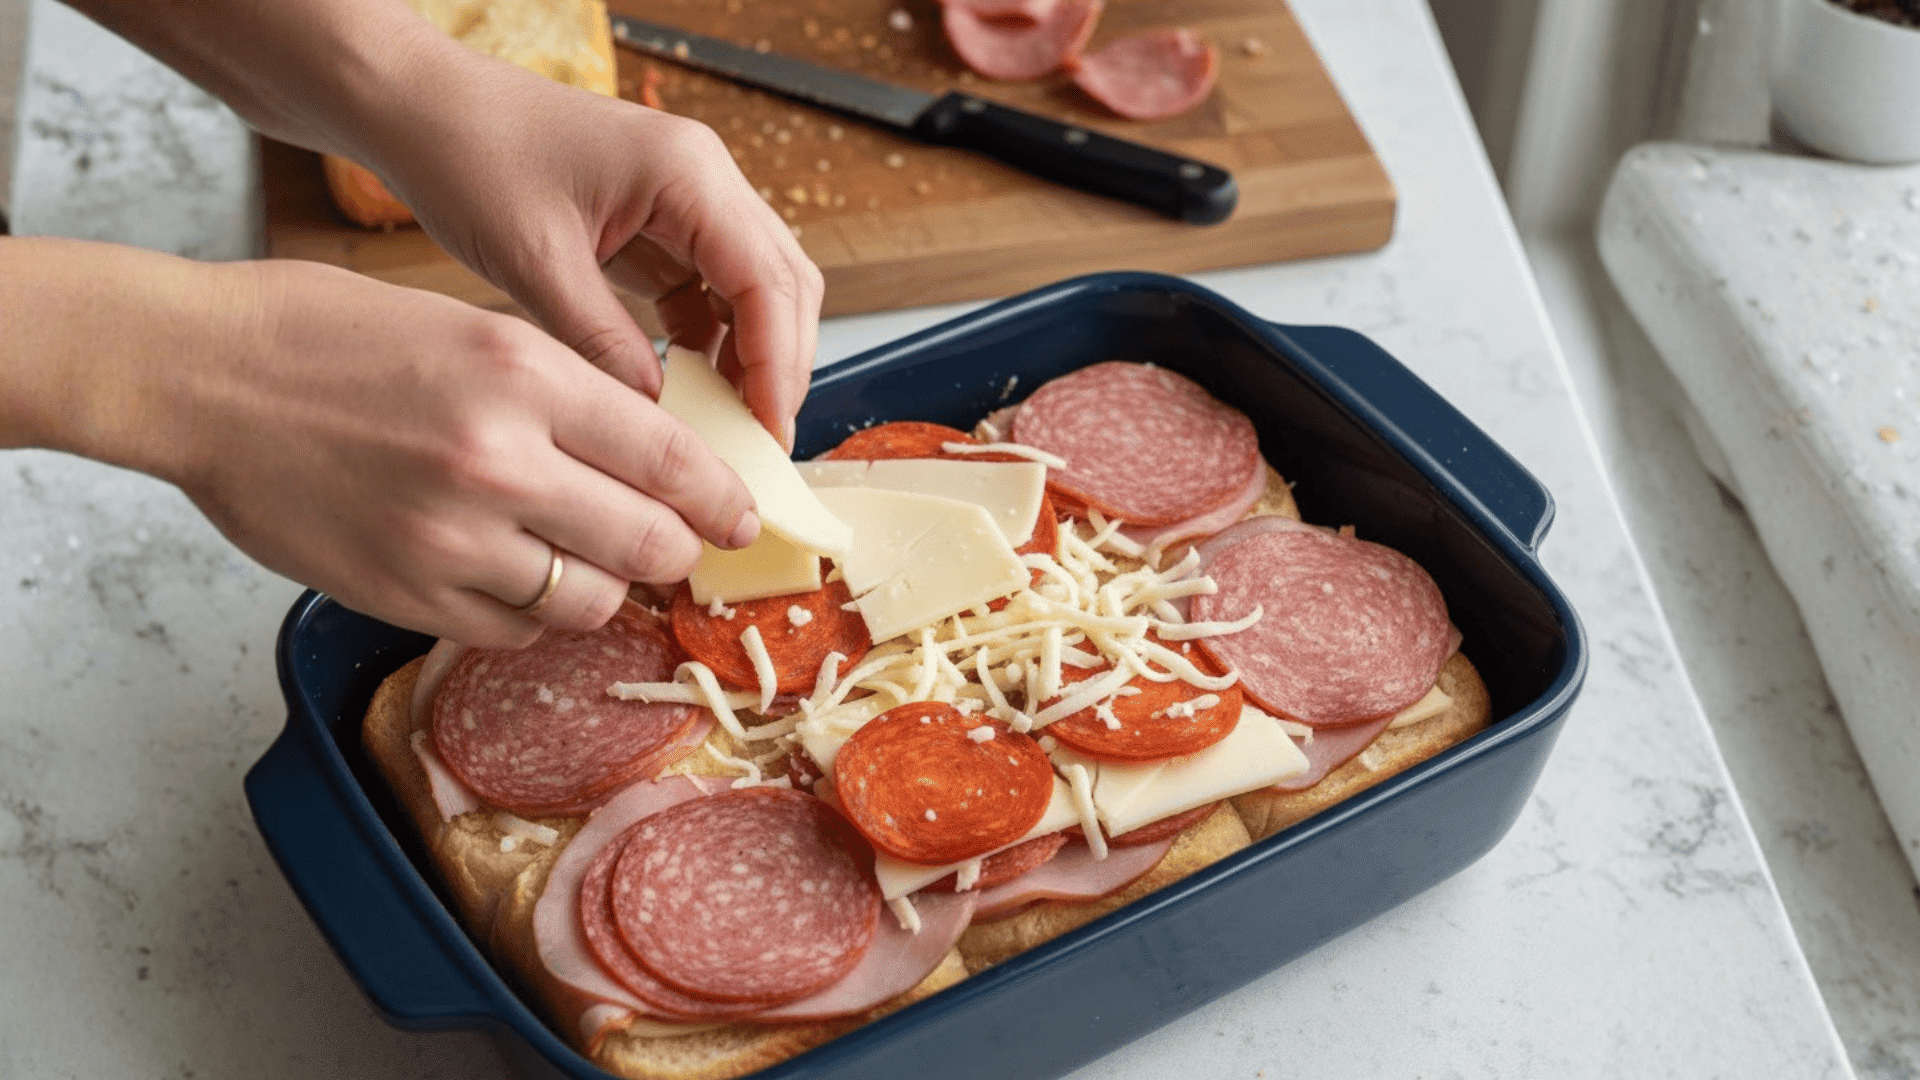
Now for the fun part. Layer your salami, pepperoni, and ham evenly across the bottom half of the rolls. I like to alternate meats for better flavor distribution.
Then add your cheese: provolone and mozzarella work perfectly. You can do a single layer or double up for extra meltiness. Make sure the cheese covers all the edges.
Step 3: Add Veggies and Flavor Boosters
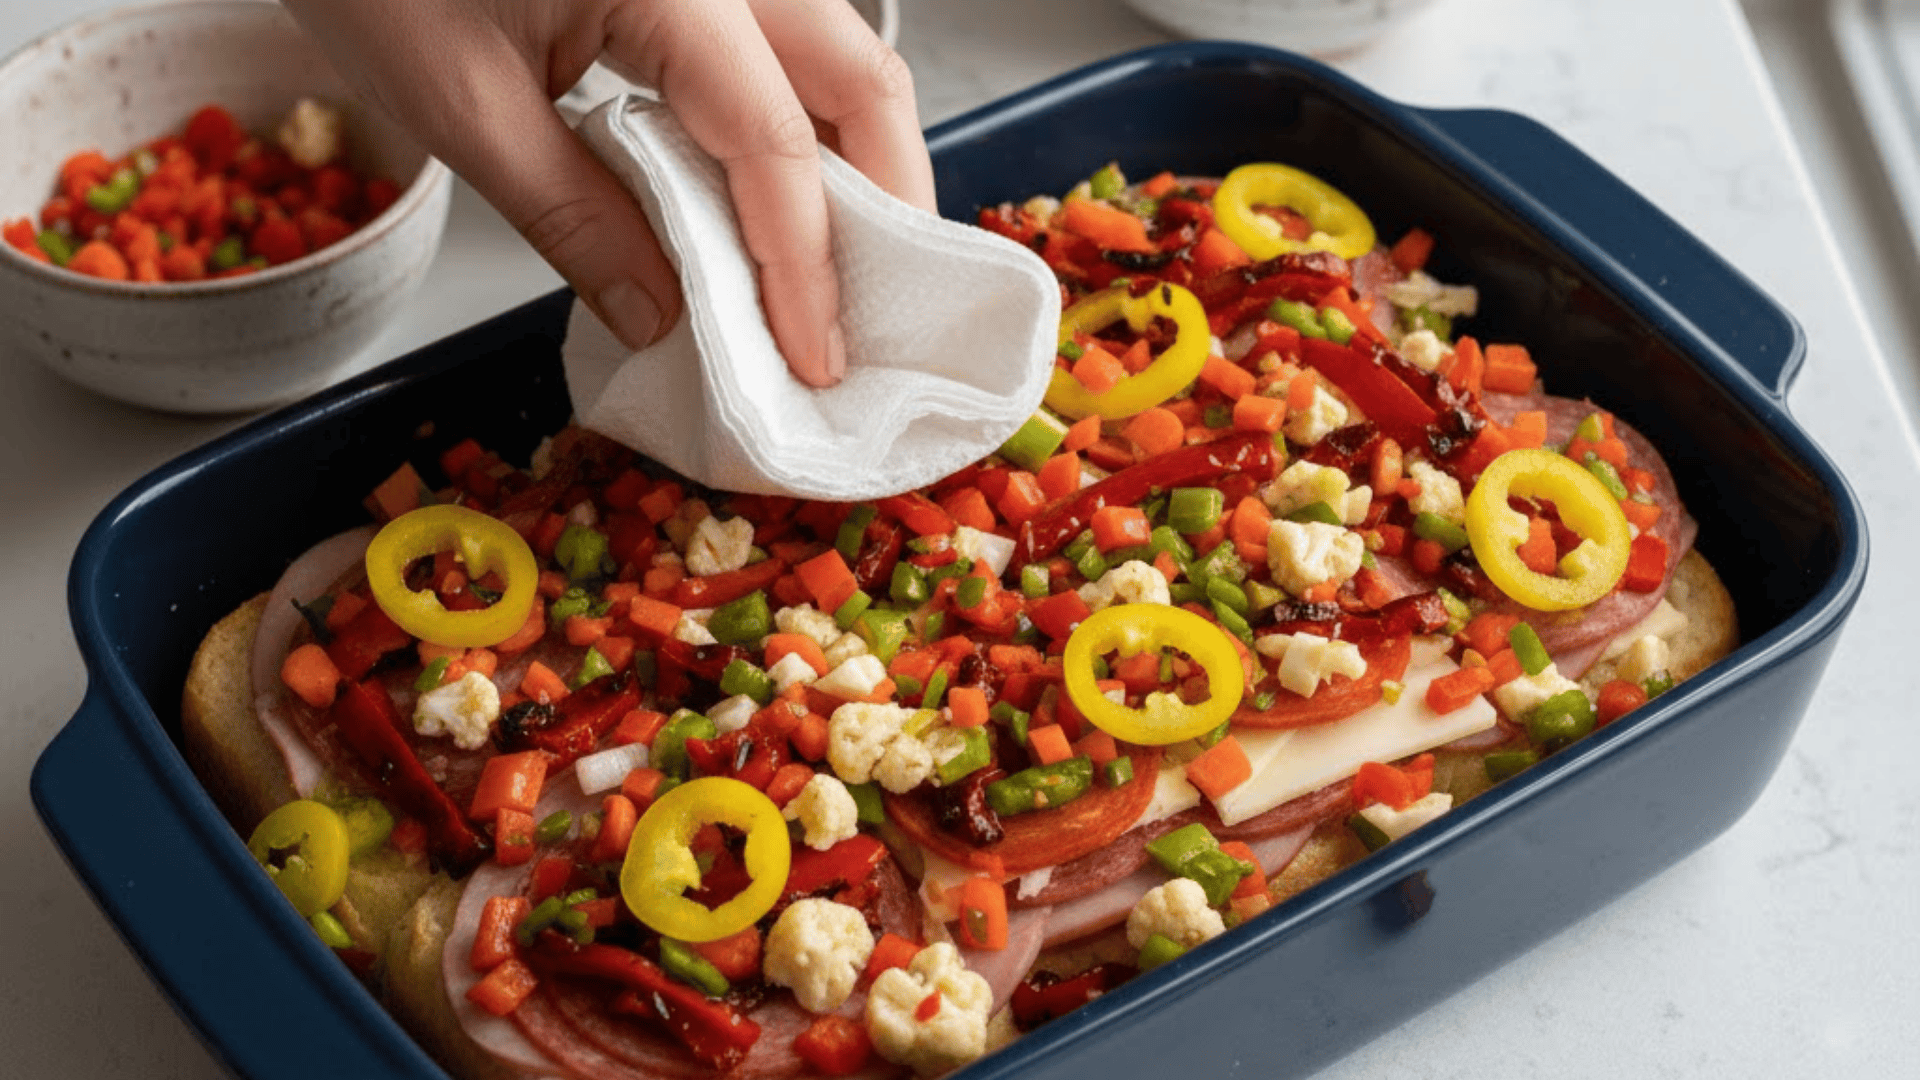
Time to pile on the giardiniera, banana peppers, roasted peppers, or whatever add-ins you love. Here’s the key: don’t overload it, or you’ll end up with soggy sliders.
Pat any wet ingredients dry with a paper towel first. The acidity from the peppers balances out the richness beautifully.
Step 4: Pour the Seasoned Butter Mixture
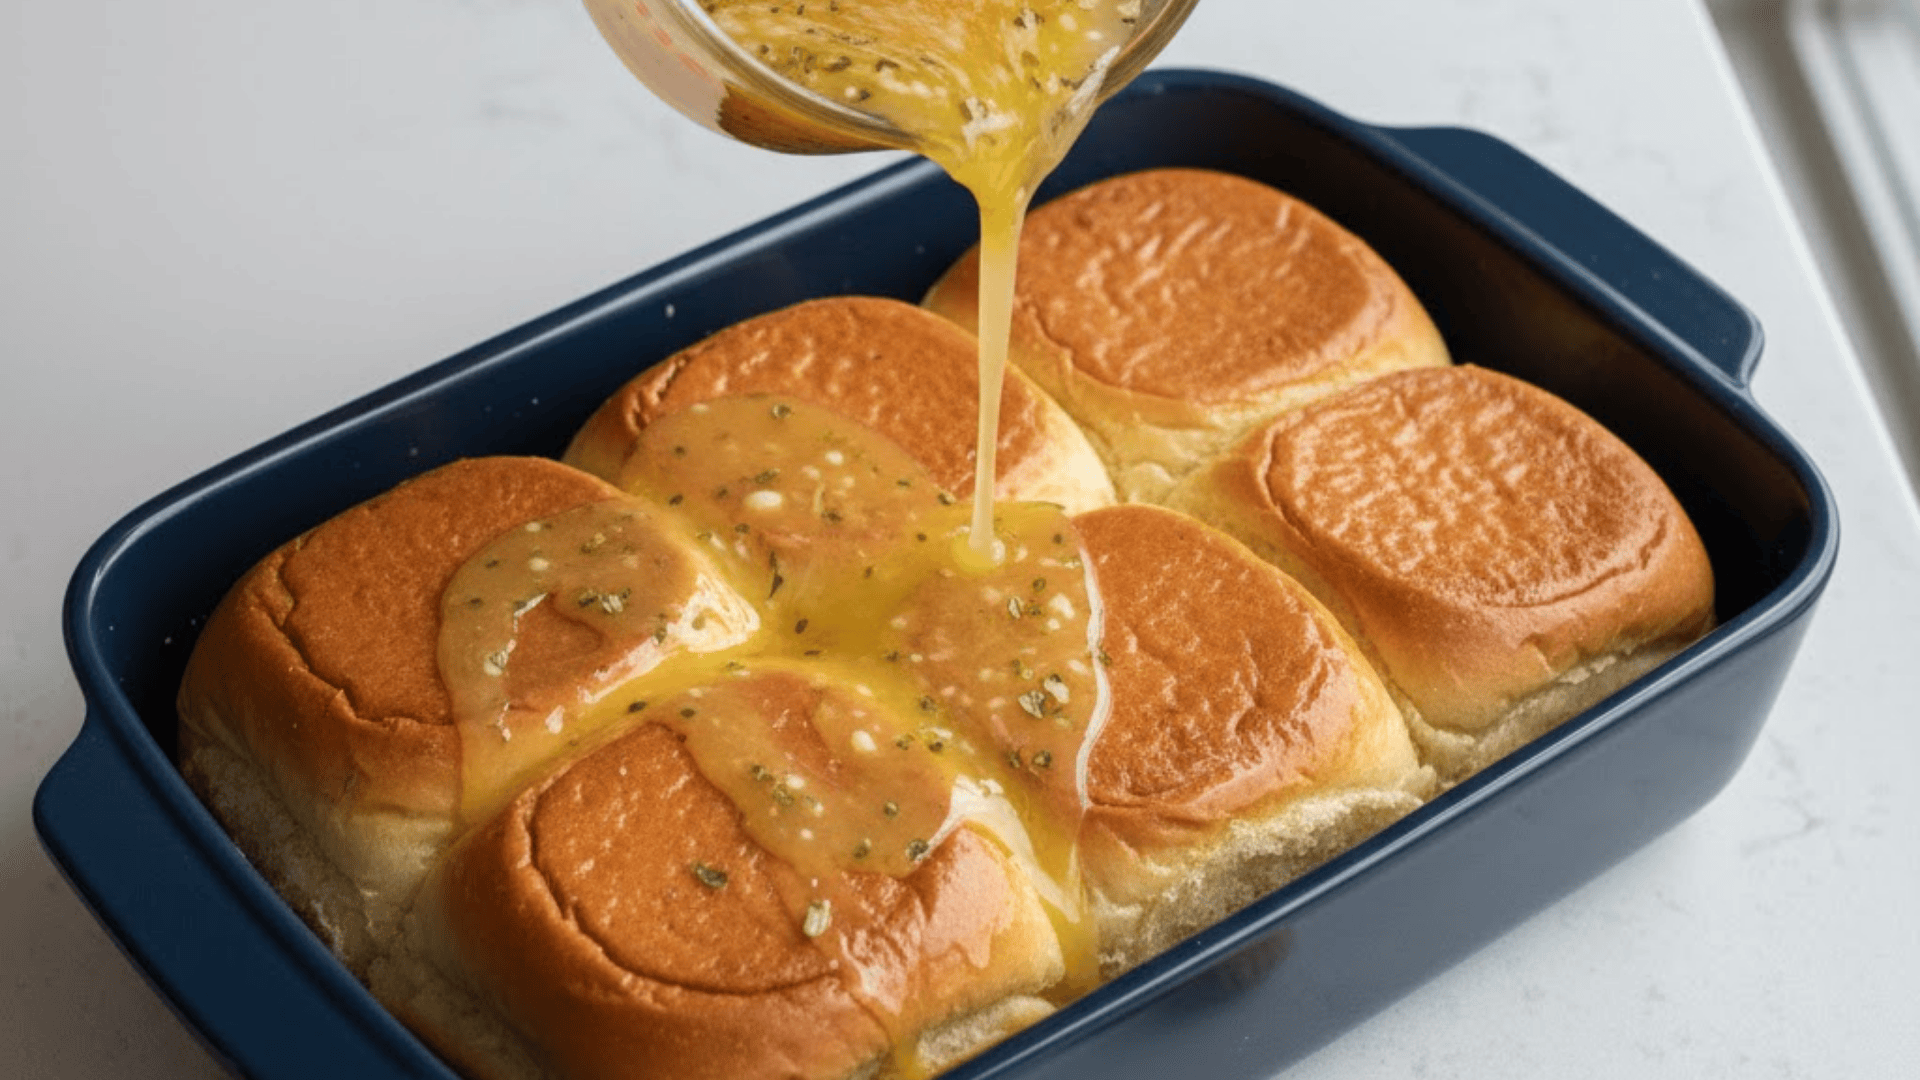
Mix melted butter with Italian seasoning, garlic powder, Parmesan, and red pepper flakes. Pour this golden goodness evenly over the top of the rolls, making sure to get the edges.
This is what gives you those crispy, flavorful corners everyone fights over.
Step 5: Bake and Rest
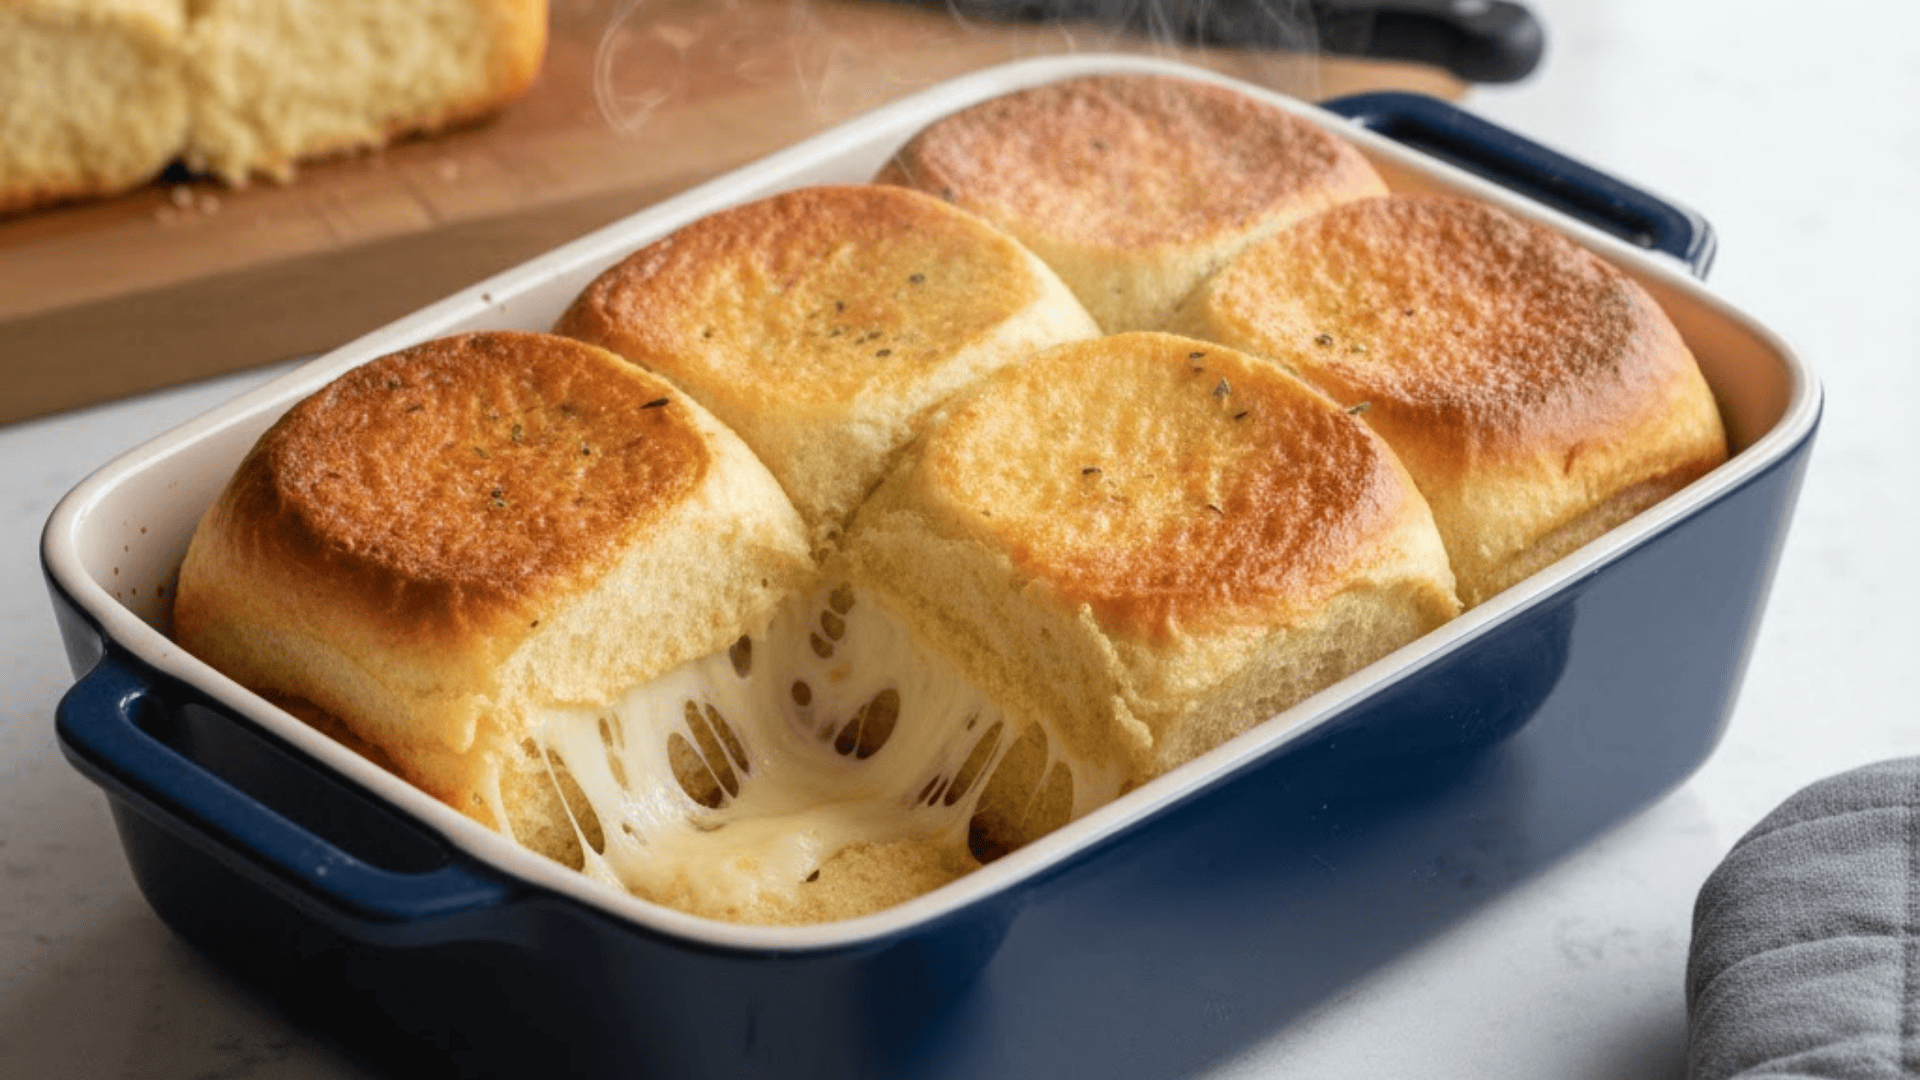
Cover with foil and bake at 350°F for about 15 minutes, then uncover and bake another 5 minutes until golden and bubbly.
Let them rest for a few minutes before slicing; this helps everything set so they don’t fall apart when you cut them into individual sliders.
Chopped Italian Sliders: The Viral Variation
If you’ve seen chopped Italian sliders all over TikTok and Instagram, you know what I’m talking about.
This version flips the script by chopping everything, meats, cheese, veggies, into tiny pieces and mixing them together before piling onto the rolls.
The texture is totally different from classic sliders, more like a loaded Italian sub salad on a bun, and it’s incredibly satisfying.
How to Make Chopped Italian Sliders?
The method is simple, and honestly, it’s kind of therapeutic. Here’s how I do it:
- Step 1: Finely dice your salami, pepperoni, ham, and provolone into small, bite-sized pieces.
- Step 2: Toss everything in a bowl with giardiniera, olive oil, and Italian seasoning until well combined.
- Step 3: Spread the mixture generously and evenly across the bottom half of your slider rolls.
- Step 4: Add the top buns, brush with seasoned butter, and bake at 350°F for 15-20 minutes.
- Step 5: You can also skip baking and serve them cold for a quick, refreshing option.
More Italian Slider Variations to Try
Once you’ve mastered the classic, it’s time to get creative. I love switching things up depending on my mood or what I have in the fridge.
Here are some of my favorite Italian sliders variations that never disappoint:
| Variation | Time | What Makes It Special |
|---|---|---|
| Spicy Italian Sliders | 25 mins | Add Calabrian chili paste, spicy giardiniera, and extra red pepper flakes in the butter for serious heat |
| Caprese Style | 20 mins | Fresh mozzarella, ripe tomato slices, basil leaves, and a drizzle of balsamic glaze; light and summery |
| Chicken Pesto Sliders | 30 mins | Shredded or grilled chicken mixed with basil or arugula pesto, topped with provolone or mozzarella |
| Meatless Italian Sliders | 35 mins | Roasted veggies, olive tapenade, and a cheese-forward approach for a vegetarian crowd-pleaser |
| Deli-Style Cold Italian Sliders | 10 mins | No baking required; perfect for picnics and make-ahead lunches with all the classic deli flavors |
Stella’s Take: Honestly, I could eat the spicy version every single day. There’s something about that kick of Calabrian chili that just hits different, you know?
Best Sauces & Condiments for Italian Sliders
Want to take your Italian sliders to the next level? Here are my go-to condiments that add extra flavor without overpowering the meats and cheese:
- Creamy Italian dressing adds tang and richness, perfect for drizzling over the meat layer
- Pesto mayo: mix basil pesto with mayo for a creamy, herby spread that’s absolutely addictive
- Dijon-based vinaigrette brings a sharp, bold kick that cuts through the richness
- Red wine vinaigrette is light and zesty, ideal for balancing out heavier toppings
- Spicy garlic aioli is creamy with a garlicky punch and just enough heat to keep things interesting
I usually keep a few of these on hand because, honestly, even the same slider can taste completely different depending on which sauce you use. It’s all about what you’re craving that day.
What to Serve with Italian Sliders?
These sliders are pretty filling on their own, but if you’re feeding a crowd or want to round out the meal, here’s what I love pairing them with.
An Italian chopped salad is always a winner because it keeps things fresh and crunchy. Pasta salad works great too, especially a cold one with Italian dressing.
If you want something warm, roasted potatoes with garlic and herbs hit the spot. Tomato soup is perfect for dipping if you’re going the comfort food route.
And honestly, you can’t go wrong with an antipasto platter loaded with olives, cheeses, and marinated veggies. It’s like extending the Italian vibe across your whole table.
Storage, Make-Ahead & Freezing Tips
One of the best things about Italian sliders is how well they hold up for later. Whether you’re meal prepping or just making extras, here’s how to keep them fresh and delicious:
- Store assembled but unbaked sliders in the fridge for up to 24 hours, then bake when ready to serve
- Reheat baked sliders at 300°F covered with foil to prevent drying out, about 10 minutes does the trick
- Freeze assembled sliders tightly wrapped in foil for up to 2 months, then bake straight from frozen
- Make the seasoned butter mixture ahead and store it in the fridge for up to a week
- Prep all your meats, cheeses, and veggies, chopped and ready in containers for quick assembly during busy weeknights
The make-ahead option is honestly a lifesaver when I’m hosting. I’ll assemble everything the night before, pop them in the oven when guests arrive, and they think I’ve been cooking all day.
Final Thoughts
There you have it; everything you need to nail this Italian sliders recipe from start to finish. I’ve made these more times than I can count, and they never get old.
If you prefer the classic version or the viral chopped style, the beauty of these sliders is that you can make them your own.
Play around with the meats, switch up the cheeses, and add whatever toppings sound good to you. They’re forgiving, delicious, and always a hit.
Now I want to hear from you: what’s your favorite way to make them? Drop a comment below and let me know how yours turned out!