If you’re a fan of indulgent desserts, then Vanilla Bean Creme Brulee is probably high on your list.
There’s something magical about making this classic French treat at home: the creamy custard, the satisfying crack of caramelized sugar, and the sweet scent of vanilla that fills the air.
I’ve learned through experience that with a little know-how, you can easily create restaurant-quality crème brûlée right in your own kitchen.
In this blog, I’ll walk you through every step of the process, from prepping the ingredients to achieving that perfect sugar top.
Whether you’re a seasoned baker or trying your hand at this dessert for the first time, you’ll feel like a pro with these tips and tricks. Let’s dive in!
Understanding Vanilla Bean Creme Brulee
Vanilla Bean Creme Brulee is a luxurious French dessert I absolutely adore making. It features a rich, creamy custard made from heavy cream, egg yolks, sugar, and real vanilla beans, all crowned with a layer of hard caramelized sugar that cracks satisfyingly under your spoon.
The name literally translates to “burnt cream” in French, referring to the torched sugar topping that creates its signature texture. Dating back to 17th-century France, this beloved dessert has become a restaurant staple worldwide.
When I use vanilla bean pods rather than extract, I infuse the custard with countless tiny specks and a depth of flavor that makes each spoonful extraordinary.
Step-by-Step Instructions: Vanilla Bean Creme Brulee
I’m going to walk you through each step of making crème brûlée, from prep to that final satisfying crack. Follow along closely, and you’ll create restaurant-quality results in your own kitchen.
Ingredients for Vanilla Bean Creme Brulee
Quality ingredients and precise measurements are essential for perfect crème brûlée. This recipe will serve 6 unless you are open to sharing. Here’s everything you’ll need:
- 2 cups heavy cream
- 1 whole vanilla bean (or 2 teaspoons vanilla bean paste)
- 5 large egg yolks
- 1/3 cup granulated sugar (plus extra for the topping)
- Pinch of salt
- 4-6 tablespoons superfine sugar (for caramelizing)
Heavy cream provides richness, vanilla beans deliver depth of flavor, egg yolks create the custard base, and sugar sweetens while forming that iconic crunchy topping.
Step 1: Preheat and Prep
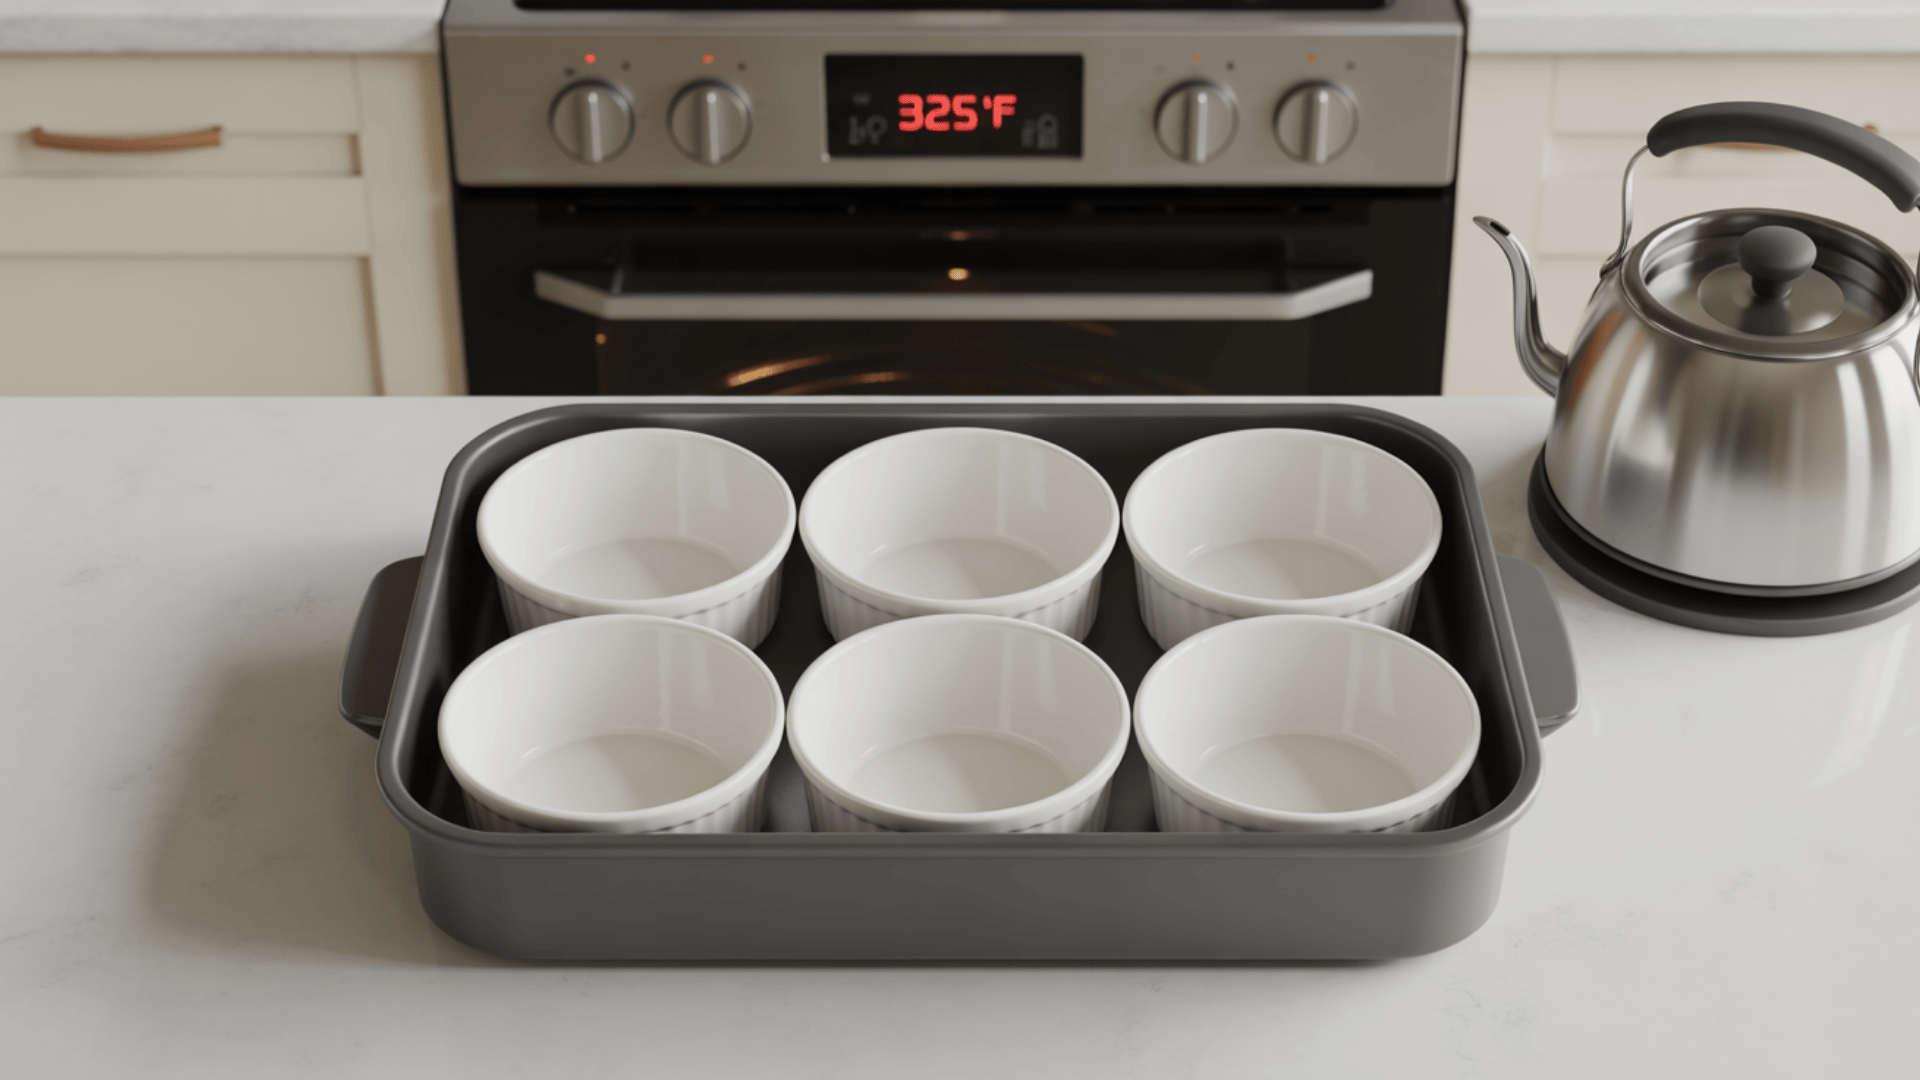
Preheat the oven to 325°F (163°C). Arrange 4-6 ramekins in a deep baking dish, leaving space between them. Set a kettle of water to boil; You’ll need it for the water bath later. Proper preparation ensures smooth cooking and consistent results.
Pro Tip: I use ceramic ramekins instead of glass for more even heat distribution and better results.
Step 2: Infuse the Cream
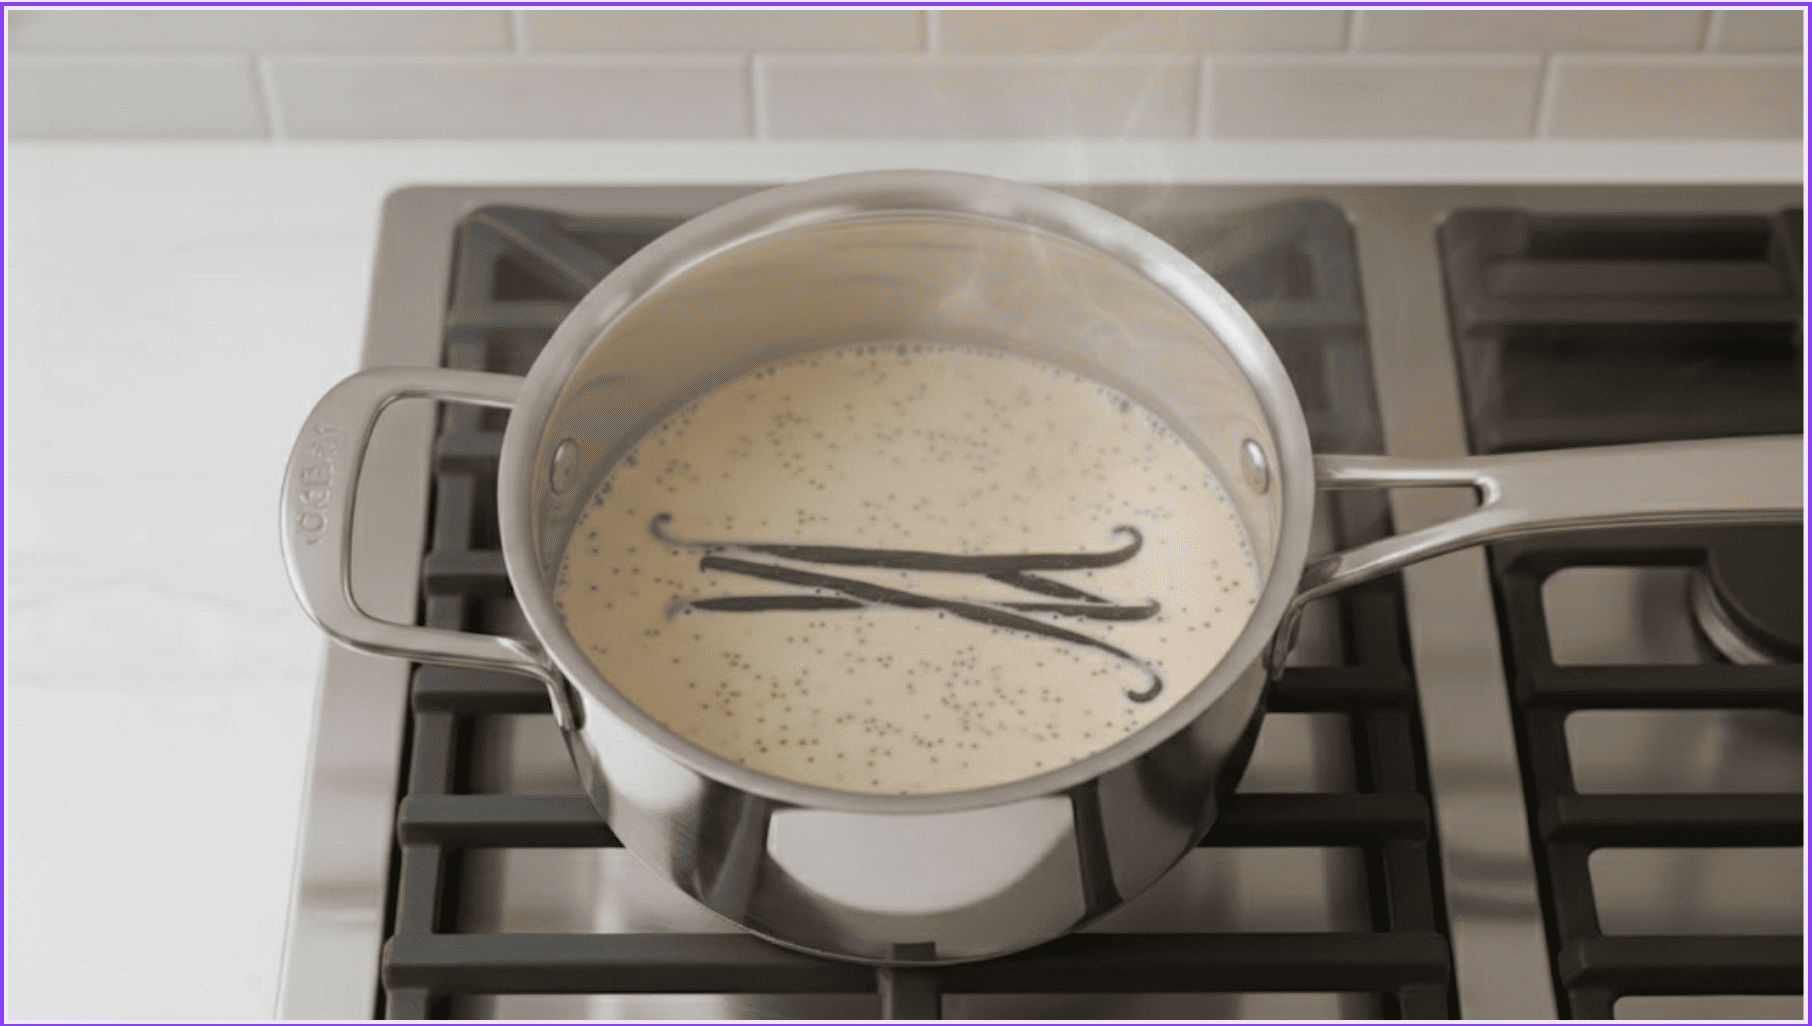
Pour heavy cream into a saucepan. Split the vanilla bean lengthwise, scrape out the seeds, and add both to the cream.
Heat to a gentle simmer, remove from heat, cover, and steep 15-20 minutes for maximum flavor extraction. Remove the pod before using the infused cream.
Pro Tip: I save used vanilla pods, rinse them, dry them, and store them in sugar to make vanilla-scented sugar.
Step 3: Whisk the Yolks
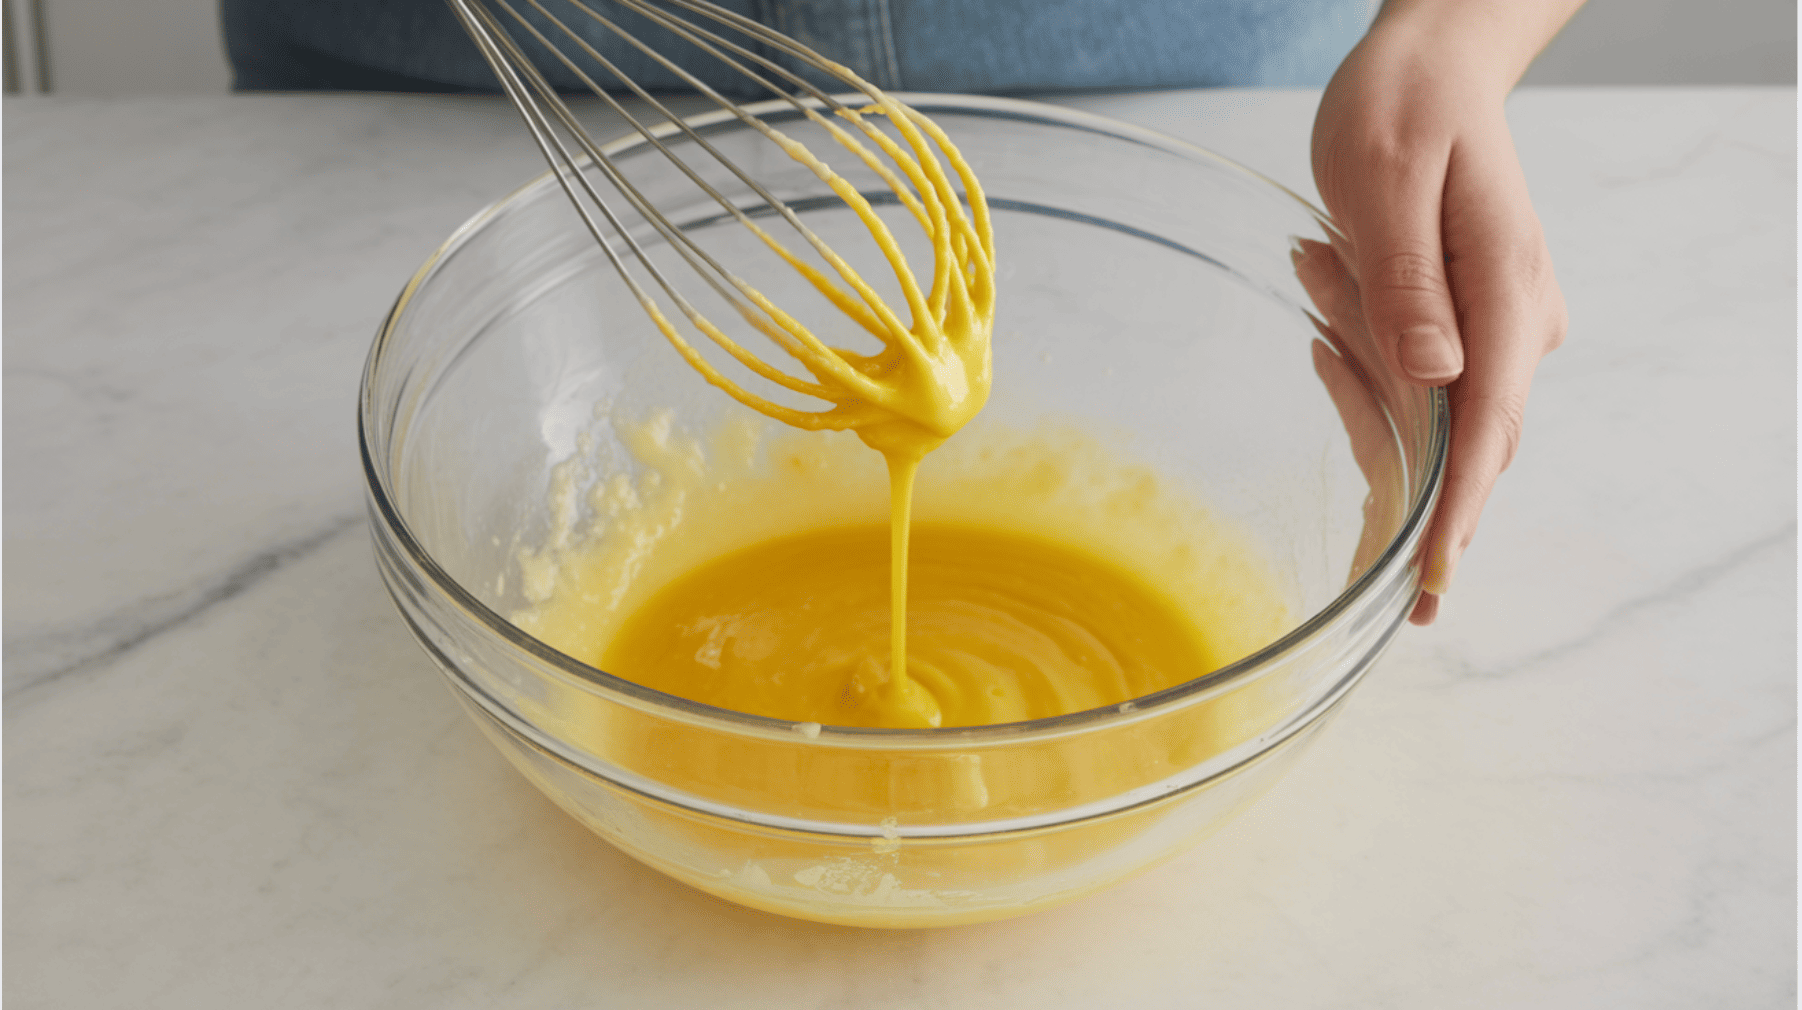
Separate the eggs and place yolks in a mixing bowl. Add sugar and salt. Whisk vigorously 2-3 minutes until pale yellow and thick; the mixture should fall in ribbons.
This ribboning incorporates air and dissolves sugar, creating a smooth custard base for optimal texture.
Pro Tip: I use room temperature egg yolks for easier whisking and a smoother final mixture.
Step 4: Temper the Eggs
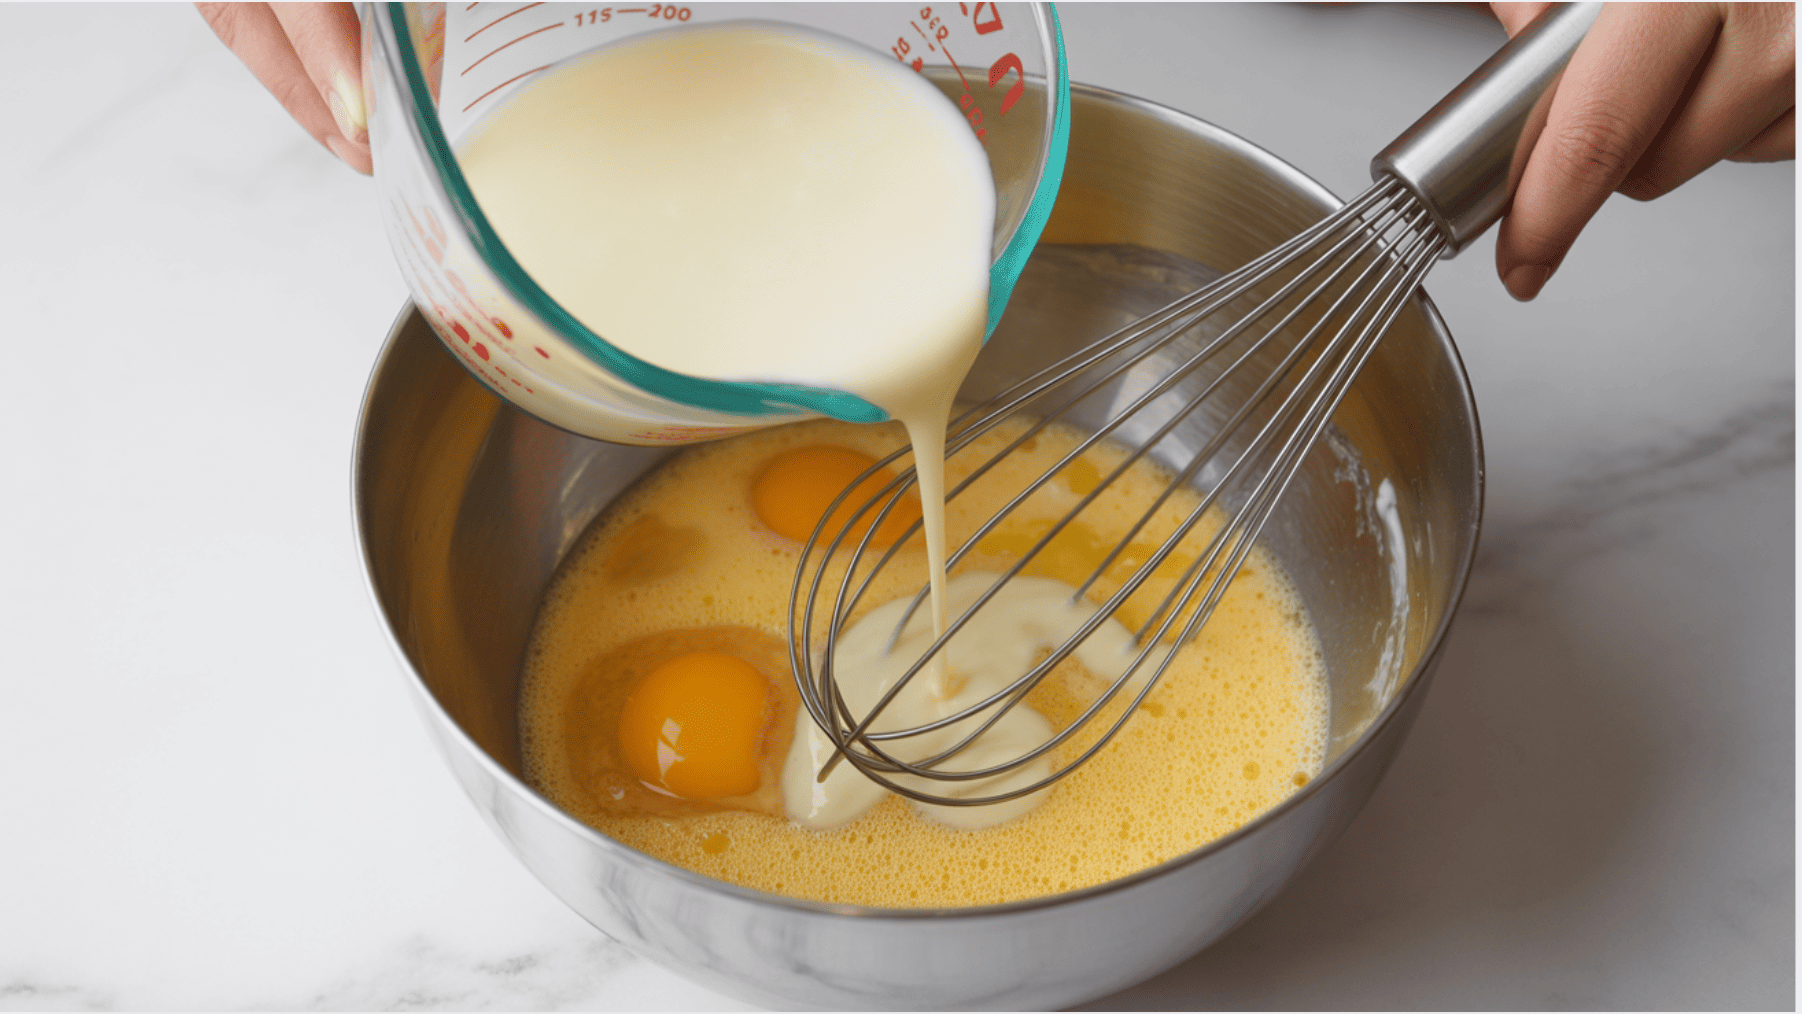
Reheat the cream until warm. While whisking the egg mixture constantly, slowly drizzle in 1/4 cup warm cream, then another 1/4 cup.
Once half incorporated, pour the egg mixture into the saucepan with the remaining cream, whisking continuously. Strain the custard through a fine-mesh sieve to achieve an ultra-smooth, lump-free custard.
Pro Tip: I sometimes place a damp towel under my bowl to prevent spinning during this crucial step.
Step 5: Bake in a Water Bath
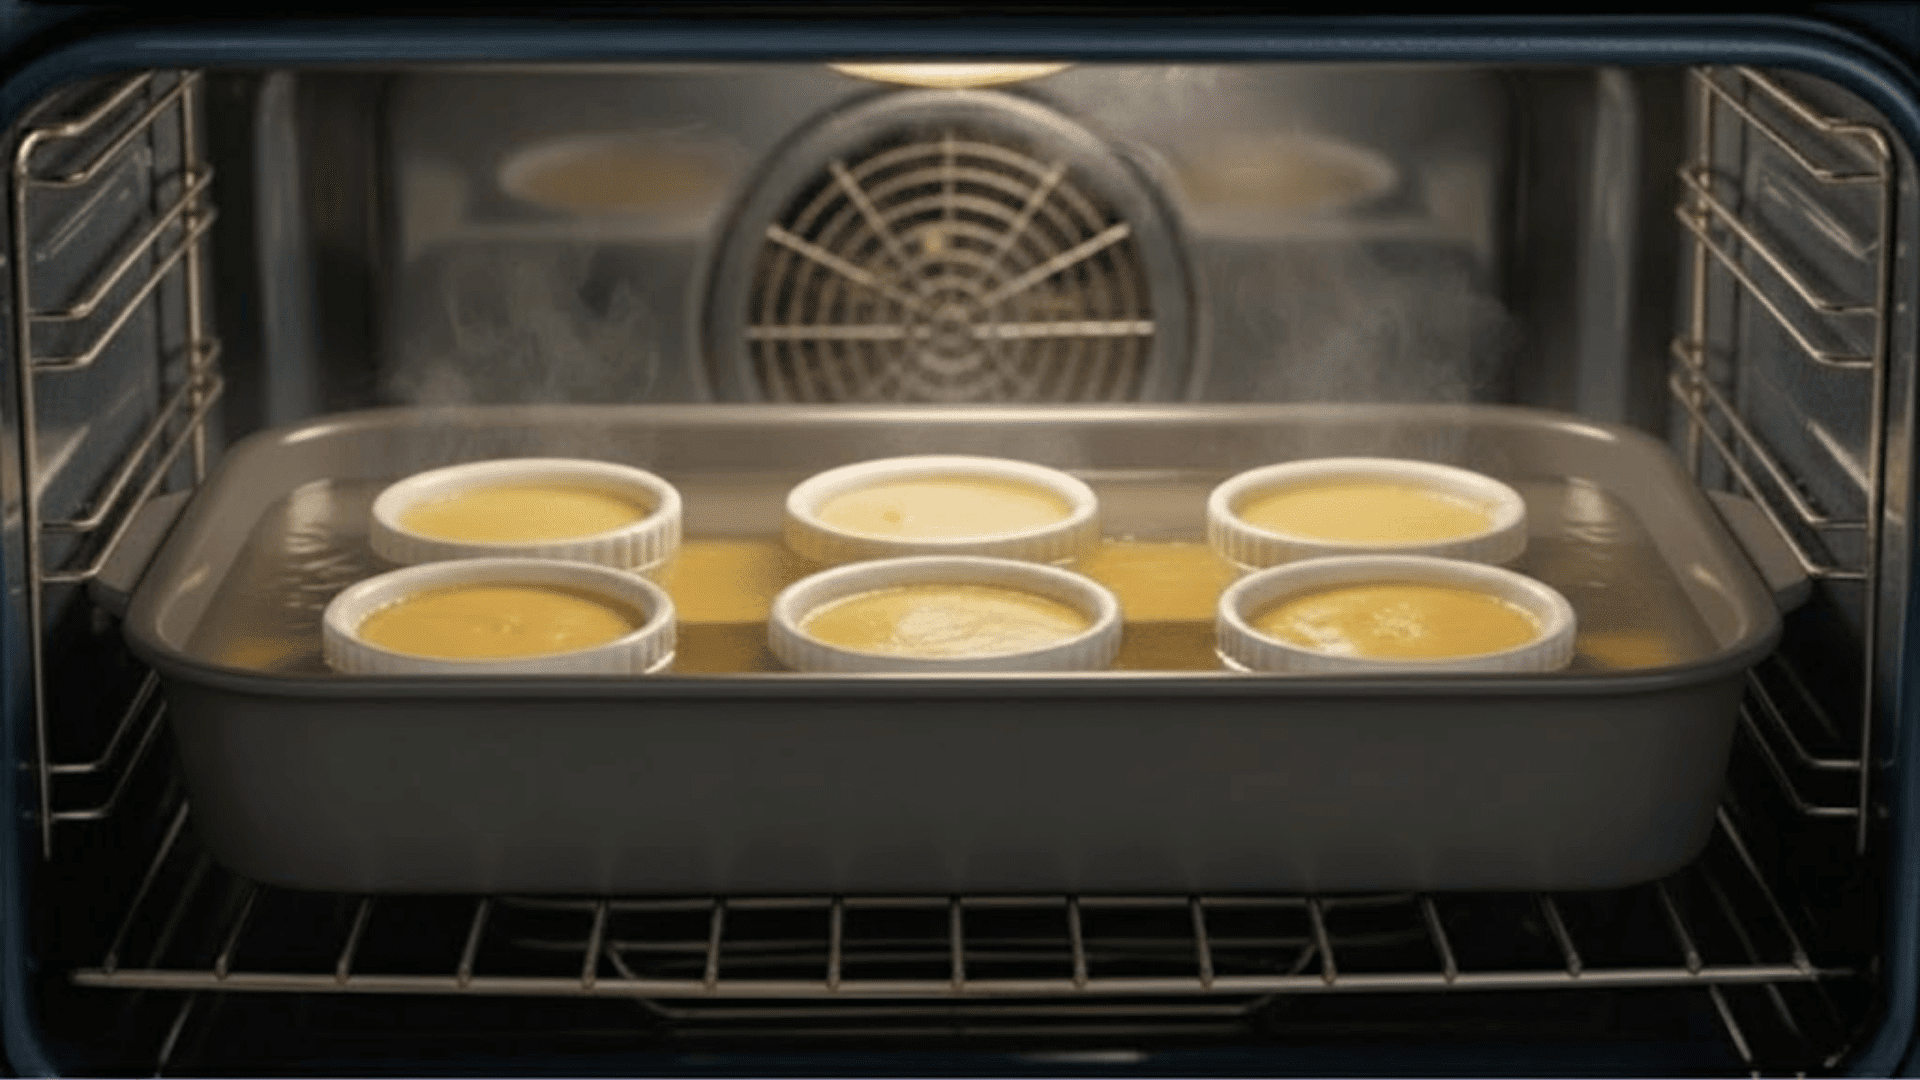
Pour custard into ramekins, filling 3/4 full. Place the baking dish in the oven, then add hot water until halfway up the ramekin sides.
Bake for 35-45 minutes, until the edges are set, but the centers jiggle. The water bath provides gentle, even heat, preventing overcooking while the centers set properly.
Pro Tip: I sometimes like to place a kitchen towel on the bottom of the dish to prevent ramekins from sliding around.
Step 6: Let Chill in The Refrigerator
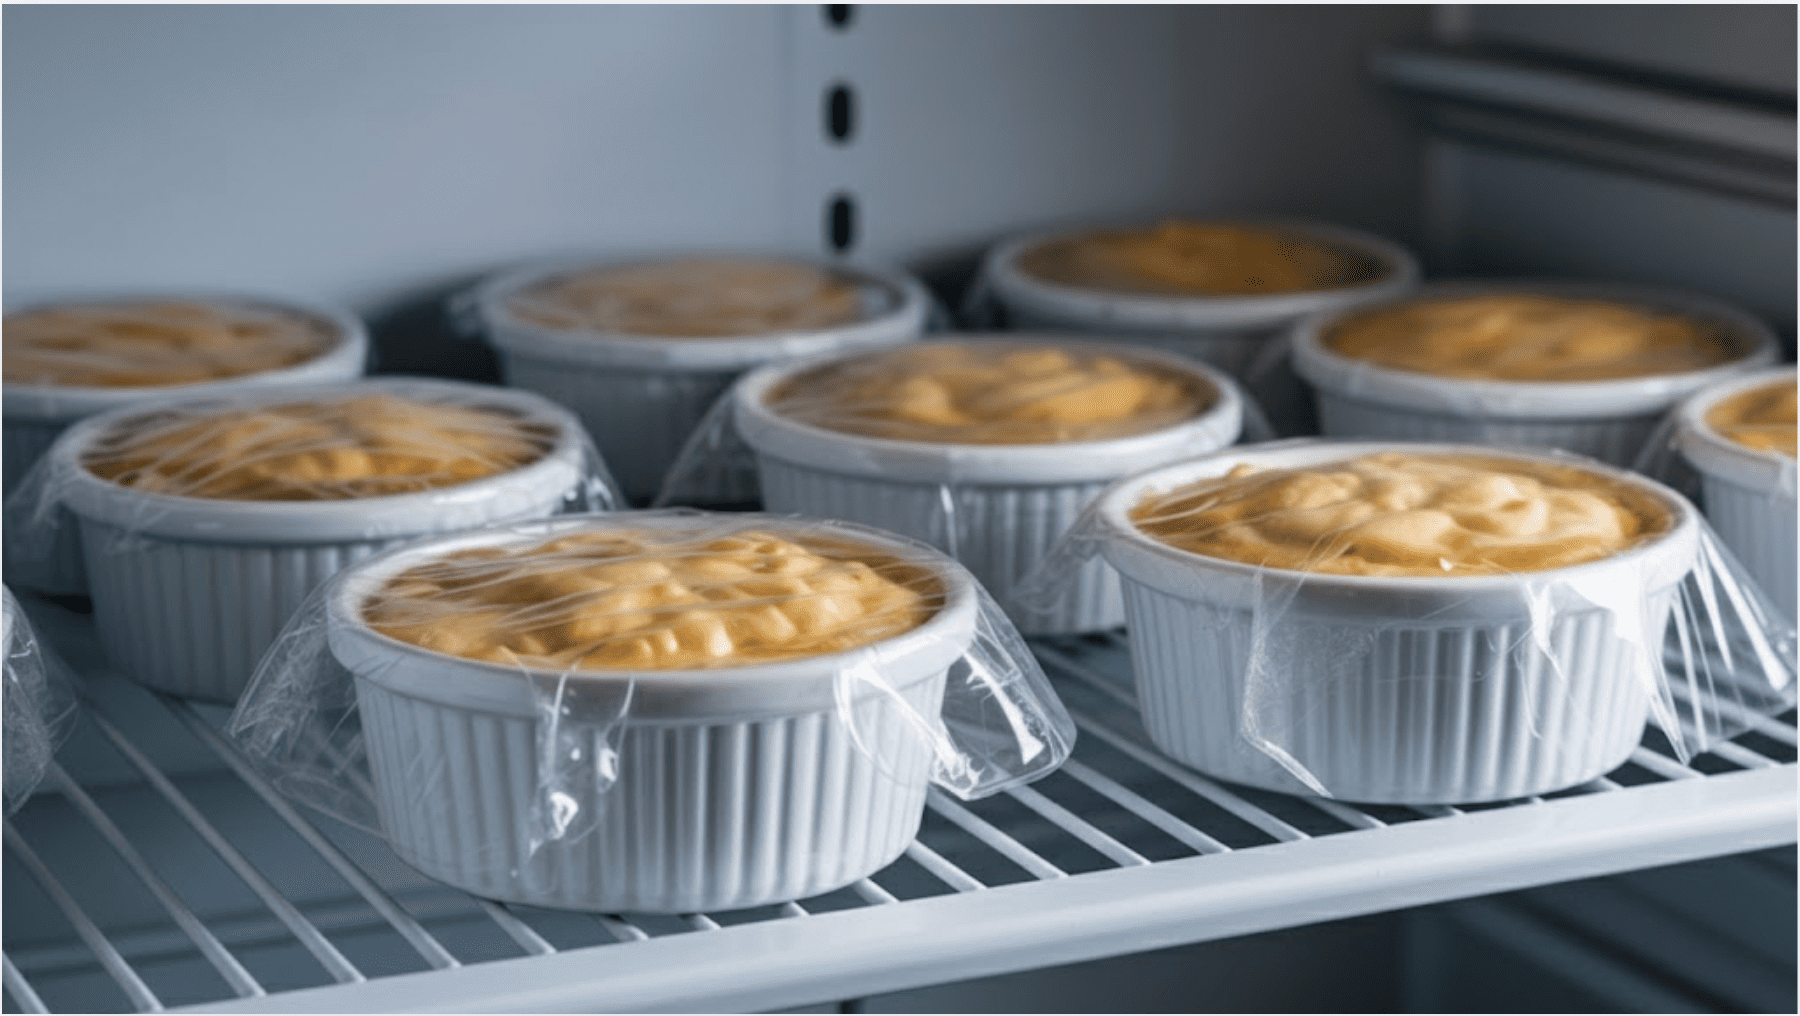
Remove the ramekins from the water bath using tongs. Cool them on a wire rack for 30-45 minutes. Cover each with plastic wrap without touching the custard surface.
Refrigerate for at least 4 hours, preferably overnight. Proper chilling sets custards completely, develops full flavor, and creates a perfect contrast to the warm topping.
Pro Tip: I press plastic wrap onto the custard’s surface to prevent skin from forming before adding sugar.
Step 7: Brûlée the Top
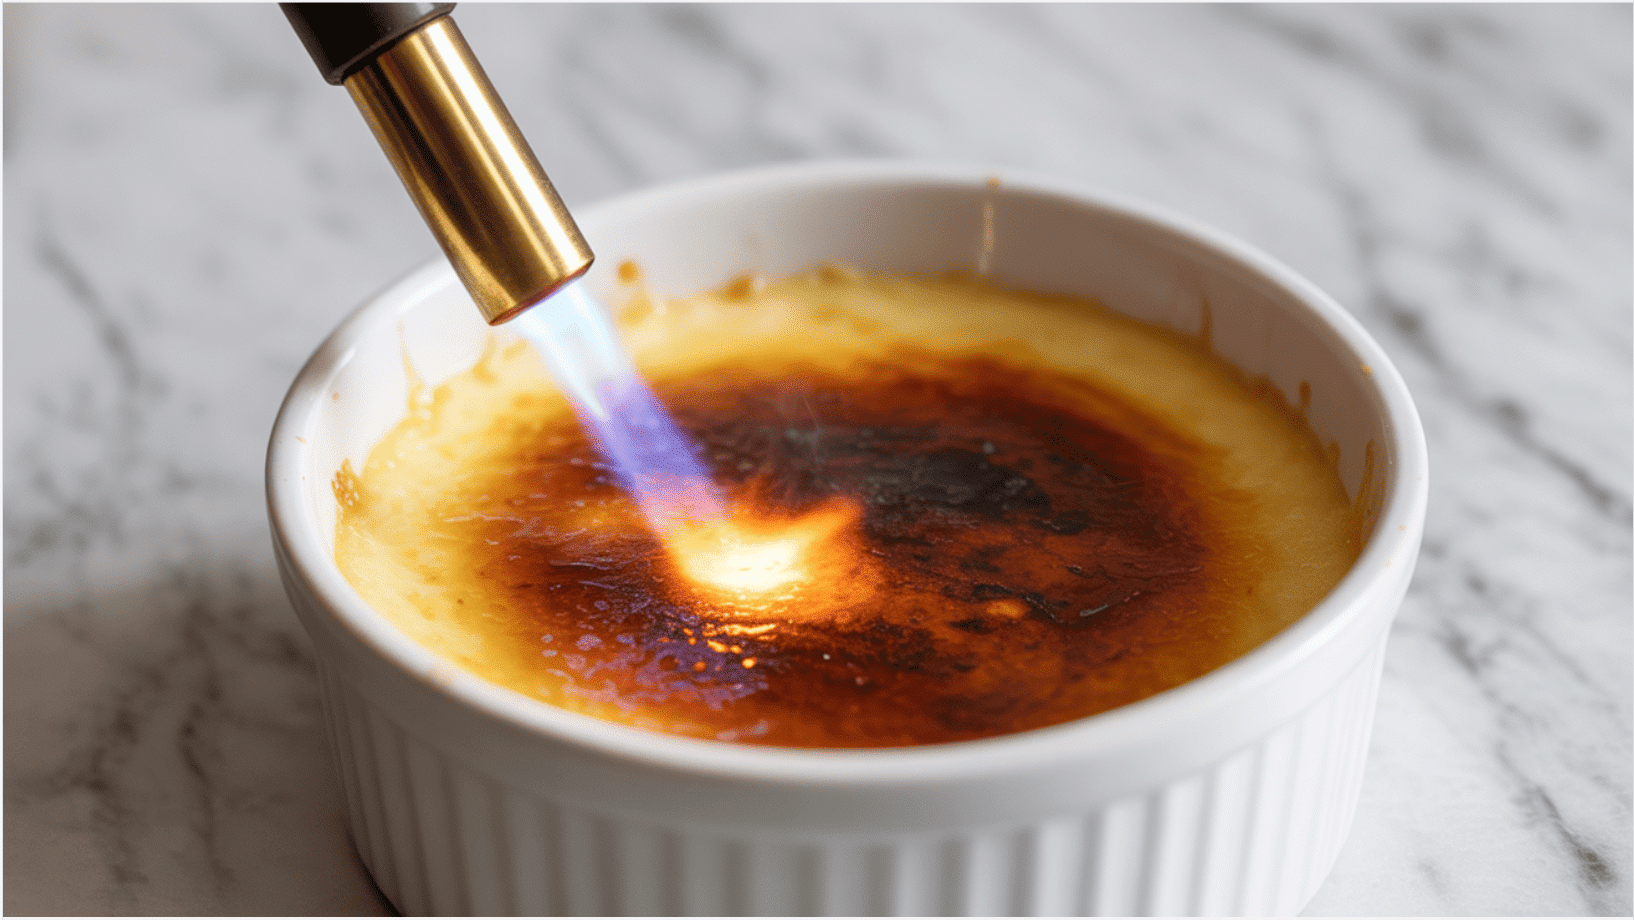
Remove the custards from the refrigerator and blot moisture with a paper towel. Sprinkle 1-2 tablespoons superfine sugar evenly over each.
Use a kitchen torch 3-4 inches from the surface, moving in circles until the sugar bubbles and turns deep amber. Let it cool for 1-2 minutes before serving to achieve a hardened shell.
Pro Tip: I make one extra custard to practice my torching technique before serving to guests.
Following these seven steps carefully will guarantee you perfect crème brûlée every time. I’ve refined this technique through countless batches, and now you have all my secrets to success.

Toppings and What to Pair With Vanilla Bean Creme Brulee
The traditional caramelized sugar topping is the true hallmark of crème brûlée, providing that satisfying crack when my spoon breaks through. I use superfine or caster sugar for perfect texture, though turbinado or demerara sugar adds complex, molasses-like flavor and extra crunch.
Beyond the standard preparation, I love pairing it with fresh berries, particularly raspberries or strawberries, which add a tart contrast to the rich custard. A small dollop of lightly sweetened whipped cream adds indulgence.
For beverages, I recommend espresso, cappuccino, or dessert wines such as Sauternes or late-harvest Riesling. Champagne or sparkling wine also complements the dessert’s refinement perfectly.
Alternatives and Substitutions
I know dietary restrictions shouldn’t stop you from enjoying this incredible dessert. I’ve tested various substitutions to ensure everyone can make delicious crème brûlée at home, regardless of dietary needs.
Here are my favorite alternatives:
| Dietary Need | Ingredient to Replace | Substitute | Notes |
| Vegan | Heavy cream & egg yolks | Coconut cream + silken tofu with cornstarch | Use 1 cup tofu + 2 tbsp cornstarch per 5 yolks |
| Dairy-Free | Heavy cream | Coconut cream or oat cream | Coconut cream works best for texture |
| Keto | Sugar (custard & topping) | Allulose | Use the same measurements; caramelizes well |
| Low-Sugar | Sugar | Stevia or monk fruit blend | Reduce by half; adjust to taste |
| No Vanilla Bean | Vanilla bean | Vanilla extract or paste | Use 2 teaspoons; the paste gives visible specks |
I’ve found these substitutions work beautifully when measured carefully. Each alternative preserves the dessert’s signature texture and flavor, so you can confidently adapt the recipe to suit your dietary needs.
Common Mistakes to Avoid
I’ve made plenty of mistakes while perfecting my crème brûlée technique, and I want to help you avoid the same pitfalls.
Watch out for these critical mistakes:
- Overbaking the custard: I remove mine when the centers still wobble; they’ll continue setting as they cool. Overbaking results in a rubbery texture rather than silky creaminess.
- Improper temperature control: I add hot cream slowly while whisking constantly to avoid scrambled eggs. High oven temperatures cause curdling.
- Incorrect torch technique: I keep my torch at a proper distance, producing a thin, even sugar layer. I avoid burnt spots and thick, chewy tops.
- Skipping the water bath: The water bath provides gentle, even heat that prevents edges from overcooking before centers set.
By avoiding these common errors and following the proper techniques I’ve shared, you’ll achieve consistently excellent results. I pay attention to visual cues like the jiggle test and the color of the sugar, and I know your crème brûlée will rival any restaurant version you’ve tried.
Final Touches
This Vanilla Bean Creme Brulee recipe doesn’t just satisfy your sweet tooth, but also makes you look impressive when you crack that sugar shell in front of guests.
I’ve walked you through everything from prepping your ramekins to infusing vanilla beans to getting that perfect wobble in your custard to torching the sugar until it’s just right.
With this recipe, you are sure to become the classy person in every family who is always bragging about their luxurious desserts and lifestyle. Remember to pair it with dessert wines and toppings if you want to achieve a self-acclaimed Michelin star.
Let me know in the comments if yours turned out as good as you hoped, and whether there are any other desserts you want the deets on.