I still remember my first piercing. A friend held my hand, I tried to act cool, and then came that quick pinch. Just like that, I was hooked.
From simple lobes to sculpted cartilage, ear piercing types now go far beyond one shiny stud. This guide breaks down the most popular styles, where they’re placed, how much they hurt, and how long they take to heal.
You’ll also learn how to pick what fits your comfort, lifestyle, and mood, and why going to a professional piercer matters more than you think.
Understanding Ear Piercings
The biggest difference is between lobe and cartilage piercings. Lobes are soft and quick to heal. Cartilage, on the other hand, is thicker and needs more time and care.
How much it hurts and how well it heals depends on:
- Skin thickness: Thinner skin heals faster
- Cartilage density: Thicker cartilage = more tenderness
- Aftercare routine: Consistency makes all the difference
Before deciding, always visit a licensed piercer. Needles, not guns. Gloves, not guesses.
Types of Ear Piercings
Every piercing tells a story; some quiet, some bold. If you’re adding your first stud or curating a full ear stack, here’s a complete look at the main ear piercing types, how they feel, and how long they take to heal.
Lobe Piercings
Soft, forgiving, and quick to heal, lobe piercings are where most people begin. They’re classic, comfortable, and let you experiment with jewelry styles, from simple studs to layered hoops.
1. Standard Lobe
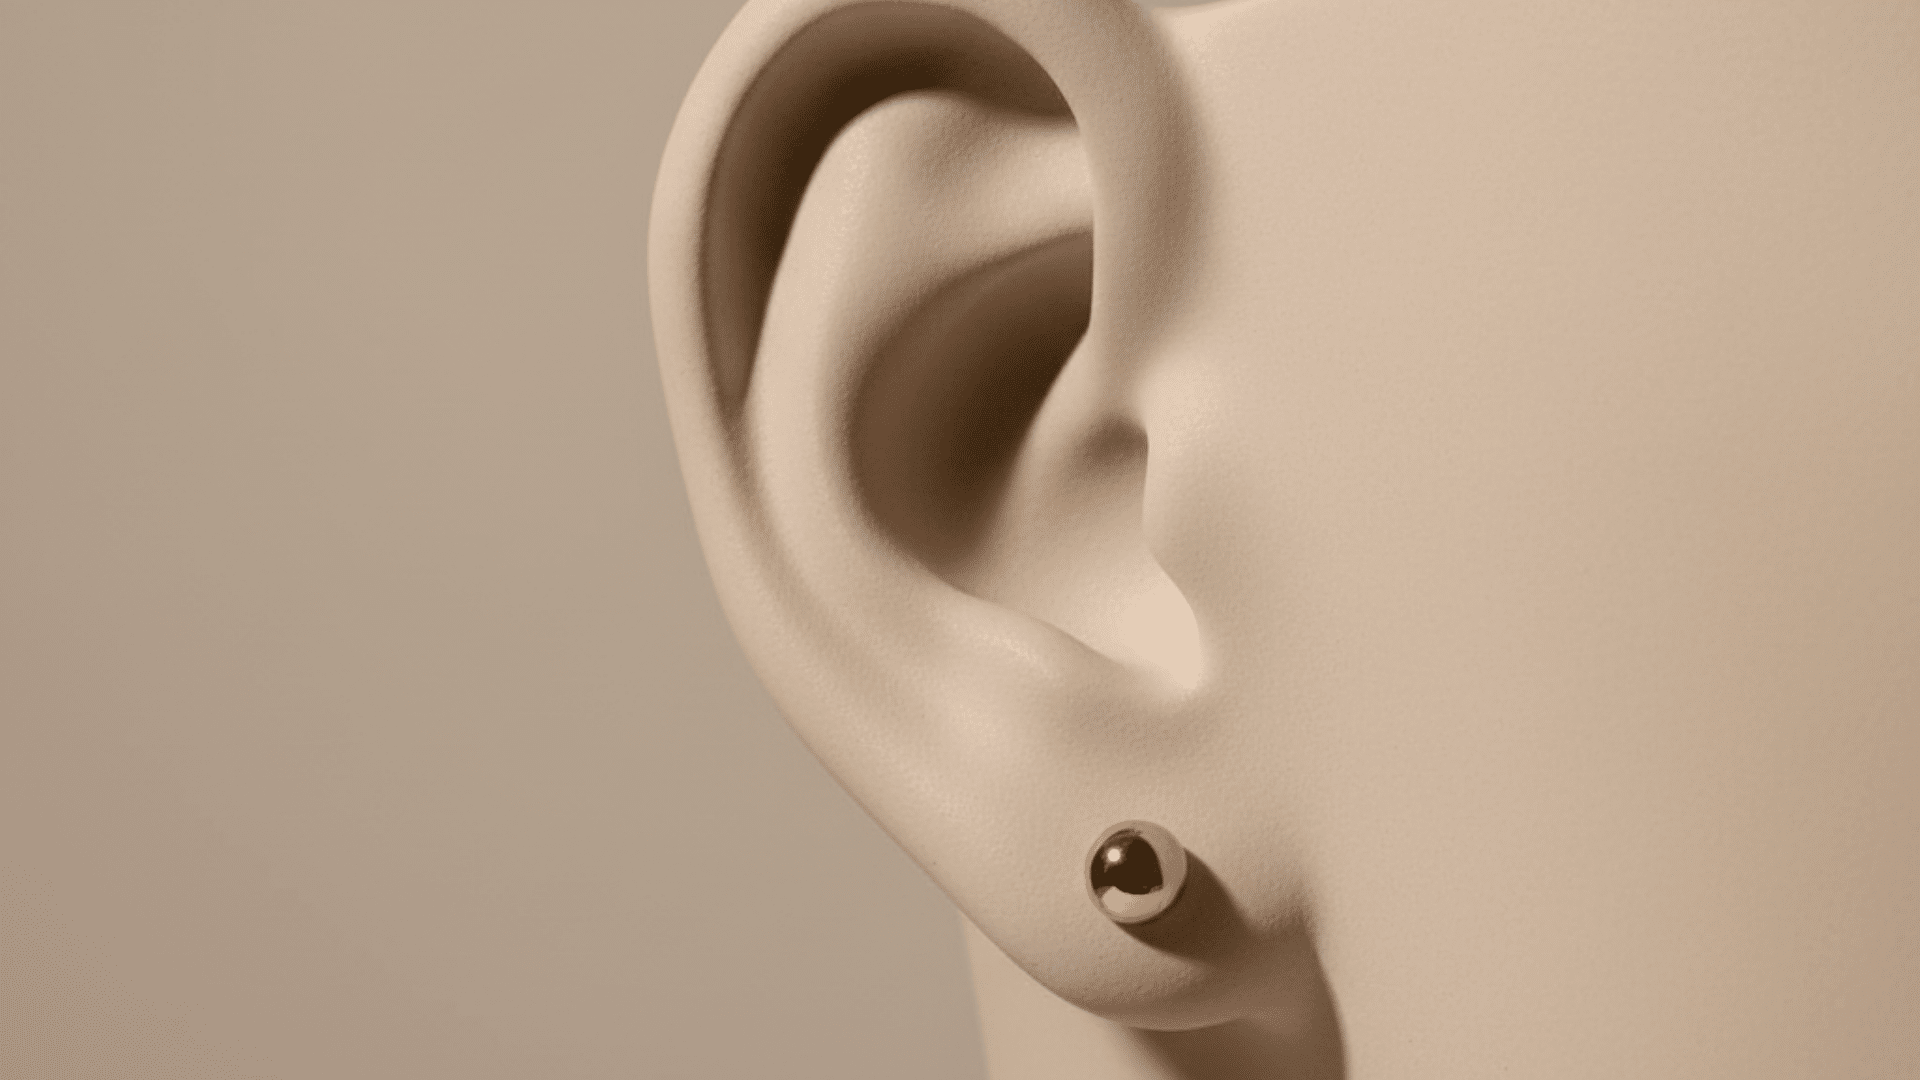
A gentle introduction to piercing. It’s quick, nearly painless, and heals without much effort. You can wear anything from tiny gems to bold hoops once healed, making it the foundation for every ear styling choice.
Placement: Lower part of the earlobe
Pain Level: 1/10 (very mild)
Healing Time: 6–8 weeks
2. Upper / Second / Third Lobe
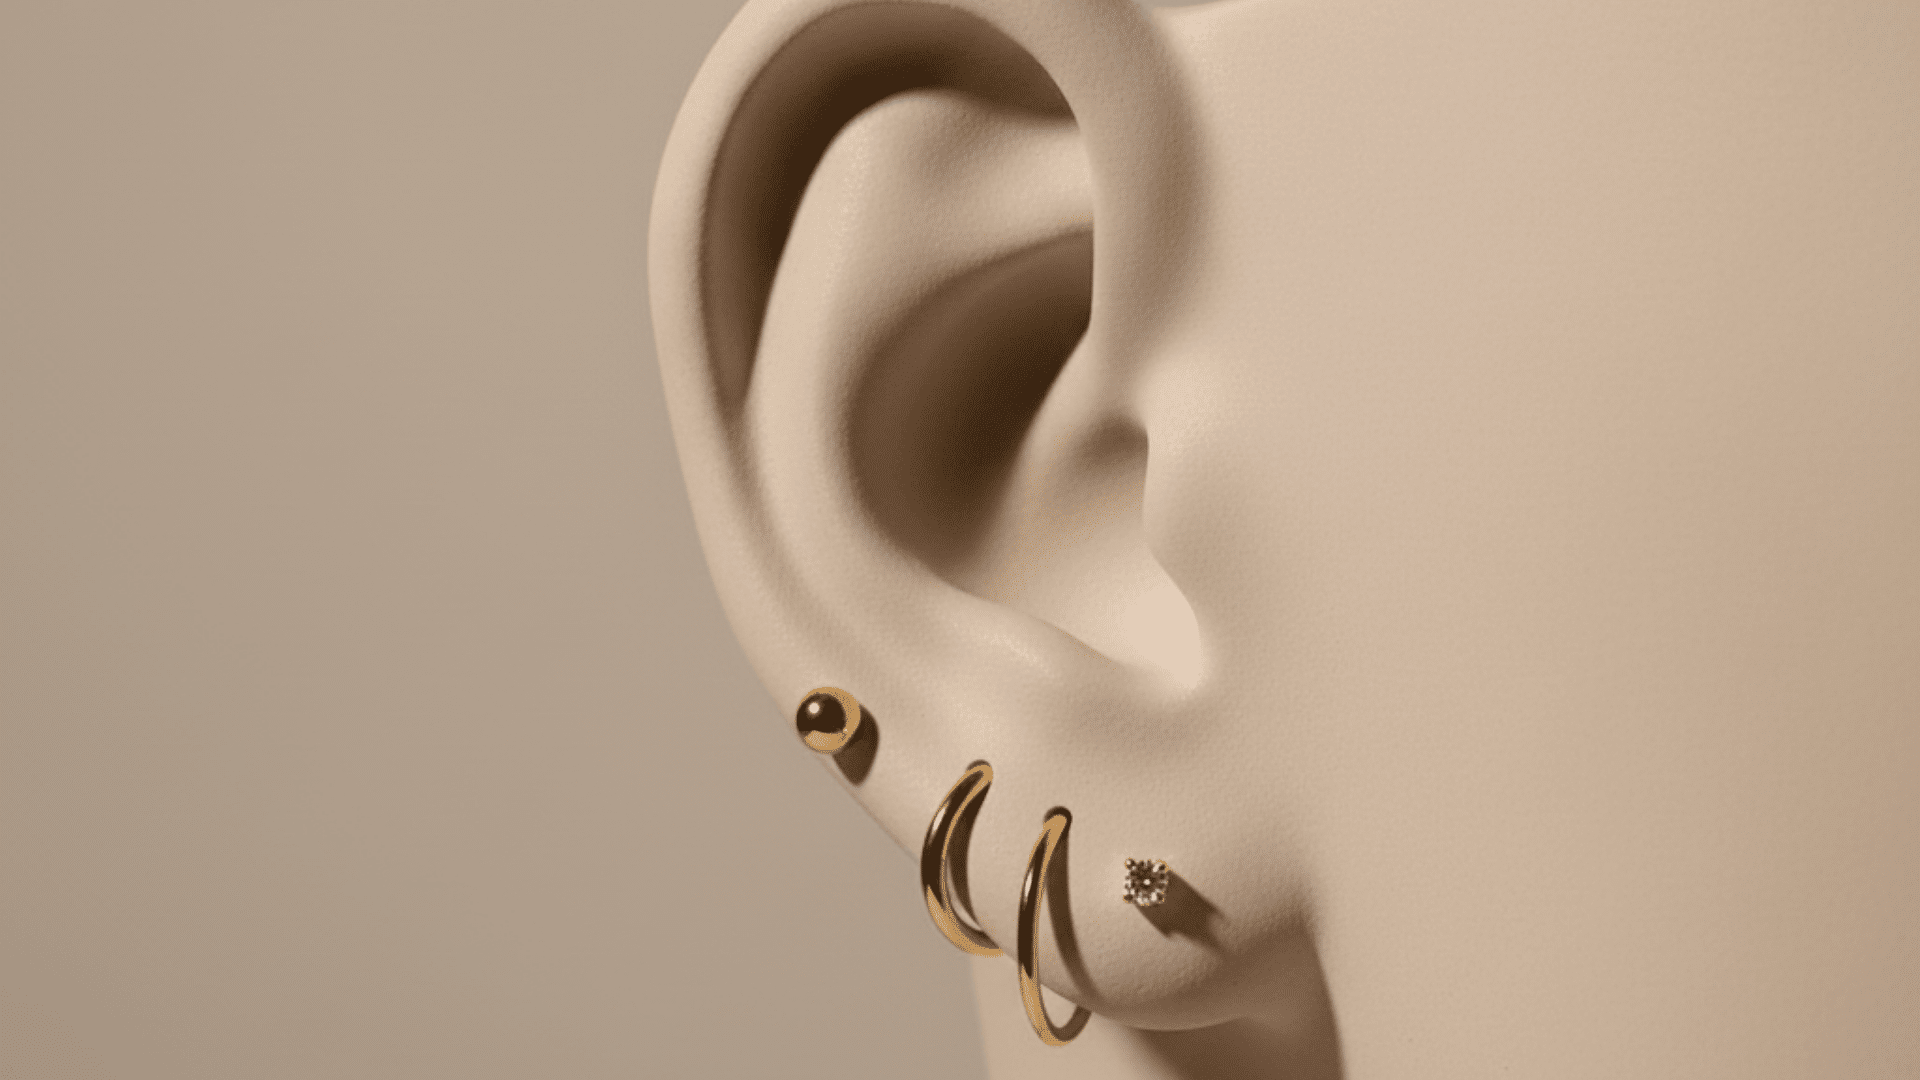
Perfect for adding dimension. These extra lobe piercings give you that layered look seen in minimalist stacks. You can keep it subtle with small hoops or make it fun with mismatched studs.
Placement: Slightly above the standard lobe
Pain Level: 2–3/10 (light pinch)
Healing Time: 8–10 weeks
3. Transverse Lobe
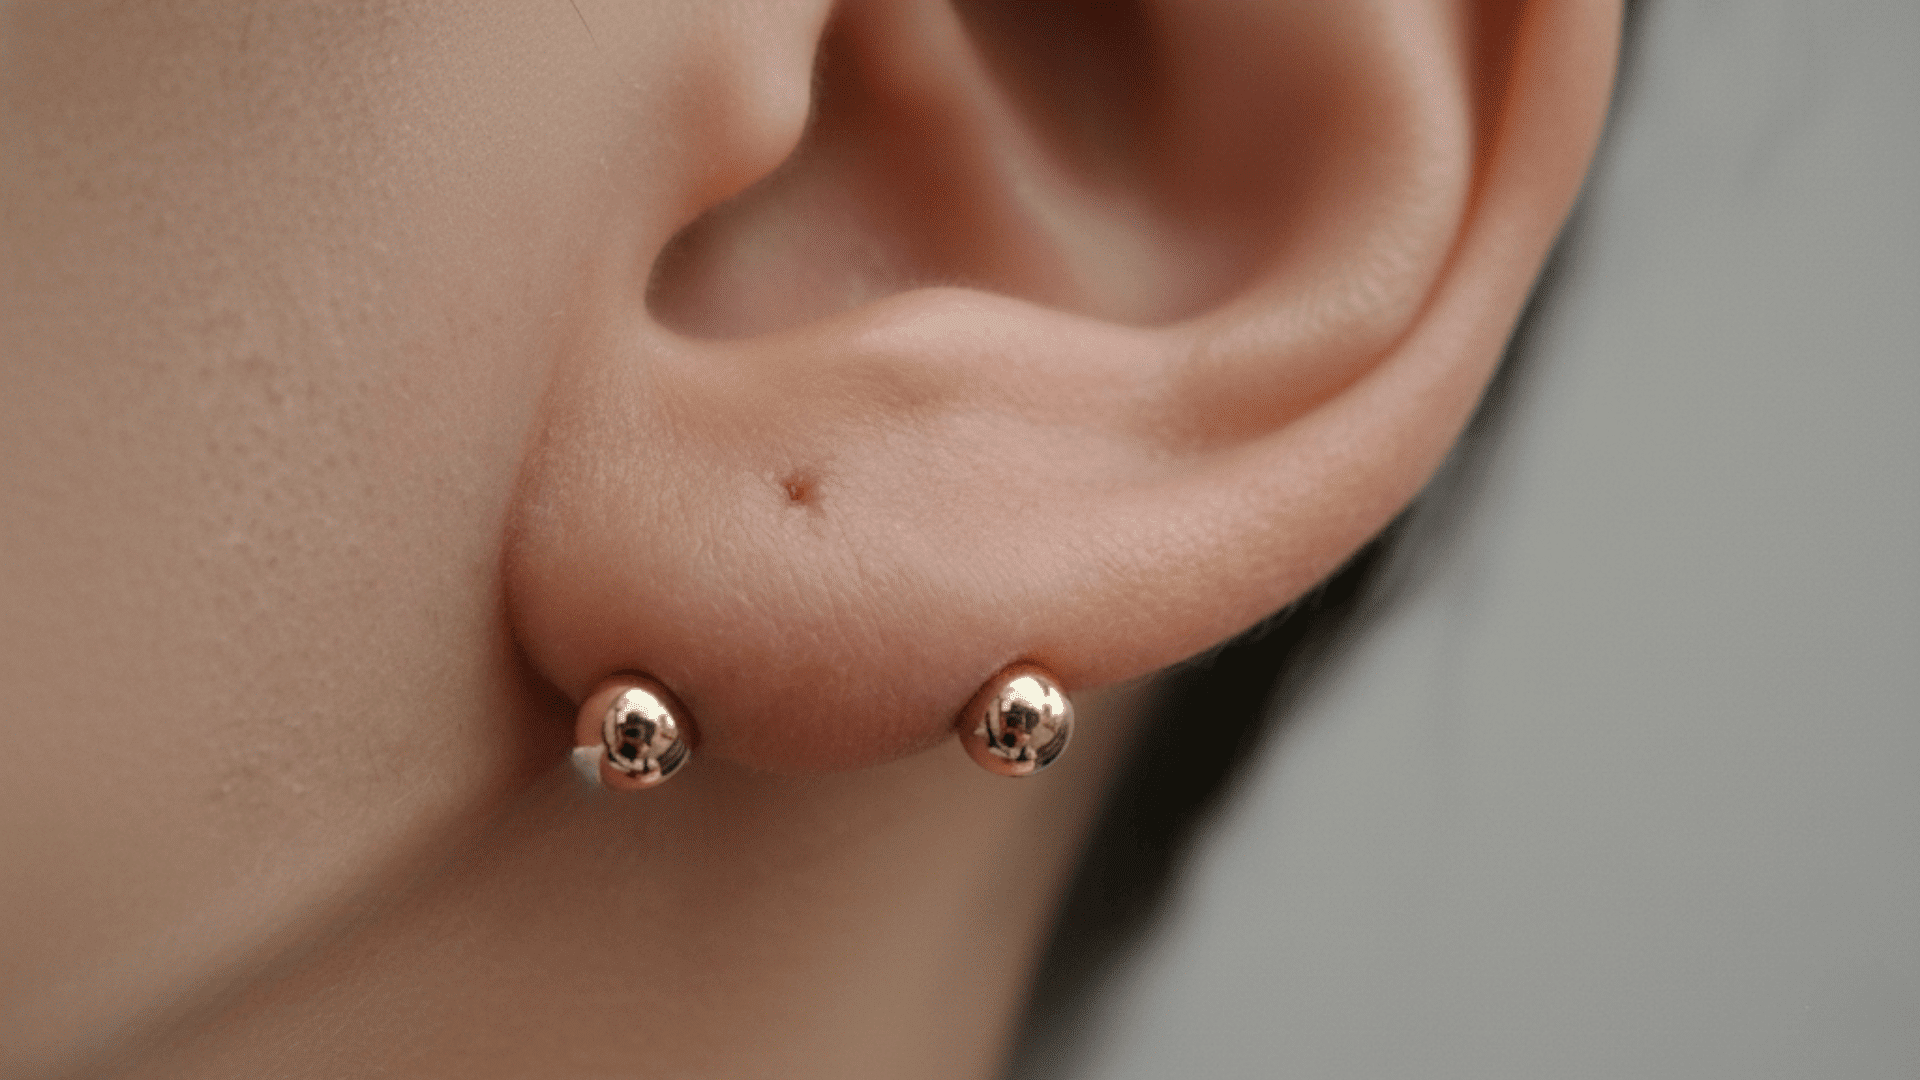
Unlike standard piercings, this one runs horizontally through the lobe, showing both ends of a barbell. It’s unique, stylish, and a bit of a conversation starter, though it needs extra healing time and gentle aftercare.
Placement: Horizontal bar through the lower ear lobe
Pain Level: 4/10 (moderate)
Healing Time: 3–6 months
Helix Piercings
Helix piercings line the outer ear and instantly add edge. They take longer to heal than lobes but open endless styling options, from dainty hoops to layered rings.
4. Standard Helix
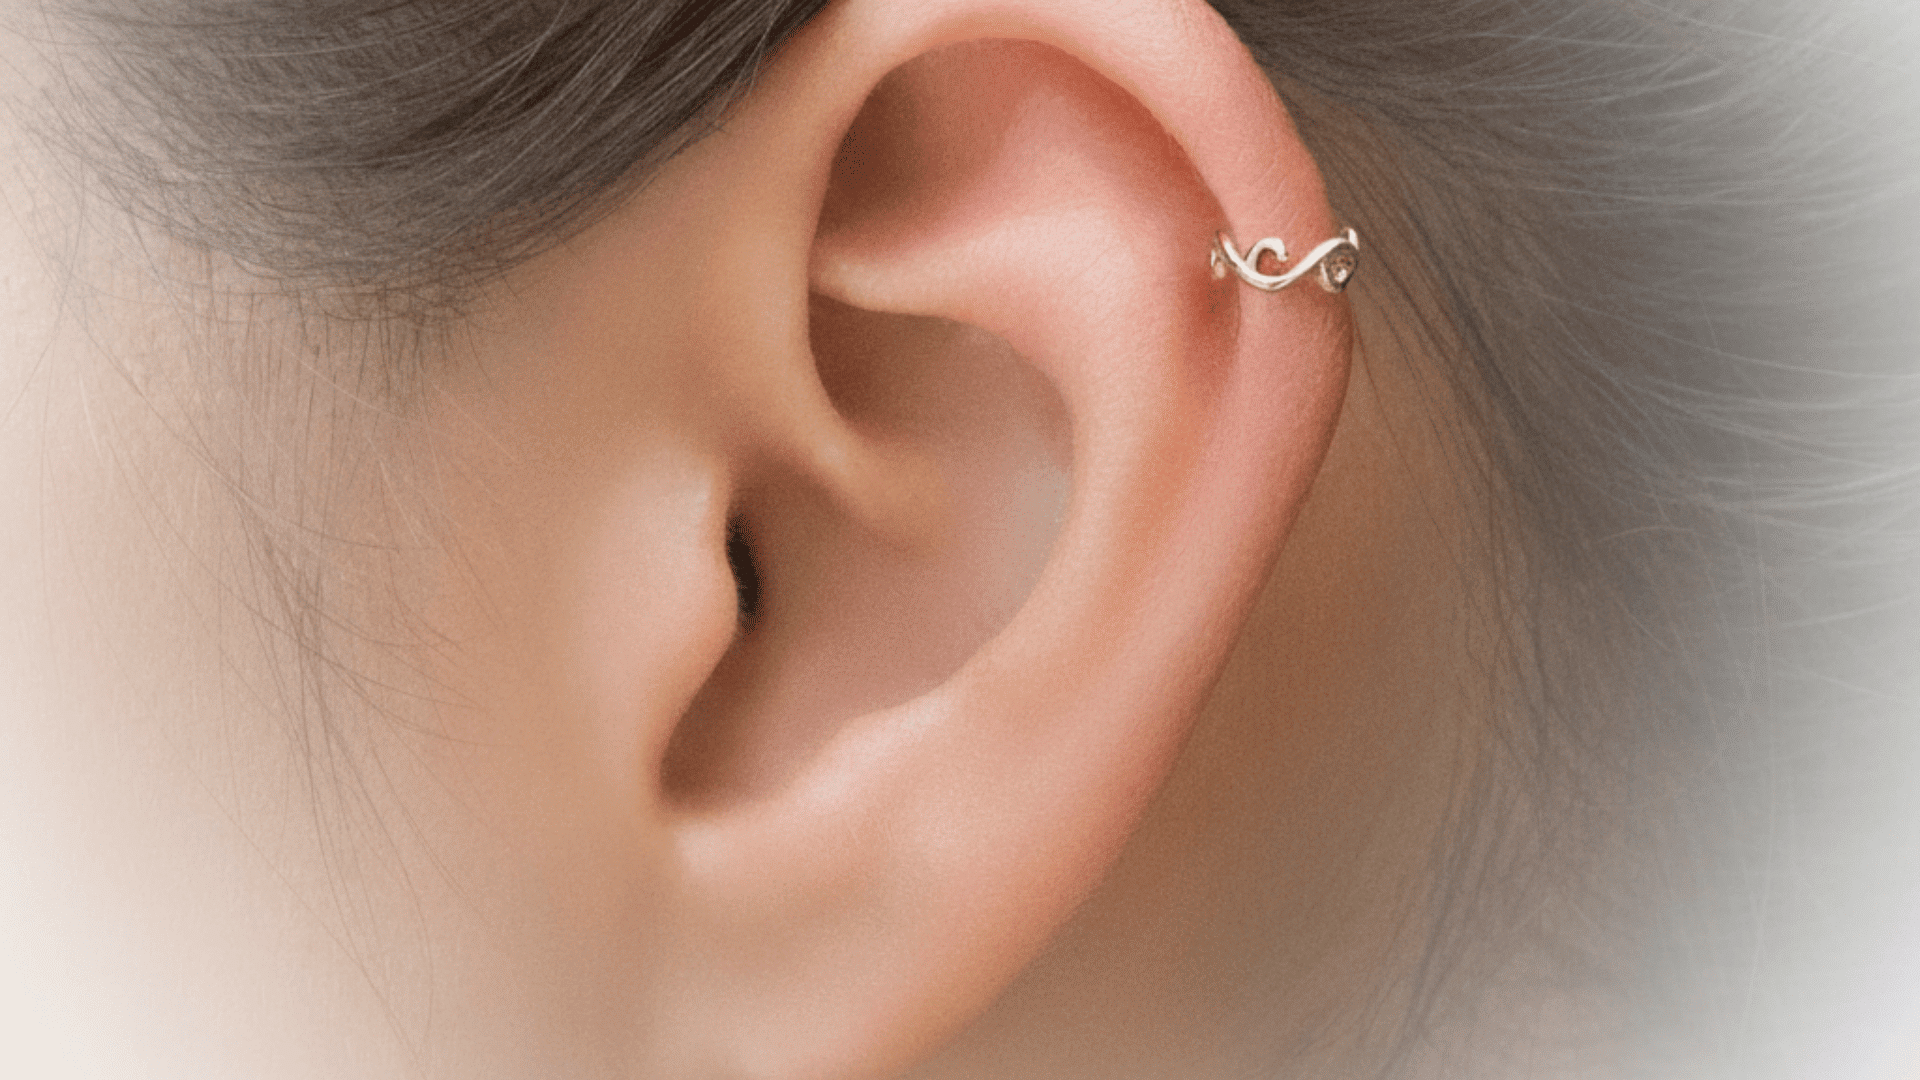
A small but striking piercing along the rim of the ear. It offers a clean, modern touch that pairs well with subtle jewelry. Slightly more care is needed since it passes through cartilage, but the result is always worth it.
Placement: Upper outer edge of the ear
Pain Level: 5/10 (sharp pinch)
Healing Time: 6–9 months
5. Forward Helix
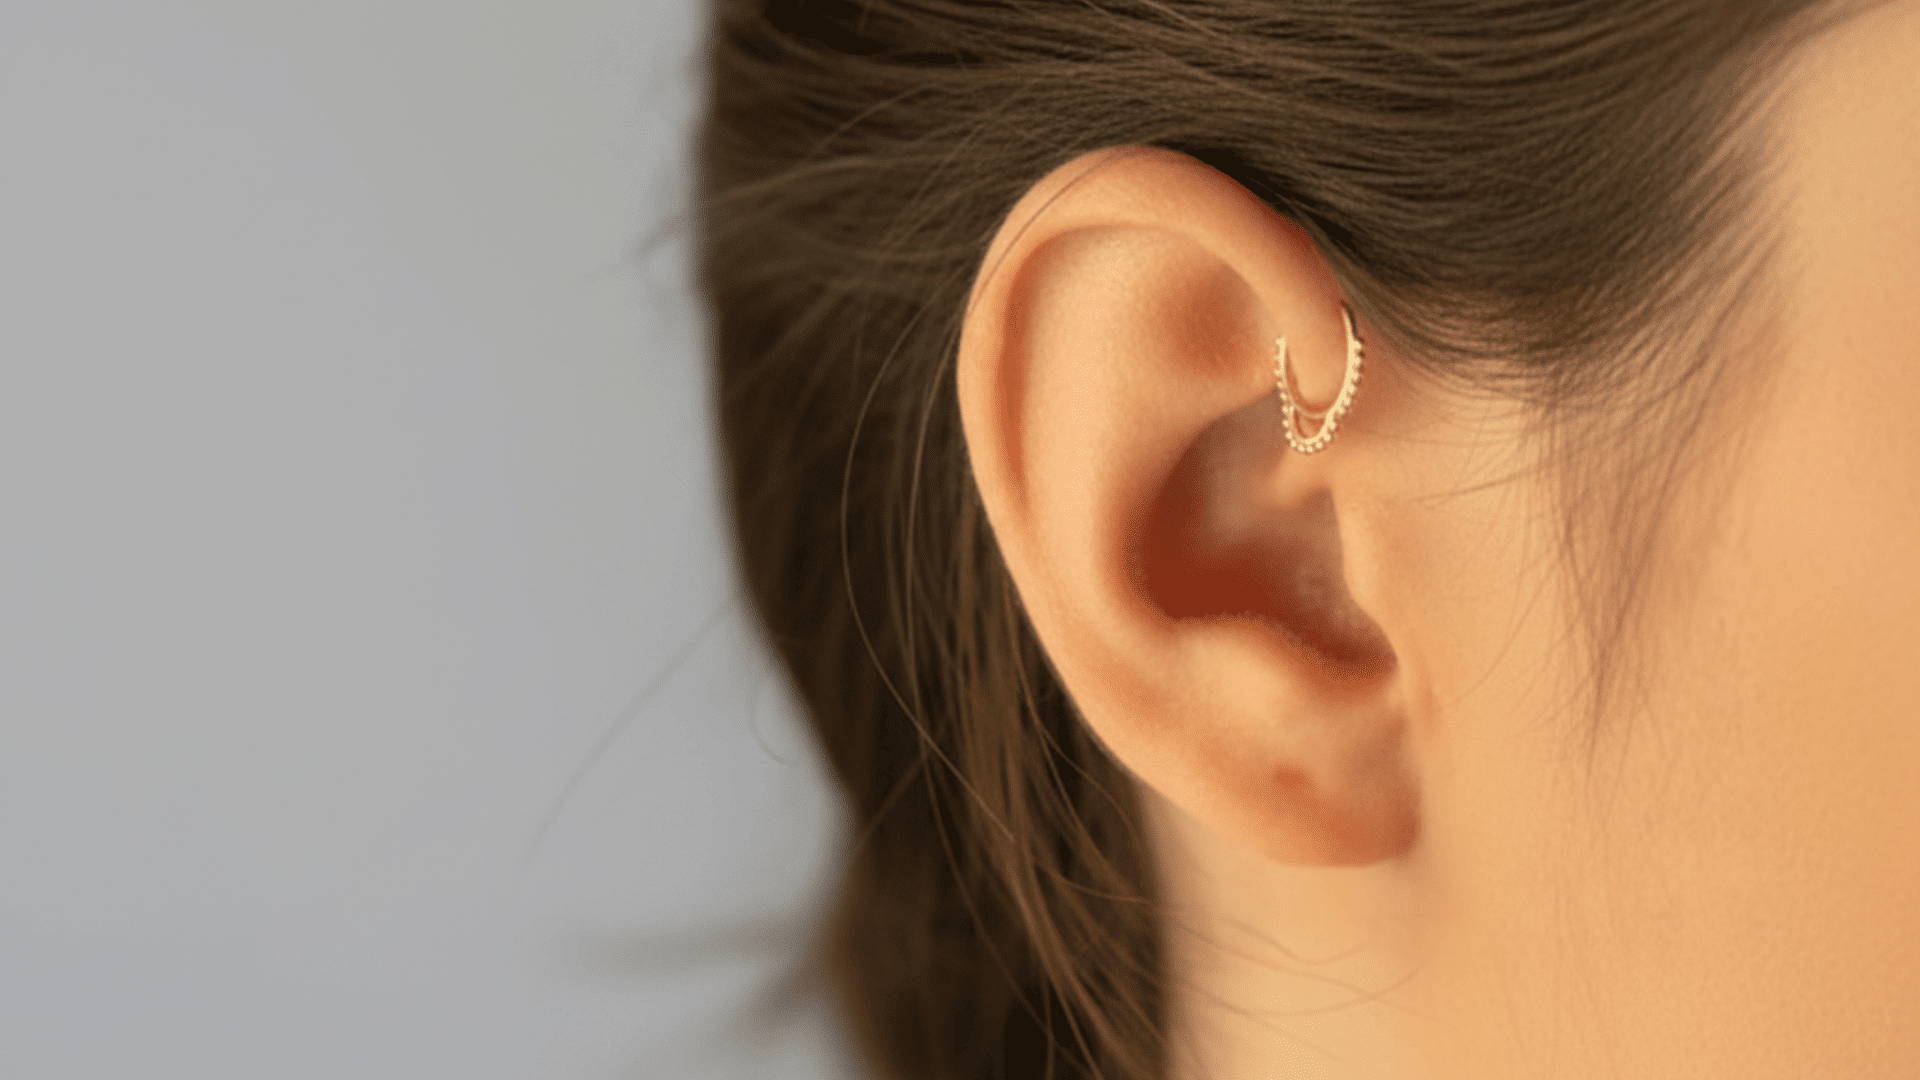
Placed near your face, this piercing catches the light beautifully. Small studs or delicate gems fit perfectly here, adding a bright accent that feels refined and easy to style every day.
Placement: Front side of the upper ear near the face
Pain Level: 6/10 (short sting)
Healing Time: 6–9 months
6. Double / Triple Helix
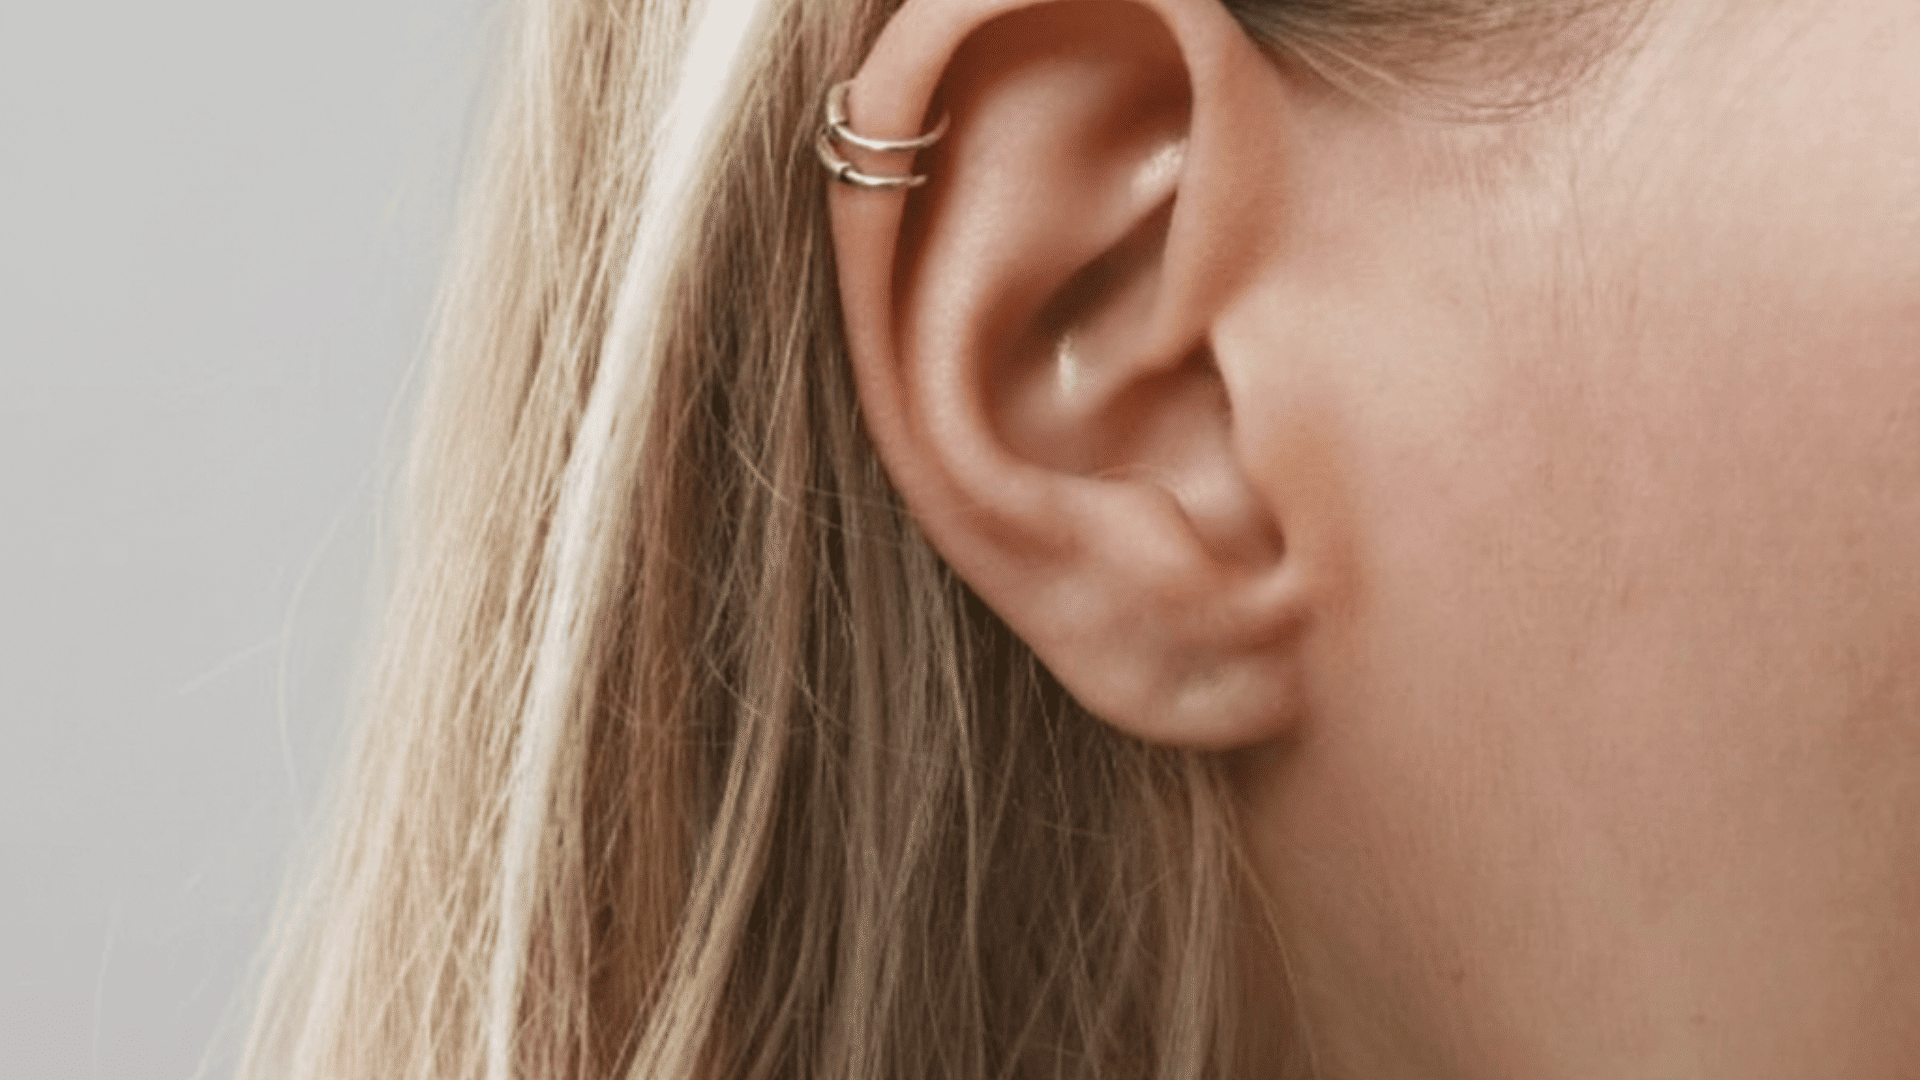
This trio-style piercing stacks along the ear’s rim, creating a modern, curated look. It’s perfect for symmetry lovers or those building an ear stack. Healing takes time, but the layered result feels intentional and striking.
Placement: Multiple piercings along the upper ear rim
Pain Level: 6–7/10 (moderate)
Healing Time: 9–12 months
Inner Ear Piercings
Inner piercings sit deeper inside the ear folds, creating dimension and structure. They’re slightly more complex but offer some of the most creative looks.
7. Tragus
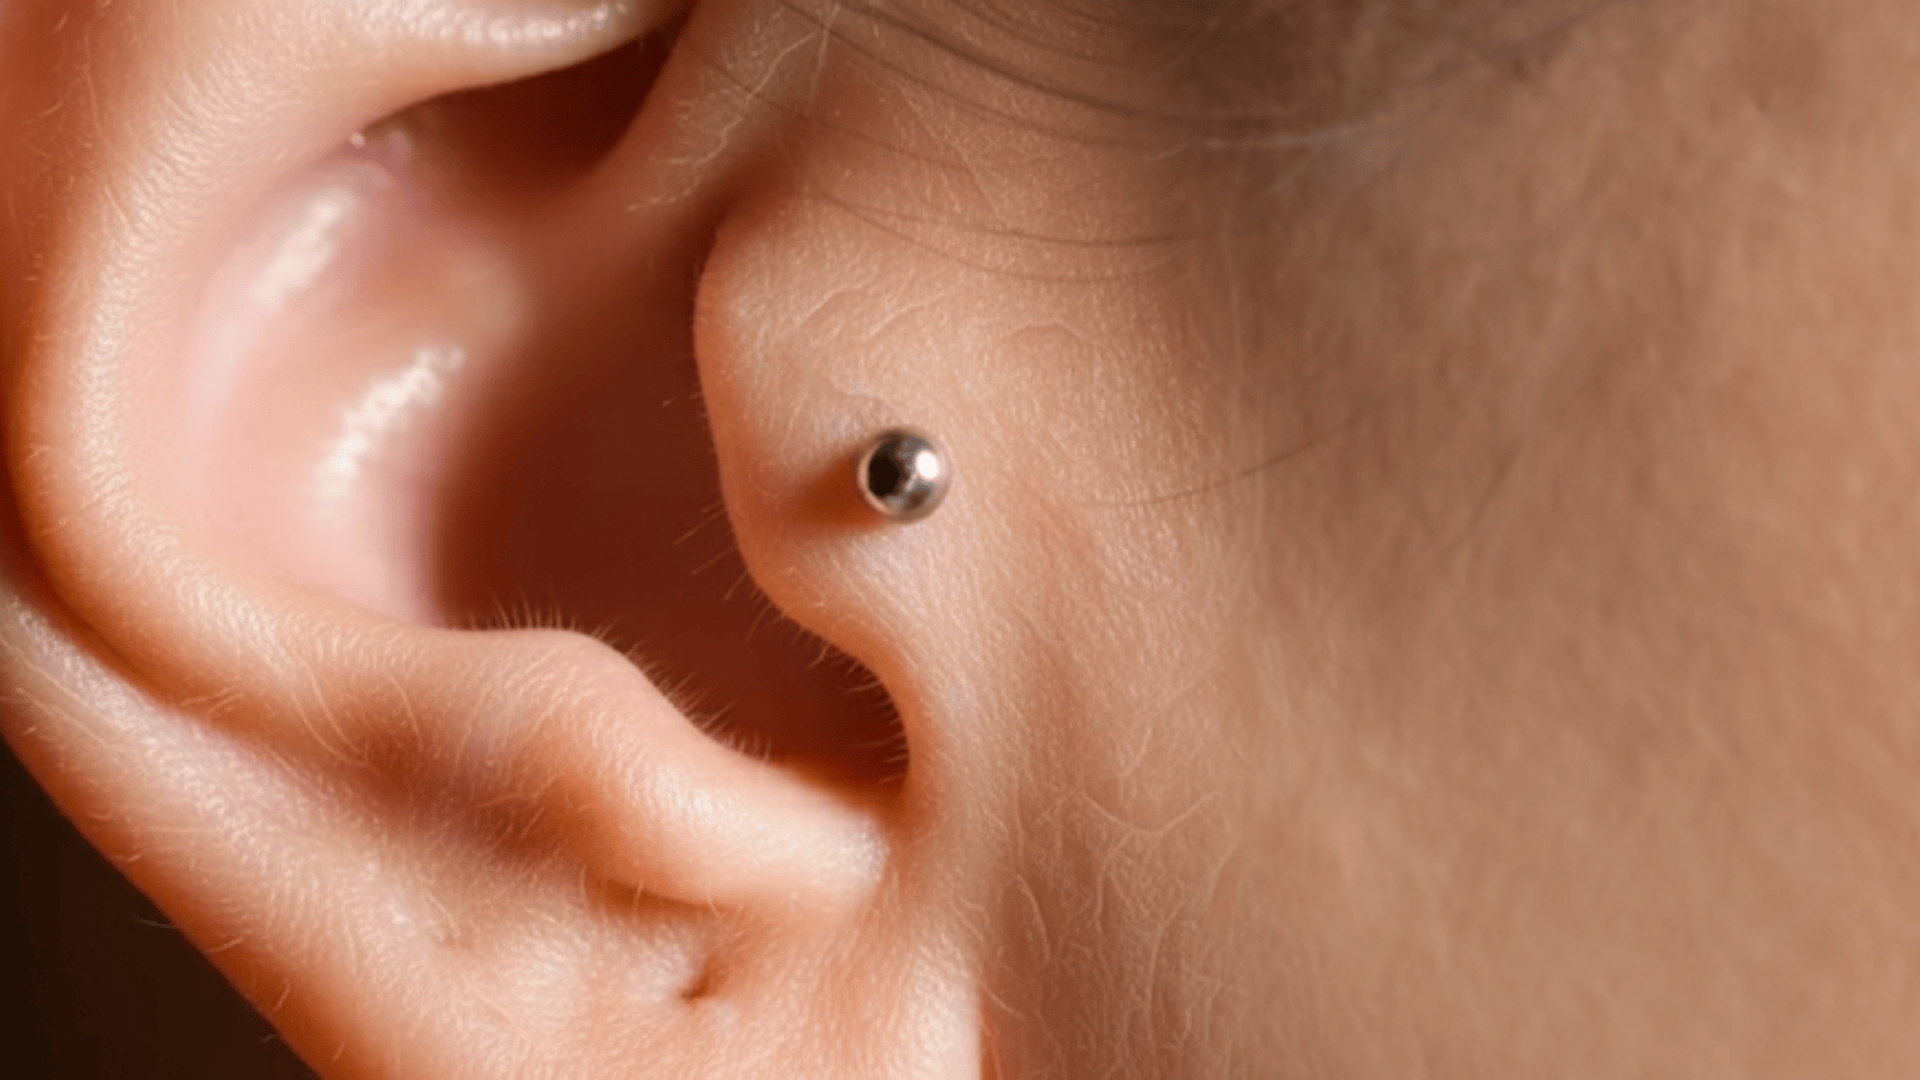
A subtle yet stylish piercing on the small flap in front of your ear canal. It looks great with a tiny stud and feels more like pressure than pain. Avoid pressing it with earphones while healing.
Placement: Small flap in front of the ear canal
Pain Level: 5/10 (pressure over pain)
Healing Time: 3–6 months
8. Anti-Tragus
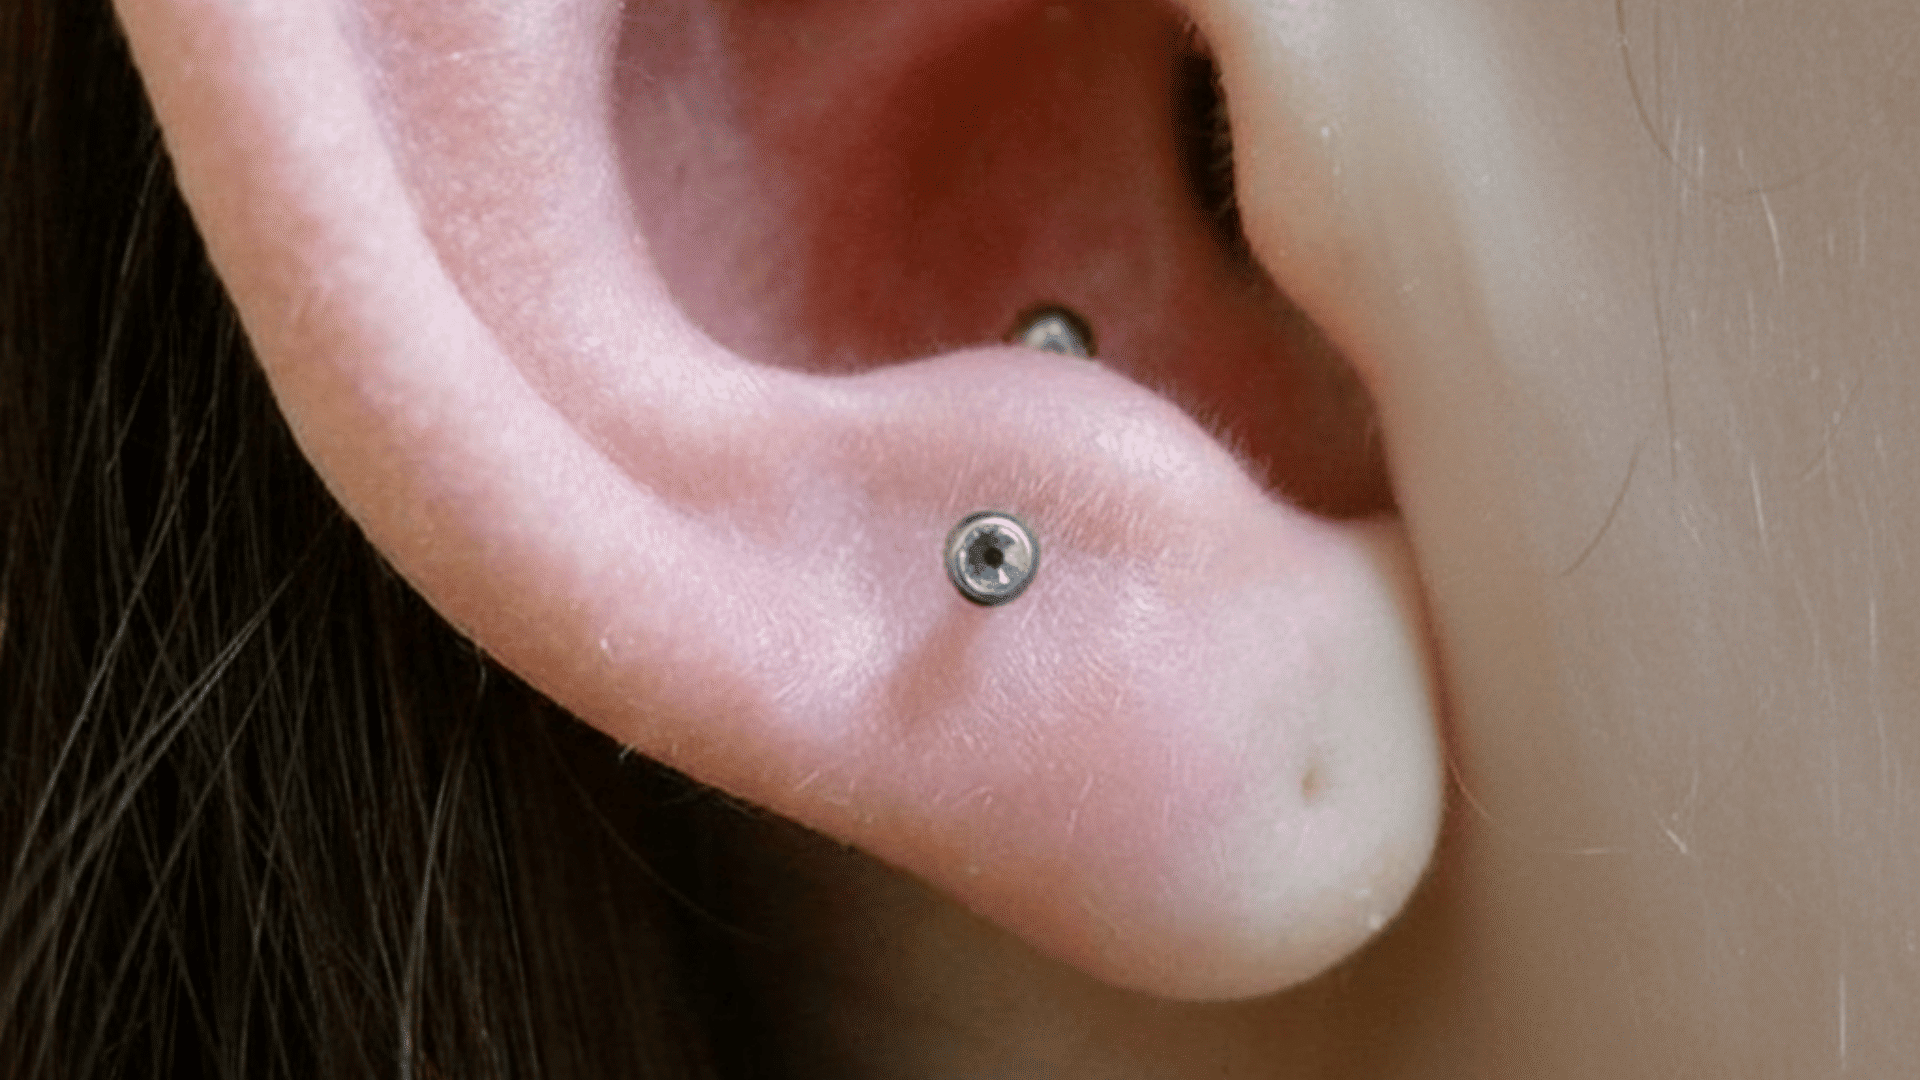
Found opposite the tragus, just above your earlobe, this one is small but expressive. It adds structure and pairs well with a lobe or helix piercing for a balanced look.
Placement: Ridge opposite the tragus
Pain Level: 6/10 (moderate)
Healing Time: 6–9 months
9. Daith
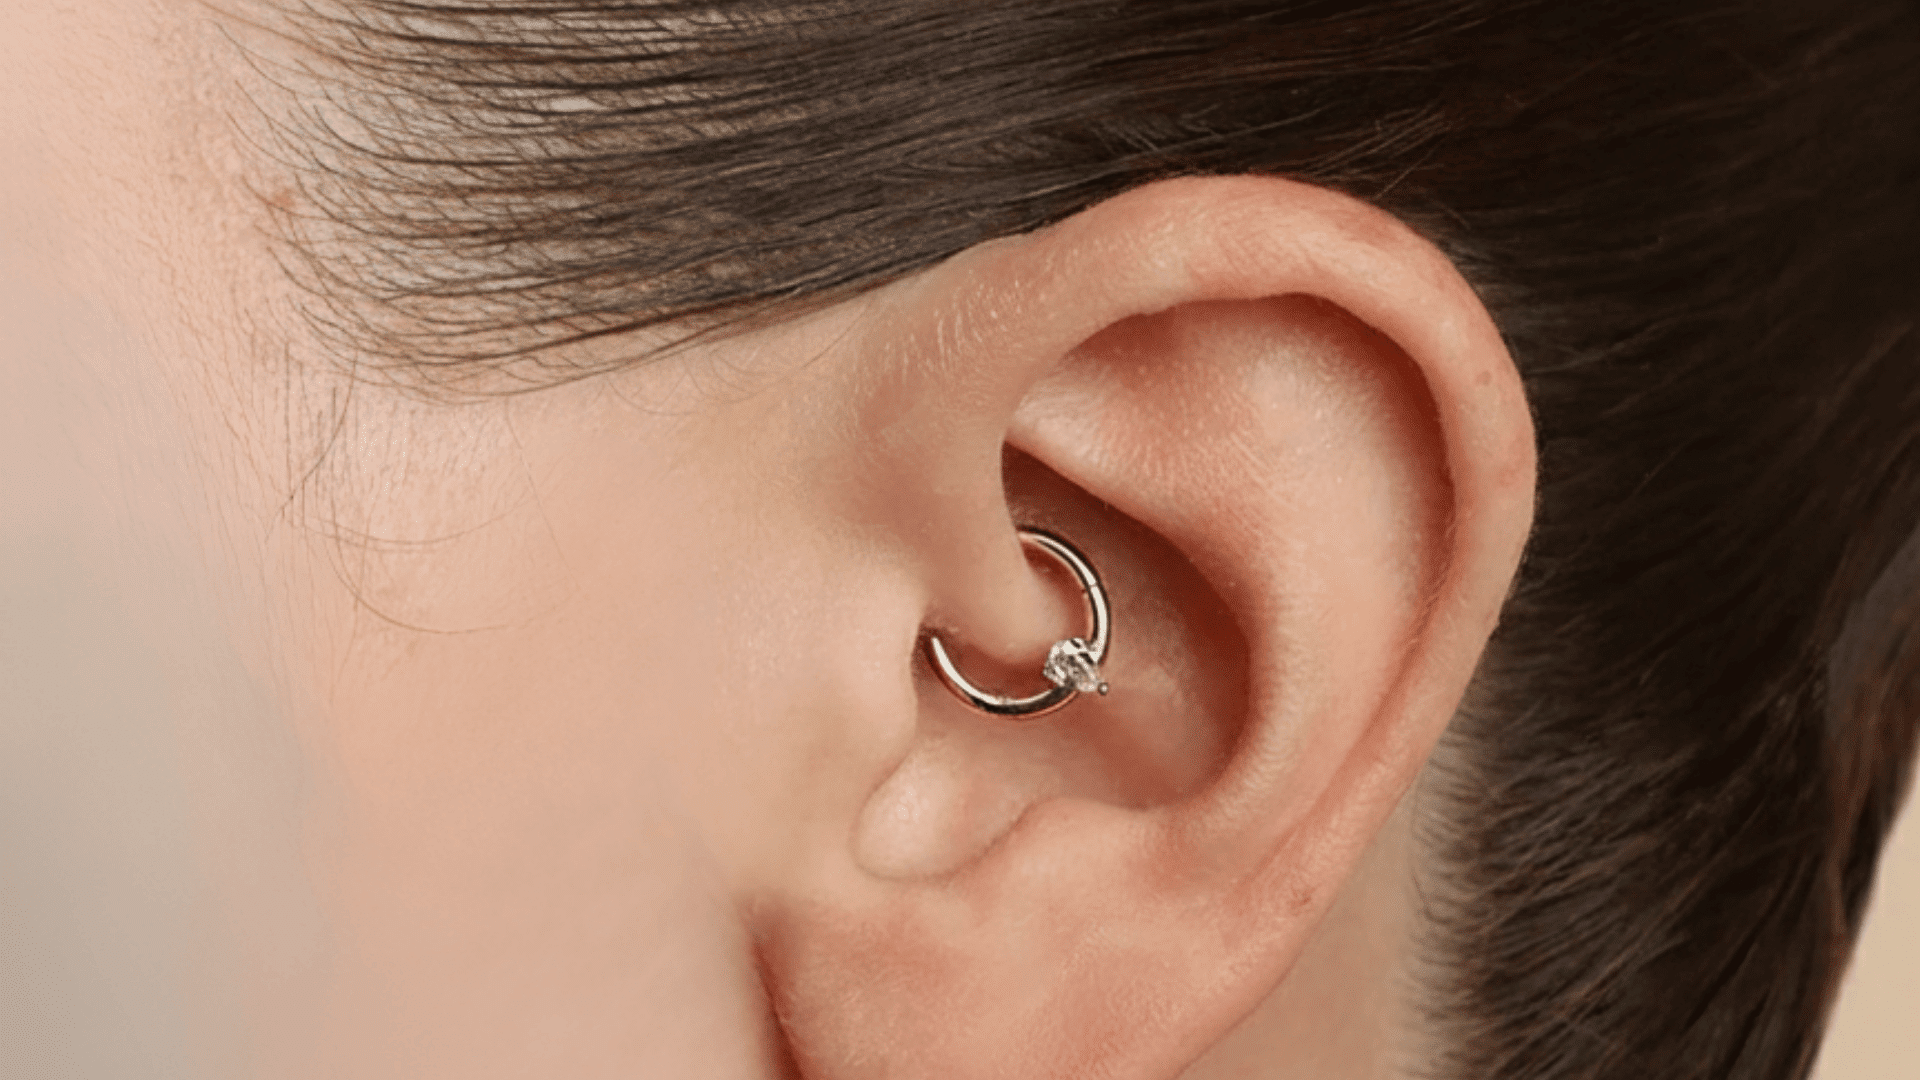
This piercing tucks neatly into the ear’s inner fold. It’s known for its curved, elegant look and works beautifully with small hoops or circular barbells that follow your ear’s shape.
Placement: Inner cartilage fold above the ear canal
Pain Level: 6/10 (deep pinch)
Healing Time: 6–9 months
10. Conch (Inner and Outer)
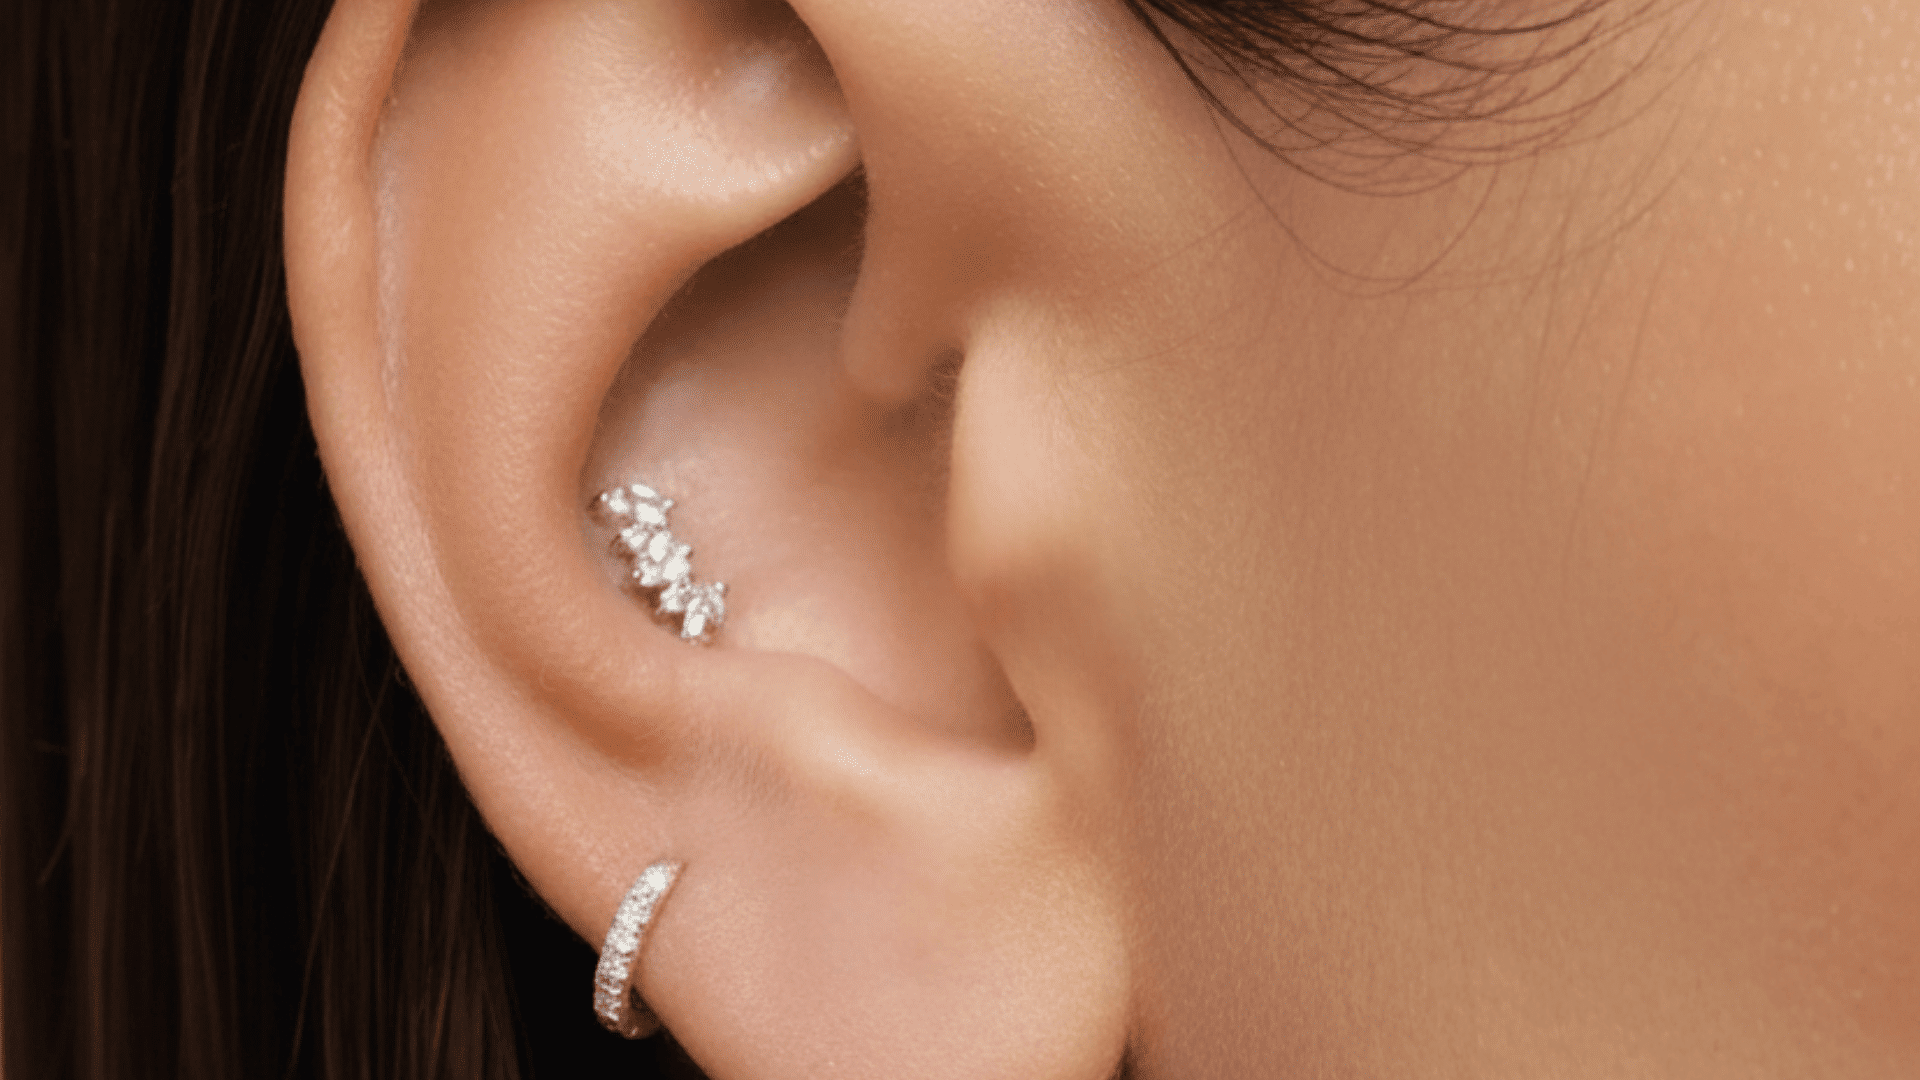
Located in the bowl of the ear, the conch offers flexibility, studs give a clean look, while hoops wrapping the outer edge feel bolder. It’s one of the most versatile cartilage piercings you can get.
Placement: Central bowl of the ear (inner or outer)
Pain Level: 6–7/10 (steady ache)
Healing Time: 6–12 months
11. Rook
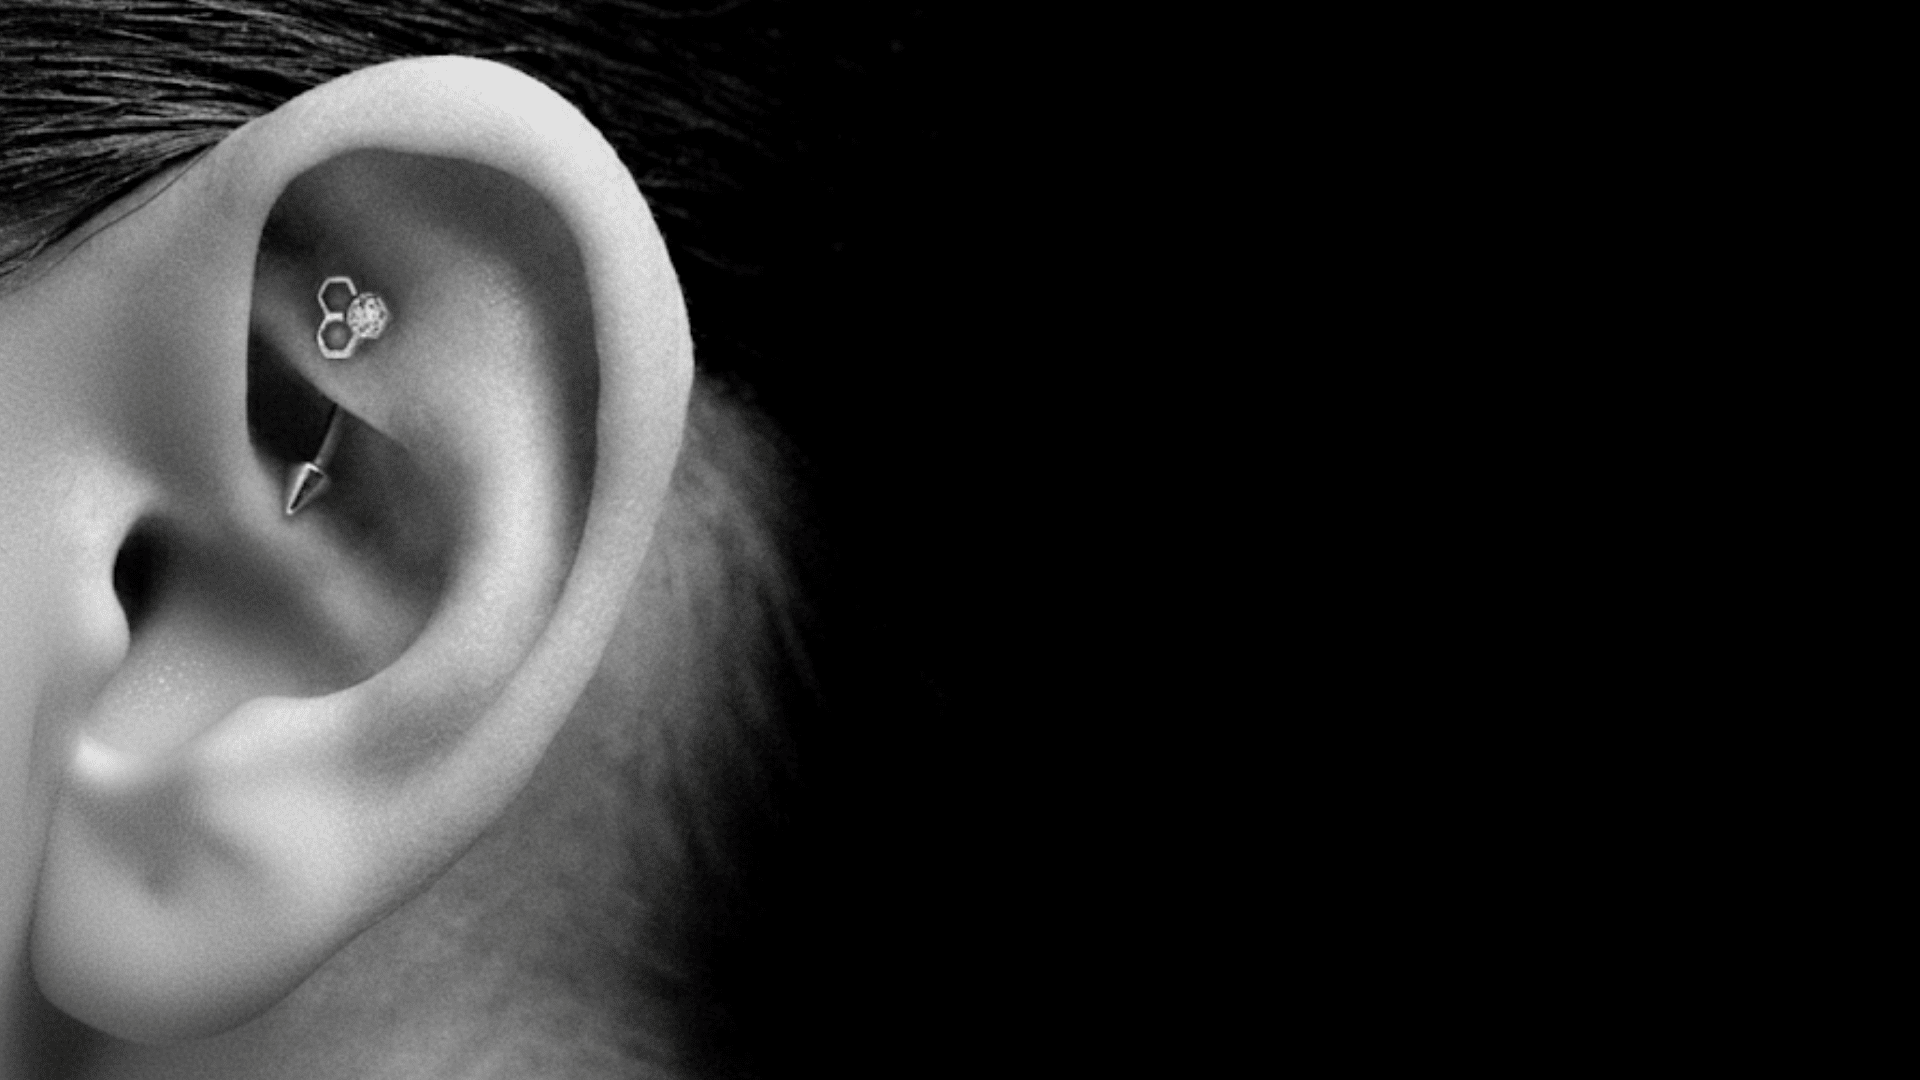
A small ridge piercing above the daith that adds height and depth. It’s discreet but impactful, best styled with a curved barbell for a sleek finish.
Placement: Ridge above the daith
Pain Level: 7/10 (sharp sting)
Healing Time: 6–10 months
12. Snug

One of the rarest and most striking piercings. It runs through the inner ridge of the ear, creating a sculpted, high-fashion effect. It’s sensitive but visually distinctive.
Placement: Inner ridge of the middle ear
Pain Level: 8/10 (sharp and deep)
Healing Time: 8–12 months
Statement Piercings
These piercings are for the bold; the ones that make an instant statement and turn the ear into art.
13. Industrial (Scaffold)
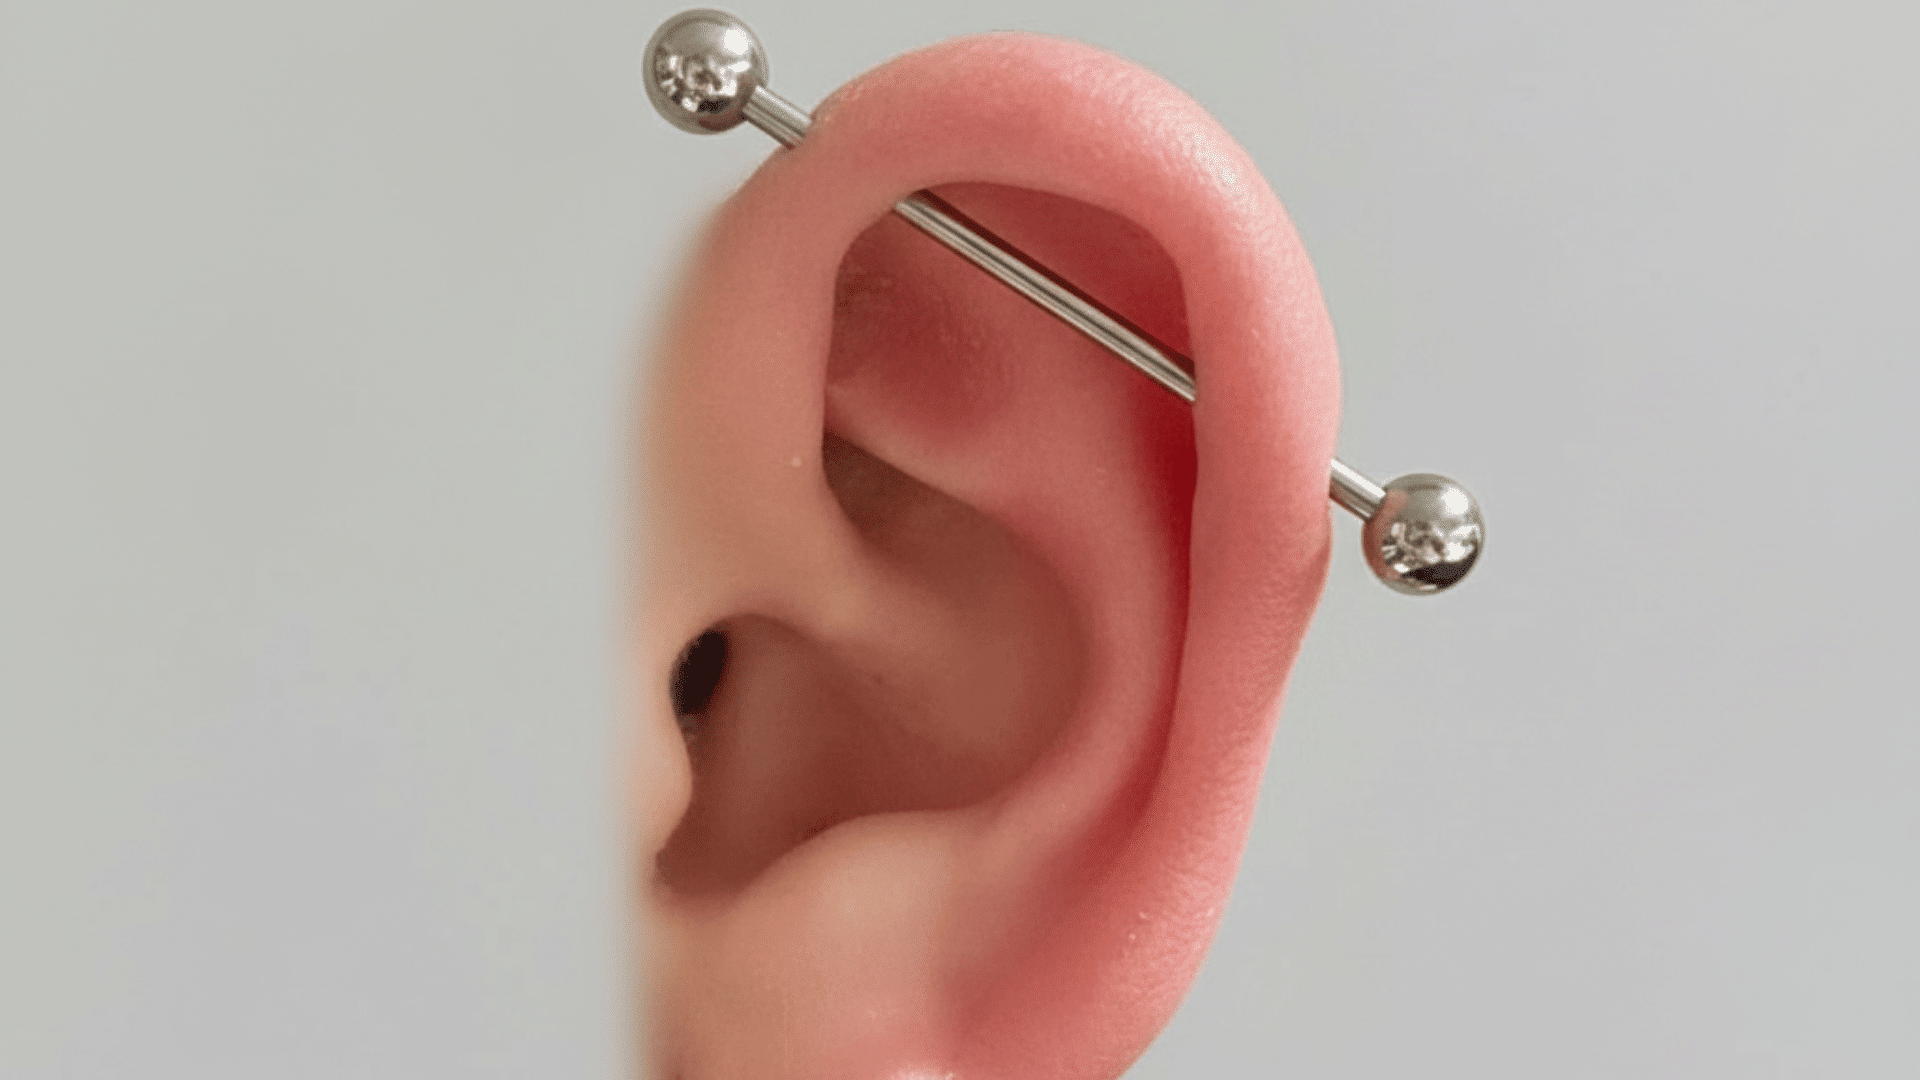
Two holes connected by one straight barbell across the top of the ear. It’s striking and stylish but requires extra patience and careful cleaning during healing.
Placement: Across the top of the ear, linking two piercings
Pain Level: 8/10 (strong and lasting)
Healing Time: 9–12 months
14. Orbital
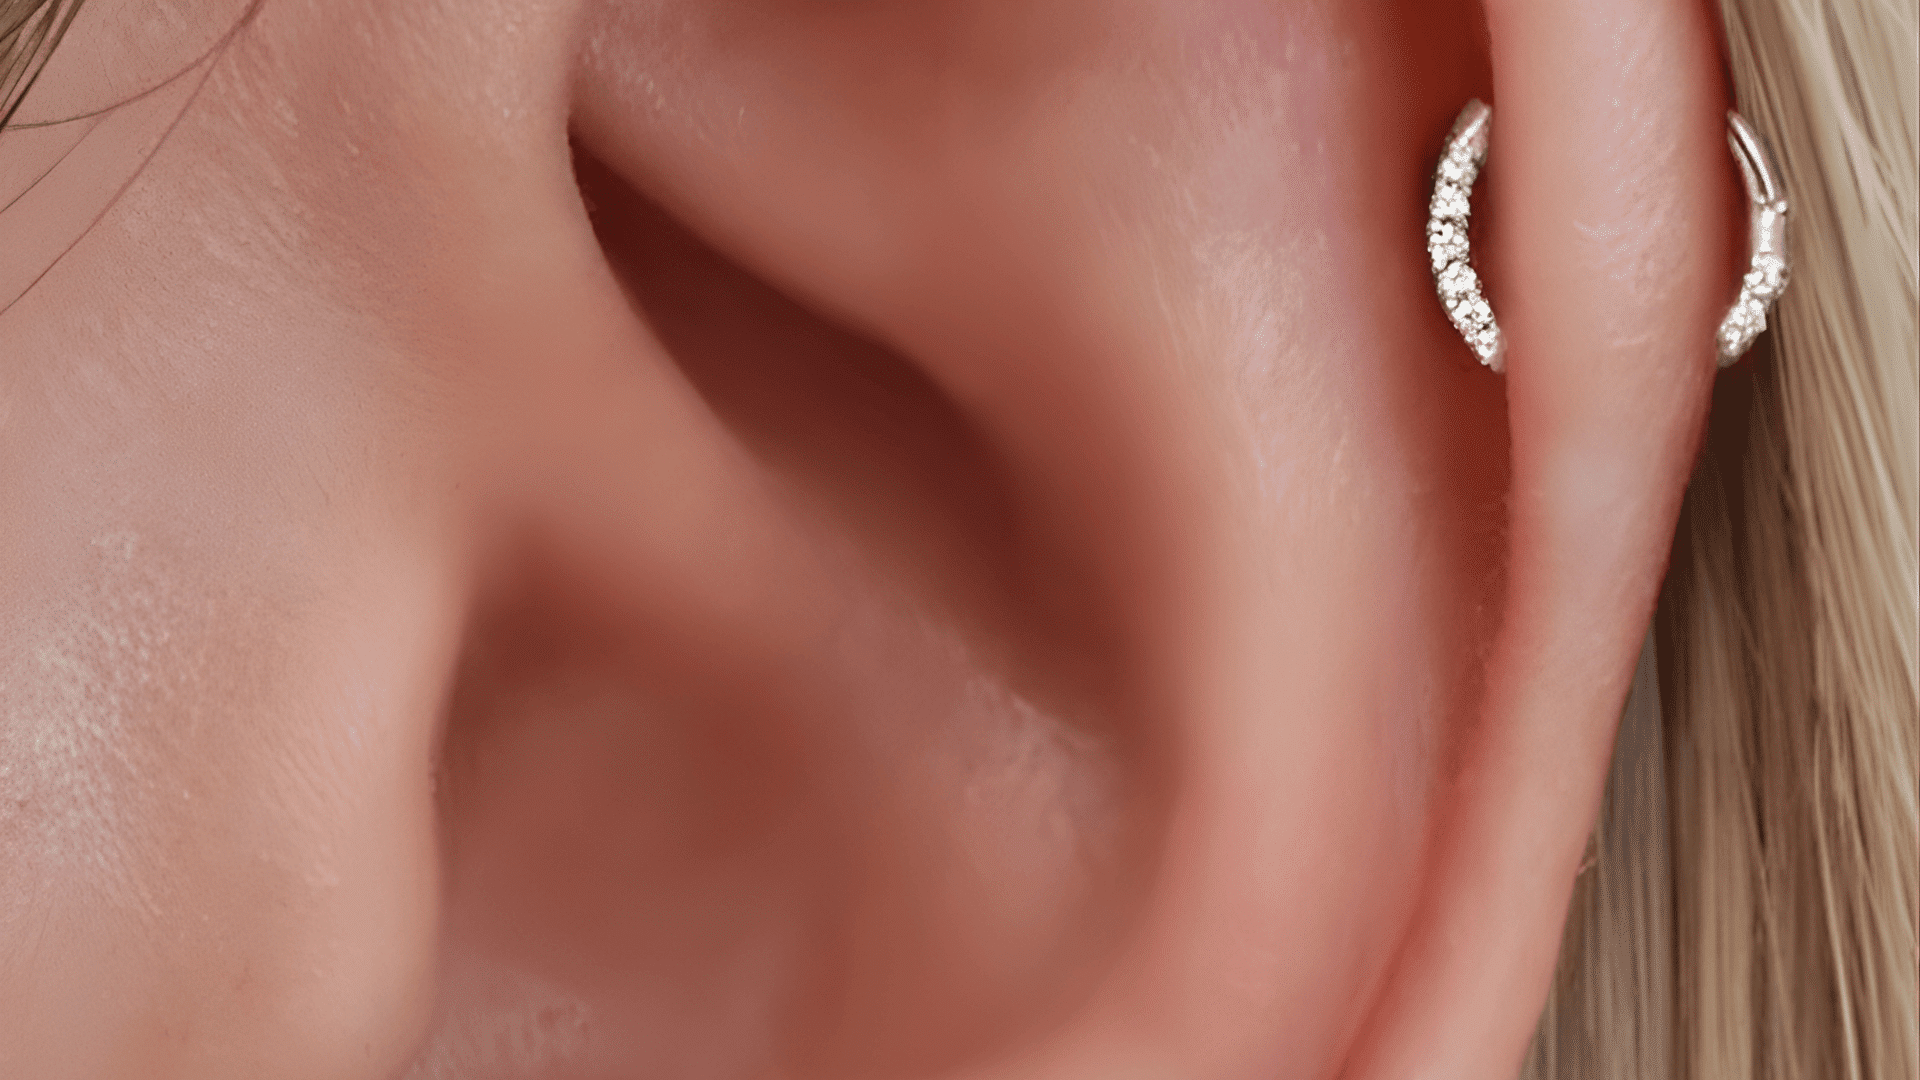
Two piercings joined by a single hoop, often seen on the lobe or helix. It’s creative yet minimal and easy to personalize with different ring styles or finishes.
Placement: Two holes connected by one hoop (lobe or helix)
Pain Level: 6/10 (moderate)
Healing Time: 6–9 months
15. Curated Ear Stack
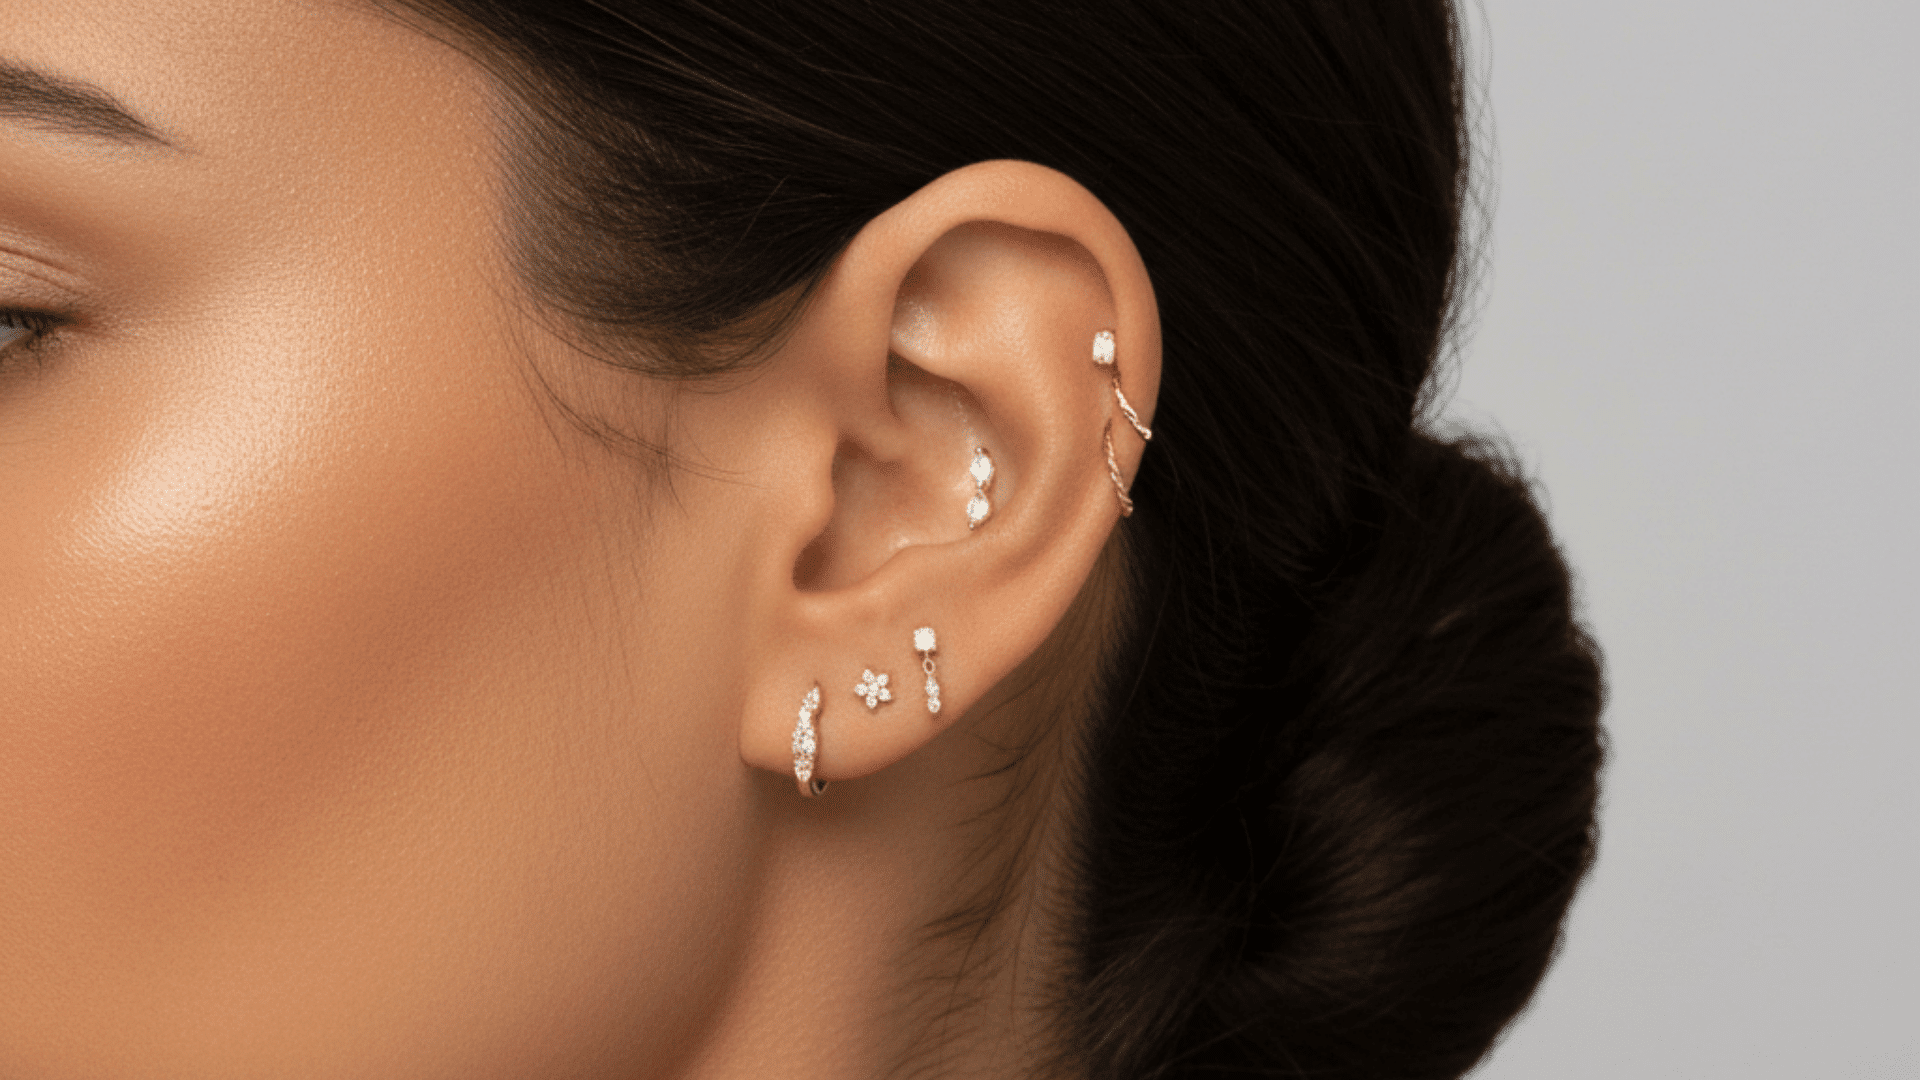
More of a style plan than a single piercing, this look combines multiple placements for a balanced, custom design. It’s built over time and changes as you do.
Placement: Custom mix across lobe, helix, and inner ear
Pain Level: Varies by piercing type
Healing Time: Varies (heals in stages)
Types of Earrings
Once your piercings heal, the fun begins, jewelry. Each earring type changes the look, mood, and balance of your ear styling.
| Type | Description | Best For |
|---|---|---|
| Studs | Simple, flat, and secure; perfect for everyday wear or first piercings. | Lobe, upper lobe |
| Hoops | Classic rings that range from tiny to bold; they add movement and shape. | Lobe, helix, conch |
| Huggies | Small hoops that fit close to the ear; neat and polished. | Upper lobe, helix |
| Barbells | Straight or curved bars are used for structured piercings. | Industrial, rook |
| Drops / Dangles | Lightweight styles that swing with movement. | Fully healed lobes |
| Cuffs | Clip around the ear with no piercing needed; easy to test new looks. | Any ear style |
| Threaders | Fine chains that glide through the ear for a minimal, airy finish. | Lobe, second lobe |
Once you know your piercing type, matching it with the right earring style becomes the fun part, where comfort meets personality, and your ear starts to tell its own story.
Choosing the Right Ear Piercing Option
Picking your piercing isn’t just about looks; it’s about how you live. The best ear piercing options fit your comfort, not someone else’s trend.
Here’s how to decide:
- Pain tolerance: Start with lobes if you’re new. Cartilage, if you’re brave. Industrial if you’re bold.
- Lifestyle: Think about dress codes, headphones, or sports gear.
- Ear anatomy: Not every ear suits every placement; your piercer can help map it.
- Style: Simple, trendy, or dramatic; your choice should feel like you.
A good piercer can help match your anatomy with your style so you leave confident, not sore.
Ear Piercing Healing and Aftercare Tips
Good aftercare can turn an okay piercing into a perfect one. It’s not complicated, but it does require consistency. Think of it as a little daily ritual; a few minutes that keep your new piercing happy, clean, and healing smoothly.
Cleaning Routine
Using a sterile saline spray twice a day, morning and night, is ideal. Gently dab away any crust or residue with a clean tissue or cotton pad.
No twisting, no fiddling, and absolutely no spinning the jewelry; that only irritates the skin.
If you shower daily, rinse your piercing gently with warm water to remove soap residue, then pat dry with a paper towel (not a cloth, bacteria love those).
Healing times vary:
- Lobes: 6–8 weeks
- Cartilage: 4–12 months. Patience really does pay off here.
Common Mistakes to Avoid
- Avoid alcohol, hydrogen peroxide, or harsh soaps; they dry out the skin and slow healing.
- Never twist or spin your jewelry; friction can reopen the wound and delay recovery.
- Keep hair, headphones, and hats away from fresh piercings to prevent snagging and bacteria transfer.
- Don’t change your jewelry too early; the surface may look healed while the inside still needs time.
- Always wash your hands before cleaning or touching your piercing; no exceptions.
Healing takes patience, not pressure. The fewer times you touch it, the faster it settles.
When to Seek Help
If you notice swelling, redness, pain, warmth, or thick discharge, don’t wait it out. Contact your piercer or a healthcare professional; they can check if it’s irritation or an actual infection.
A good rule of thumb: if it hurts more on day ten than it did on day one, it’s time to get it looked at.
Catching problems early saves your piercing (and your patience).
Style Recommendations for Each Piercing
Match your jewelry to your mood; it’s the easiest way to express your style without saying a word.
| Style | Piercing Types | Jewelry Ideas |
|---|---|---|
| Minimalist | Lobe, Tragus, Forward Helix | Small studs, gold huggies, tiny hoops, subtle gems |
| Trendy | Conch, Double Helix, Orbital | Layered hoops, mixed metals, asymmetrical stacks |
| Bold | Industrial, Snug, Rook | Barbells, statement cuffs, geometric shapes, chains |
If you prefer something quiet or something that catches the light, the best look is always the one that feels most you.
Cost and Safety Considerations
Piercings can range from $30–$150, depending on the type, jewelry, and studio. Higher doesn’t always mean better, but safety always matters.
Choose studios with sterilized tools, sealed needles, and trained professionals. Jewelry should be implant-grade titanium, surgical steel, or solid gold. Never settle for nickel or mystery metals.
Your ears aren’t a place to experiment.
Wrap Up
So that’s the truth about ear piercing types, where they sit, how they feel, and how to find one that fits your style.
The trick is to start small, give your ears time to heal, and build your story one sparkle at a time. With clean jewelry and gentle aftercare, every piercing becomes part of your look, not your struggle.
And if you’re already planning your next one, don’t stop here, check out my other guides for jewelry pairings, and more ear inspiration.