Ever heard of a Russian manicure and wondered what makes it different? I did too. The first time I saw one, I couldn’t believe how neat and smooth it looked.
I had to find out what made it stand out from the regular manicures I was used to. After trying it myself and learning more, I realized it wasn’t just about looks; it was about technique, tools, and care.
Now, you might be wondering the same things I once did. What is a Russian manicure, really? Is it safe? How does it work? Is it worth trying?
Here, you’ll get simple answers. You’ll learn how it’s done, why some love it, and what to watch out for if you plan to get one.
What is a Russian Manicure?
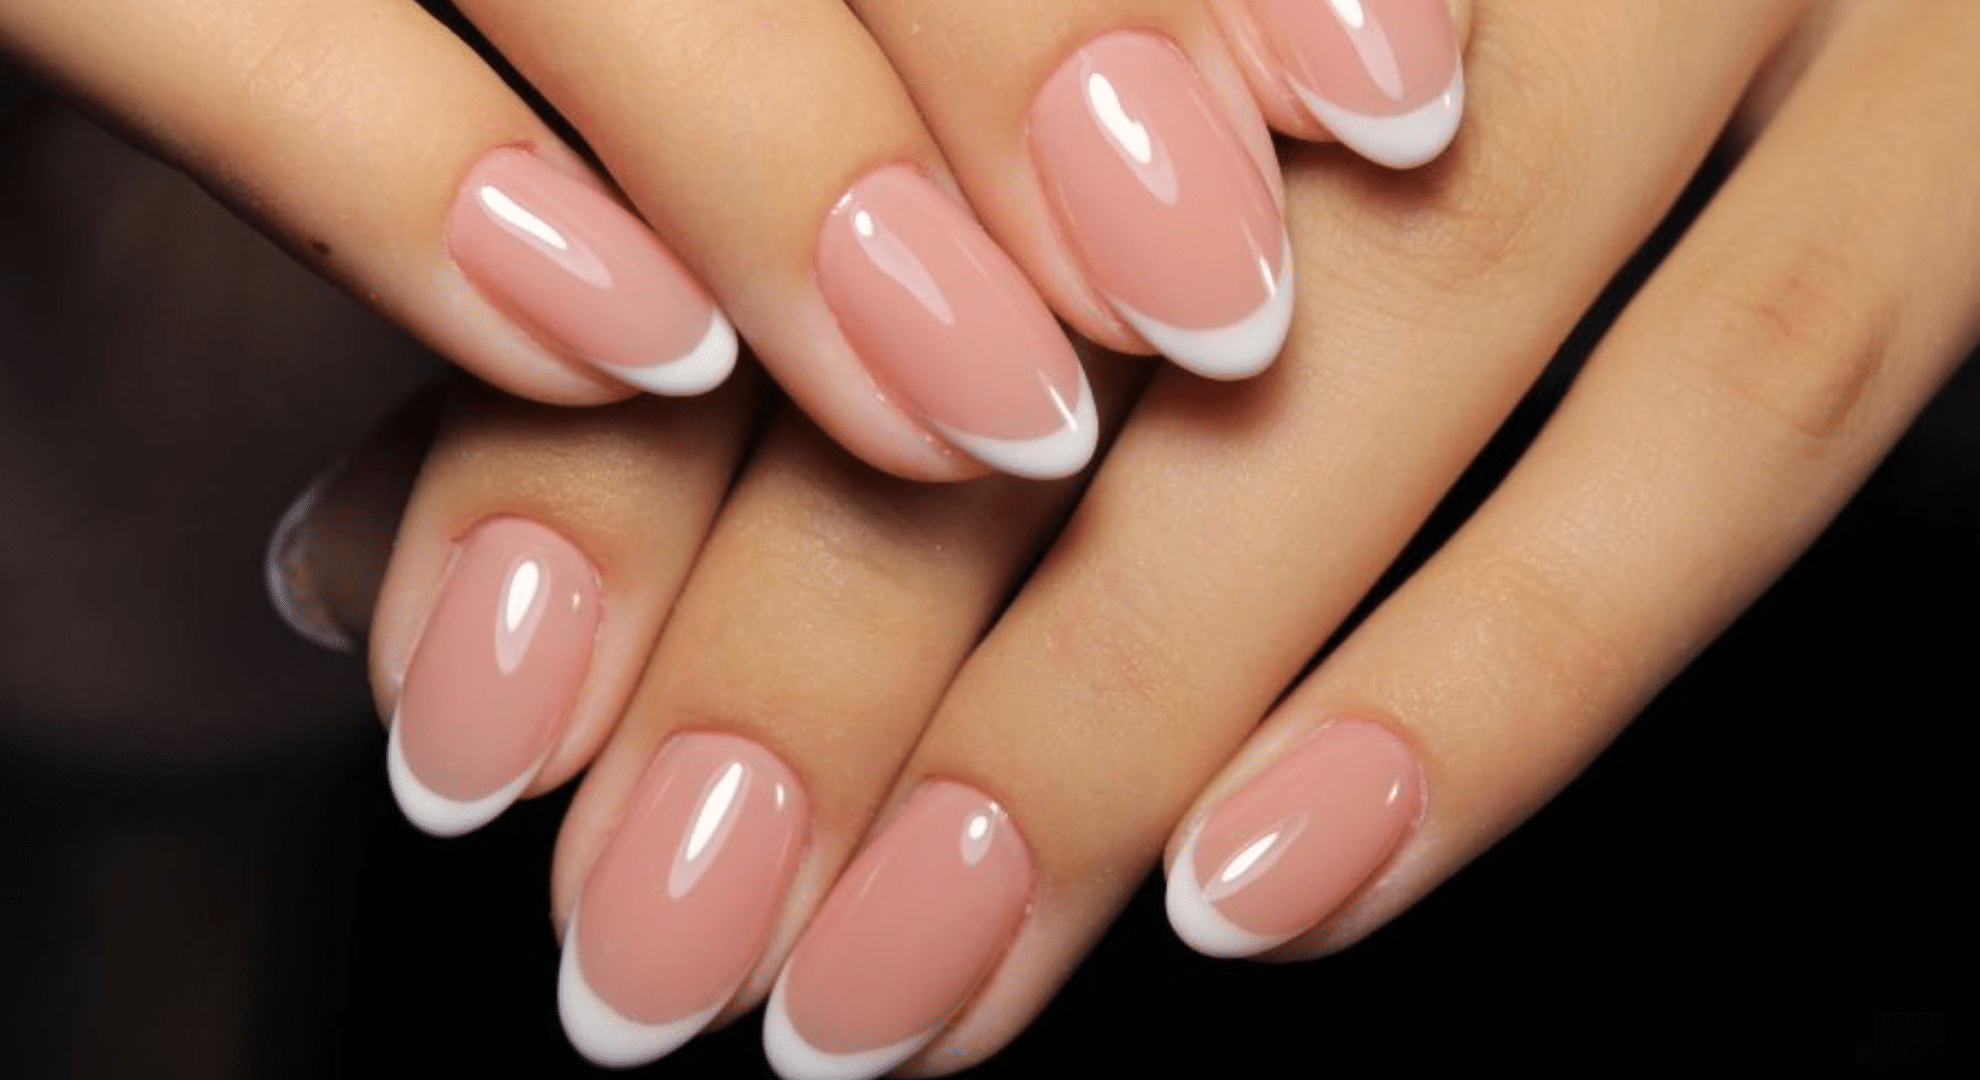
A Russian manicure is a technique that focuses on cleaning the cuticle area with a small electric file. Instead of soaking your hands in water like a regular manicure, this one is done dry.
The main goal is to get super clean, sharp-looking nails by removing every bit of dead skin around the nail bed. That’s what gives it that extra neat, polished look.
I first saw it on social media. It was all over nail videos, those close-up shots of smooth nail beds and flawless polish. People were talking about how it lasts longer and grows out cleaner. That’s what got my attention.
What makes a Russian manicure different is the detail. It takes more time and skill, but the results are hard to ignore. It’s about making the whole nail area look tidy and well-cared for.
That’s why it keeps showing up on nail pages everywhere.
What Makes It Different: Russian Manicure vs Regular Manicure
Wondering how a Russian manicure stacks up against the usual one you get at the salon? Here’s how the two methods differ in process, tools, results, and safety:
1. Technique and Preparation
A Russian manicure starts dry. No soaking. That’s one of the first things that sets it apart. Instead of softening the cuticles with warm water like in a regular manicure, this method keeps everything dry to give the nail tech more control.
The tools are different, too. Russian manicures use a small electric file (called an e-file) with different diamond-tipped bits. These tools are designed to clean the cuticle area with serious precision. Regular manicures stick to the basics: cuticle pushers, nippers, and nail files. It’s simpler and usually quicker.
2. Cuticle Treatment
In a Russian manicure, the cuticle is fully removed using the e-file. Every bit of dead skin around the nail is cleared away. This makes the nail bed look extra clean and helps the polish sit smoothly.
With regular manicures, the cuticle is only pushed back and maybe trimmed a little. That’s gentler on your skin, but it doesn’t give the same polished look.
When the cuticle area is clean and even, polish can be applied closer to the skin without smudging or lifting. That’s why Russian manicures look fresh longer. But keep in mind, cuticles protect your nails from bacteria. Removing too much can open the door to problems if it’s not done safely.
3. Polish Application and Finish
With Russian manicures, polish goes on right up to the edge of the nail bed. There’s no gap, no leftover skin in the way. The result? A super clean, seamless look that grows out slowly and evenly.
In regular manicures, polish is often applied just shy of the cuticle. This helps avoid flooding the nail with polish but can show growth quicker. The finish is still neat, but it doesn’t have that same sharp look.
So, if you want a more professional, photo-ready finish, Russian manicures might be the better pick. But if you’re after something quicker and easier, regular manicures get the job done.
4. Longevity and Maintenance
One of the reasons people love Russian manicures is the staying power. They can last 3 to 4 weeks with very little chipping. Because the polish is applied so close to the skin, the grow-out doesn’t look obvious.
Regular manicures usually last about 1 to 2 weeks. They’re great if you like changing up your polish more often or don’t want to commit to longer appointments.
Russian manicures take longer and require a skilled tech, so you may have to search for the right salon. They’re best for people who want long-lasting results and don’t mind a bit of upkeep. Regular manicures are faster, more common, and great for low-maintenance nail care.
5. Risks and Safety
Russian manicures need training and care. If the technician isn’t experienced, there’s a risk of cutting too deeply or causing an infection. That’s why it’s important to go to someone who really knows what they’re doing.
Regular manicures are usually safer for most people. They’re less invasive, and the tools are easier to manage.
Dermatologists say the cuticle is there for a reason; it protects the nail from germs. So while cleaning it up can look nice, fully removing it too often (or too roughly) might not be the best for nail health in the long run.
Russian Manicure vs Regular Manicure: At a Glance
Here’s a quick and simple way to see how a Russian manicure compares to a regular one. This side-by-side look covers the main things you need to know before picking the one that suits you best:
| Feature | Russian Manicure | Regular Manicure |
|---|---|---|
| Technique | Dry, with e-file | Wet, with soaking |
| Cuticle Work | Fully removed | Pushed back |
| Duration | 3–4 weeks | 1–2 weeks |
| Polish Finish | Very close to the cuticle | Slight gap near cuticle |
| Skill Required | High | Moderate |
| Risk Level | Higher if untrained | Low |
Step-by-Step Guide to a Russian Manicure
If you’re curious about how a Russian manicure is actually done from start to finish, here’s a clear, easy-to-follow guide that breaks down each step.
From removing the old polish to applying the final top coat, every part of the process plays a key role in how clean and long-lasting the results turn out.
Step 1: Coating Removal
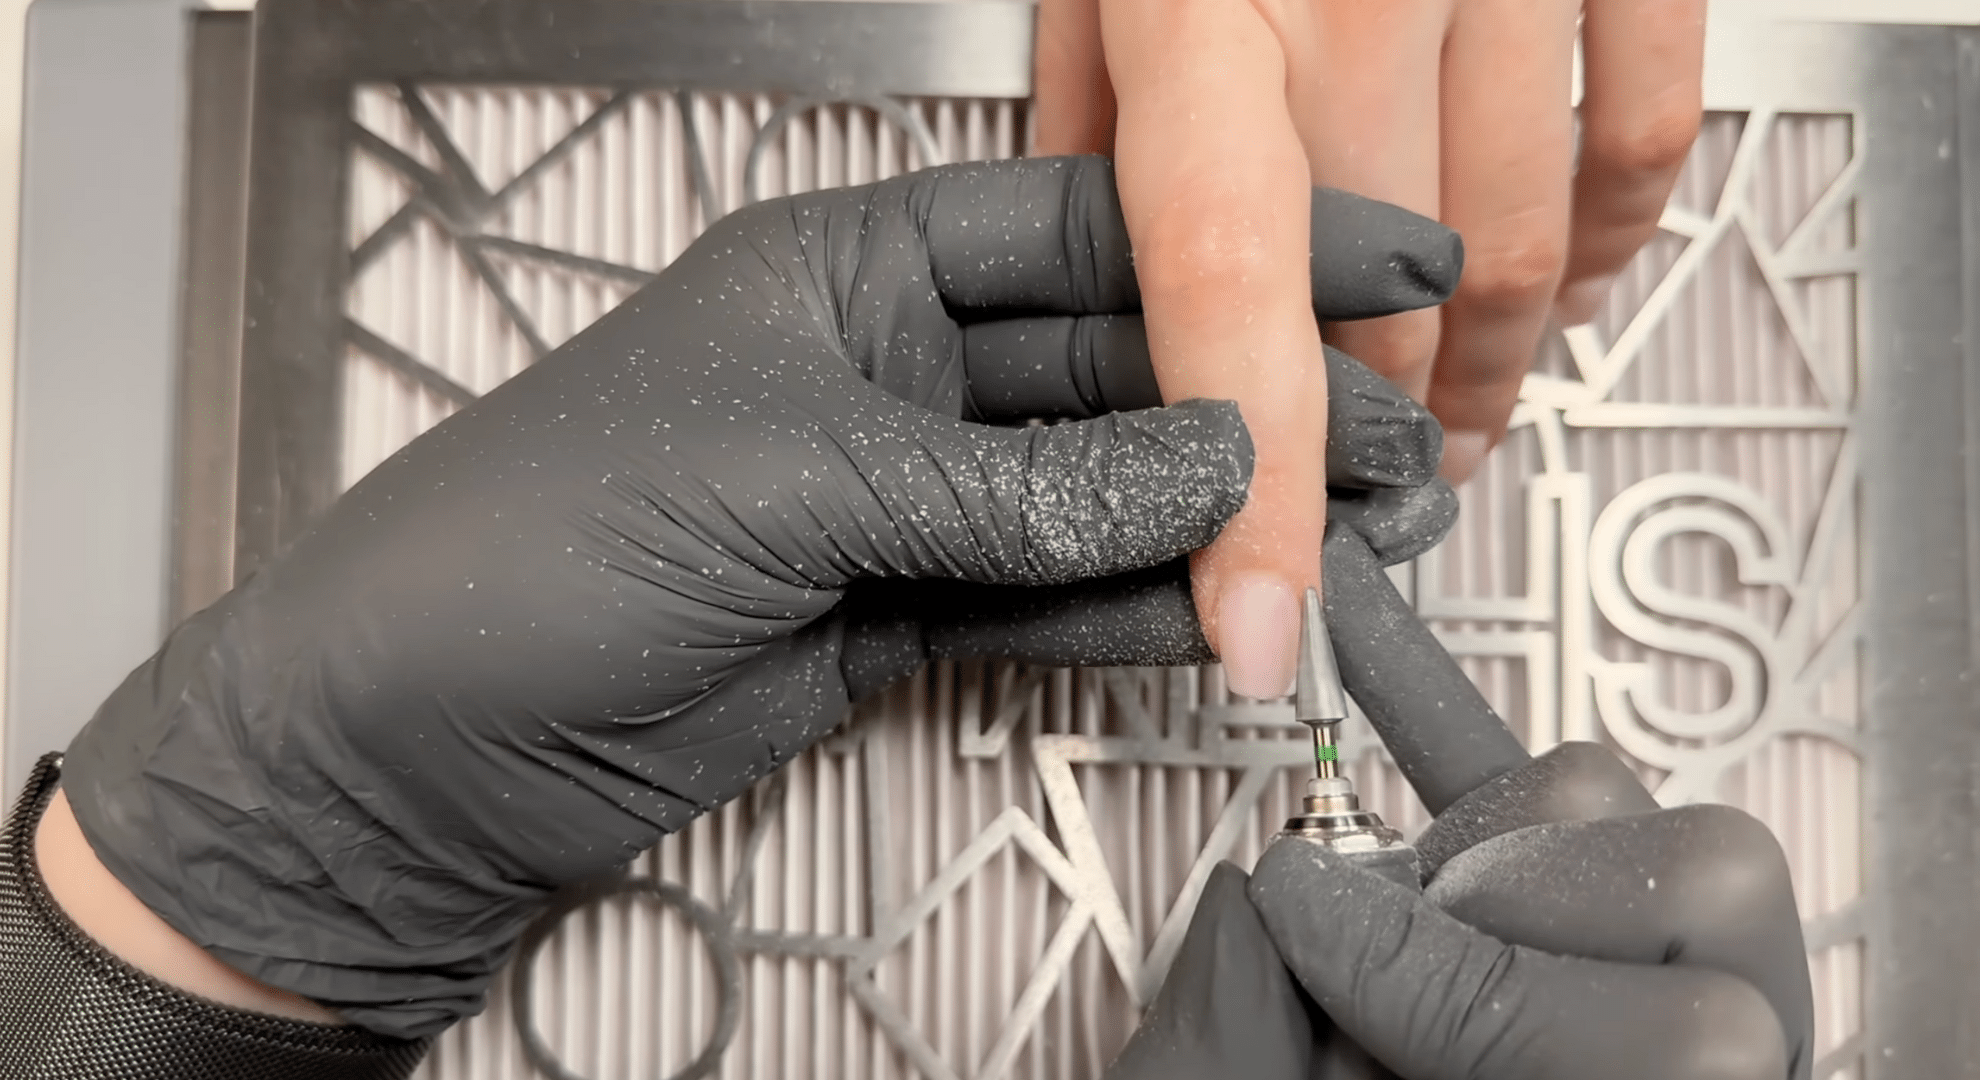
The first step is removing the old nail coating. This is done using a professional nail drill paired with a suitable nail bit.
It’s important to work gently, using smooth and steady motions without pressing down too hard. If the old coating is still intact, you can leave most of the hard gel in place.
The goal is to safely take off just enough of the old material to prepare the surface for the next steps.
Step 2: Filing the Shape
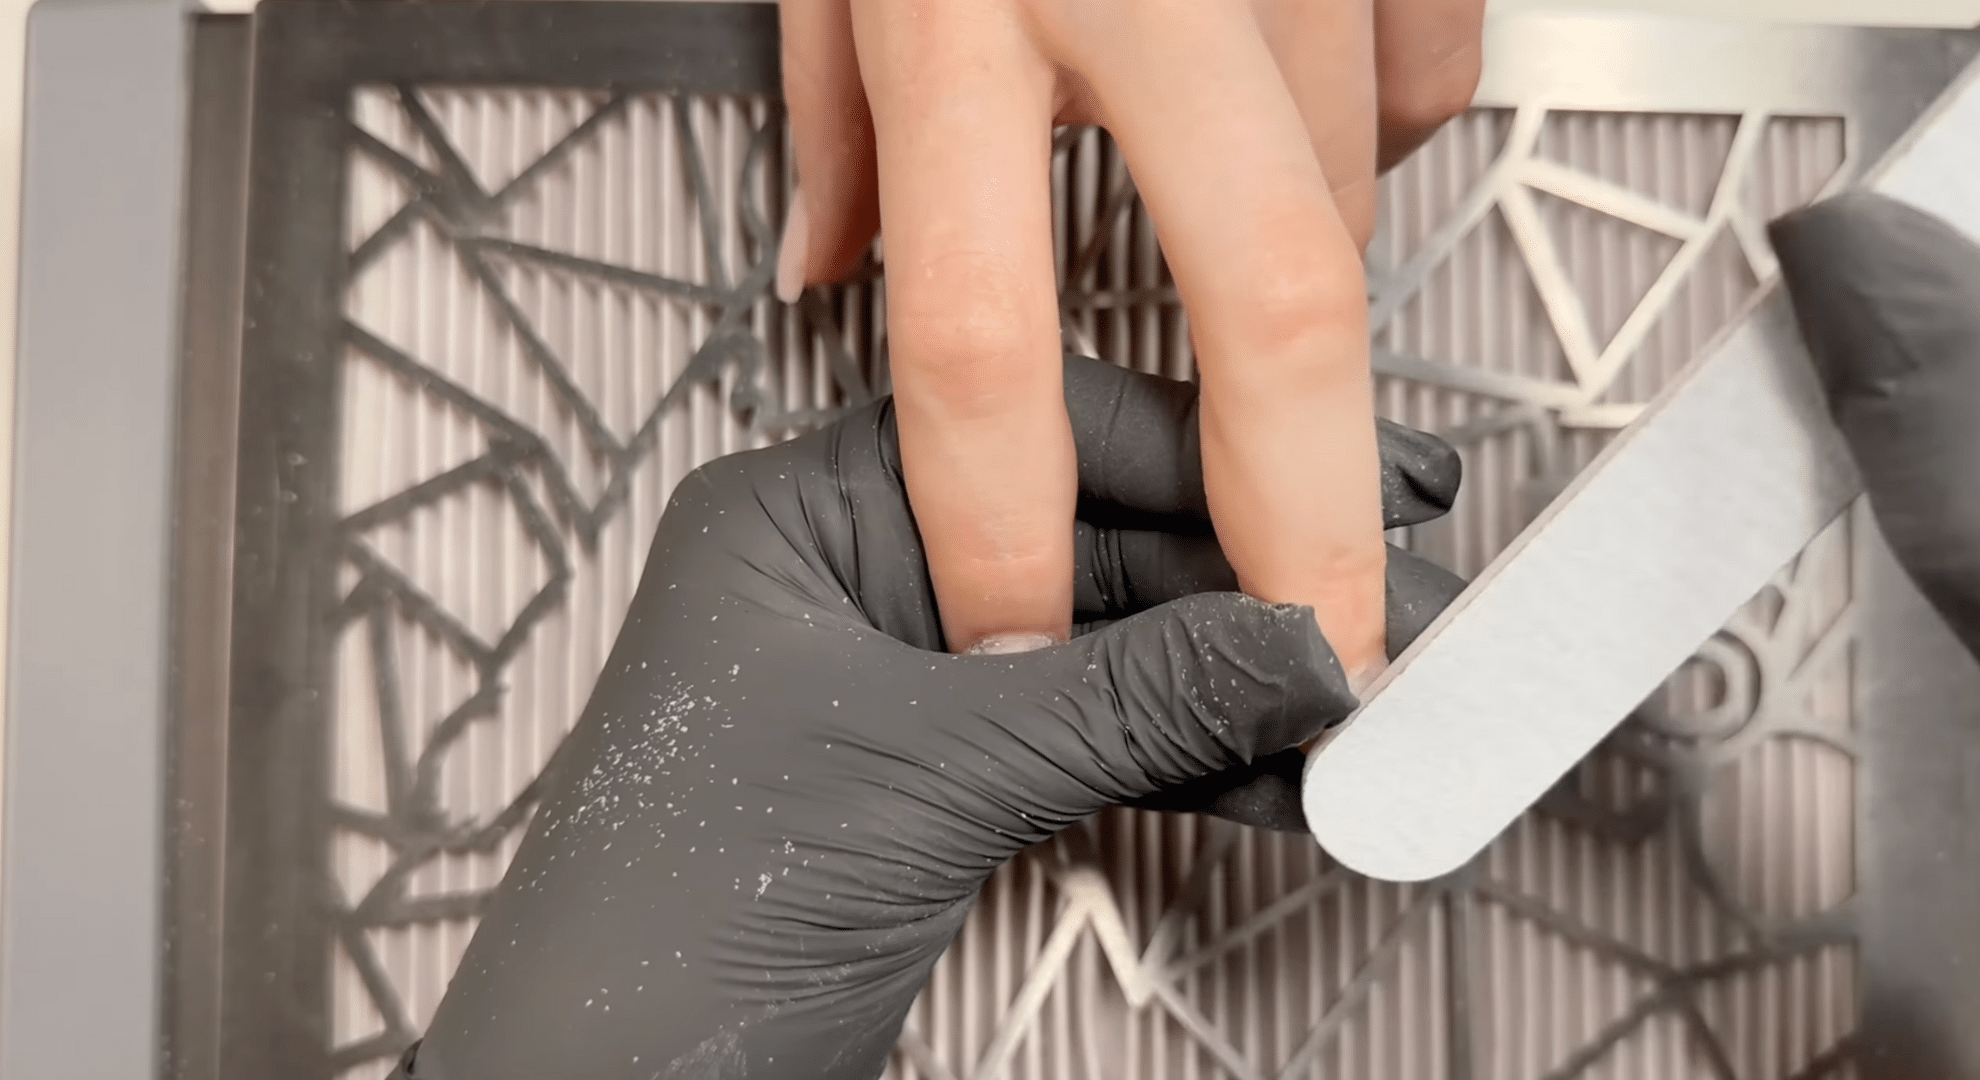
After removing the coating, the shape of the nail is refined using a manual nail file. This step helps smooth out any leftover product and begins forming the desired shape.
It’s important to avoid filing into the natural nail; only the surface of the old material and the shine on the natural nail should be touched.
Filing correctly lays the foundation for how the final nails will look and feel. Getting this step right also ensures that the new polish and base layer hold better and last longer.
Step 3: Lifting the Cuticle
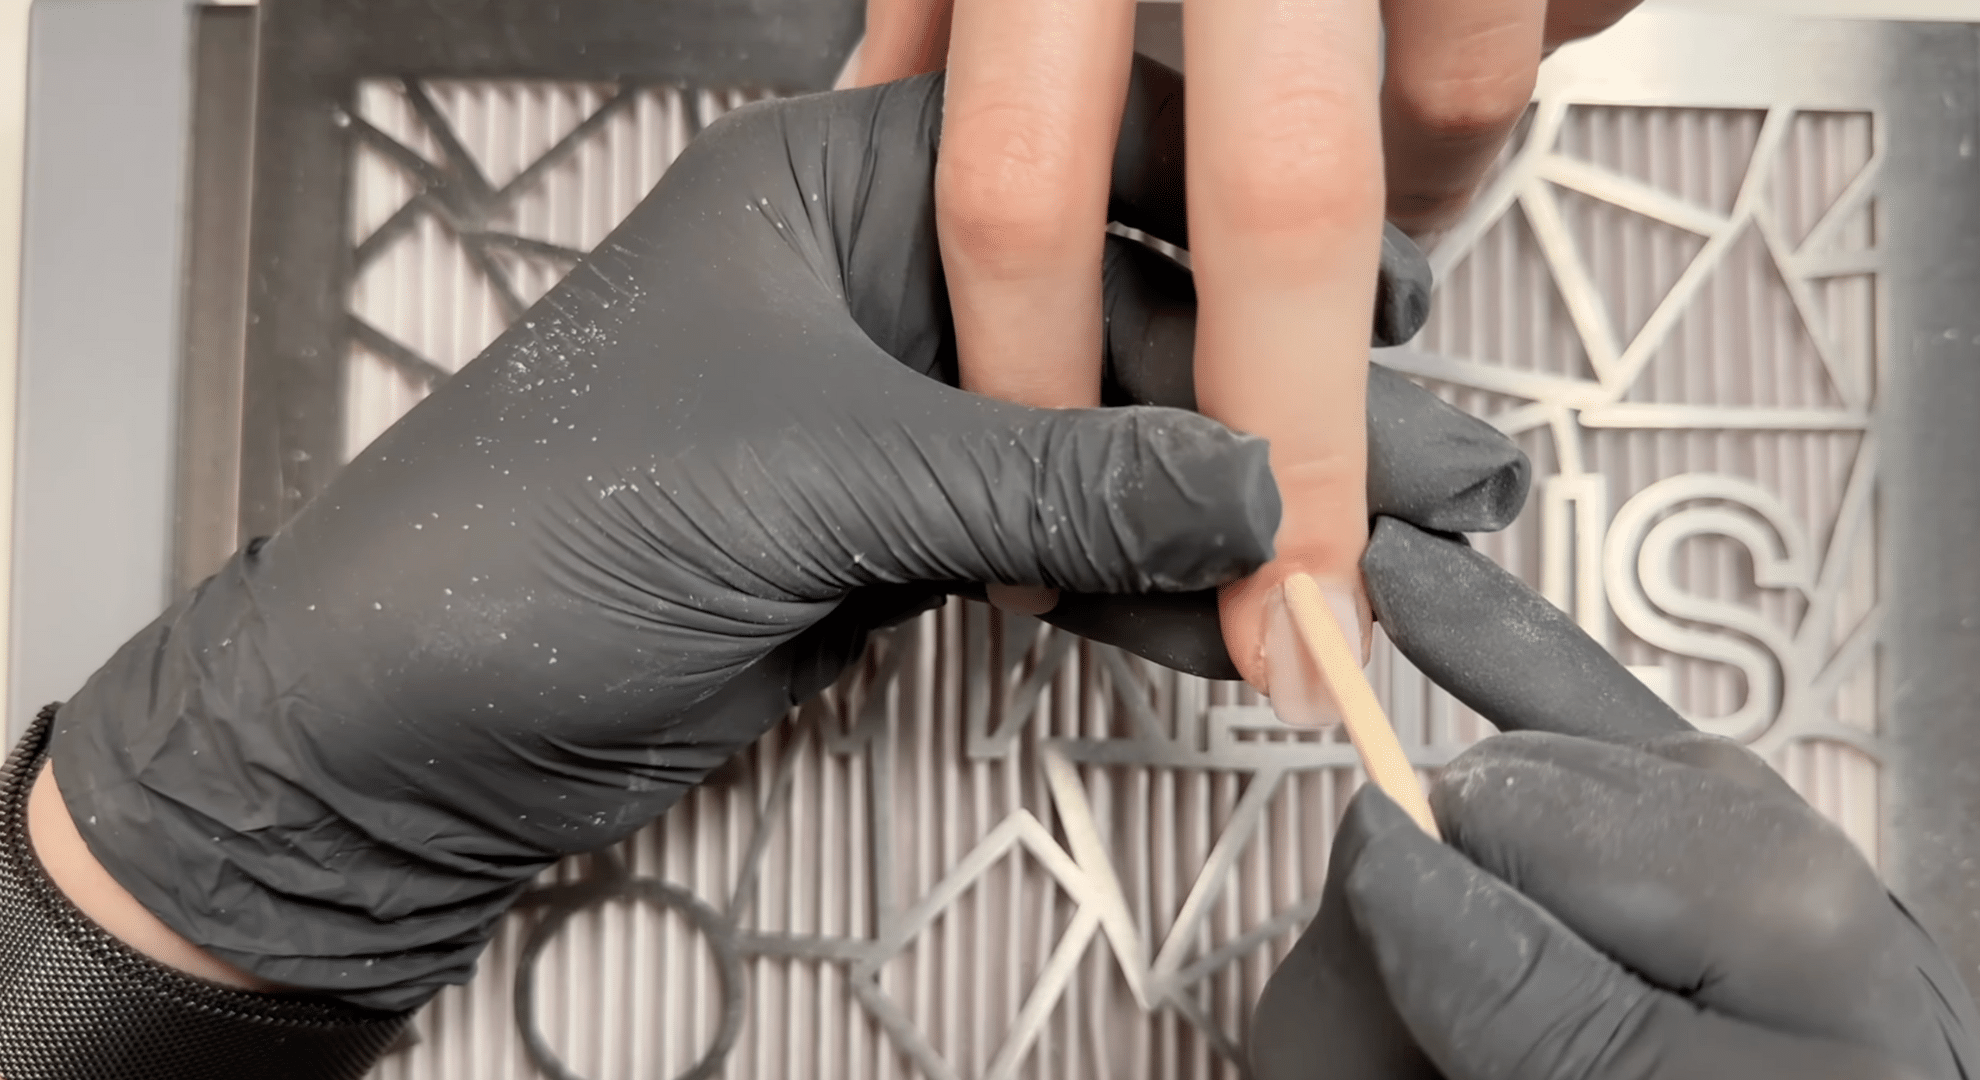
Once shaping is complete, the cuticle needs to be gently lifted. A wooden stick is used to push back the cuticle without applying pressure to the nail surface.
This part of the process helps separate the cuticle from the nail plate so it can be cleaned properly in the next steps.
It also clears space for polish to reach closer to the skin without flooding it. Taking the time to lift the cuticle carefully is key to achieving a neat, clean look and preventing over-trimming or irritation later on.
Step 4: Cleaning the Cuticle (Combi Technique)
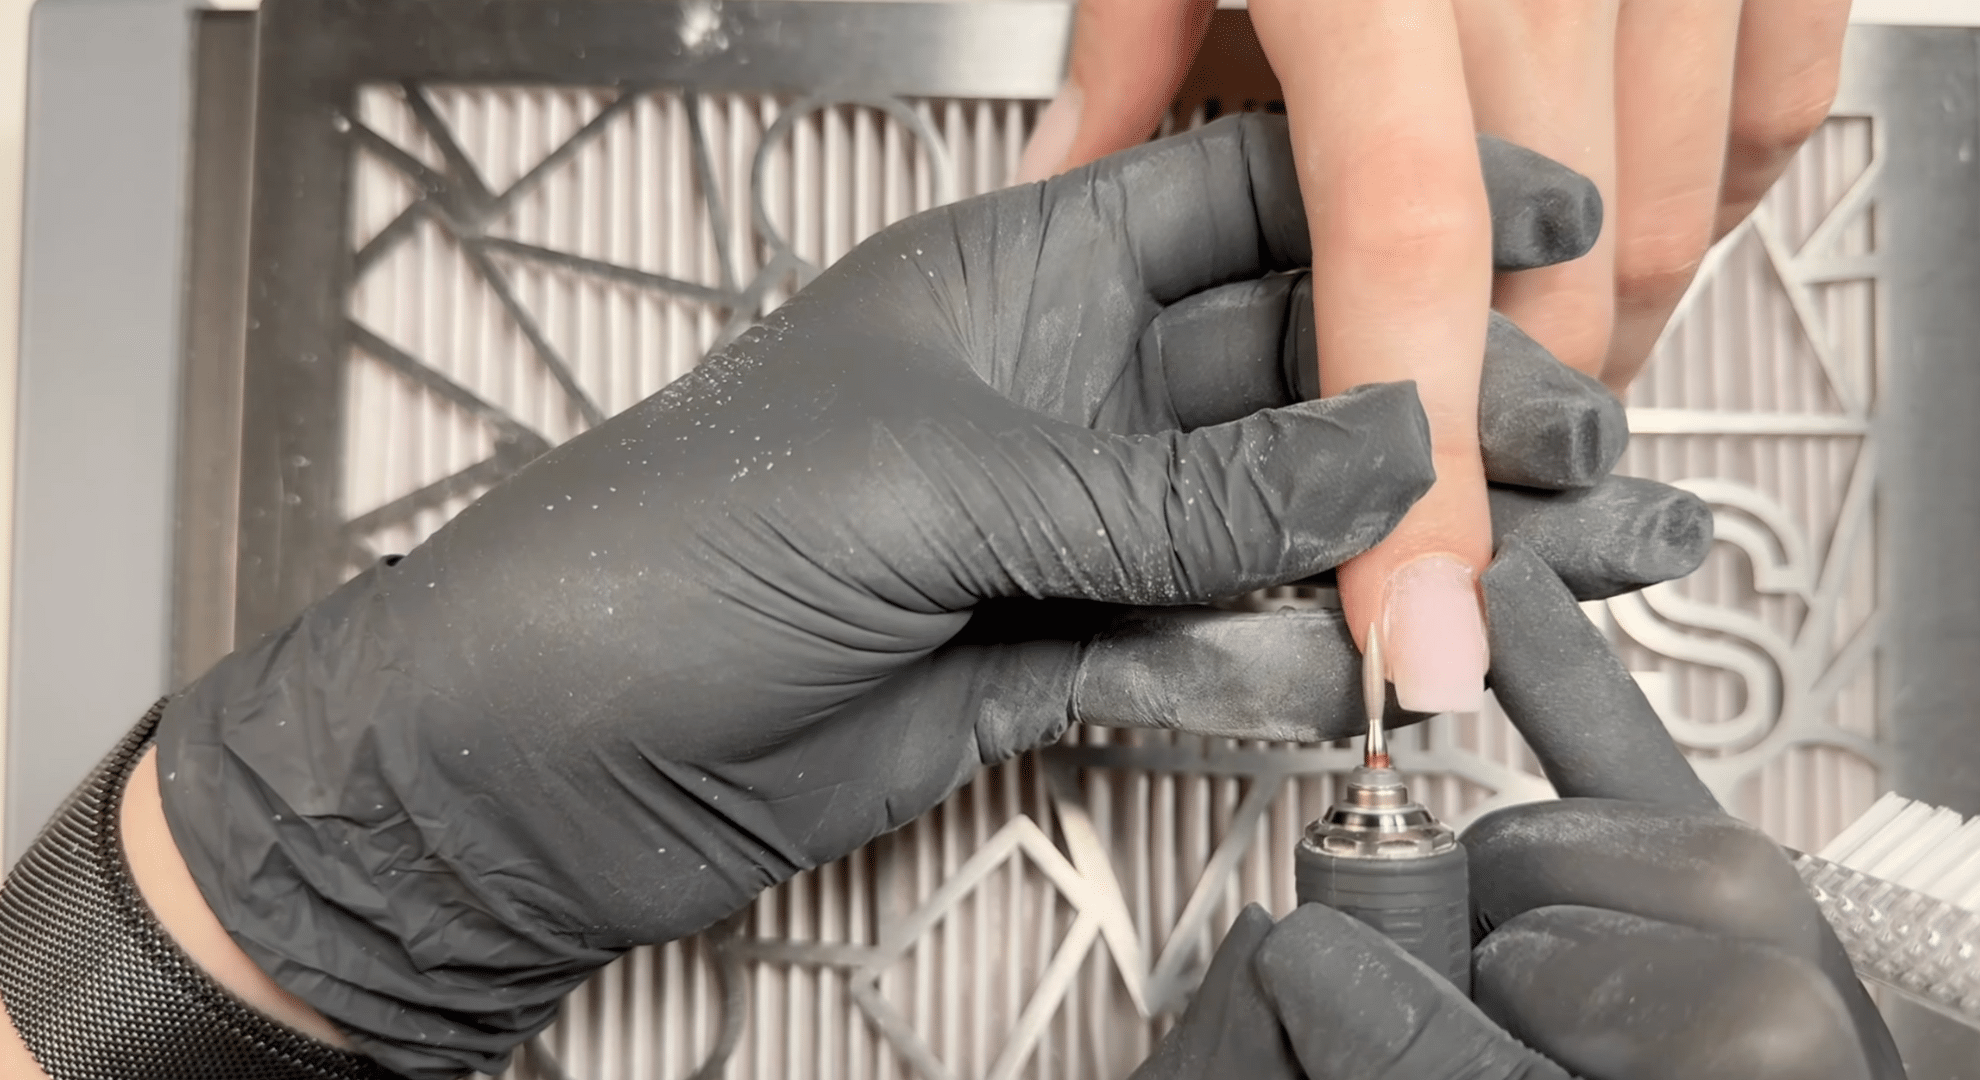
Cuticle cleaning is done using a combination of an electric file and nippers, which is called the combi technique.
The e-file is used to remove the thin layer of dead skin (called pterygium) along both sides of the nail. A brush is used along the way to clear out dust and check your work.
It’s very important to avoid guessing where to file. Without proper training, this step can be risky, so using the right bit and working slowly are crucial.
Step 5: Cuticle Removal
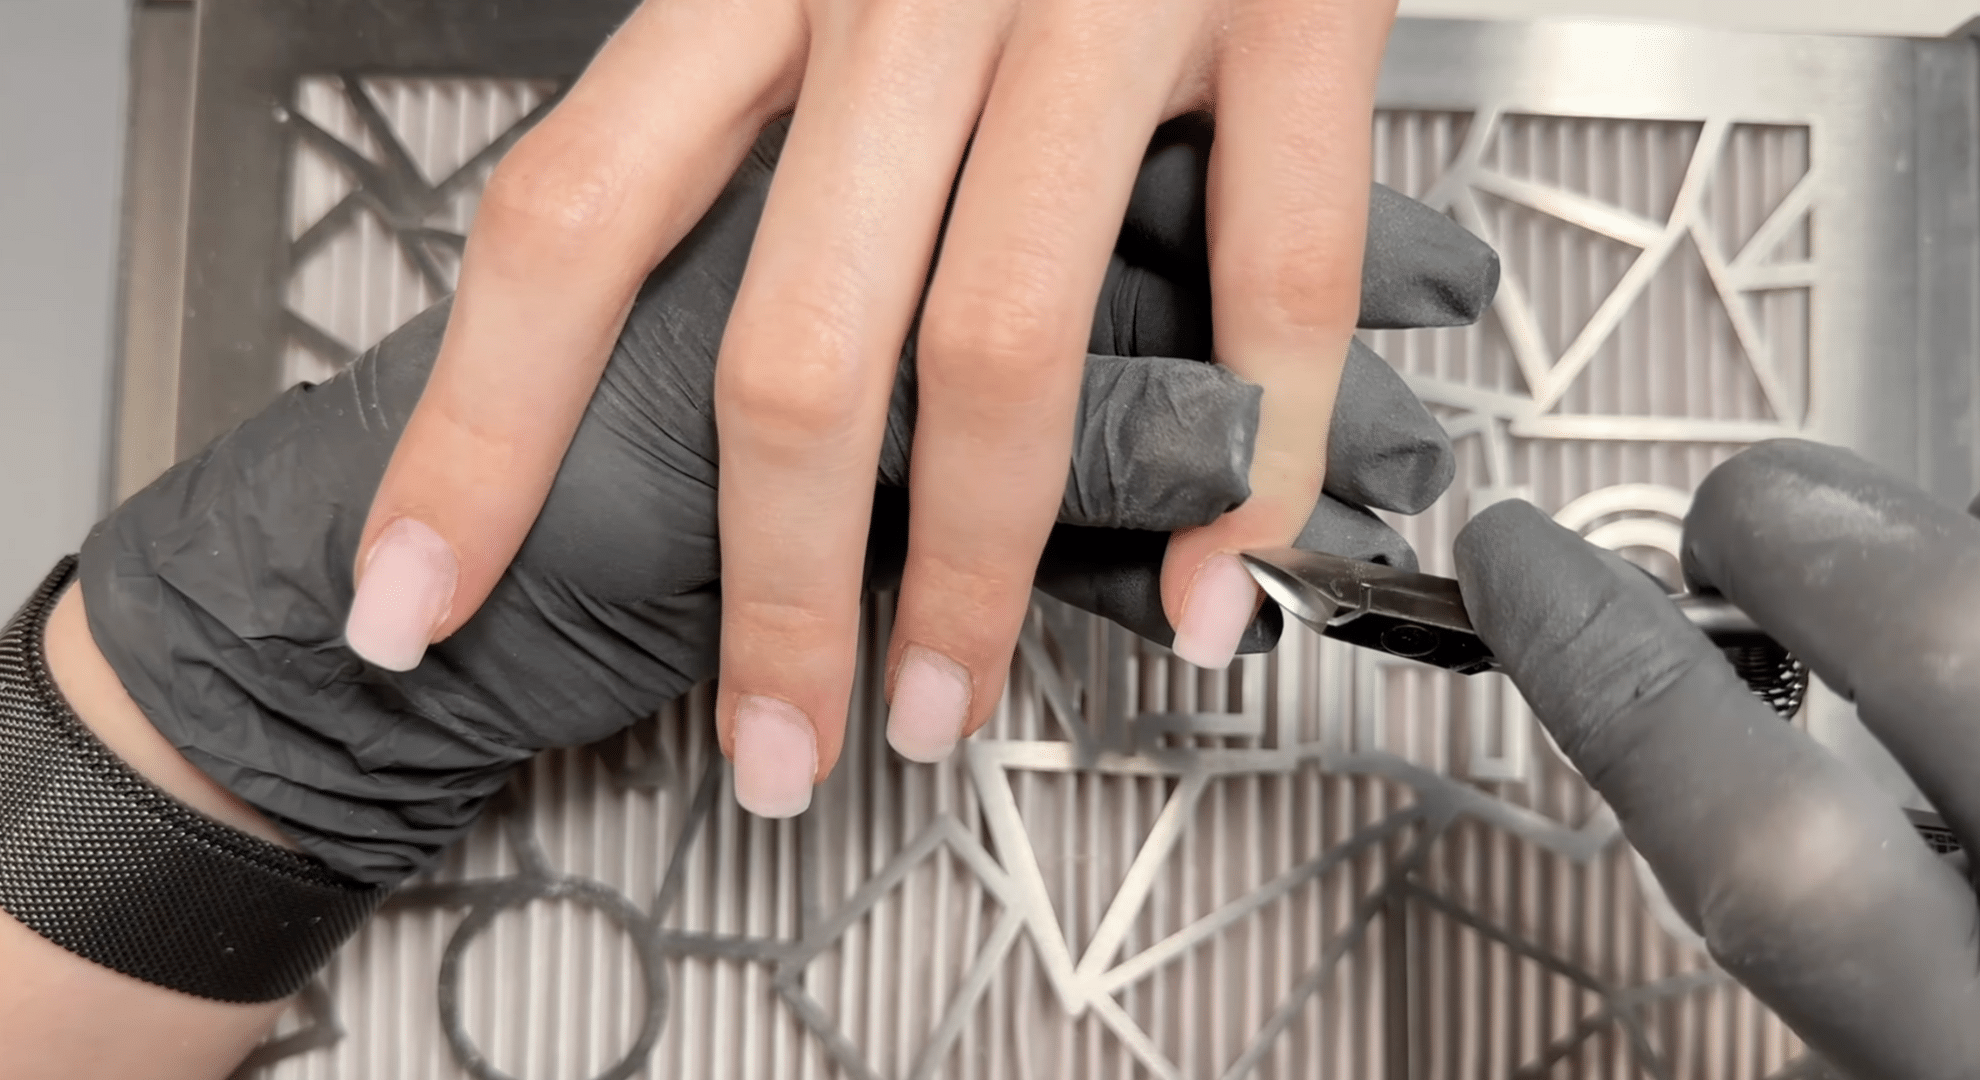
With the cuticle properly lifted and cleaned, it can now be removed using nippers. This tool should be sharp and sterile for a safe, clean cut.
A good pair of nippers helps remove the cuticle in one smooth motion without pulling or tearing. This step needs care and control to avoid cutting the skin too deeply.
Removing the cuticle completely gives the nails that sharp, polished look people often notice with Russian manicures. Clean removal also helps polish lay flatter and last longer on the nail surface.
Step 6: Cleaning and Base Application
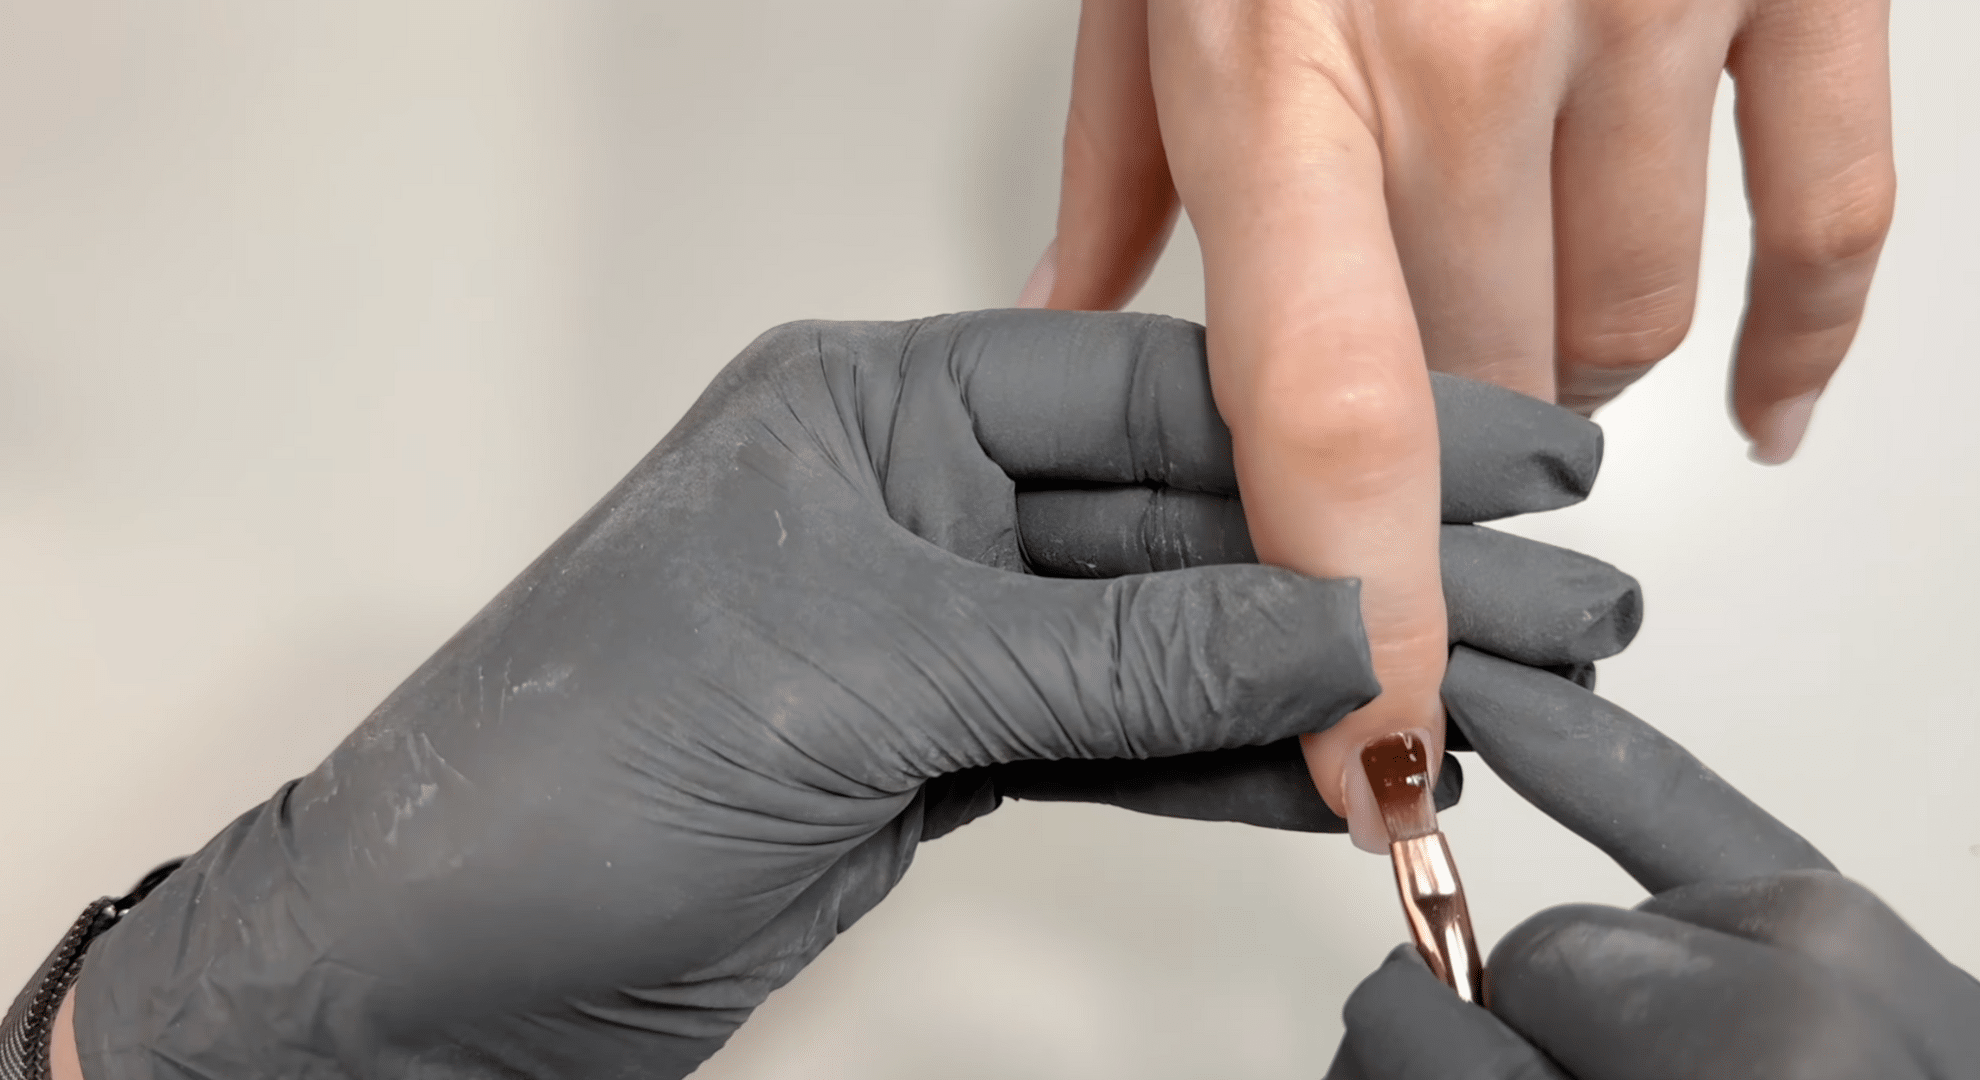
Now the nails are cleaned using alcohol to remove any dust or debris. Then, a nail prep solution is applied to dry out the surface and help the base coat stick better.
A thin layer of base coat is then added. Because there’s still some hard gel left on the nail, a thin base layer is enough for support.
It’s better to avoid thick layers of base, especially if they’re soft or acidic, as they can wear down easily. This step is essential for good hold and smooth polish.
Step 7: Final Shape Filing
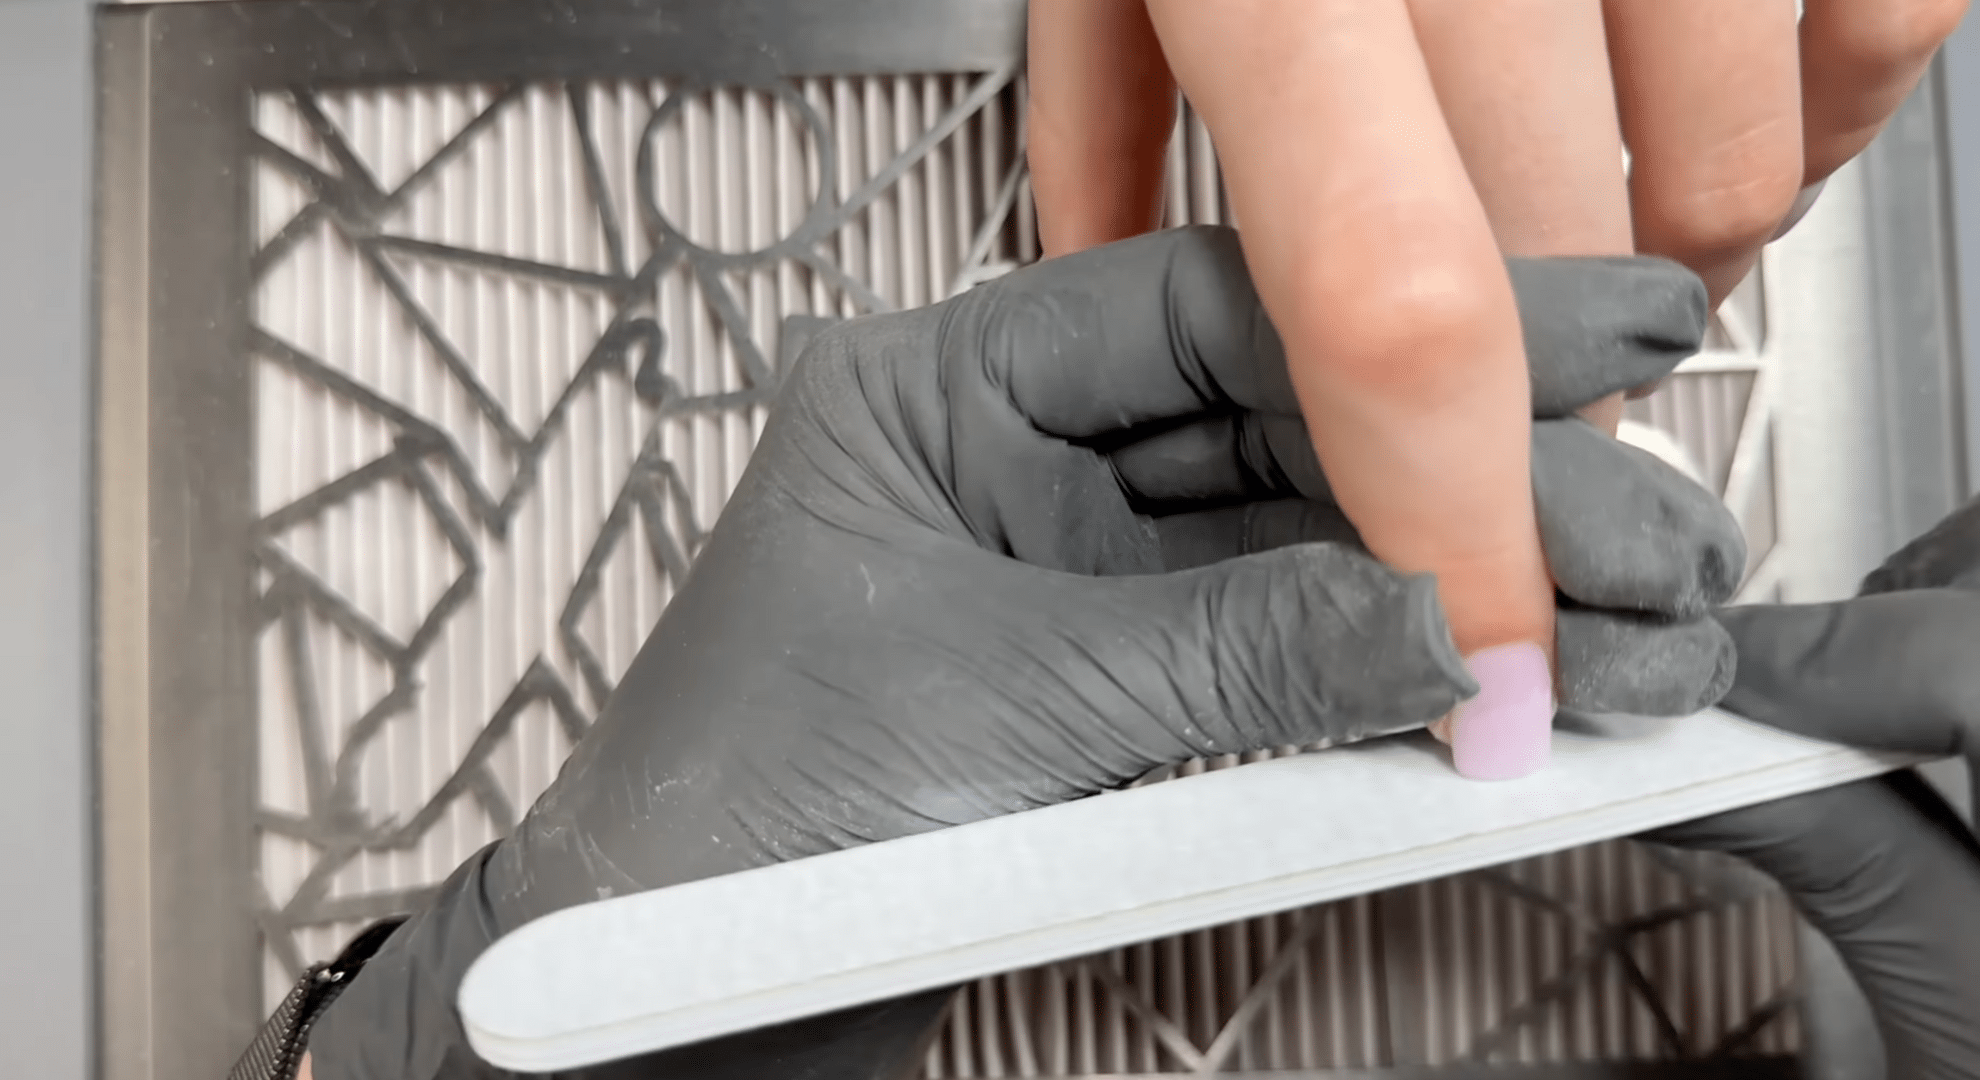
At this stage, the final shape is filed to get the nails looking natural, thin, and strong. The goal is to build a nail that not only looks good but also wears well.
The shaping should highlight the nail’s natural line without making it too wide or bulky. A well-shaped nail with the right structure helps the coating last longer and feel more comfortable.
This step also brings balance to the entire look, especially if the client prefers a soft, natural shape that’s trending.
Step 8: French Tip Design (Optional)
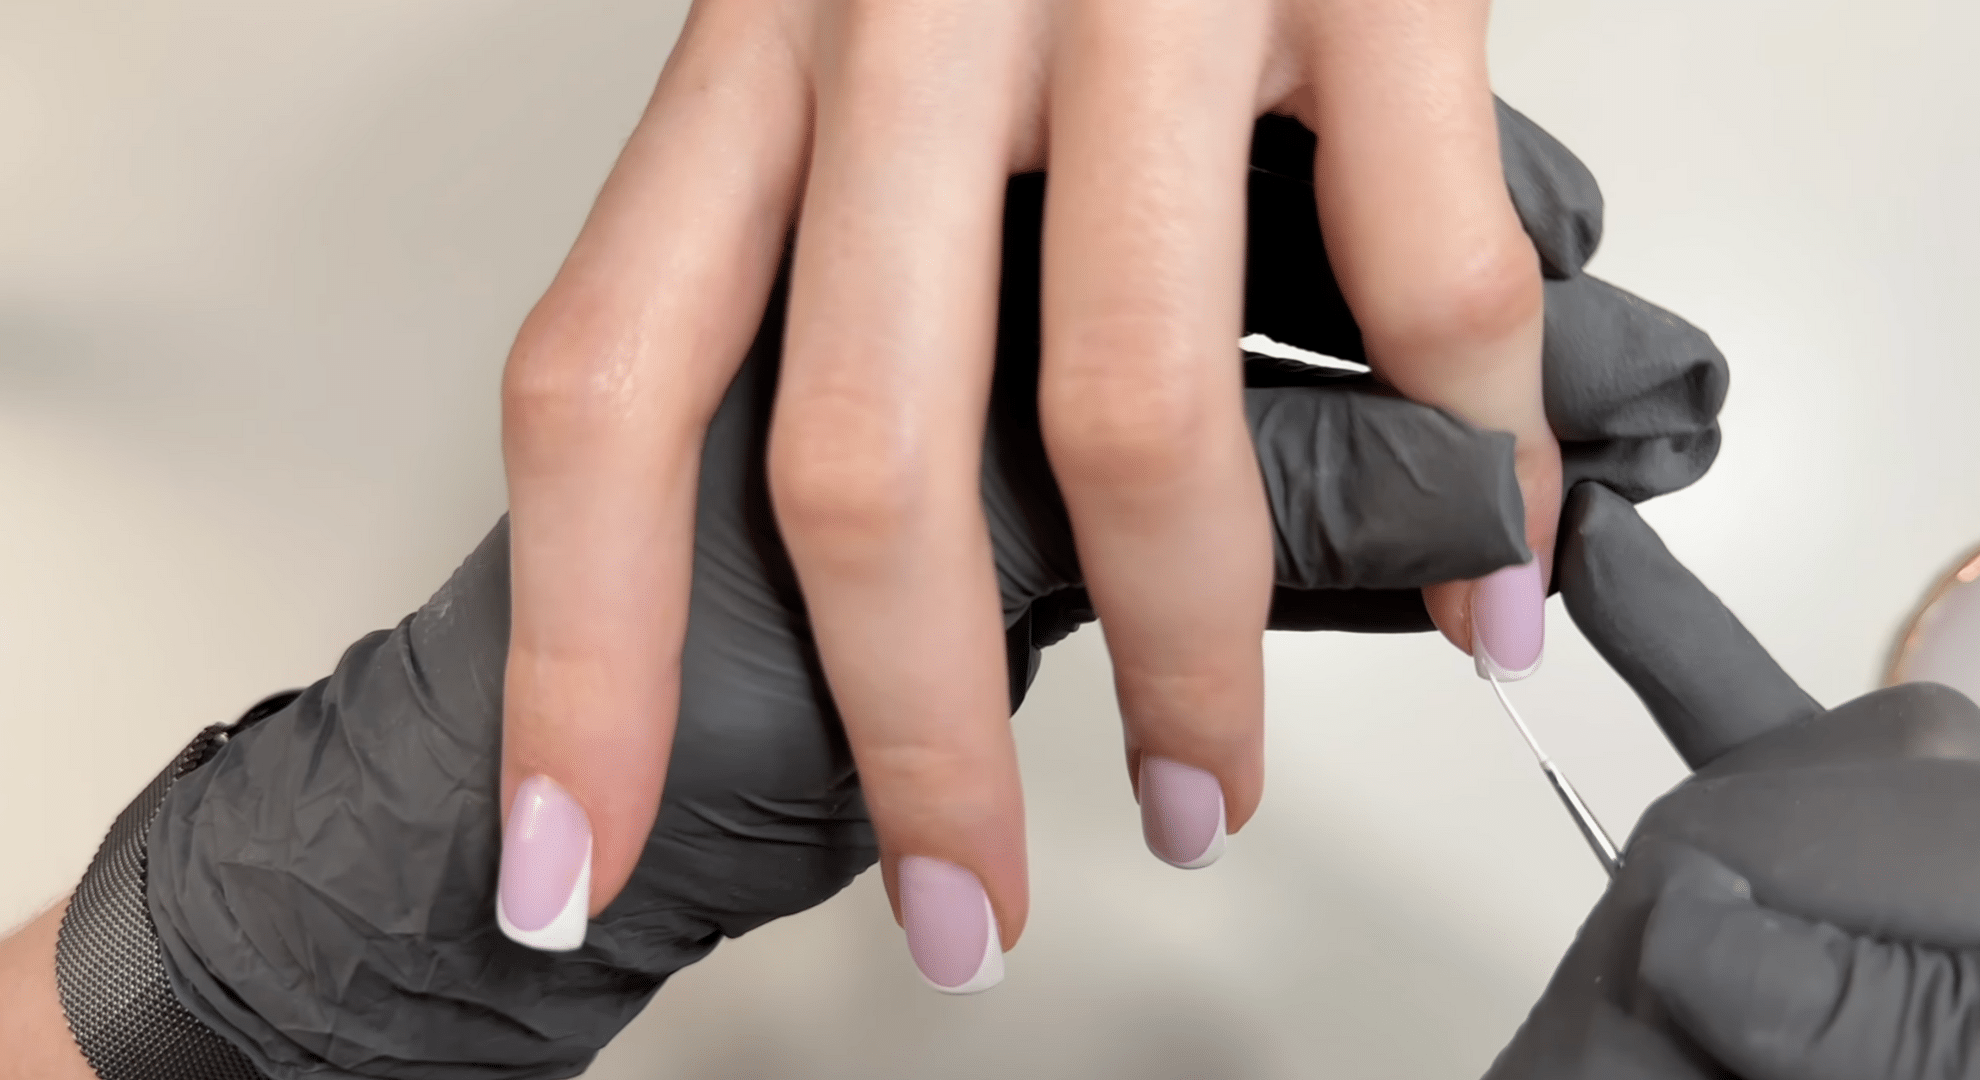
If doing a French tip, apply a thin liquid base first to smooth out the surface. After removing the sticky layer, begin the design using gel polish and a thin brush.
A popular choice is a long smile line that curves gently and stretches close to the cuticle. This gives the nail an extended, clean look. Instead of using gel paint, a high-quality gel polish is used for easier blending.
This design step is optional but adds a stylish touch when requested and can be adjusted to different tastes.
Step 9: Top Coat Application
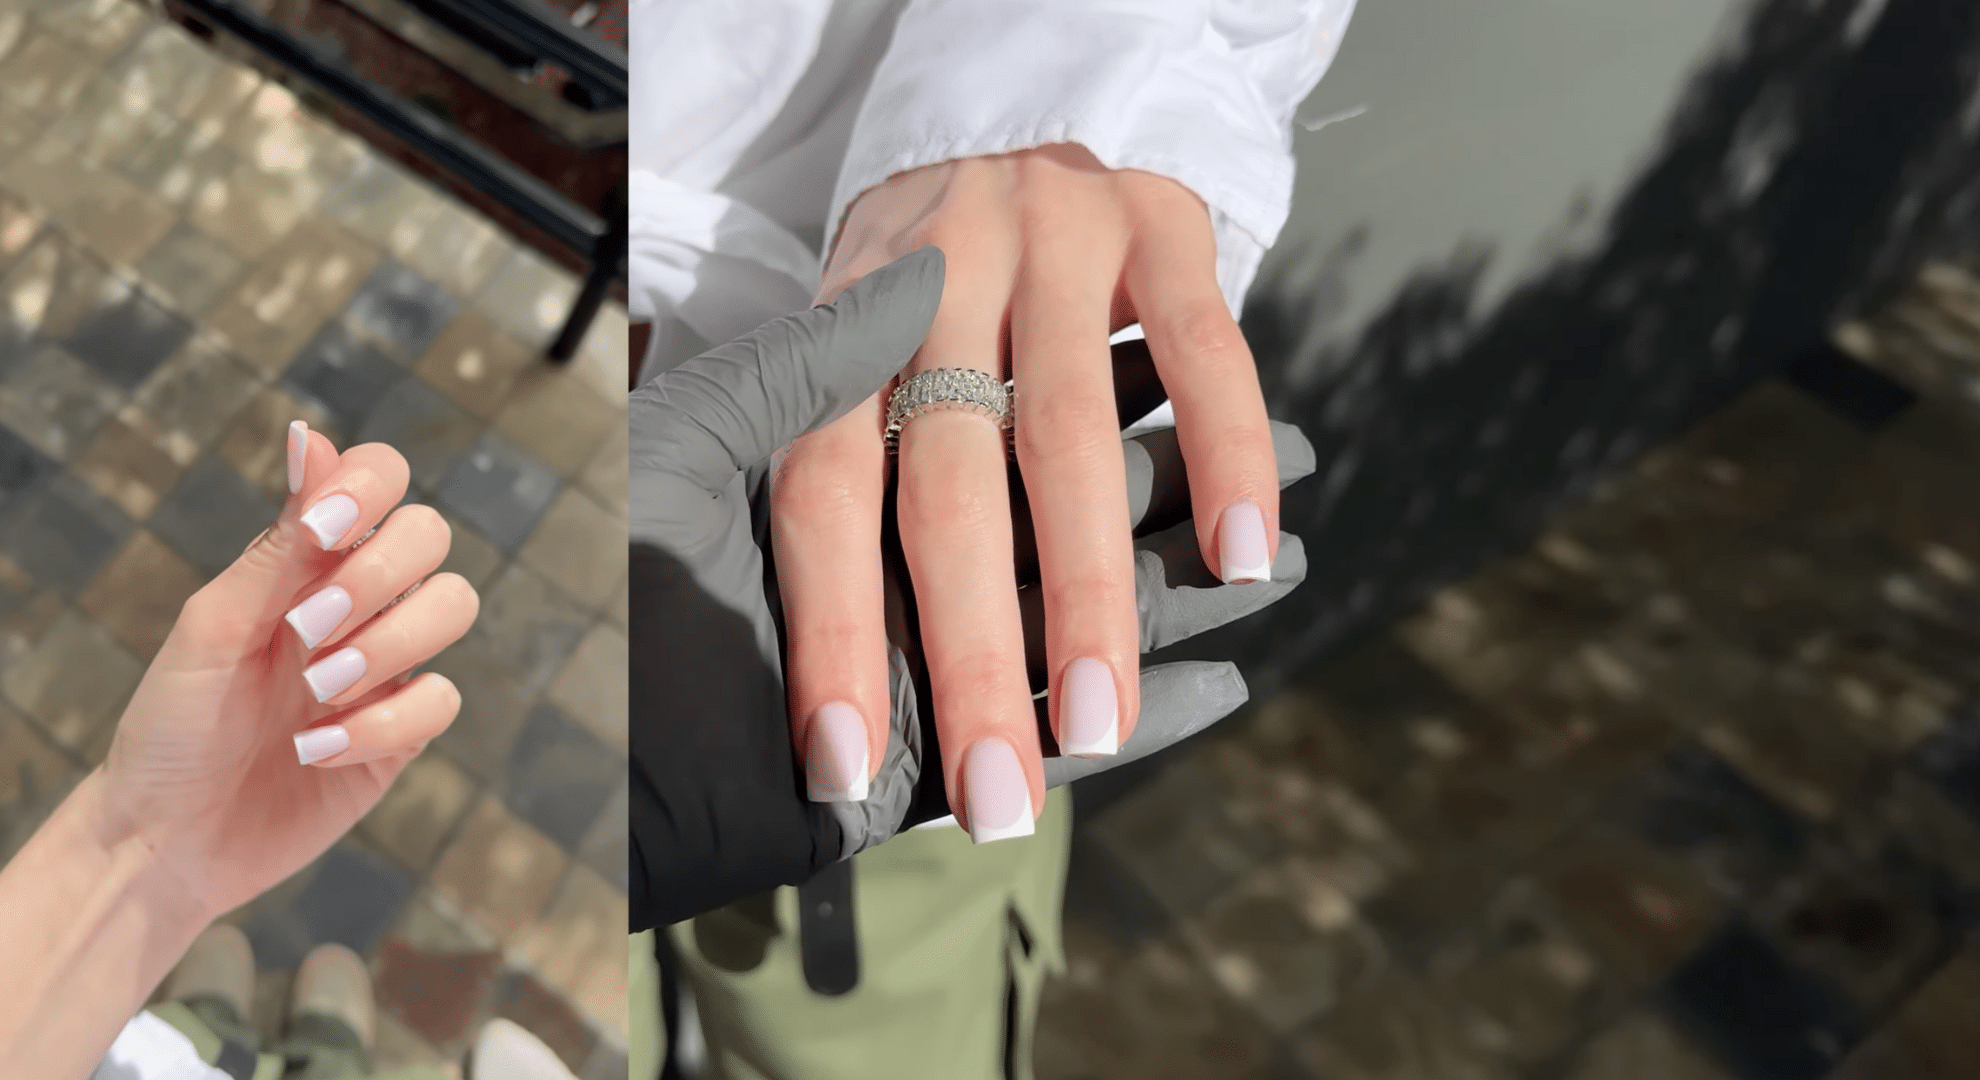
The final layer is the top coat. Sometimes, a bit of milky gel polish is mixed with the top to give the nails a soft, cloudy tone.
The top coat is applied with a slight leveling motion to even out the surface. After curing, the tips are lightly filed to clean up the shape and improve the edges’ clarity.
This last step locks everything in and gives the nails a finished, shiny look. It also helps protect the polish underneath and keeps the manicure from wearing down too fast.
If you want to see how it’s done in real time, here’s a YouTube tutorial that walks through each step visually.
Risks and Safety Concerns Related to Russian Manicure
While Russian manicures offer a super clean and polished look, they do carry some safety concerns—especially if done by someone without proper training.
One major risk is infection. If the tools aren’t sterilized or the cuticle is removed too aggressively, bacteria can enter and cause problems.
There’s also the chance of damaging the nail matrix, which is the part under the nail that controls growth. This can lead to ridges or slow-growing nails.
Over-trimming the cuticle may also weaken the skin’s natural barrier, making the area sore or irritated. That’s why proper sterilization and expert technique are so important.
A skilled technician who knows how to work safely is key to avoiding these issues.
Can You Do a Russian Manicure at Home?
Technically, yes; you can try a Russian manicure at home, but it’s not something most people should do without training. You’d need a nail drill (e-file), several diamond bits, a nail file, cuticle nippers, prep products, and gel polish.
While the tools are easy to buy, using them correctly takes skill and care. The biggest risk with doing it yourself is cutting too deep or using the e-file the wrong way, which can lead to pain, cuts, or infection.
Since the cuticle protects your nail from bacteria, removing it too much or too often can cause real problems.
Unless you’re trained and confident, it’s safer to leave this kind of manicure to a professional.
Is It Worth It?
Russian manicures offer a super clean finish that lasts for weeks without chipping or a messy grow-out. They look neat and polished, much longer than regular manicures. But they take more time, cost more, and must be done by someone properly trained.
This type of manicure is a good fit if you want a detailed, long-lasting look and you visit a trusted nail tech.
On the other hand, if your nails are weak, your skin is sensitive, or you prefer something quick and low-risk, a regular manicure might be the better option. A Russian manicure is ideal for special occasions or long trips.
It really comes down to how much time, care, and upkeep you’re comfortable with.
Maintenance and Aftercare Tips for Russian Manicure
Taking care of your nails after a Russian manicure helps keep them looking fresh and healthy for longer. Here are some simple tips to follow at home so your manicure lasts and your nails stay strong:
- Use cuticle oil daily to keep the skin around your nails soft and prevent dryness.
- Apply hand cream often, especially after washing your hands.
- Avoid picking or peeling the polish, even if it starts to lift; this can damage your natural nails.
- Avoid harsh cleaning products or strong chemicals; wear gloves when doing chores.
- Don’t use your nails as tools to open things or scratch surfaces.
- Schedule your next manicure every 3 to 4 weeks to keep them looking clean and prevent overgrowth.
- If you’re removing the manicure yourself, file the top layer gently before soaking it off; never rip or force it.
- If you’re unsure, go back to your nail tech for safe and proper removal.
Conclusion
A Russian manicure isn’t just about looks; it’s about precision, care, and results that last.
After learning what a Russian manicure involves and seeing the steps up close, I’ve come to really value the detail and skill behind it. It takes more time, but the clean finish and long wear make it worth thinking about.
If you’re considering trying it, make sure it’s done by someone trained and careful. Your nail health matters just as much as the final result.
Now that you know what a Russian manicure is, you’re in a better position to decide if it’s right for you.
Want clearer, helpful beauty tips? Check out other blogs on the website to keep learning what really works!