Some beauty trends make me stop scrolling, and brow lamination is definitely one of them. There’s something about those soft, fluffy, brushed-up brows that feels effortlessly polished without looking too perfect.
I love how brows can completely change the feel of a makeup look, whether I’m going for something natural or a little more put-together.
Lately, this sleek yet feathery style seems to be everywhere, and it’s easy to see why it has caught so much attention.
What is Brow Lamination?
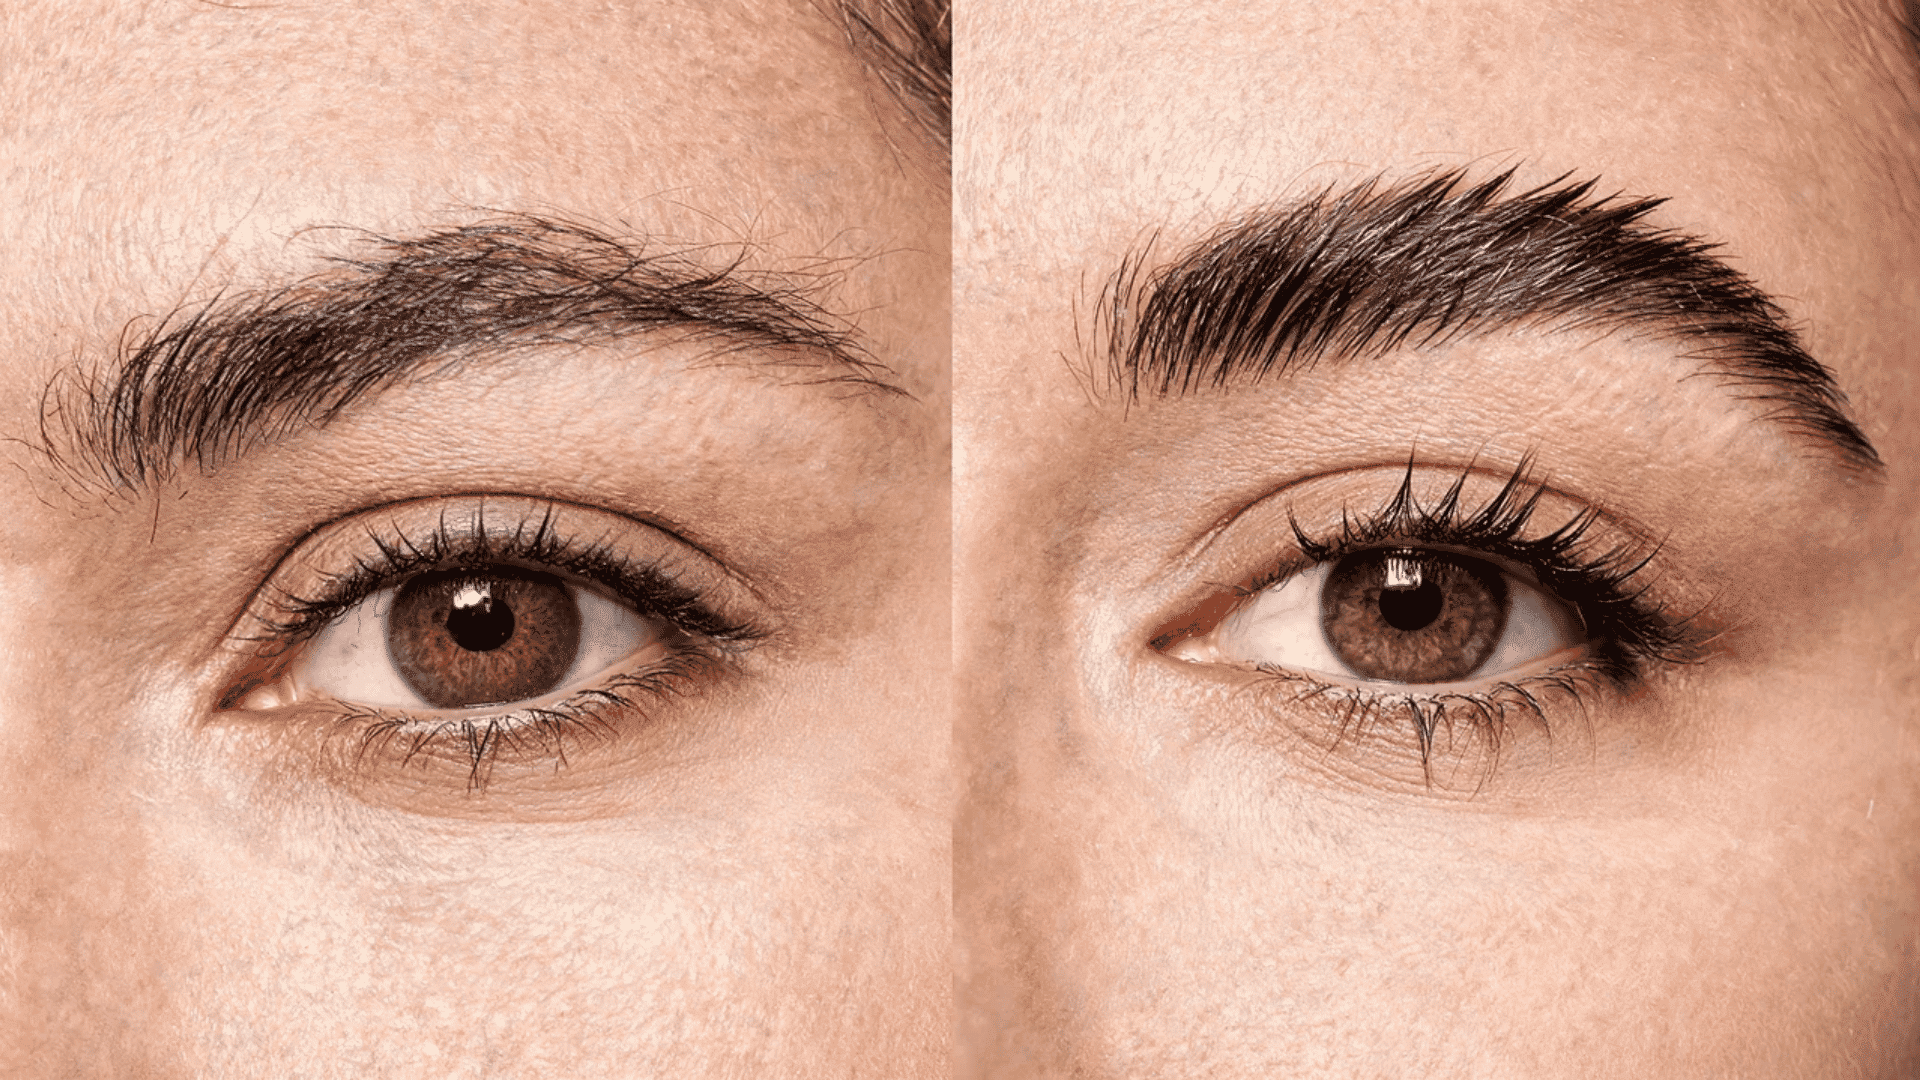
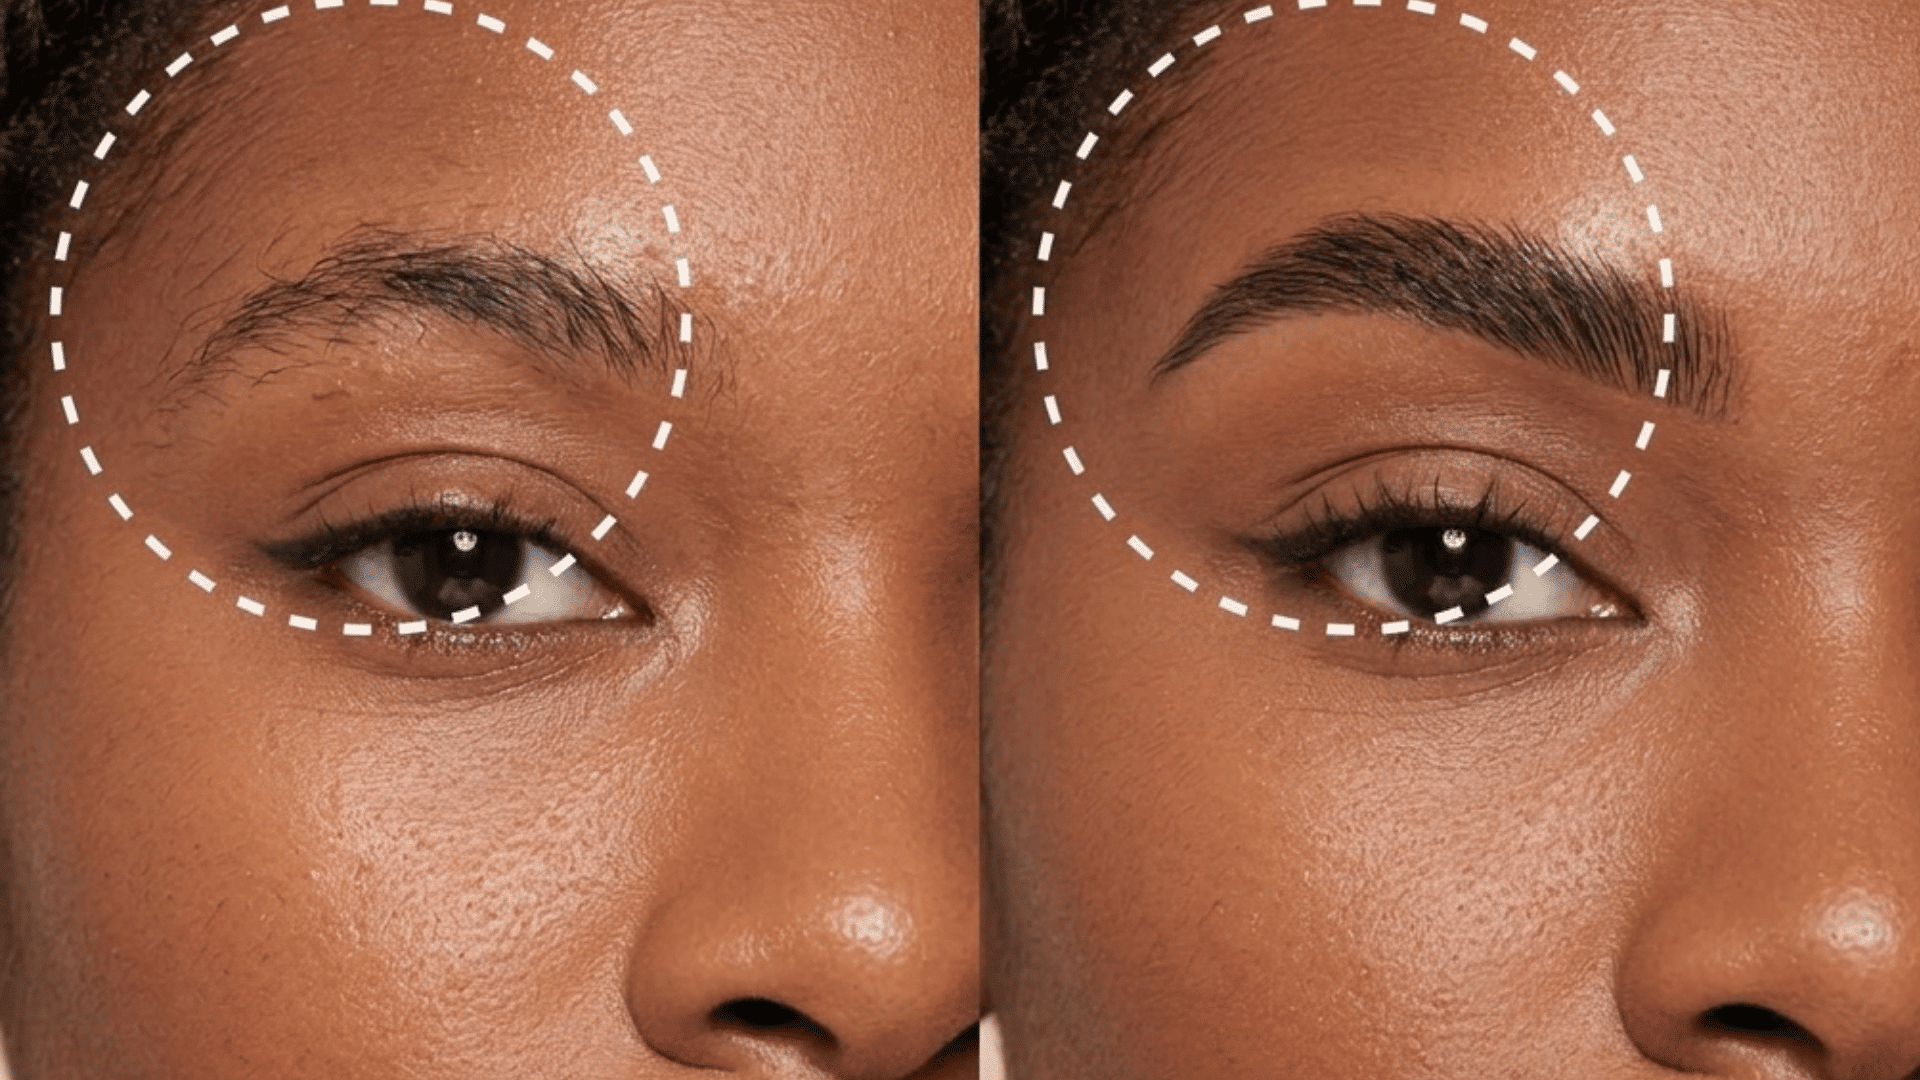
Brow lamination is a brow treatment that lifts, reshapes, and sets natural brow hairs to create a fuller, more defined appearance.
It uses a chemical solution to soften the hairs, making them easier to style upward or outward.
The treatment works with existing brow hair instead of adding pigment or extensions. It helps create a fluffy, brushed-up look while improving the overall shape and texture of the brows.
Brow lamination is suitable for people who want a polished brow style with minimal daily effort. The results typically last around four to six weeks with proper aftercare.
This is for general information only, not medical advice. If you have sensitive skin, allergies, or a skin condition near the brow area, check with a dermatologist or licensed brow technician before booking.
What to Know Before Brow Lamination Treatment?
A little prep and the right aftercare make a real difference in how brow lamination turns out. This is what matters most before you sit down in the chair:
- Brow lamination results typically last around four to six weeks with proper care.
- Arrive with clean brows free from makeup, oils, and skincare products.
- The treatment works best for natural brows needing lift, shape, and fullness.
- Keep brows dry for 24 hours to maintain the laminated shape.
If you’re already following a flawless skincare routine with retinol or acids, skip those products around the brow area for a few days before and after.
How Does Brow Lamination Work?
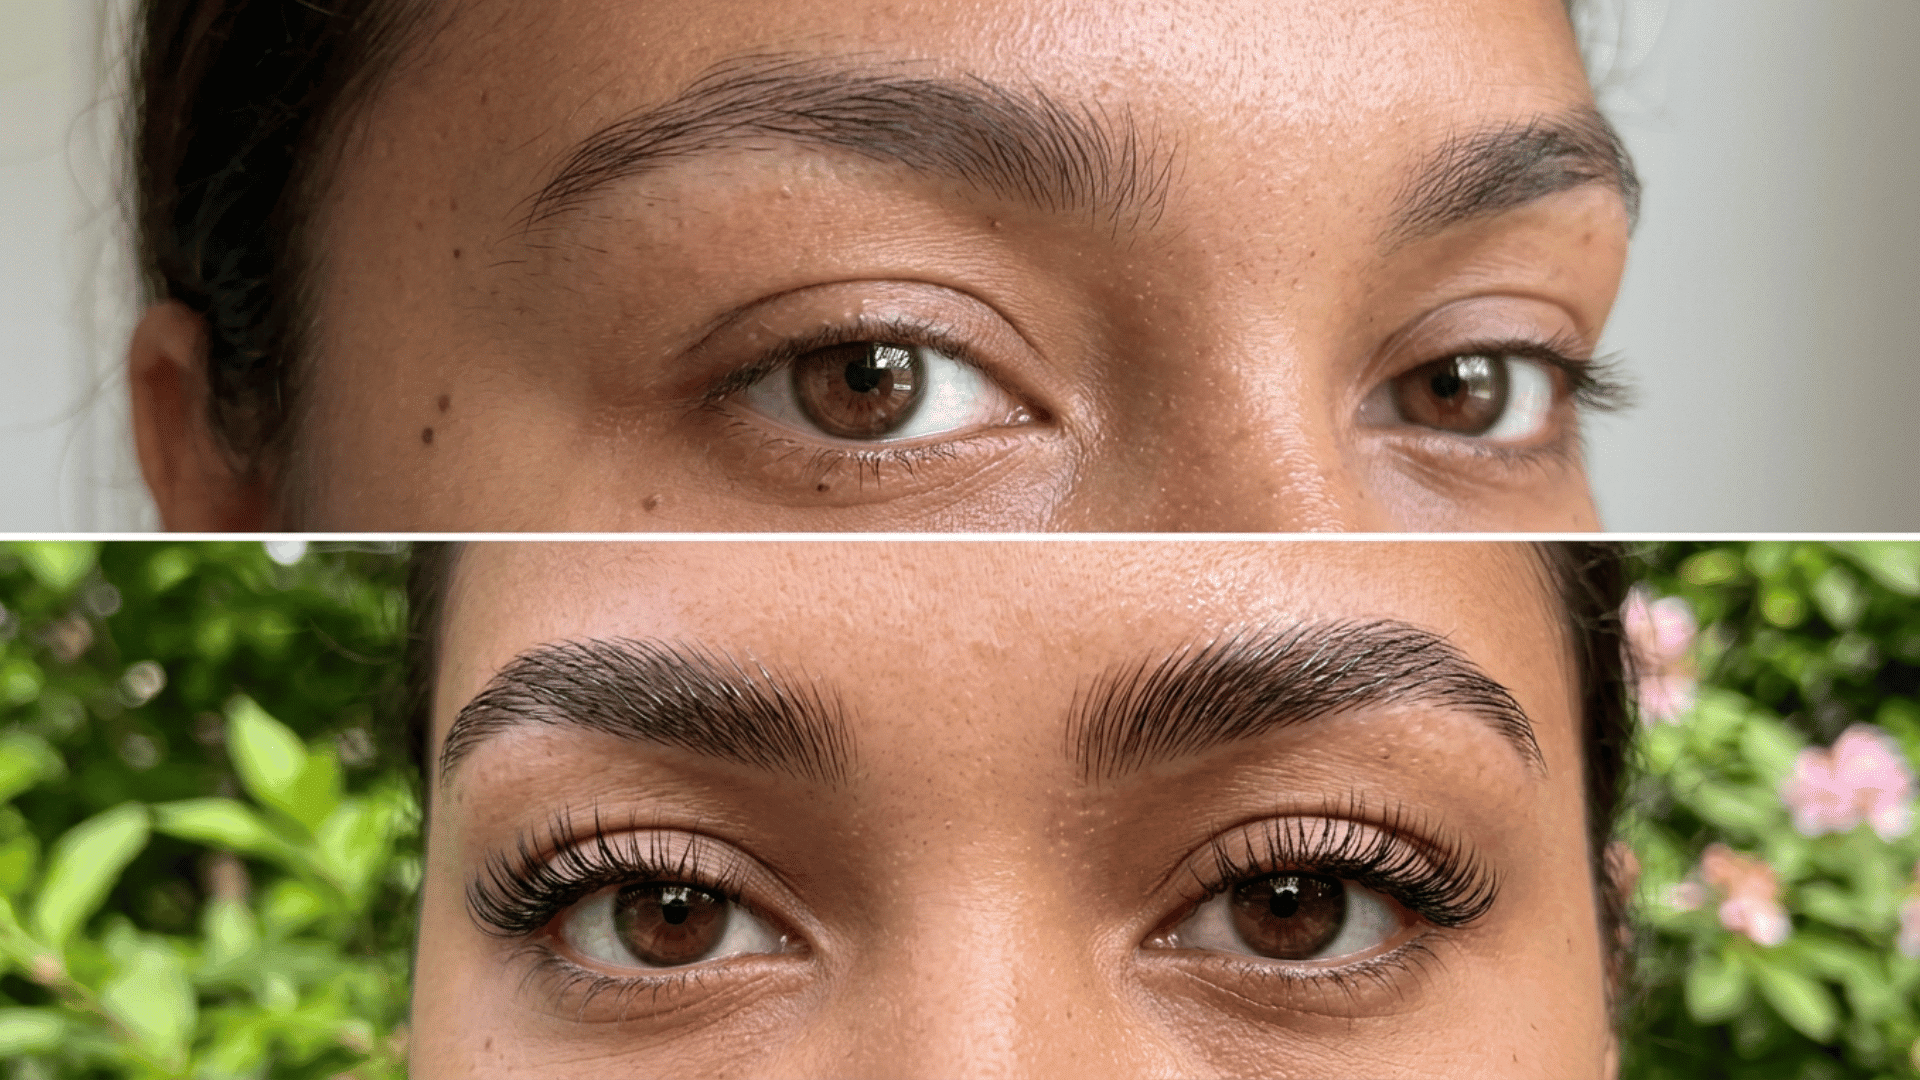
Brow lamination changes the direction of natural brow hairs so they sit in a smoother lifted shape and hold that styled look for weeks.
Step 1: Apply a Brow Lifting Solution
The brow lamination process starts with applying a keratin-infused solution to the brow hairs.
This formula softens the protein chains within the hairs, making them flexible enough to reshape without changing their natural texture.
Once softened, the brow hairs become easier to lift and style in a new direction.
This first step creates the foundation for the fuller, more lifted appearance associated with brow lamination.
Step 2: Soften and Reshape the Brow Hairs
After the solution has softened the hairs, the brow artist carefully brushes and smooths each strand into the desired position.
The hairs are guided upward or outward to create a more uniform and fluffy brow shape.
A covering film may be placed over the brows during this stage to keep them moist and help the hairs stay positioned correctly. This allows the artist to control the final shape before it is set.
Step 3: Remove the First Solution and Apply Neutralizer
After the brow hairs have been reshaped, the first solution is removed from the brows. The artist then applies a neutralizer to restore the hair structure and secure the new direction.
This step helps maintain the lifted shape created during the treatment.
The neutralizer ensures the brow hairs stay styled and hold their fuller appearance for several weeks.
Step 4: Tint the Brows for a Fuller Look
A brow tint can be added after the lamination process to enhance the color and make the brows appear more defined.
The tint darkens lighter hairs and creates a stronger overall appearance.
This optional step is especially useful for clients who want a more noticeable brow effect. It adds depth to the lifted hairs while keeping the brows looking fuller and more polished.
Step 5: Shape and Define the Brows
Once the brows are lifted and tinted, the artist completes the final shaping process. Extra hairs may be removed, and the edges cleaned to create a balanced, defined brow outline.
A small amount of highlighting or filling can also be added underneath the brow area. This enhances the shape and gives the finished look a cleaner, more structured appearance.
This tutorial is based on a helpful video by IPSY. You can check out the original video on their YouTube channel here or watch it below.
Brow Lamination Benefits and Results
Brow lamination can make natural brows look fuller, neater, and more shaped while keeping the overall finish soft and suitable for everyday wear.
- Creates fuller-looking brows: Brow lamination lifts and styles individual hairs to make brows appear thicker and more defined.
- Improves brow shape: The treatment helps control uneven or downward-growing hairs by placing them in a smoother, uniform direction.
- Reduces daily styling time: Laminated brows stay brushed and shaped, requiring less effort during your regular makeup routine.
- Provides long-lasting results: The lifted brow effect usually remains visible for around four to six weeks with proper aftercare
How Much Do Laminated Brows Cost?
Brow lamination usually costs around $50 to $150 per session, but prices can vary based on the salon, location, and services included.
Some high-end studios or salons in larger cities may charge $200 or more, especially when you add tinting, waxing, or brow shaping.
A session often takes about 45 to 60 minutes. Package prices may also be higher if you combine several brow services.
Since prices vary from one salon to another, check the current rate, what is included, and the technician’s qualifications before booking.
What is Brow Lamination vs Microblading?
Both treatments improve eyebrow appearance, but they work in very different ways and suit different starting points, as this comparison shows
| Feature | Brow Lamination | Microblading |
|---|---|---|
| Method | Uses a chemical treatment to lift and set natural brow hairs upward. | Uses tiny blade strokes to deposit pigment into the skin. |
| Purpose | Creates a fuller, brushed-up, and more defined brow shape. | Mimics natural brow hairs to fill sparse areas. |
| Results Duration | Usually lasts around 4–6 weeks. | Results can last about 12–18 months. |
| Best For | People with existing brow hair wanting a styled look. | People with thin or uneven brows needing added definition. |
Brow Lamination Aftercare Tips
Proper aftercare protects your results and keeps brow hairs healthy after the treatment. These five habits cover most of what matters:
- Keep brows dry
- Skip harsh skincare nearby
- Brush gently daily
- Apply nourishing oil
- Avoid steam and heavy sweat
Conclusion
Brow lamination offers a simple way to create fuller, lifted brows while working with your natural hair.
Knowing what brow lamination involves helps you understand the treatment, the results to expect, and the care needed to keep the look going.
With the right prep and aftercare, it can leave your brows looking more defined without adding daily styling time to your routine. It’s a low-commitment way to try a new brow shape before considering something more permanent.
What’s your favorite brow style? Share your thoughts in the comments below
Frequently Asked Questions
Is Brow Lamination Safe for Sensitive Skin?
Brow lamination can be safe for sensitive skin when performed properly. A patch test and consultation are recommended to reduce the risk of irritation or reactions.
Can You Wash Your Face After Brow Lamination?
Avoid washing your face or wetting your brows for the first 24 hours after lamination. After that, you can gently resume your normal skincare routine.
Is Brow Lamination the Same as an Eyebrow Perm?
No. Brow lamination is often called an eyebrow perm because both reshape hair, but lamination is usually gentler, and its results generally last only several weeks.
Does Brow Lamination Hurt?
Brow lamination is not typically painful. Some people feel mild tingling or warmth from the chemical solution, but you should tell your technician right away if you notice real stinging or burning.