A slick ponytail can look polished in minutes, but bumps, flyaways, and too much product can ruin the finish fast.
With the right prep, slicked-back hair can look neat, soft, or casual without feeling stiff. You can also adjust the style for straight, wavy, curly, thick, or fine hair.
All you need to know are the products that work well, the right brushing method, ponytail placement, and ways to avoid common styling mistakes.
Get ready for a natural or polished finish you can create in under five minutes, once you know how to do a slicked-back ponytail with less fuss and better control.
How to Do a Basic Slicked-Back Ponytail
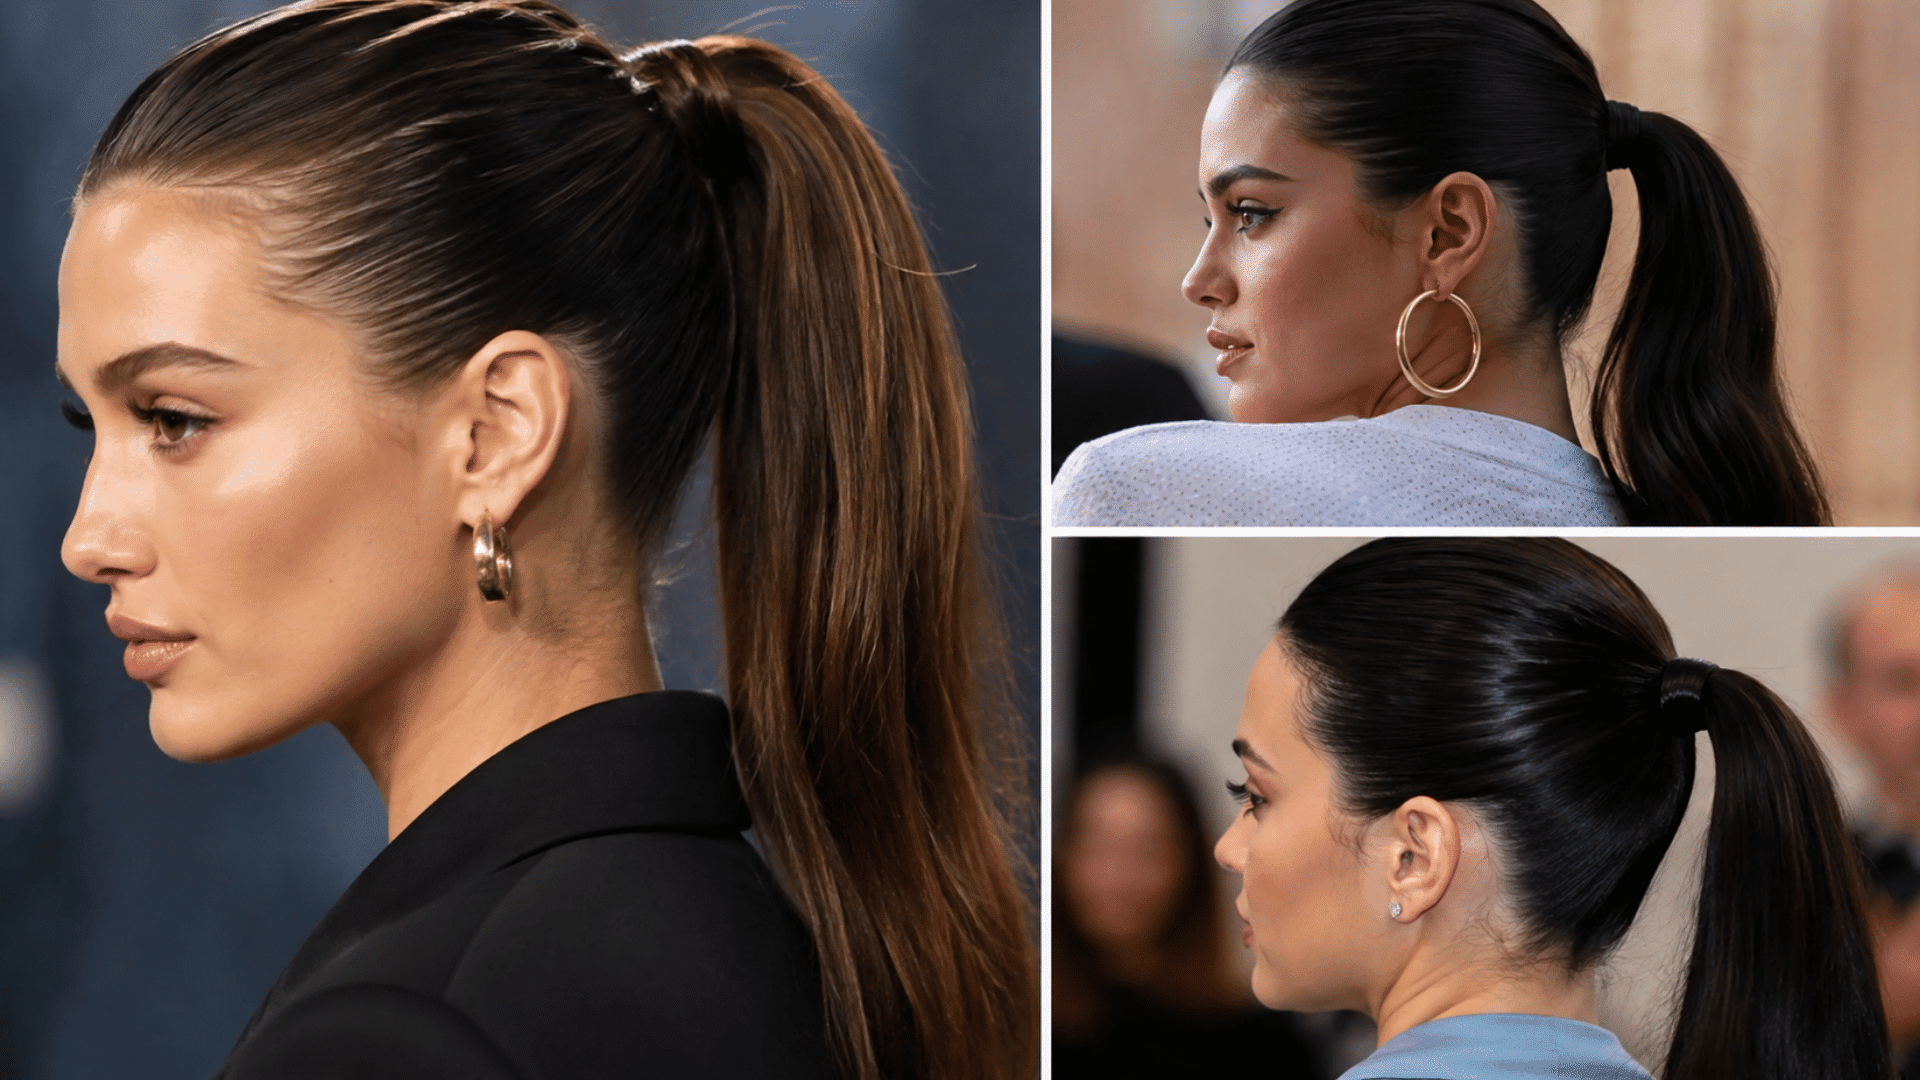
Step 1: Detangle First
Brush out every knot with a wide-tooth comb before adding any product, so the ponytail pulls back smoothly.
Step 2: Pick Your Part
A middle part gives the classic sleek look, a deep side part adds definition, and skipping the part gives a rounder finish.
Step 3: Apply Product Sparingly
Rub a dime-size amount of gel or cream between your palms, then smooth it over the roots and hairline first.
Step 4: Brush Back Firmly
Use a boar-bristle brush or fine-tooth comb to guide the hair back toward your chosen ponytail height in one motion.
Step 5: Secure and Smooth
Gather the hair, secure it with a no-crease elastic, then brush the tail once more to catch anything you missed.
Step 6: Finish and Set
Smooth flyaways with a touch more product on your fingertips, then lock everything in place with a light mist of hairspray.
Slicked Back Ponytail Style Ideas
Different ponytail placements and finishes can change the whole look, so choose a style that suits your hair texture and the occasion.
1. Low Middle Part Ponytail
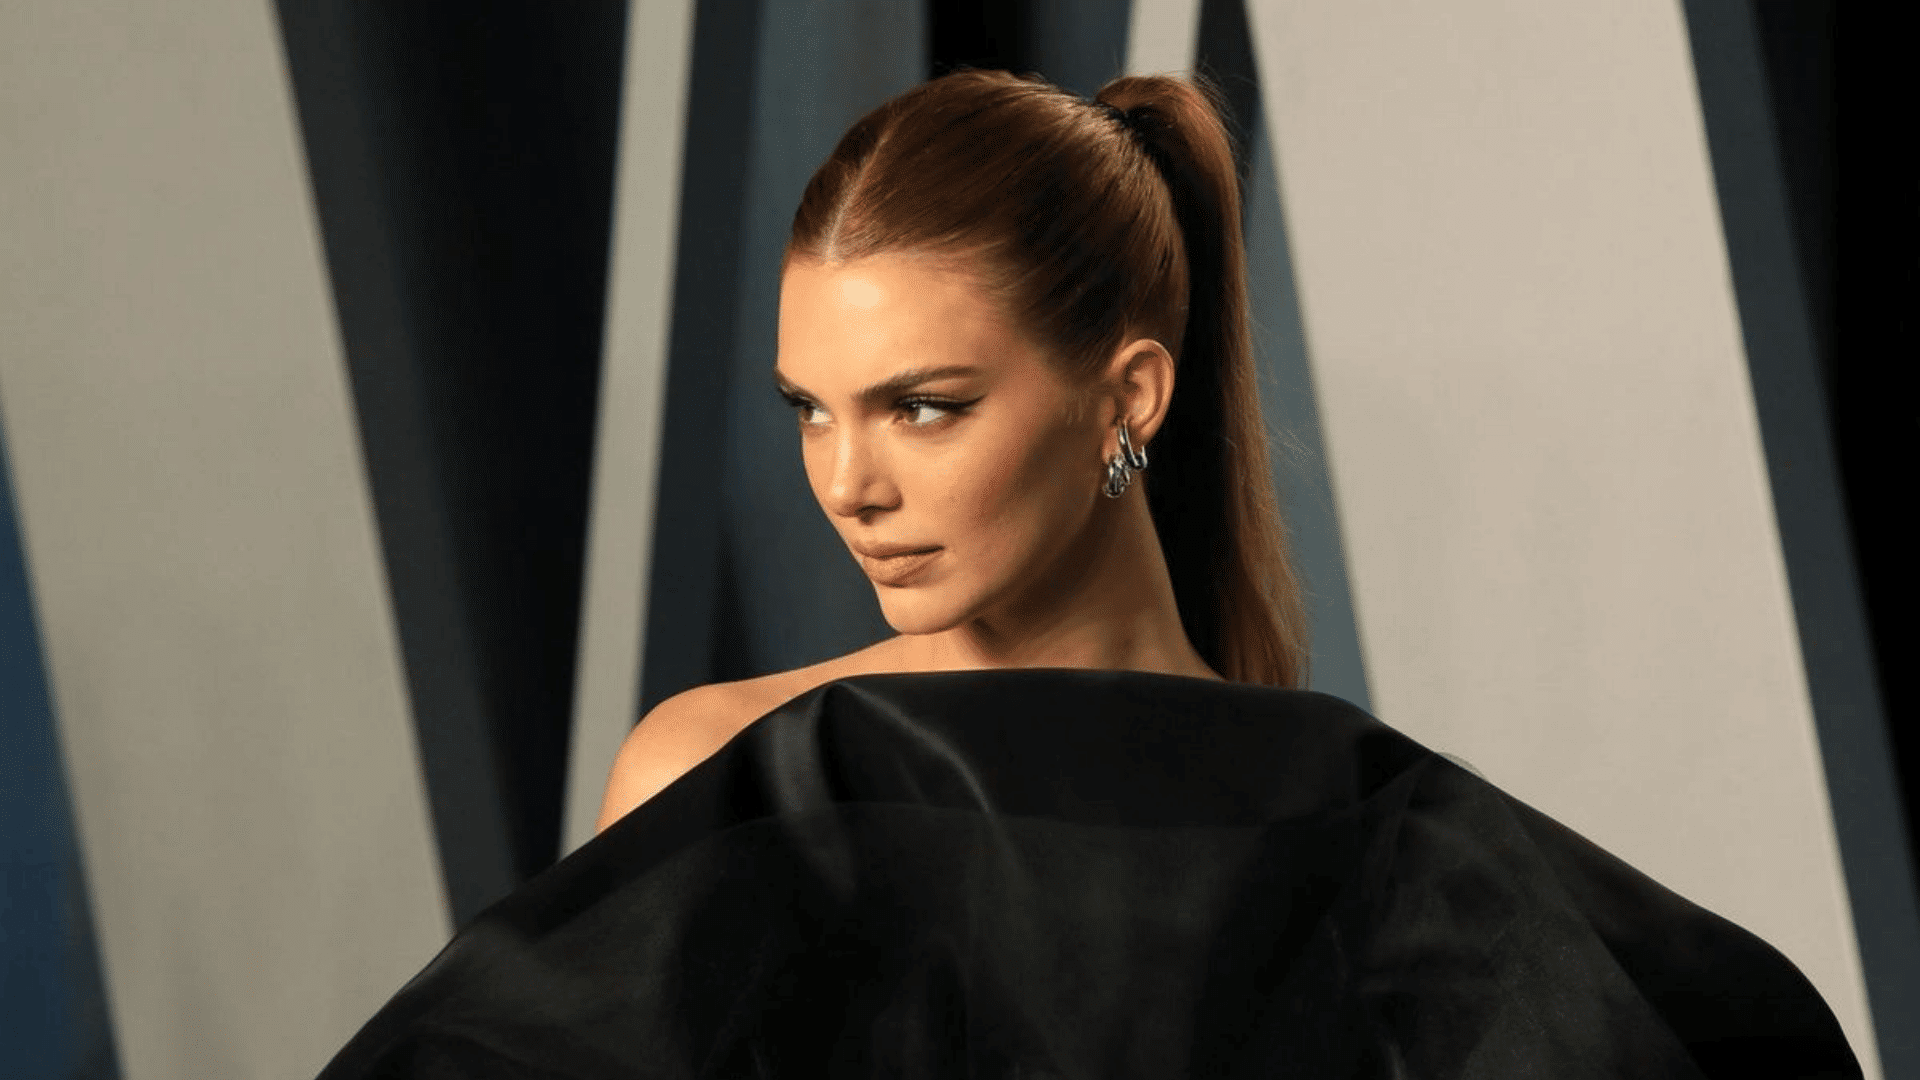
Source: Vogue
Create a clean middle part and secure the ponytail low at the nape. This style works well for office wear, dinners, and formal outfits.
Tip: Use a rat-tail comb to sharpen the part before brushing the hair back. A light gel can help keep both sides smooth.
2. High Partless Ponytail
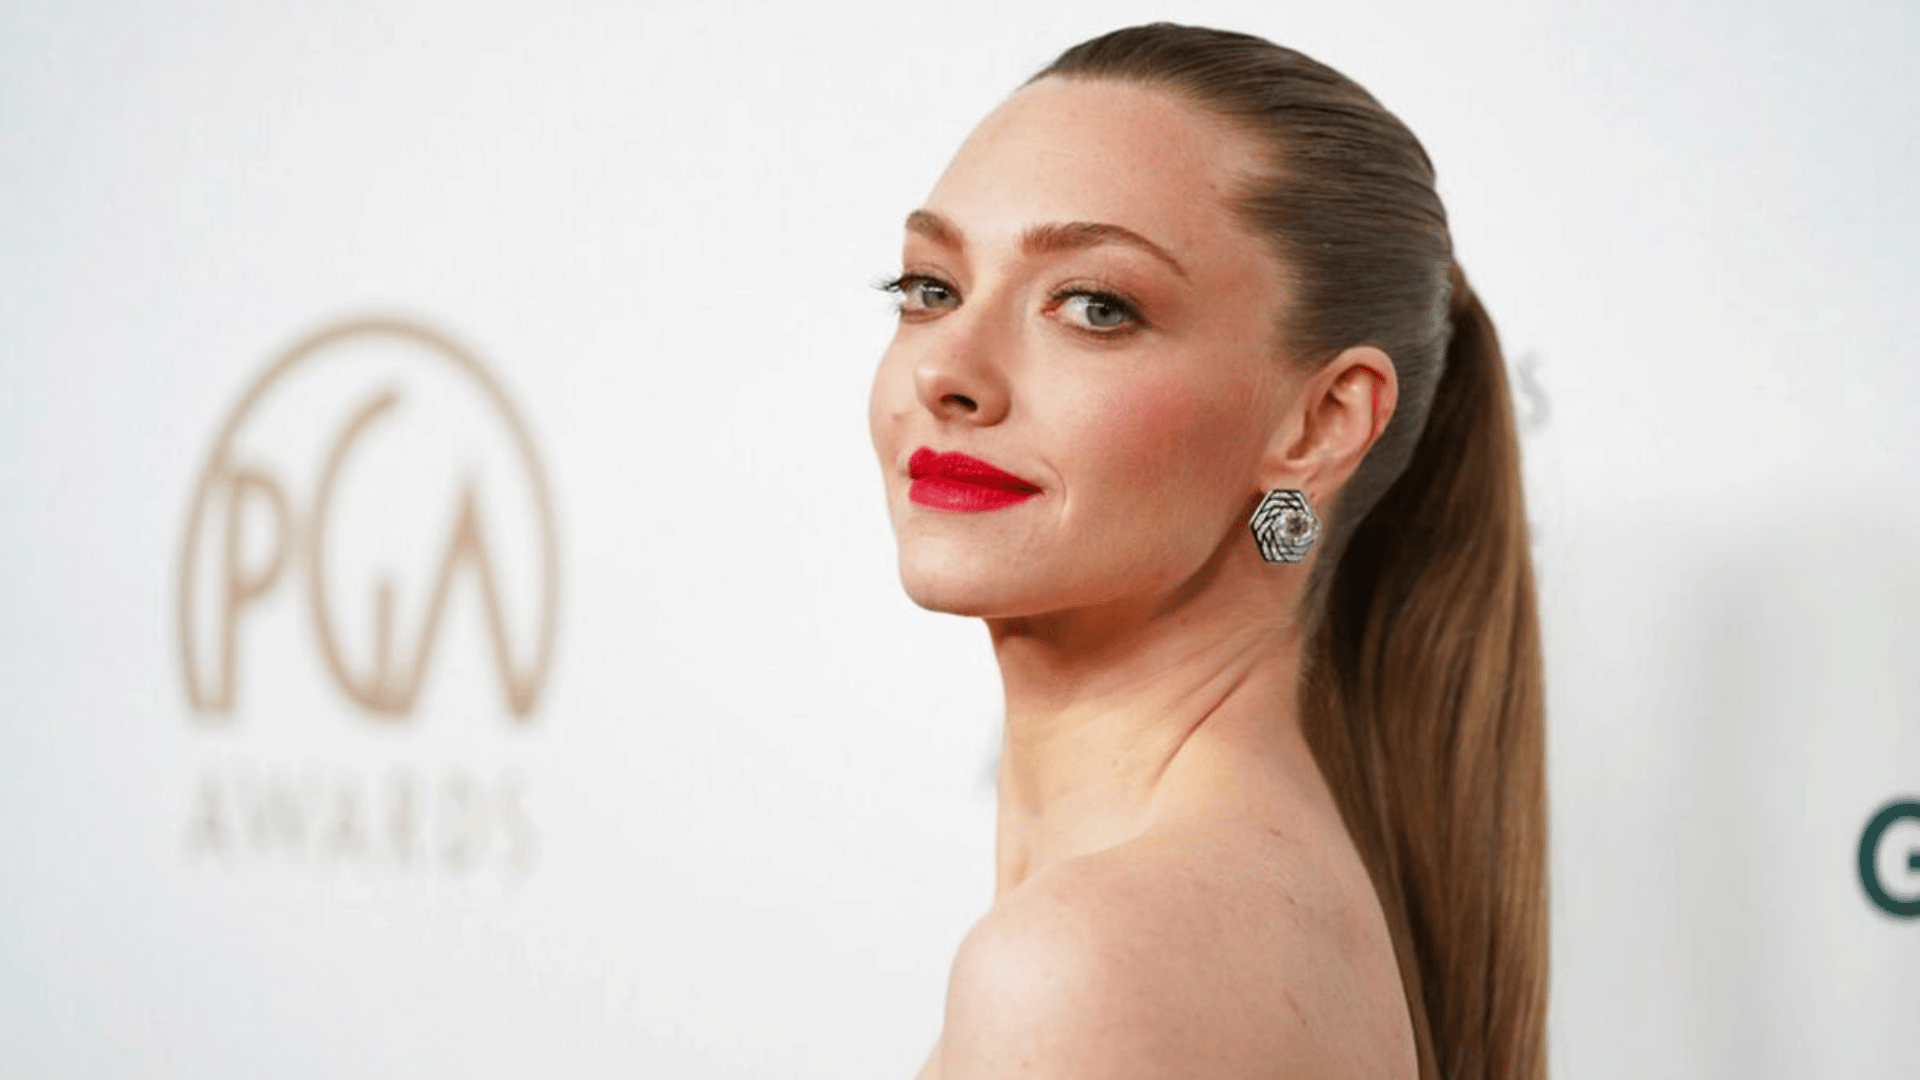
Source: HuffingtonPost
Create a clean side part, then smooth both sections toward the back using a brush or comb. Gather the hair evenly, keeping the surface sleek and neat.
Secure the ponytail at a low or medium height with a hair tie, ensuring it feels comfortable and stays firmly in place.
3. Soft Casual Slick Back
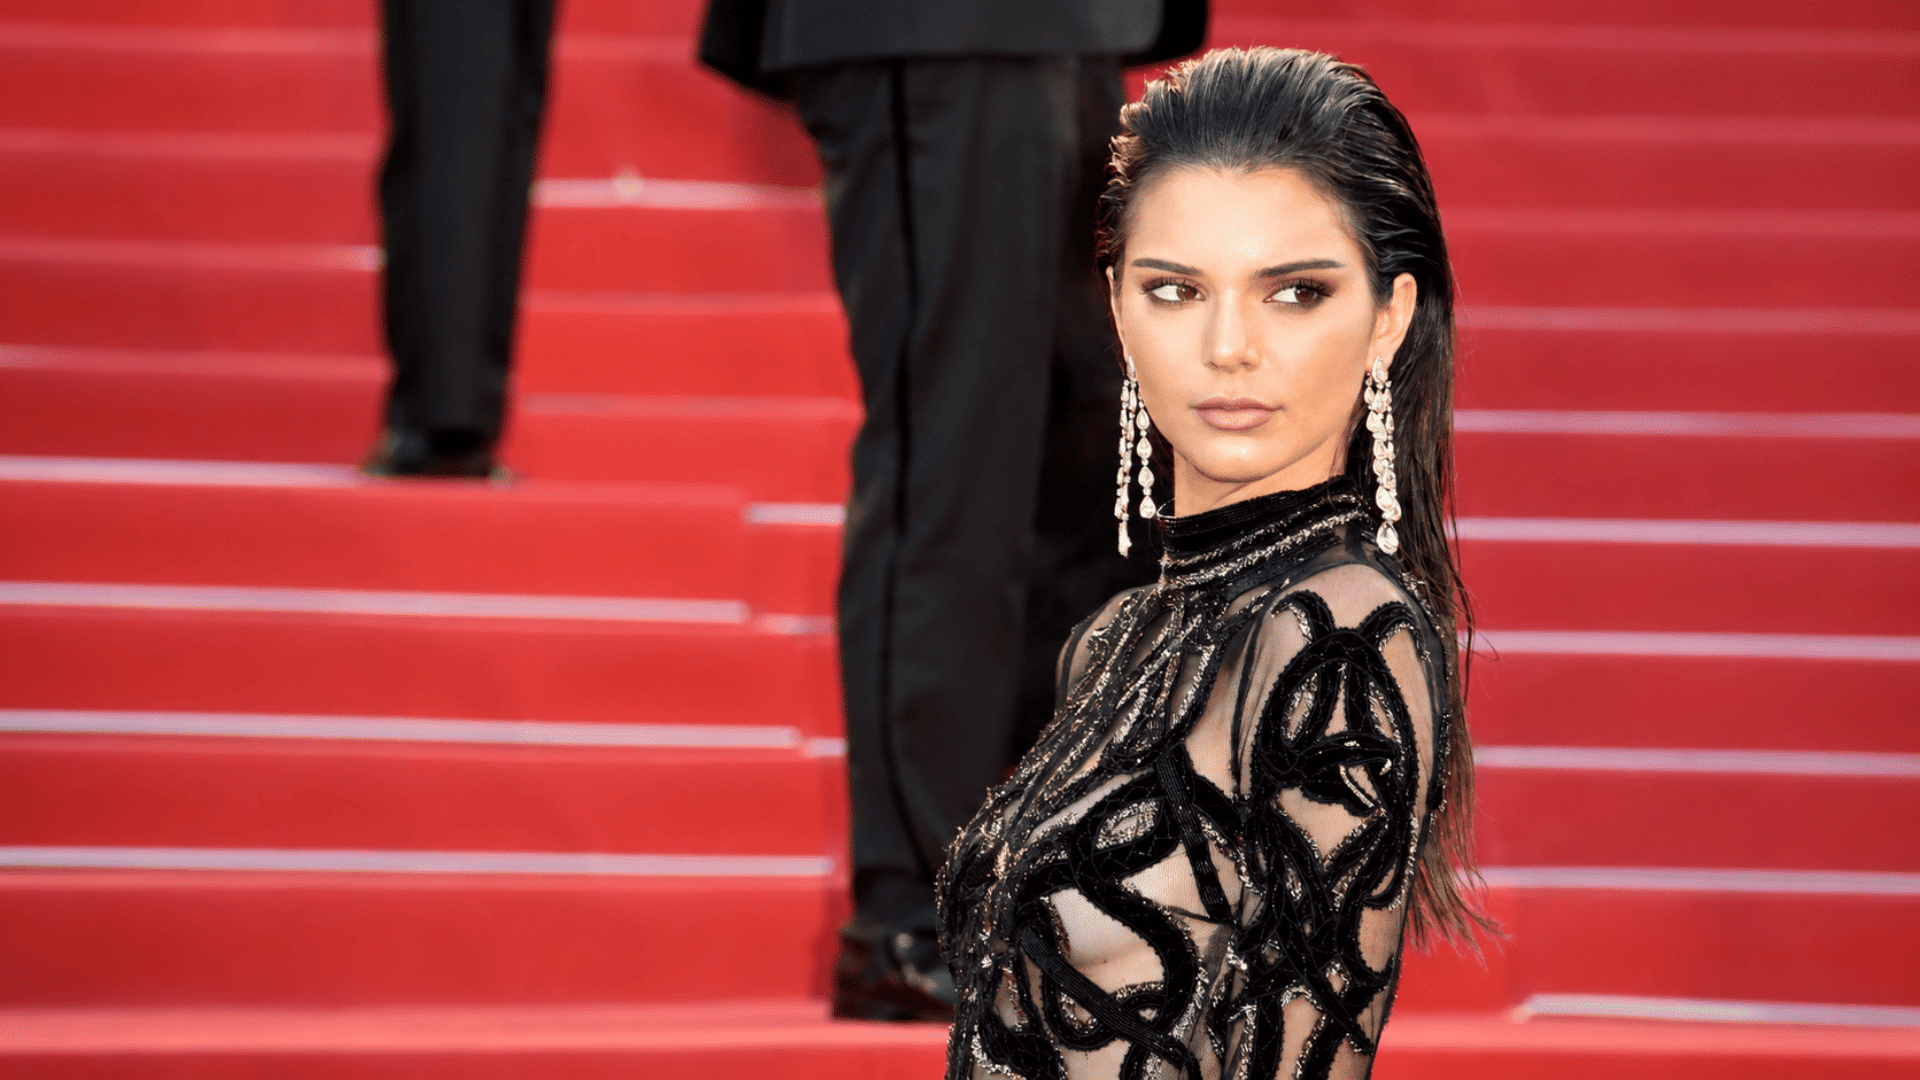
Source: Teen Vogue
Use less product and keep a little natural texture through the ponytail. This gives a relaxed finish without looking messy.
Tip: Apply a small amount of styling cream instead of heavy gel so the hair stays flexible and soft.
4. Side Part Slick Ponytail
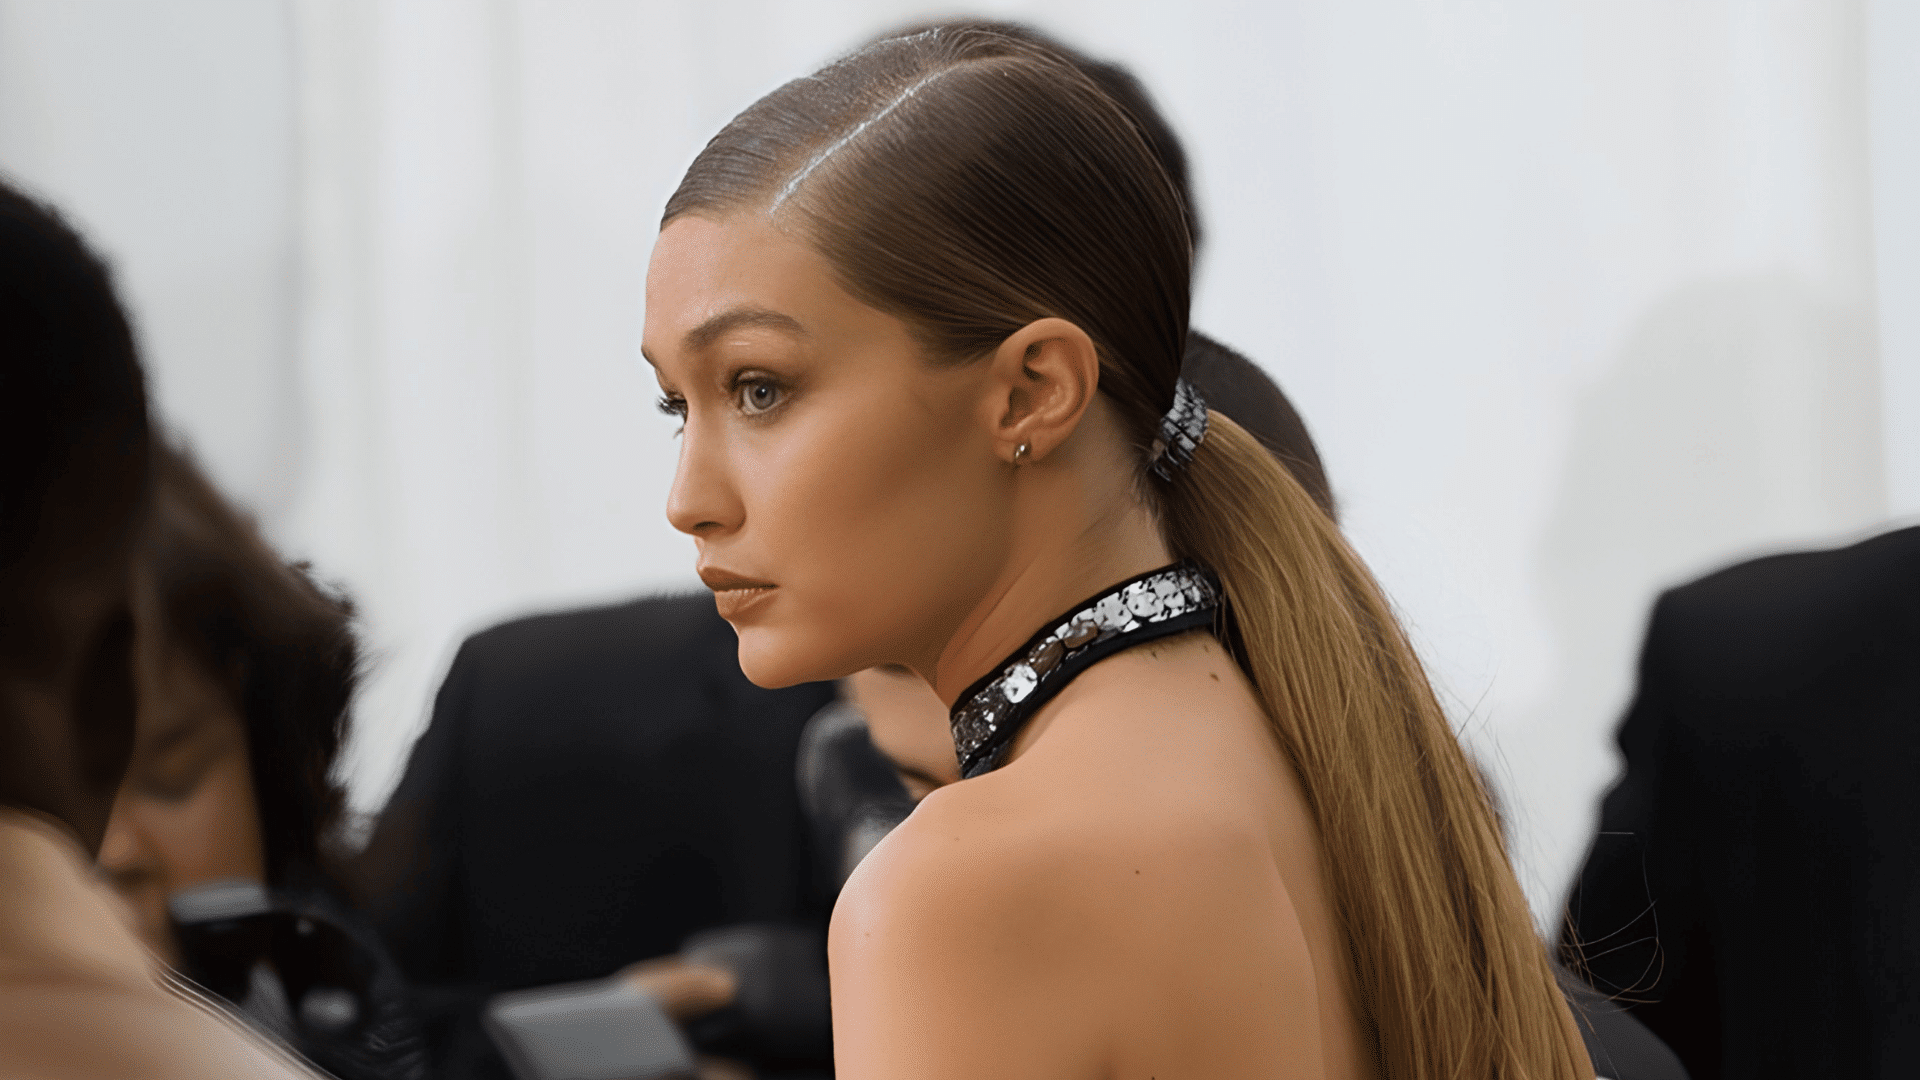
Source: Elle
Create a clean, defined side part and gently smooth both sections toward the back.
Gather the hair neatly without creating bumps or uneven areas, then secure the ponytail at a low or medium height using a strong hair tie.
Keep the finish sleek, polished, and comfortable around the hairline.
5. Curly Slick Back Ponytail
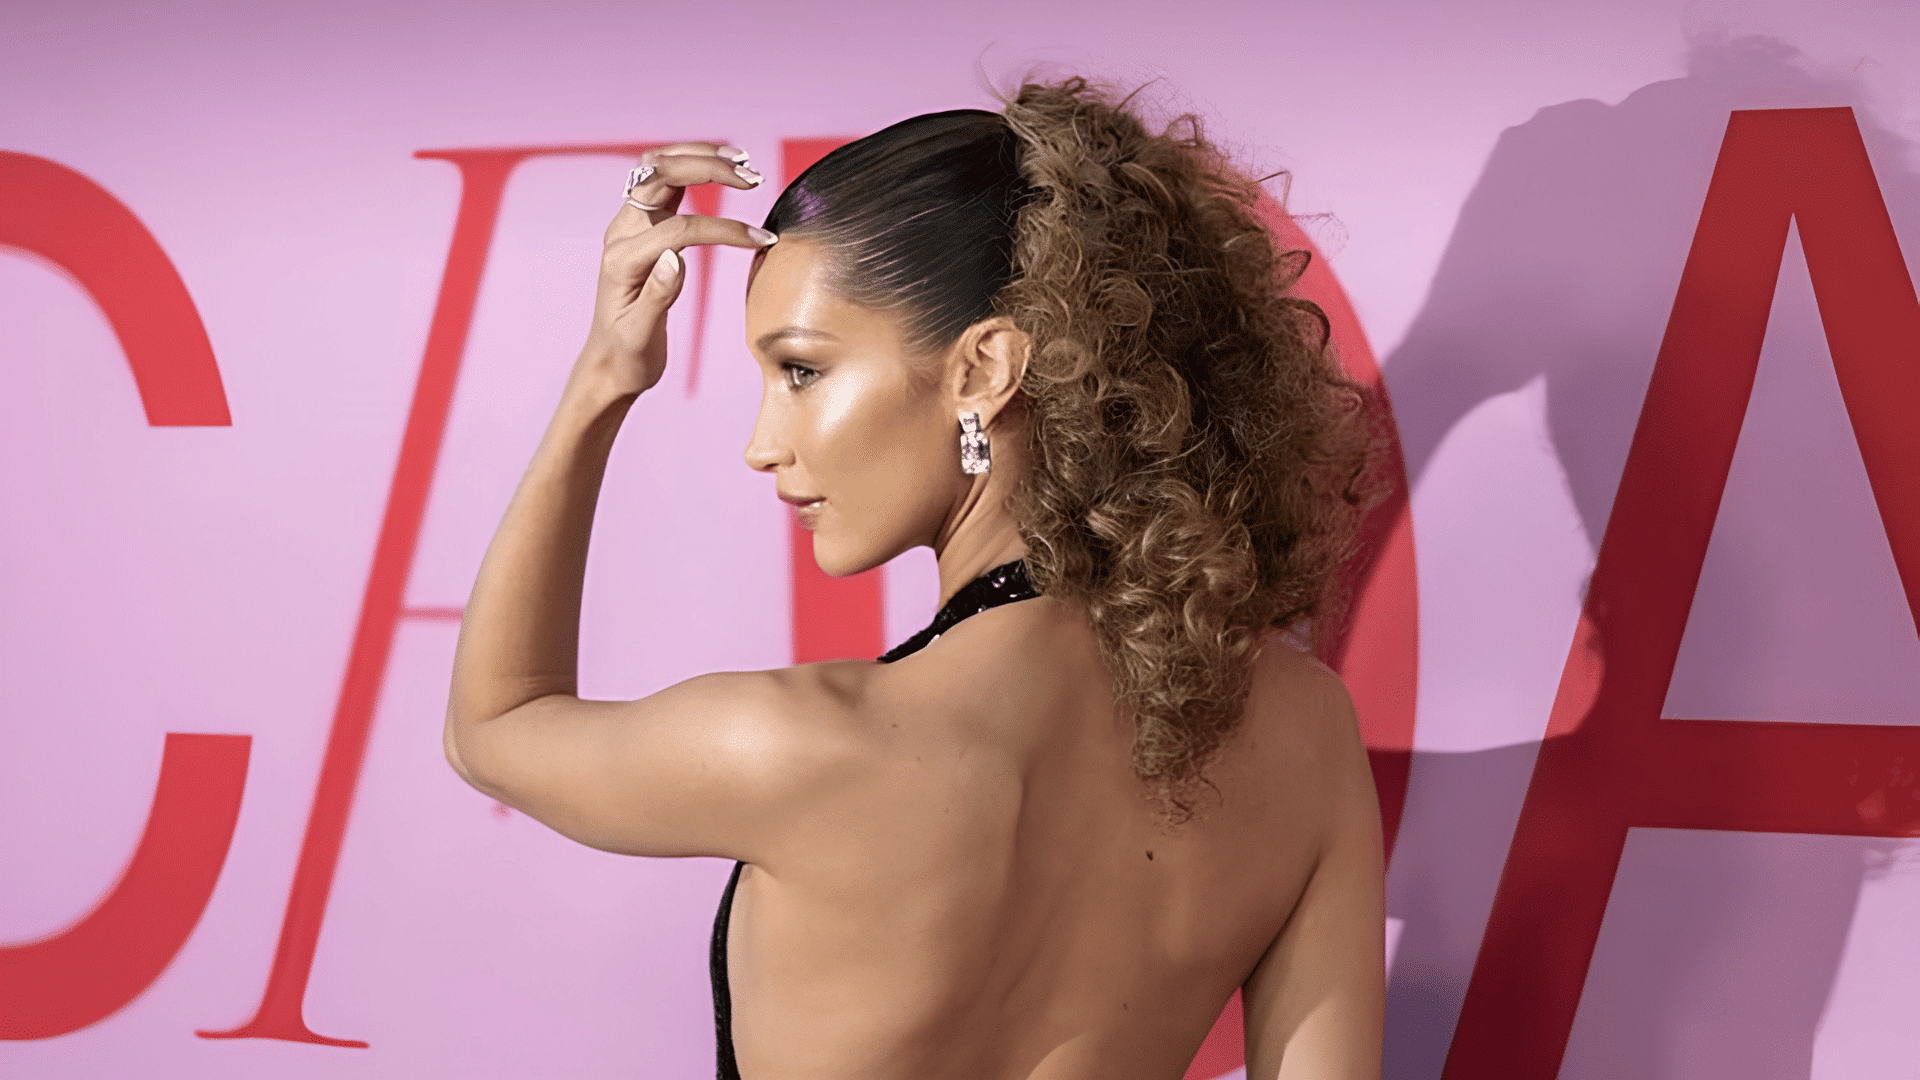
Source: Fashion Magazine
Smooth the roots carefully with a brush or comb, keeping the curls in the ponytail untouched. Avoid brushing through the textured lengths, as this can loosen the curl pattern and create frizz.
Focus on creating a sleek, polished front while allowing the ponytail’s natural curls and volume to remain fully visible.
6. Braided Slick Back Ponytail
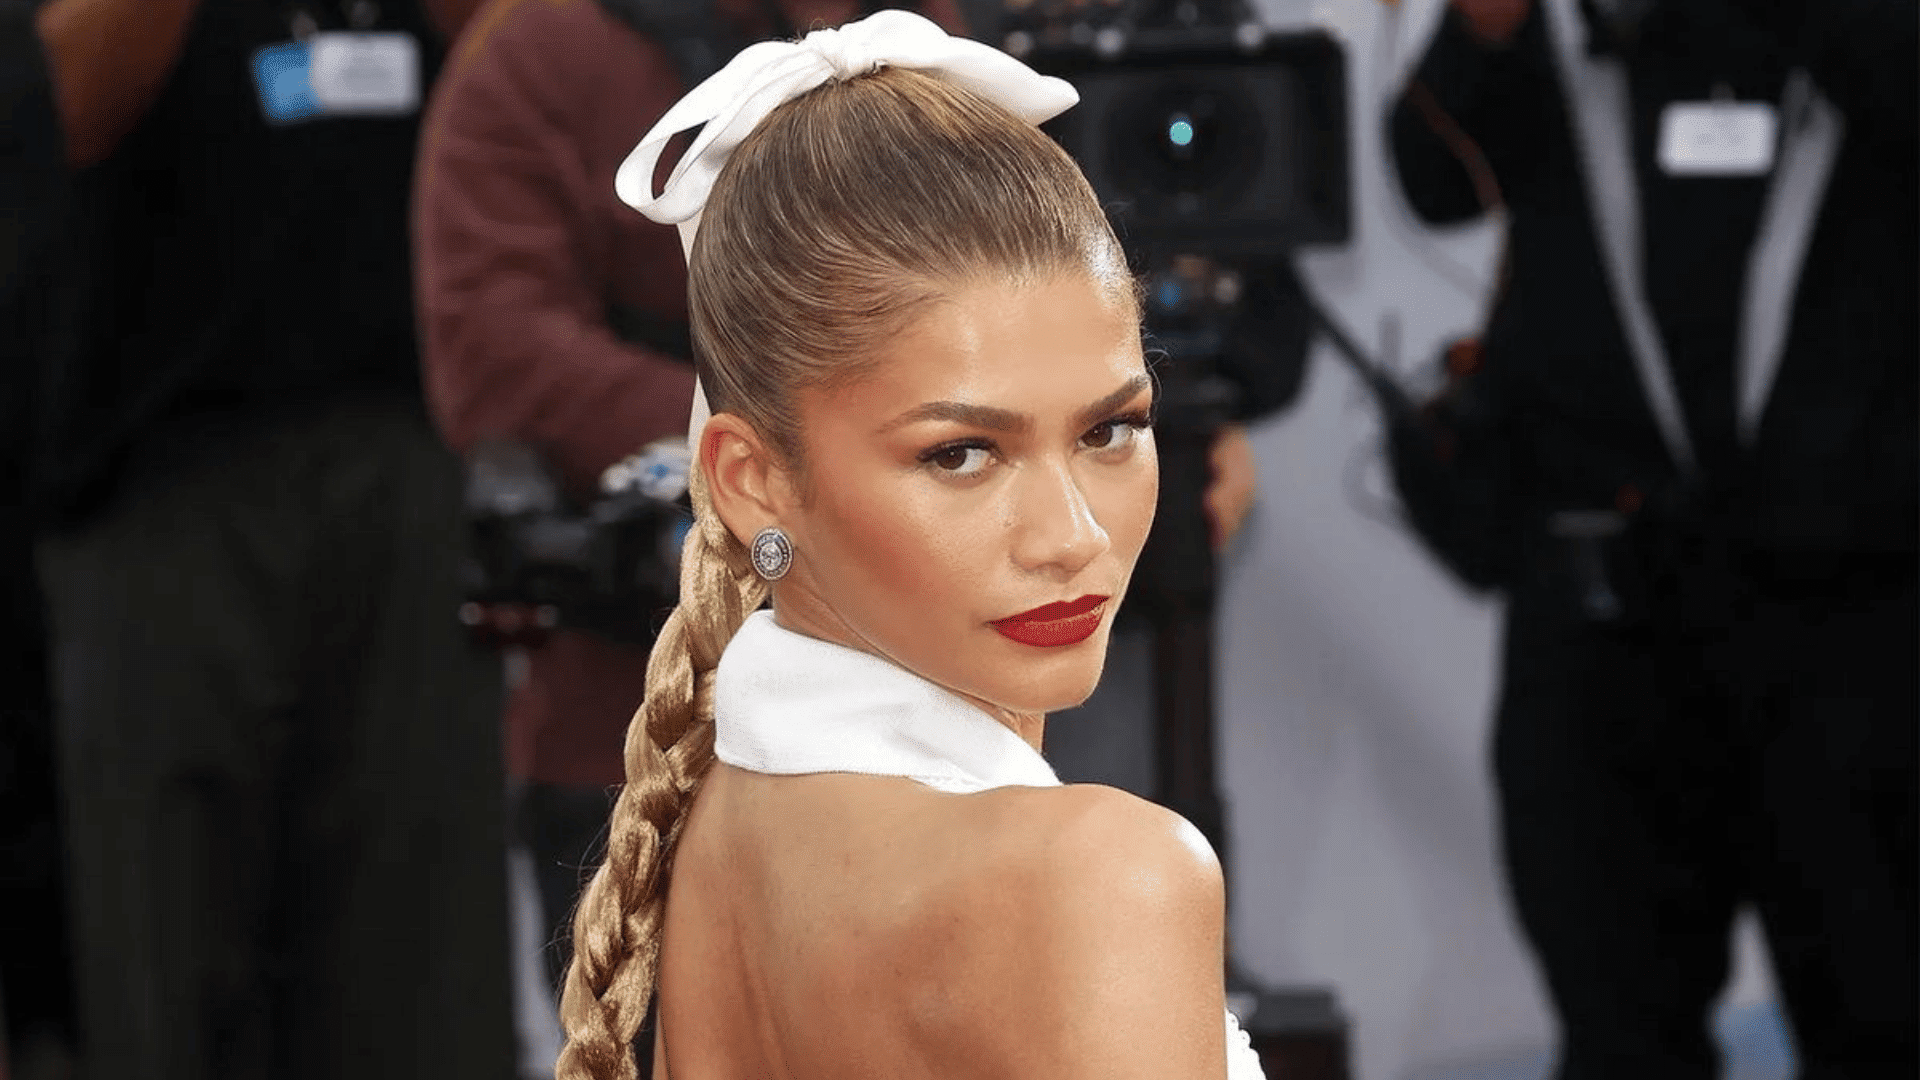
Source: WMagazine
Secure a smooth ponytail first, then braid the loose length. This adds structure and keeps the hair controlled for longer.
Tip: Add a small amount of hair oil to the ponytail before braiding to reduce frizz and give the braid a smoother finish.
7. Bubble Slick Back Ponytail
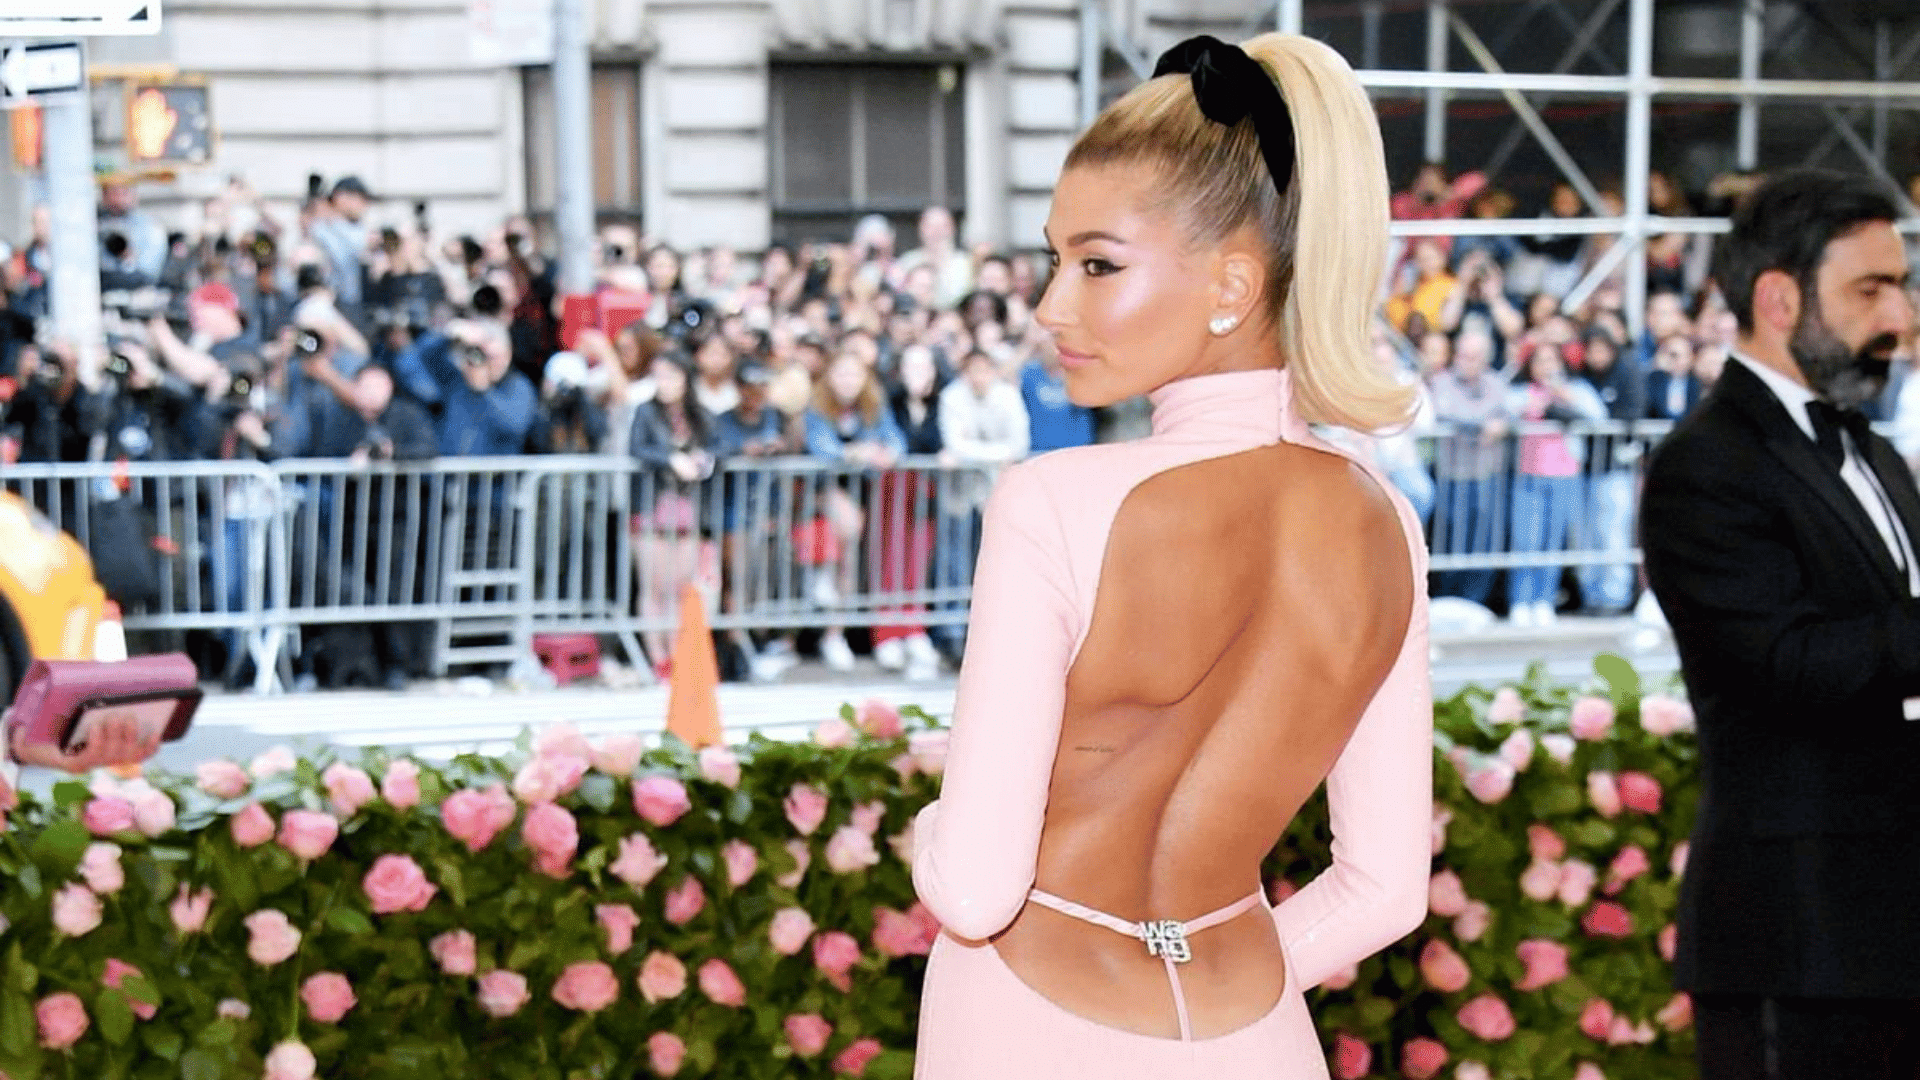
Source: ELLE
Secure the ponytail firmly at the base, then add small elastics evenly down its length. Leave enough space between each elastic to form defined sections.
Gently pull the hair outward around each section to create rounded bubble shapes, keeping the tension even for a balanced, polished, and voluminous finish.
8. Wrapped Base Ponytail
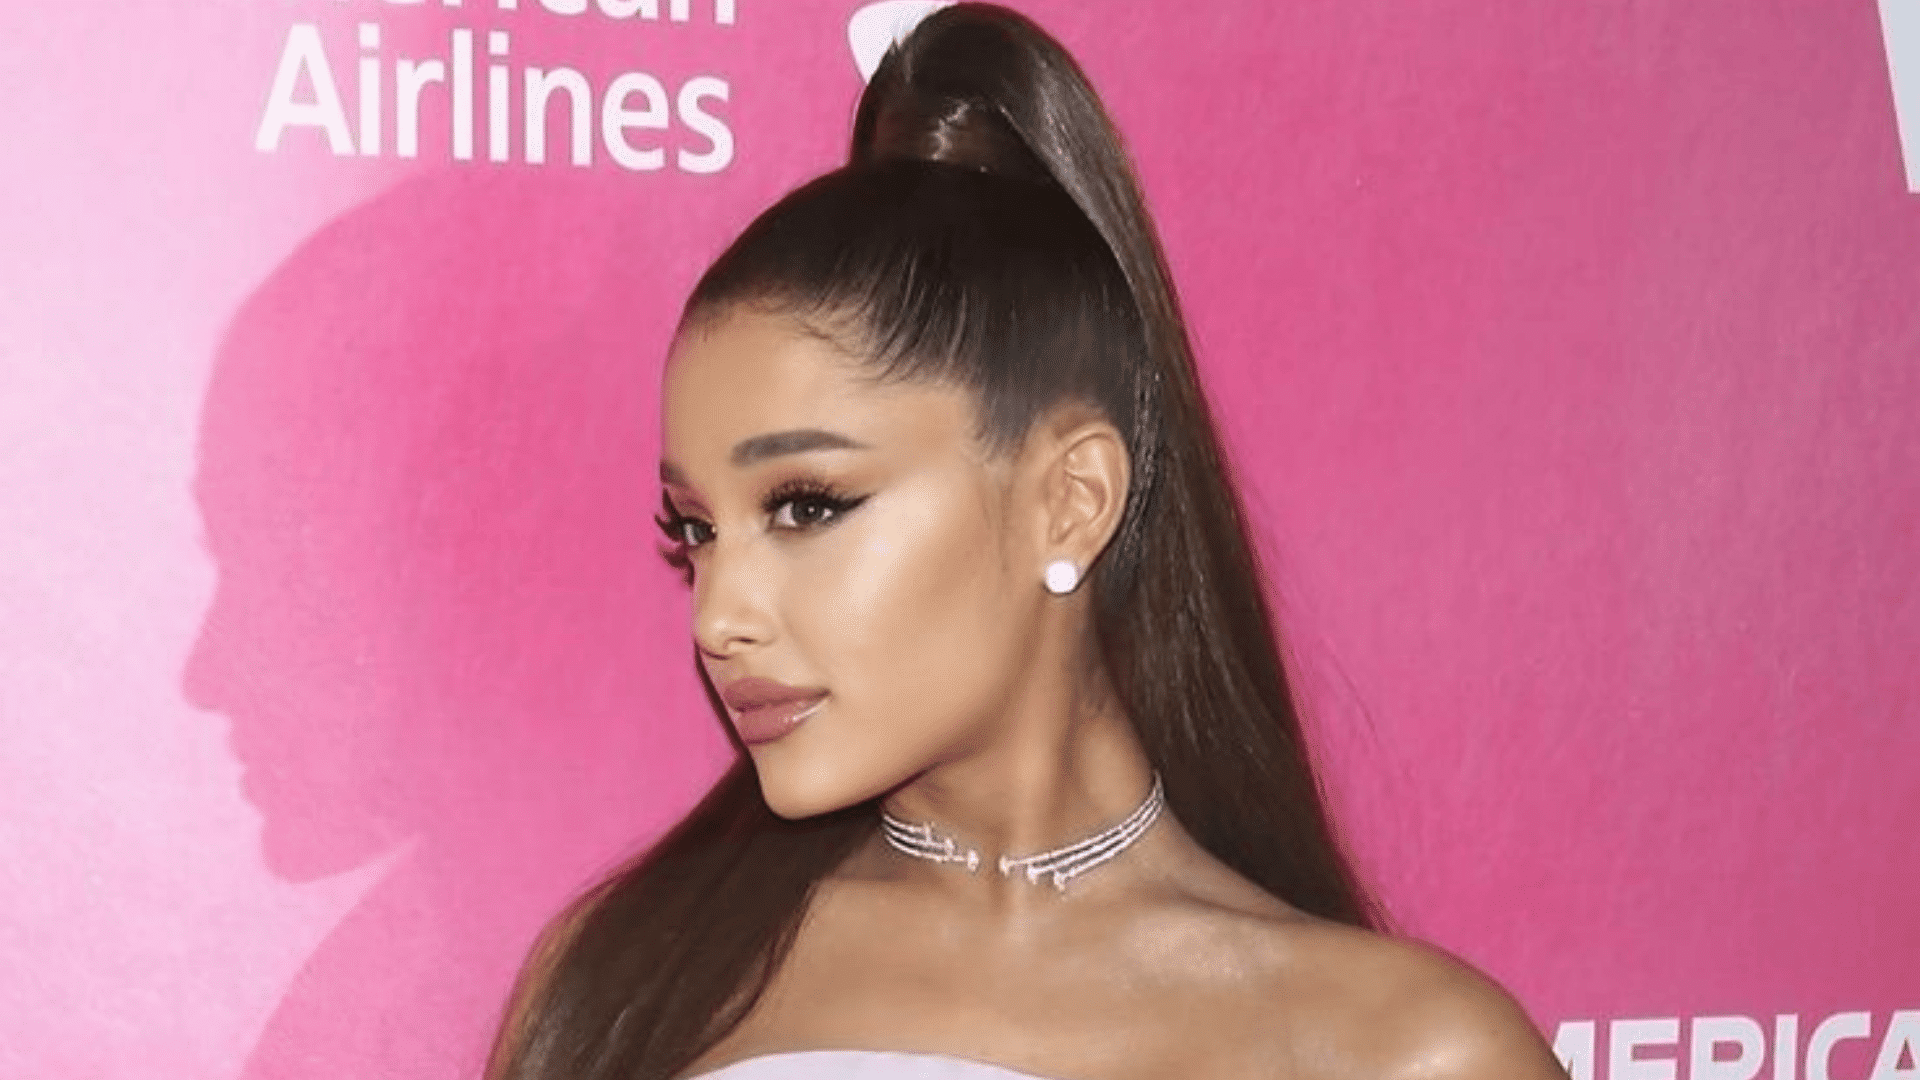
Source: Billboard
This small trick makes a huge difference in photos. Take a small strand of hair from underneath the ponytail and wrap it neatly around the visible hair tie.
Continue wrapping until the elastic is fully covered, keeping the strand smooth and secure.
Tuck the end underneath the ponytail and fasten it discreetly with a bobby pin for a polished finish.
9. Low Sleek Curly Ponytail
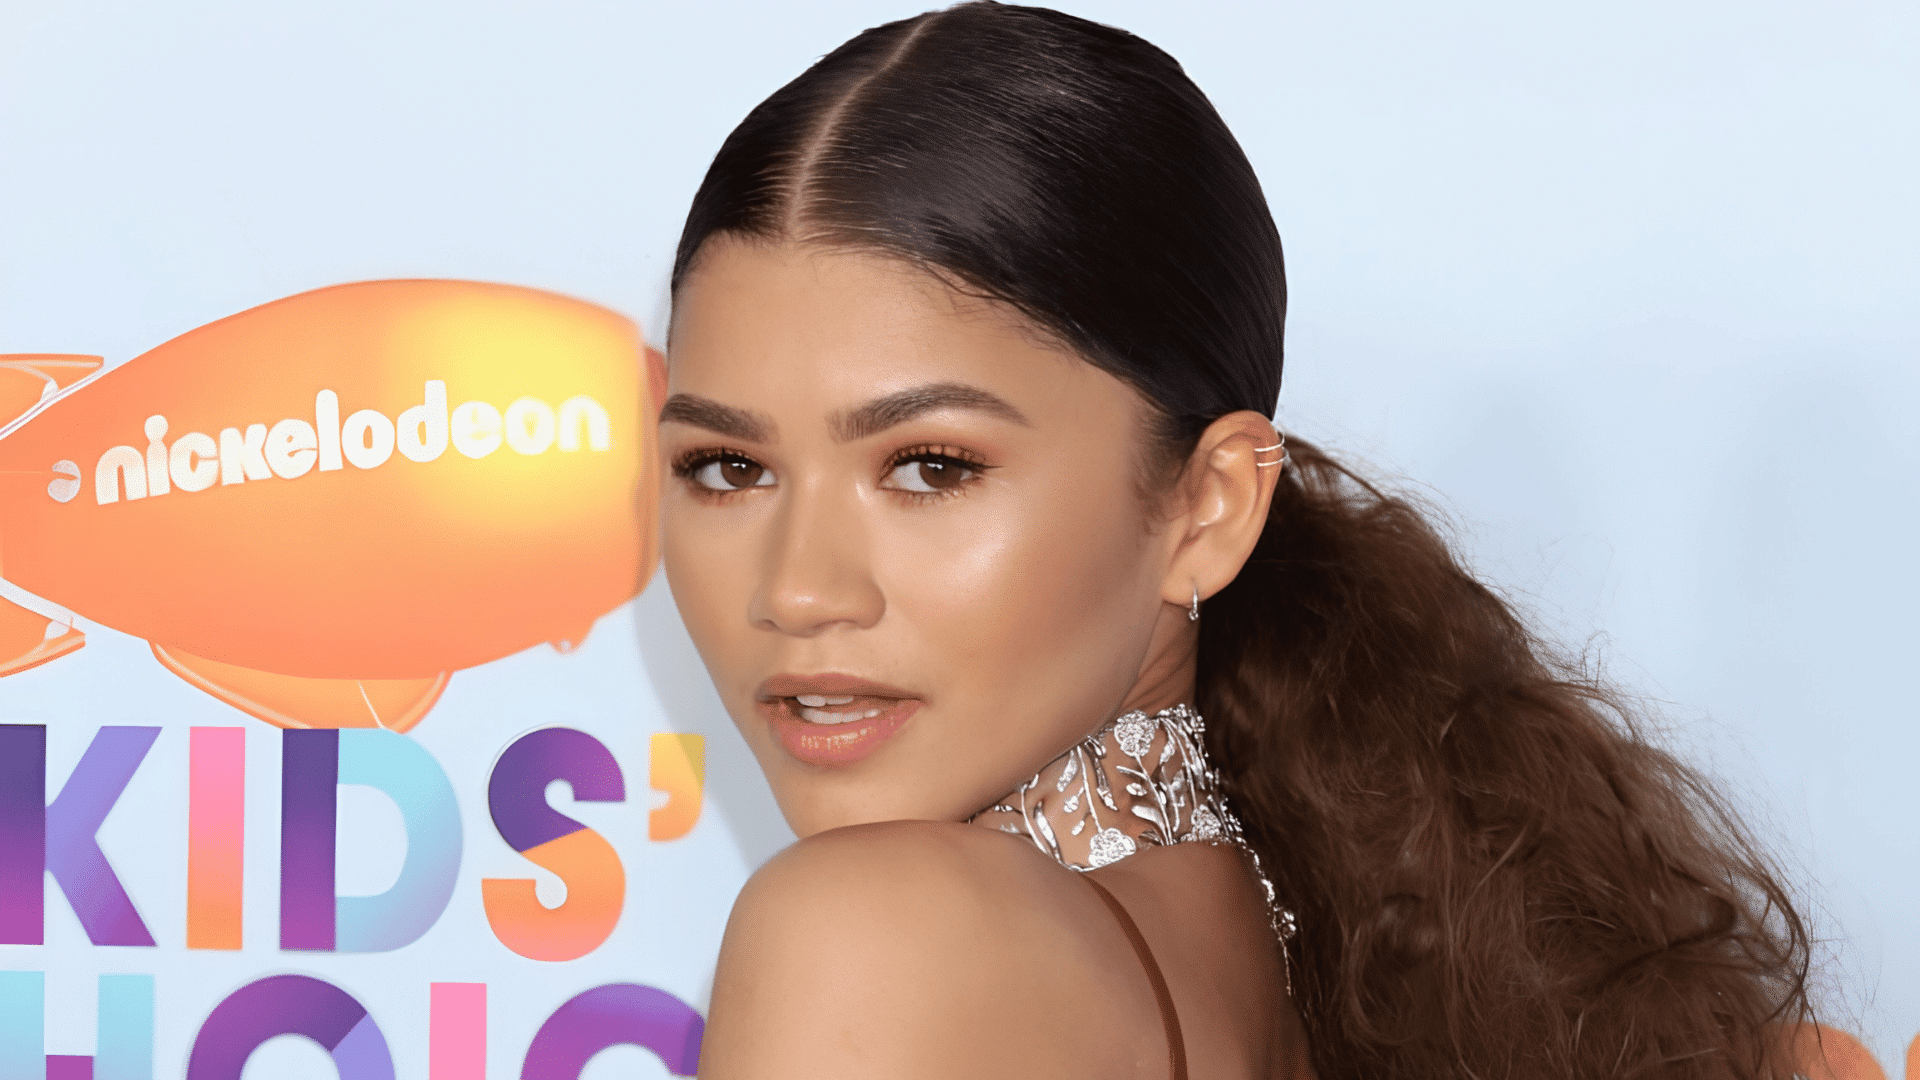
Source: Seventeen Magazine
Smooth the roots gently toward the back, using a brush or comb to create a sleek, neat appearance. Keep the ponytail positioned low at the nape of the neck for a relaxed finish.
Avoid brushing through the lengths, allowing the curls to remain full, defined, and naturally voluminous through the ends.
Tip: Apply curl cream to the lengths before styling, then use gel only around the roots to keep the front smooth.
10. High Braided Ponytail
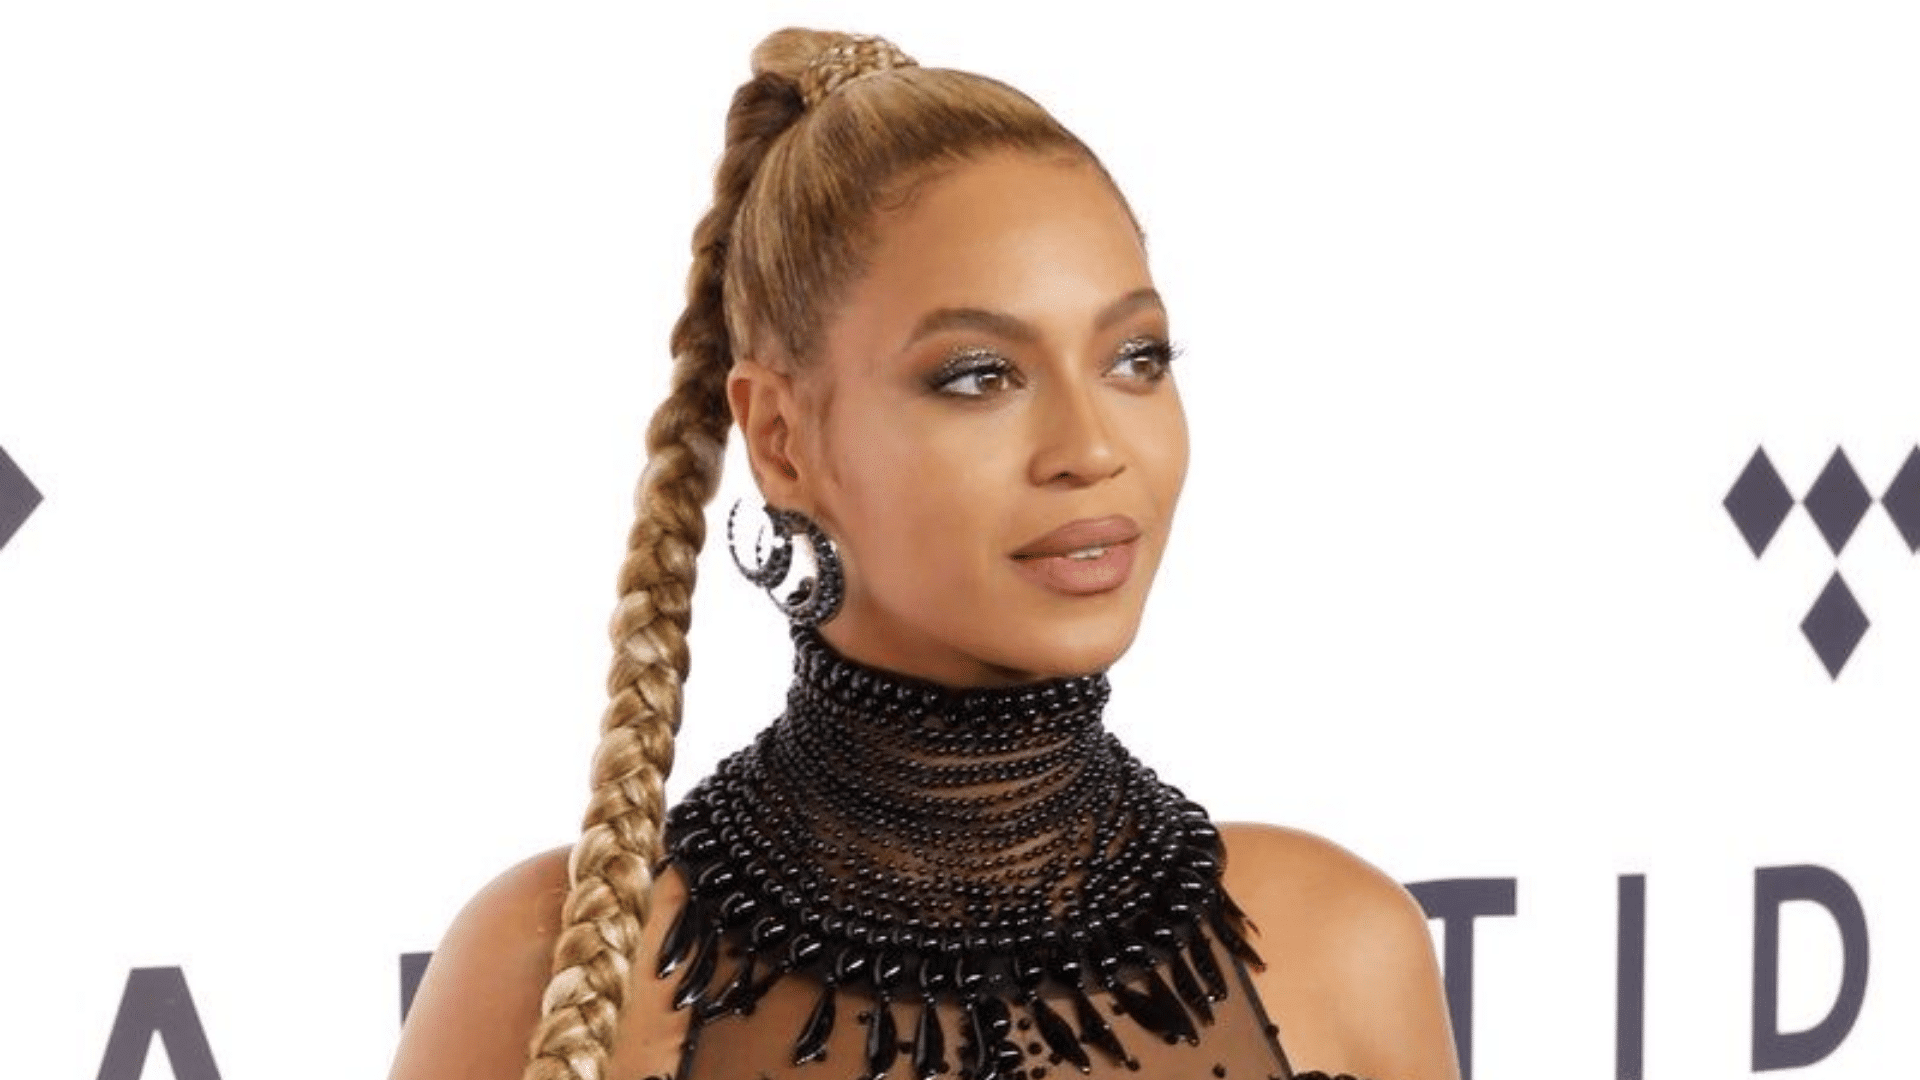
Source: Vogue
Create a high, slick ponytail and secure it firmly at the crown of the head. Braid the entire length of the ponytail, keeping the sections even as you work downward.
Keep the braid tight for a sleek, polished finish, or gently loosen the woven sections for a softer, fuller appearance.
11. Slick Back Wavy Ponytail
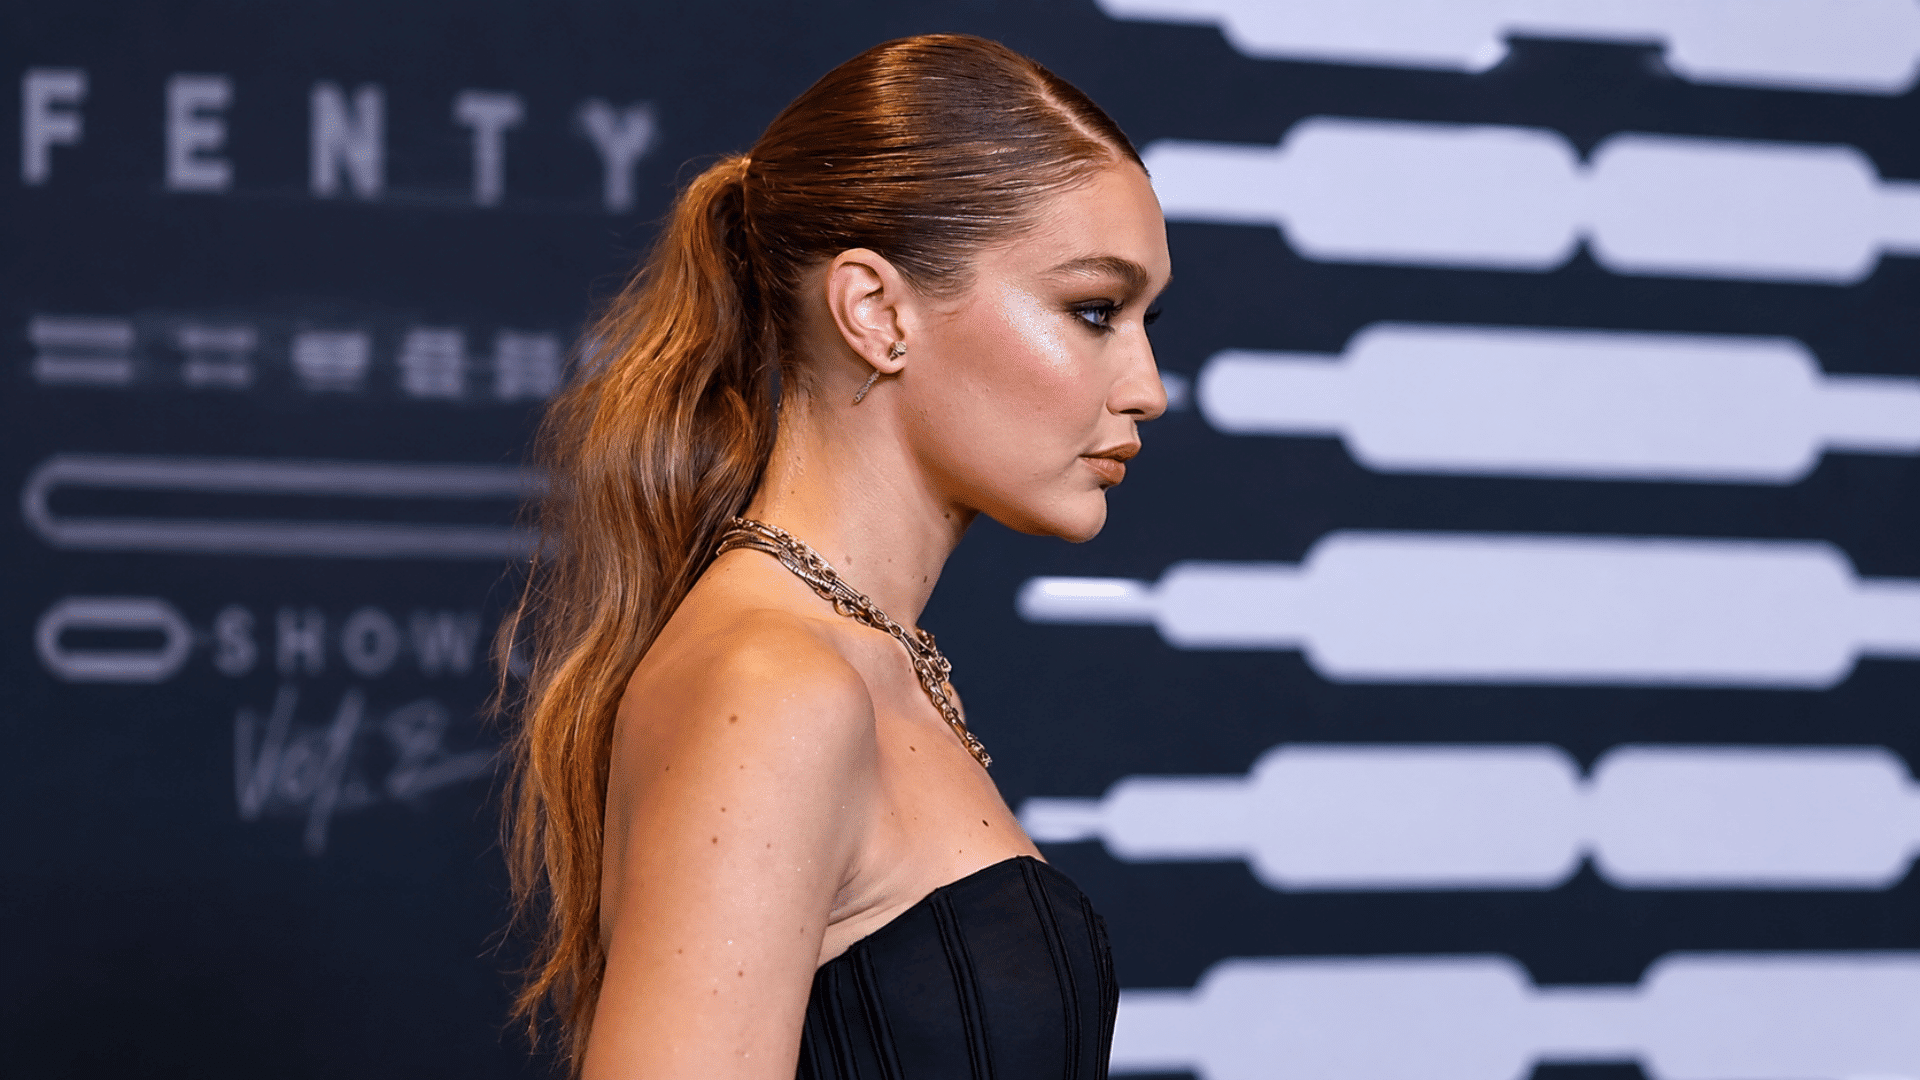
Source: Elle
Keep the crown smooth while leaving soft waves through the ponytail. This works well when you want more movement at the ends.
Tip: Style the waves before gathering the hair, then brush only the roots back.
12. Deep Side Part Ponytail
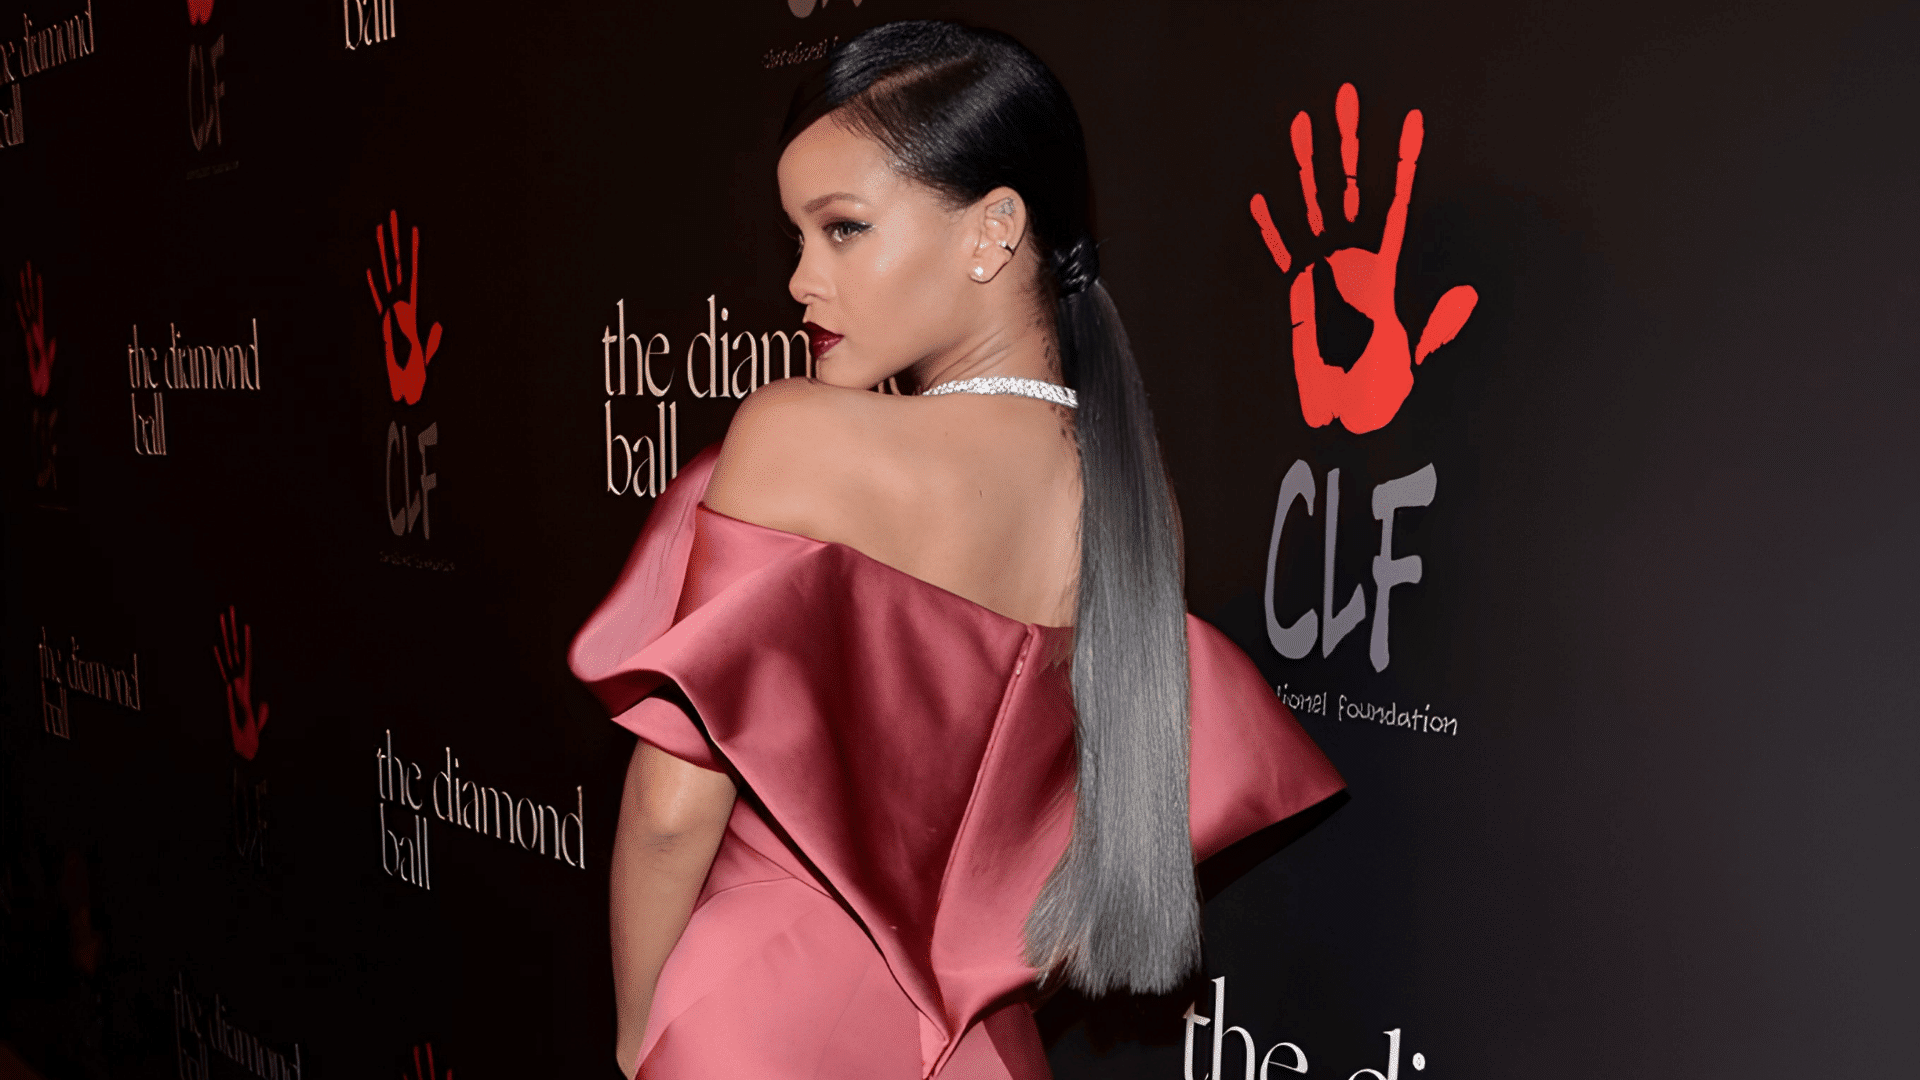
Source: Billboard
Create a deeper side part and use a brush or comb to smooth both sections flat toward the back. Gather the hair into a low ponytail, keeping the roots sleek and controlled.
Make sure the part remains clearly visible, as its defined shape adds a sharper, more polished look to the overall style.
13. Twisted Slick Back Ponytail
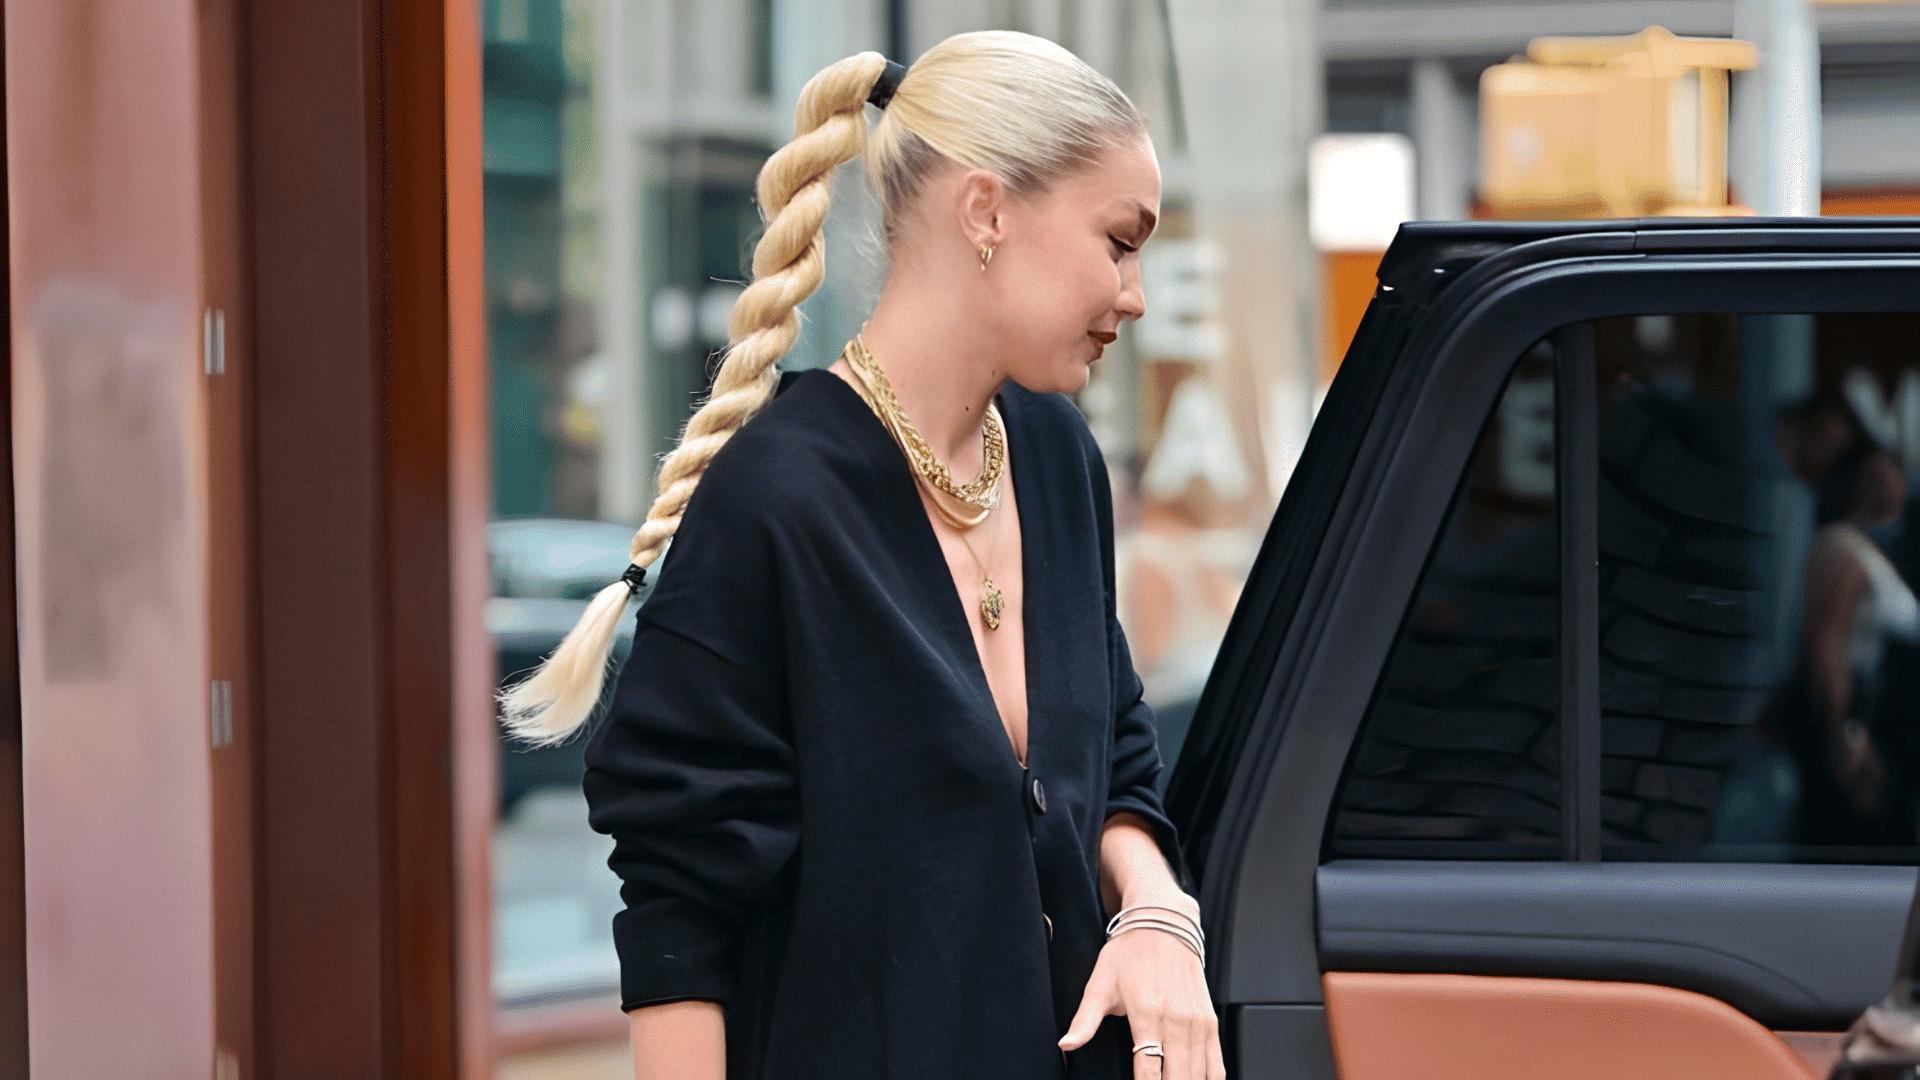
Source: Elle
Secure the ponytail firmly at the base, then divide the length into two equal sections.
Twist both sections in the same direction before wrapping them around each other to create a neat rope-like effect.
Continue twisting toward the ends, then secure the finished twist with a small hair tie.
14. Low Braided Ponytail
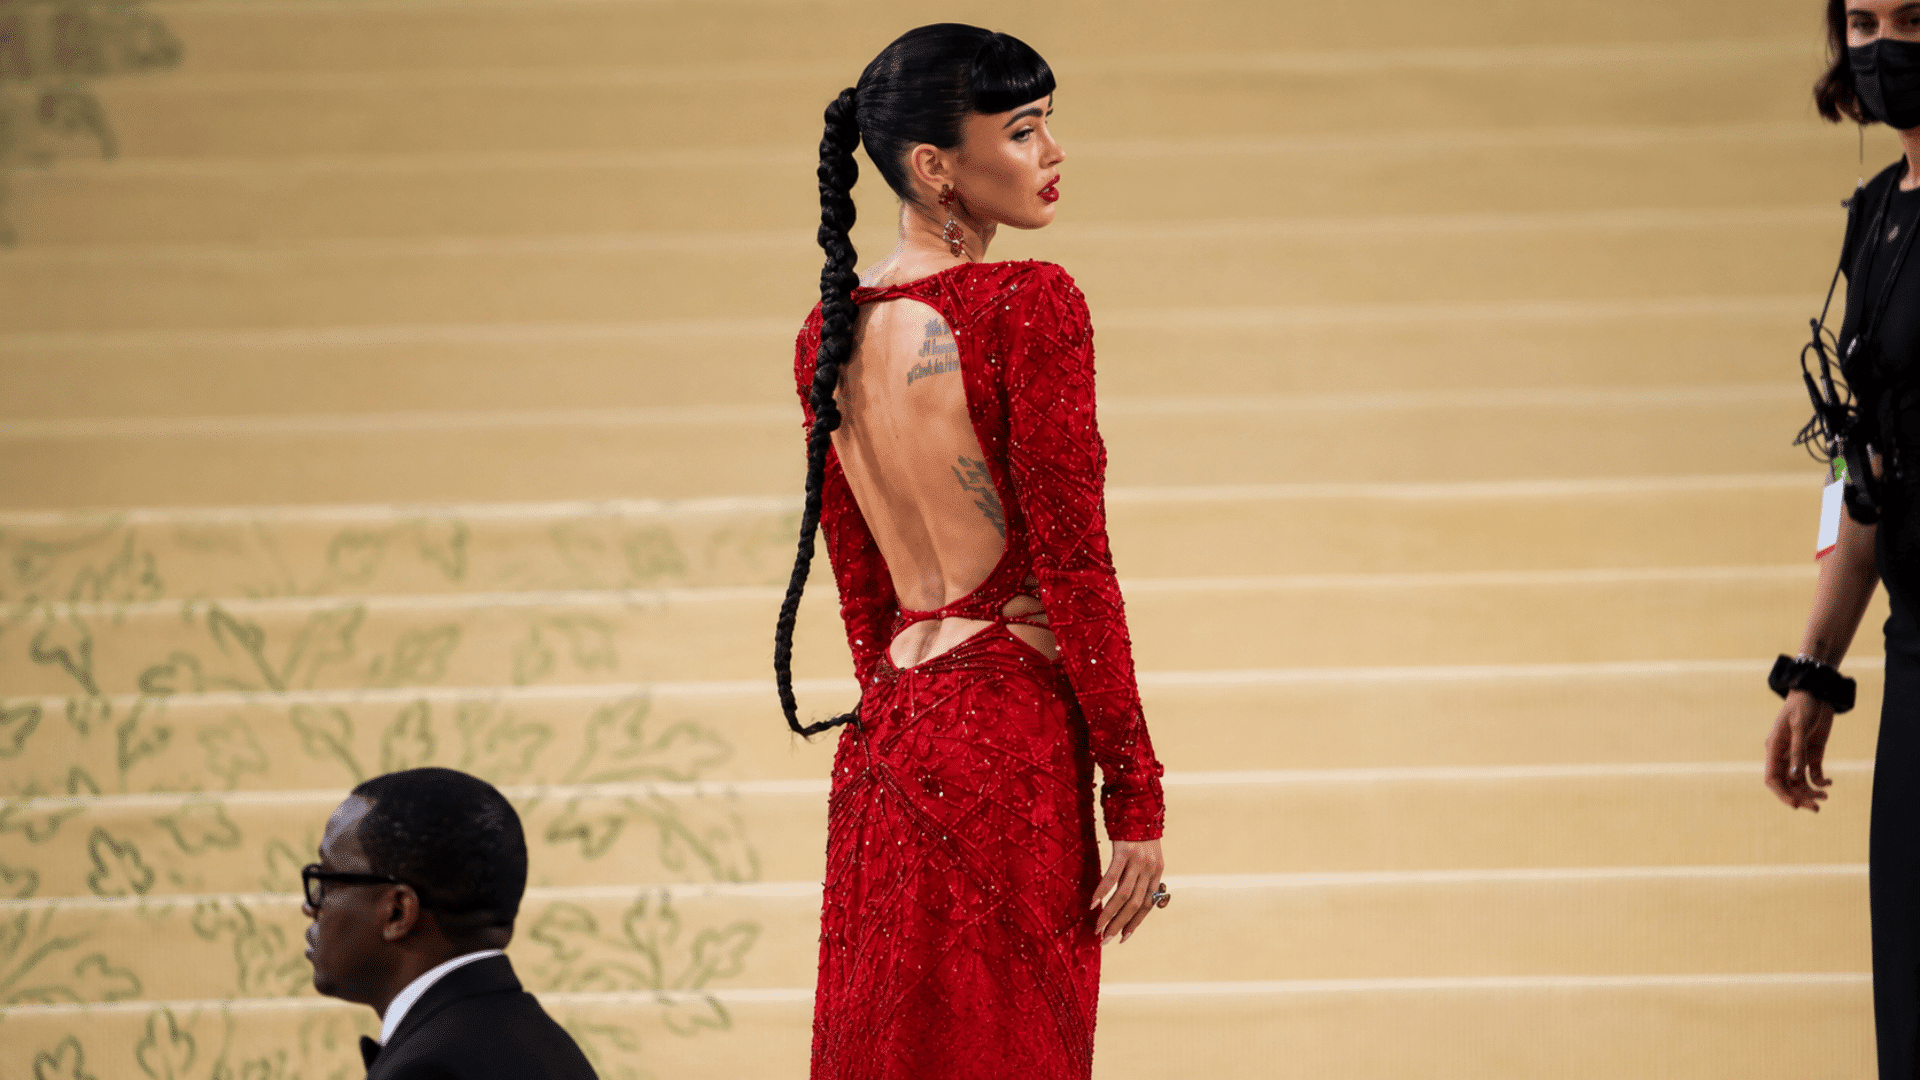
Source: Vogue
Brush the hair smoothly into a low slick ponytail and secure it firmly at the nape of the neck. Keep the roots flat and polished for a clean appearance.
Divide the ponytail into three sections and braid from the base downward, maintaining even tension to keep the style tidy while adding texture and definition.
15. Voluminous Slick Back Ponytail
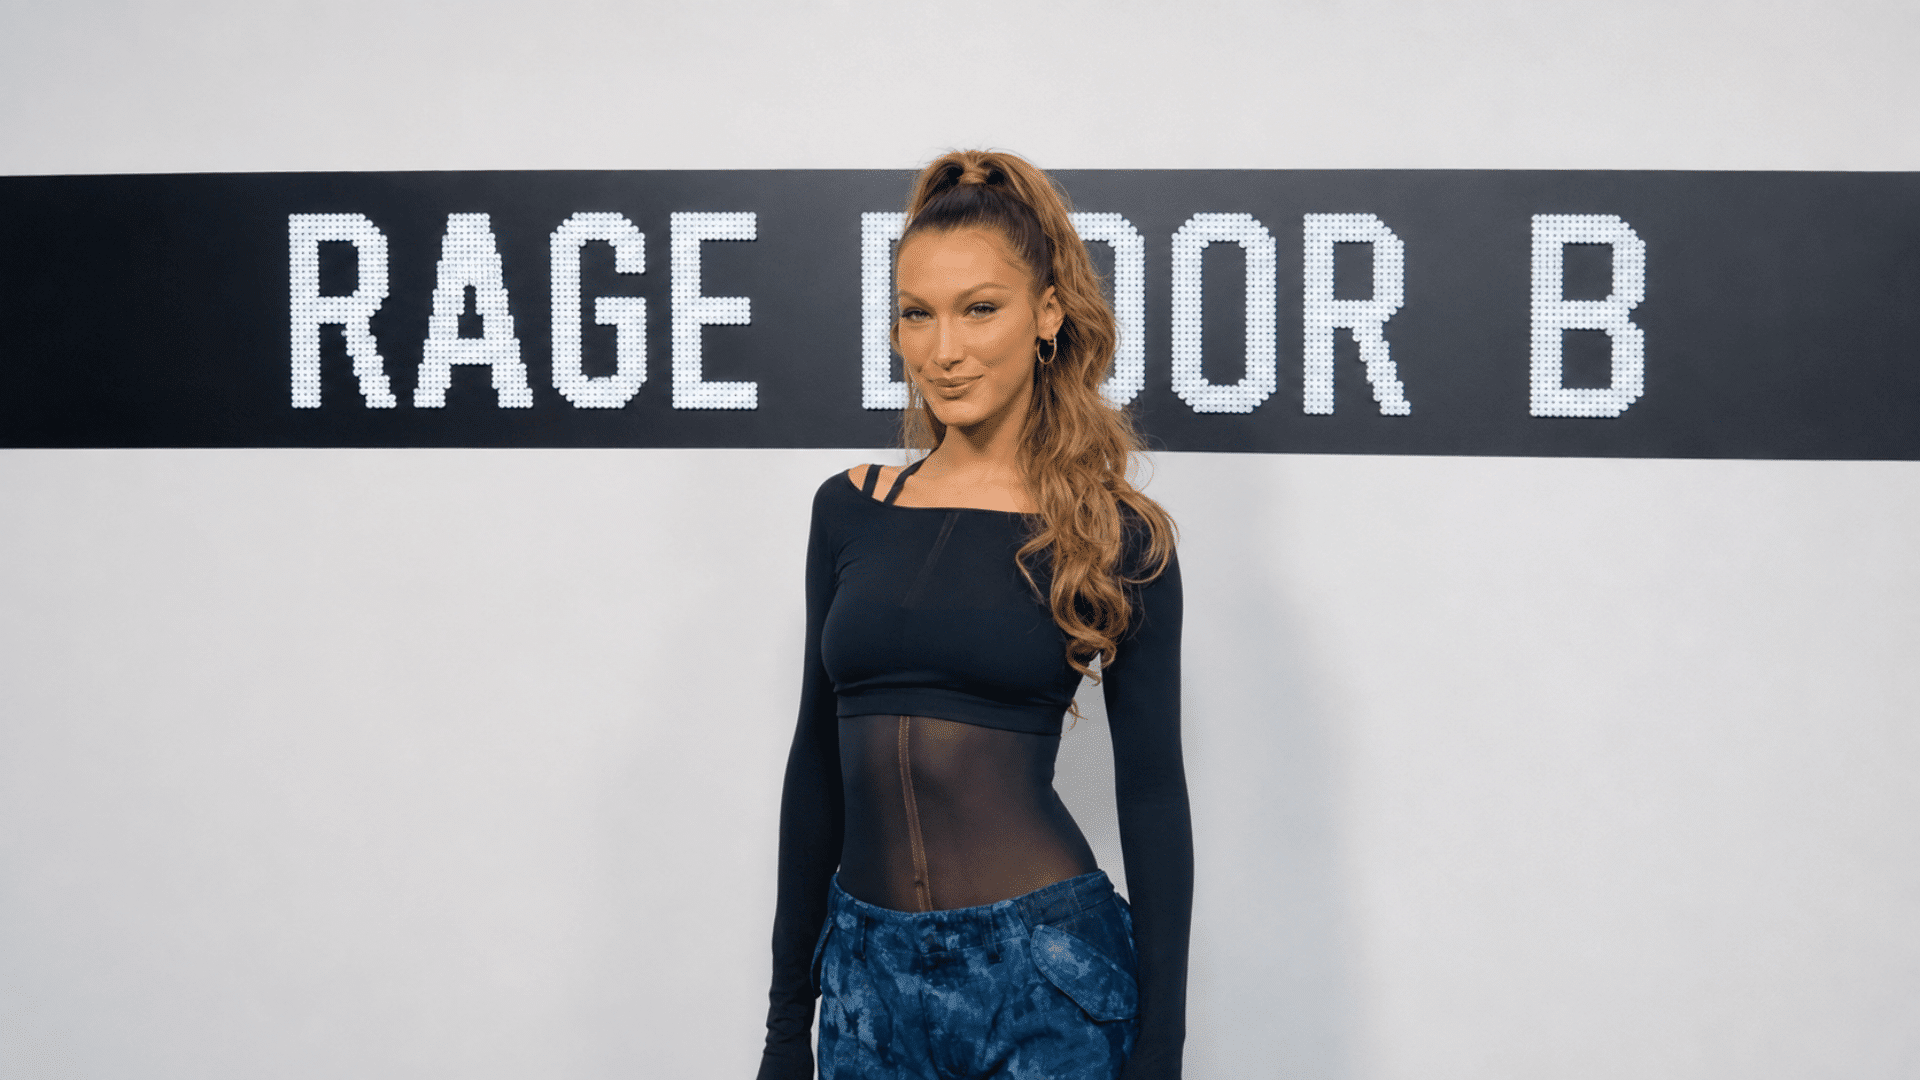
Source: Paper Magazine
Keep the roots smooth and sleek while adding volume through the ponytail length. Lightly tease the underside or add soft curls to create fullness and movement.
Focus the volume away from the scalp, ensuring the front remains polished and controlled. This creates a balanced finish with added body through the back.
Choosing Products by Hair Type
Hair texture and density affect how much hold, moisture, and weight a styling product should provide.
| Hair Type | Product Choice |
|---|---|
| Straight hair | Light gel, wax stick, or hairspray |
| Curly hair | Moisturizing gel or curl-friendly cream |
| Dry hair | Cream-based styler with light hair oil |
| Oily hair | Lightweight gel with minimal wax |
Product choice becomes easier once you understand the needs of different hair types, since texture and density affect hold and finish.
Common Slick Back Hair Mistakes
- Using too much product: Heavy gel or wax can make the roots look oily and leave the hair stiff.
- Skipping detangling: Knots underneath the surface can create bumps and make the ponytail harder to secure.
- Pulling the hair too tight: Excess tension can cause discomfort and put extra stress on the hairline.
- Ignoring the underside: The lower section near the nape can bunch up if it is not brushed before securing the ponytail.
- Securing before smoothing: Tying the ponytail too early can lock bumps into place and make them harder to fix.
- Using the wrong brush: A soft brush may not control thick hair, while a harsh brush can be too rough on fine strands.
If frizz keeps appearing around the crown or hairline, these tips on how to fix frizzy hair can help create a smoother base before styling.
How Slicked Back Styles Affect Your Hair?
Wearing slicked-back styles occasionally is generally low-risk. However, pulling your hair tightly every day can put repeated tension on the hairline and may contribute to traction alopecia.
Early signs can include soreness, small bumps, breakage, or a hairline that gradually appears to recede. Reducing tension early may help prevent further damage.
To make slicked-back styles gentler on your hair:
- Keep the ponytail snug rather than painfully tight, and avoid pulling wet hair back tightly.
- Change the ponytail position, use smooth elastics, and give your hairline regular breaks.
This information is for general educational purposes and is not a substitute for advice from a dermatologist or other qualified hair and scalp professional if you’re experiencing thinning or hair loss.
Final Thoughts
Slicked back hair works best when the prep, products, and ponytail placement suit your hair type.
Small details, such as choosing the right brush, fixing flyaways, and avoiding excess tension, can make the finished style look cleaner and feel more comfortable.
You can keep the look soft and casual or make it sleek and polished for a dressier finish.
Changing ponytail placement and giving the hairline regular breaks can also help reduce strain.
Try one of the slicked-back ponytail styles above and adjust the technique until you find the finish that works best for your hair.
Frequently Asked Questions
Can Slicked Back Hair Work on Short Hair?
Yes. You can brush short hair back using gel, cream, or wax. Bobby pins can help hold pieces that are too short for a ponytail.
How Long Does a Slick Back Ponytail Last?
A slicked-back ponytail can stay neat for several hours. Hold time depends on hair texture, weather, product strength, and how much movement occurs.
Can I Sleep With Slicked Back Hair?
Sleeping with a tight slicked style may place extra pressure on the scalp and hairline. Loosen the ponytail or remove it before going to bed.
Why Does My Slick Back Look Greasy?
Too much gel, wax, oil, or pomade can create a greasy finish. Use smaller amounts and apply product only where extra smoothing is needed.