Choosing between a Dutch braid and a French braid can be frustrating when both styles seem almost identical at first glance.
I remember learning them for the first time and wondering why one braid lay flat while the other stood up.
The difference comes down to a small change in technique, but it creates a completely different look. Understanding that change makes braiding much easier.
For anyone learning to braid or deciding which style suits a look, knowing a few techniques can make the choice easier.
Dutch vs French Braid : What’s the Difference?
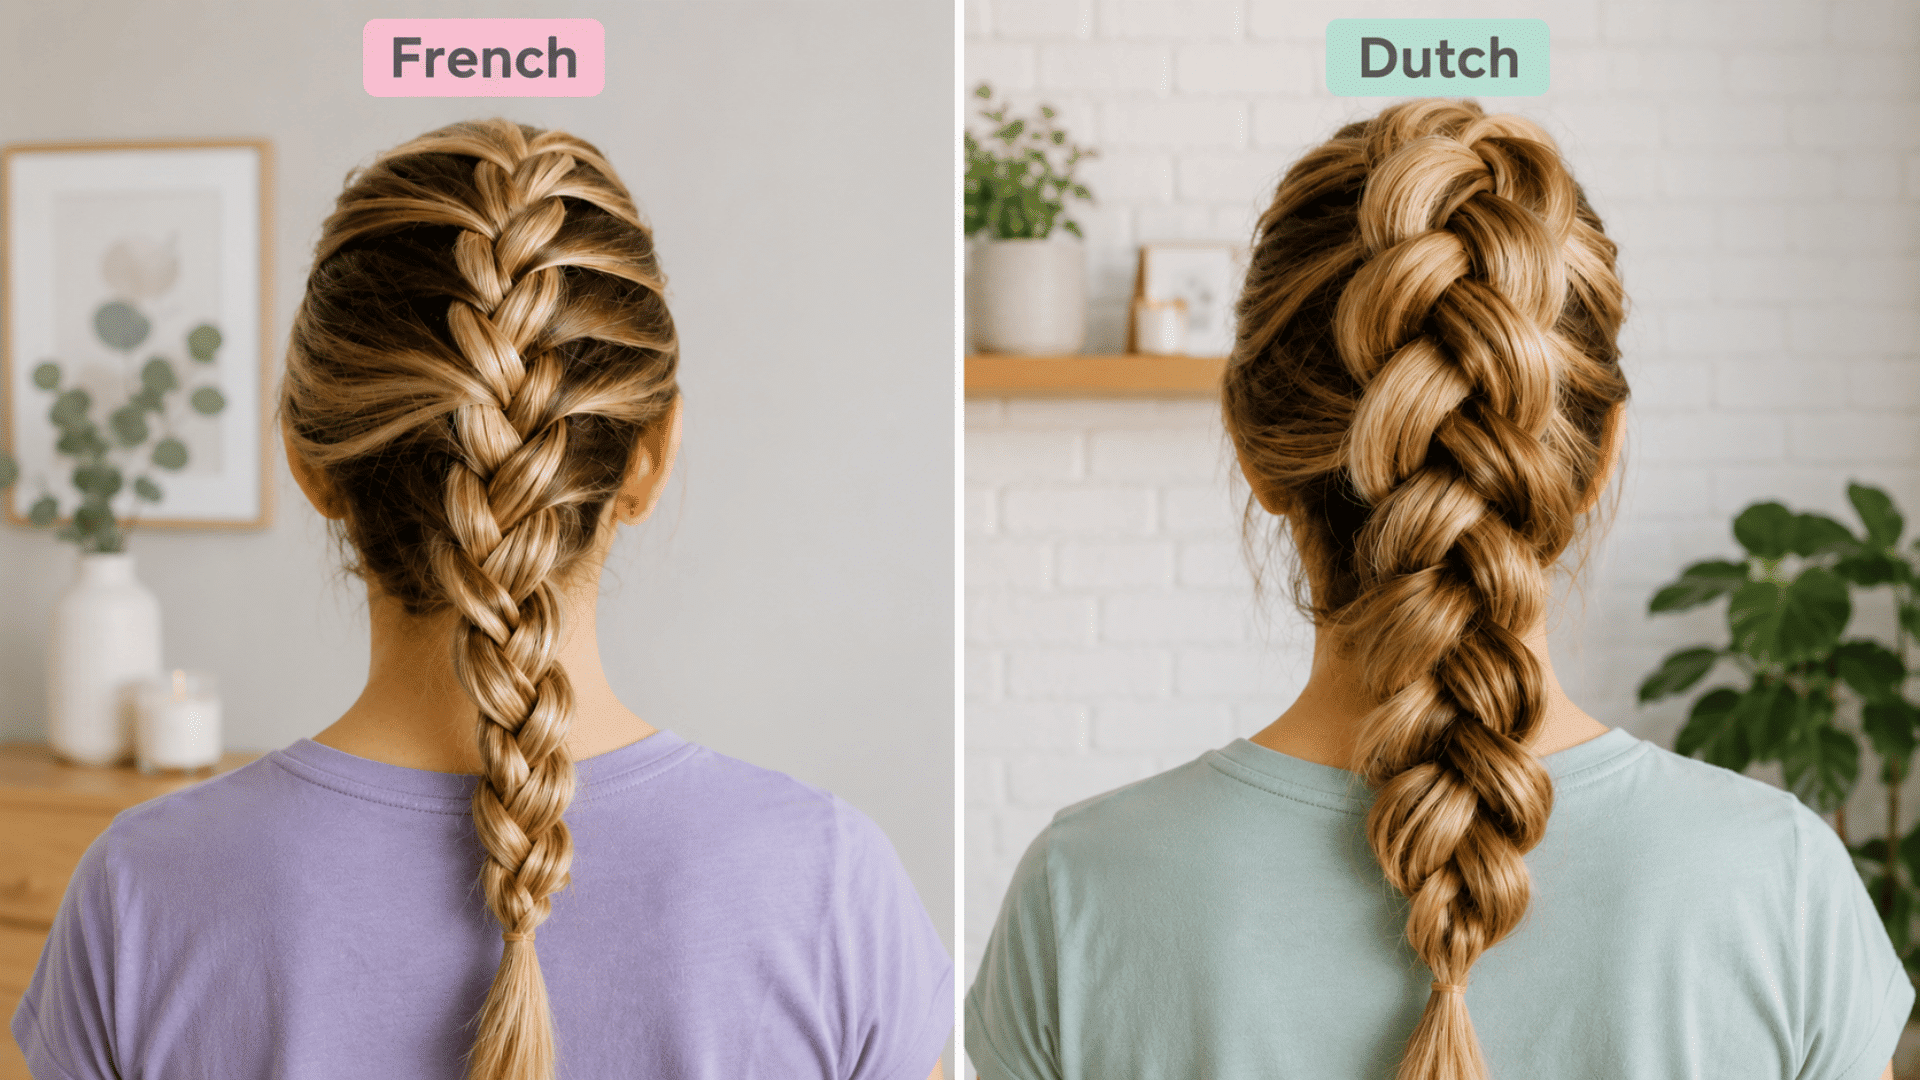
The main difference between a Dutch braid and a French braid is how the strands are crossed. A Dutch braid crosses strands under the middle, while a French braid crosses them over the middle.
This small technique change creates noticeably different results. A Dutch braid sits above the hair, giving it a raised, textured, and more defined appearance.
A French braid lies flatter against the scalp, creating a smooth and classic look. Both braiding styles use three sections of hair and involve gradually adding more hair from each side.
Your choice depends on whether you prefer bold definition or a softer, polished finish.
How to Create a French Braid and Dutch Braid Side by Side
Step 1: Section the Hair for Both Braids
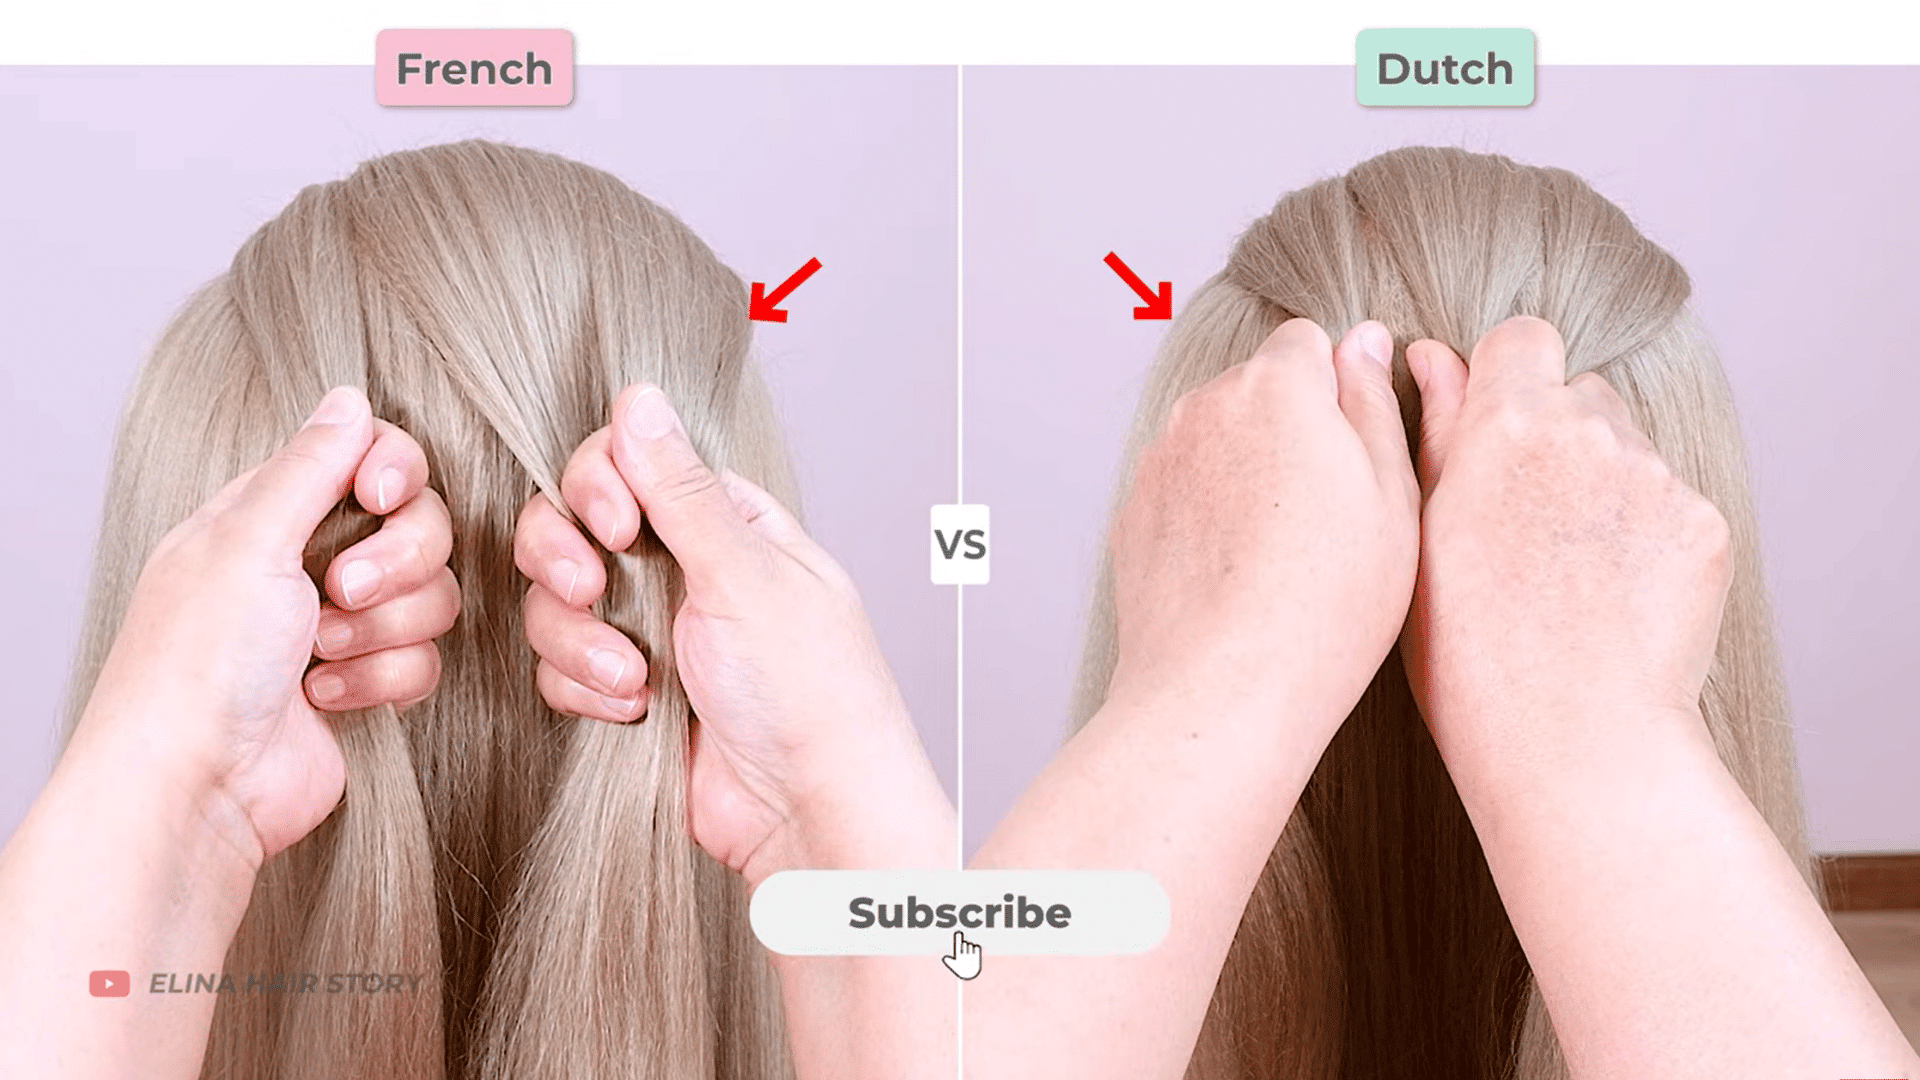
Before sectioning, apply a small amount of a styling cream to smooth flyaways and make the hair easier to manage while braiding.
Start by taking a section of hair from the top of the head and dividing it into three equal strands.
Both braids begin the same way, so creating even sections helps keep the braids balanced from the start.
Step 2: Learn the Crossing Pattern
-
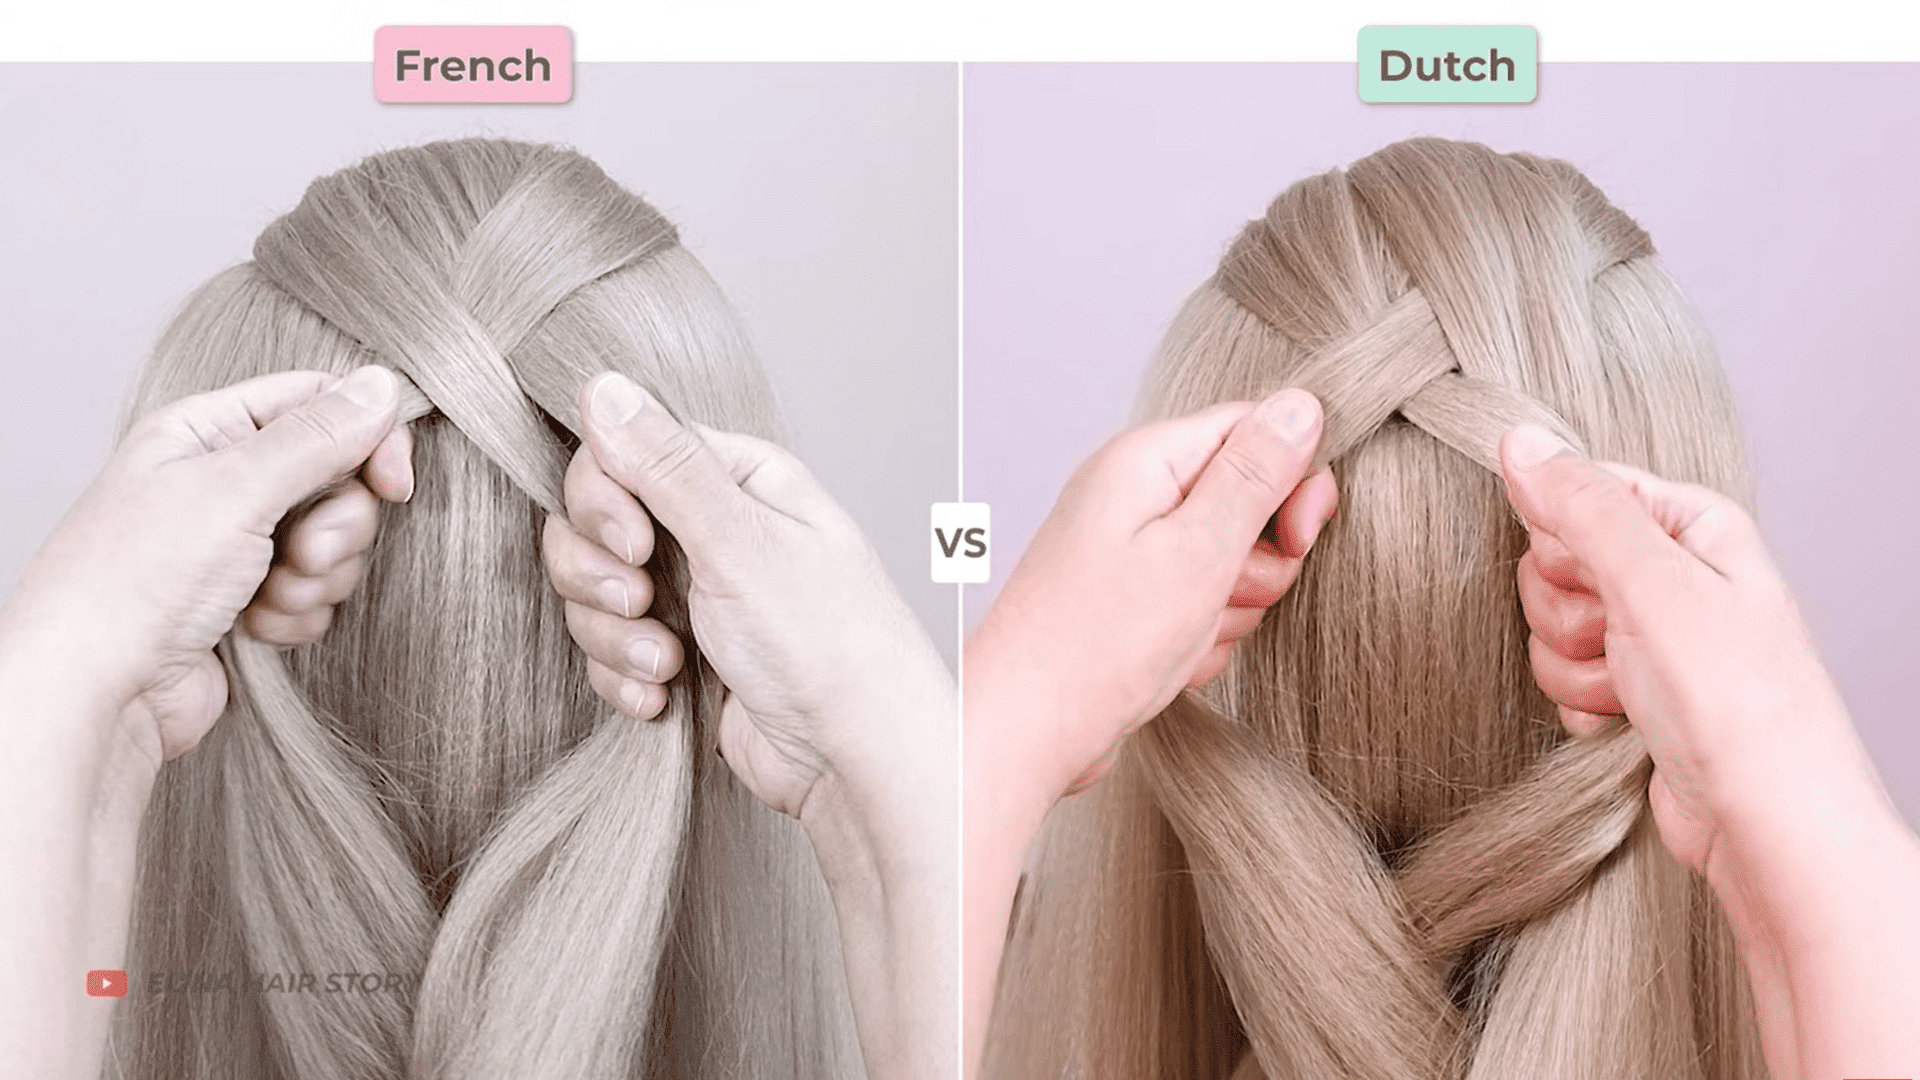
French Braid: Begin by crossing the right outer strand over the middle strand. Then, cross the left outer strand over the middle strand. This overhand motion creates a smooth braid pattern that sits close to the scalp. Cross the outer strands over the middle.
-
Dutch Braid: Begin by crossing the right outer strand under the middle strand. Then, repeat with the left outer strand. This underhand technique causes the braid to sit on top of the hair rather than blend into it. Cross the outer strands under the middle.
Step 3: Add Hair to The Braid
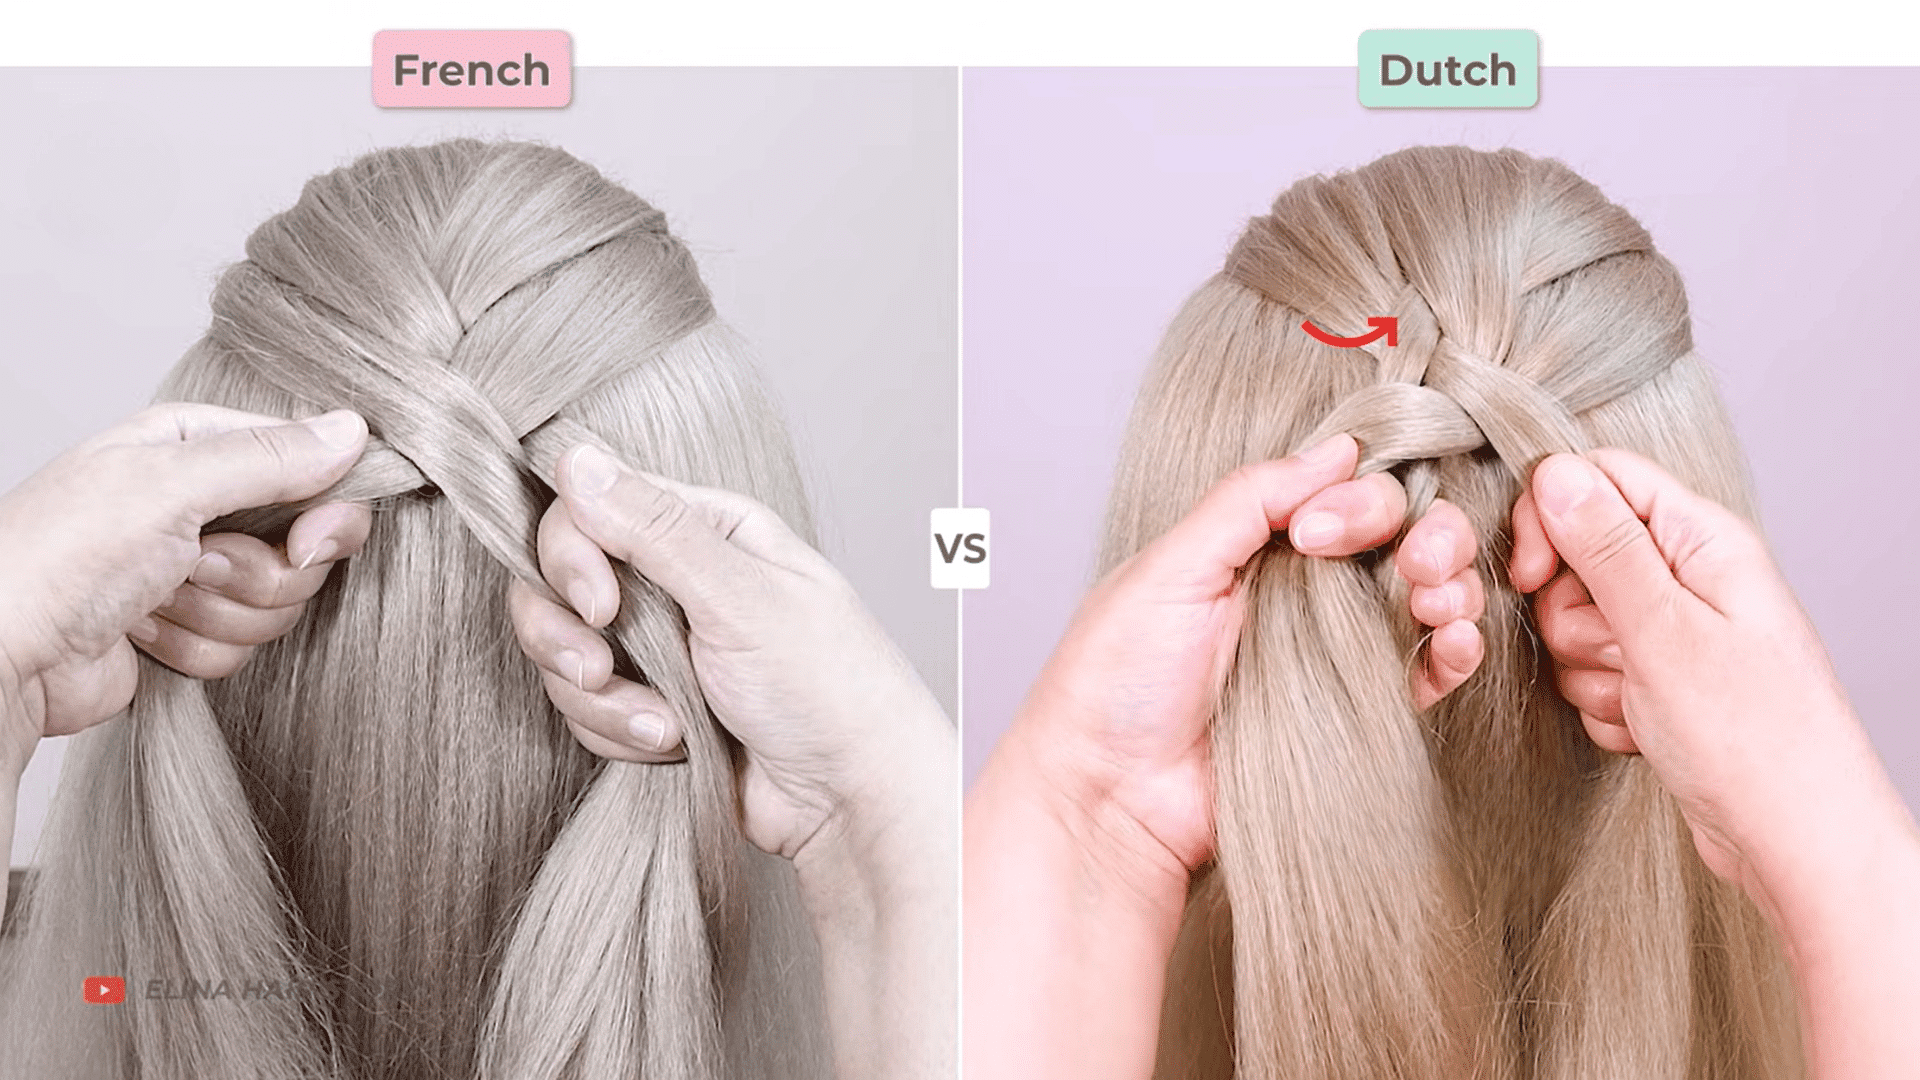
-
French Braid: Cross the right strand over the middle and hold the braid securely. Pick up a horizontal section of hair from the right side and add it to the strand you just crossed. Repeat the same process on the left side. Add hair after crossing over.
-
Dutch Braid: Cross the right strand under the middle, then gather a horizontal section of hair from the same side and combine it with that strand. Repeat on the left side while maintaining the under-crossing pattern. Add hair after crossing under.
Step 4: Continue the Braid Pattern
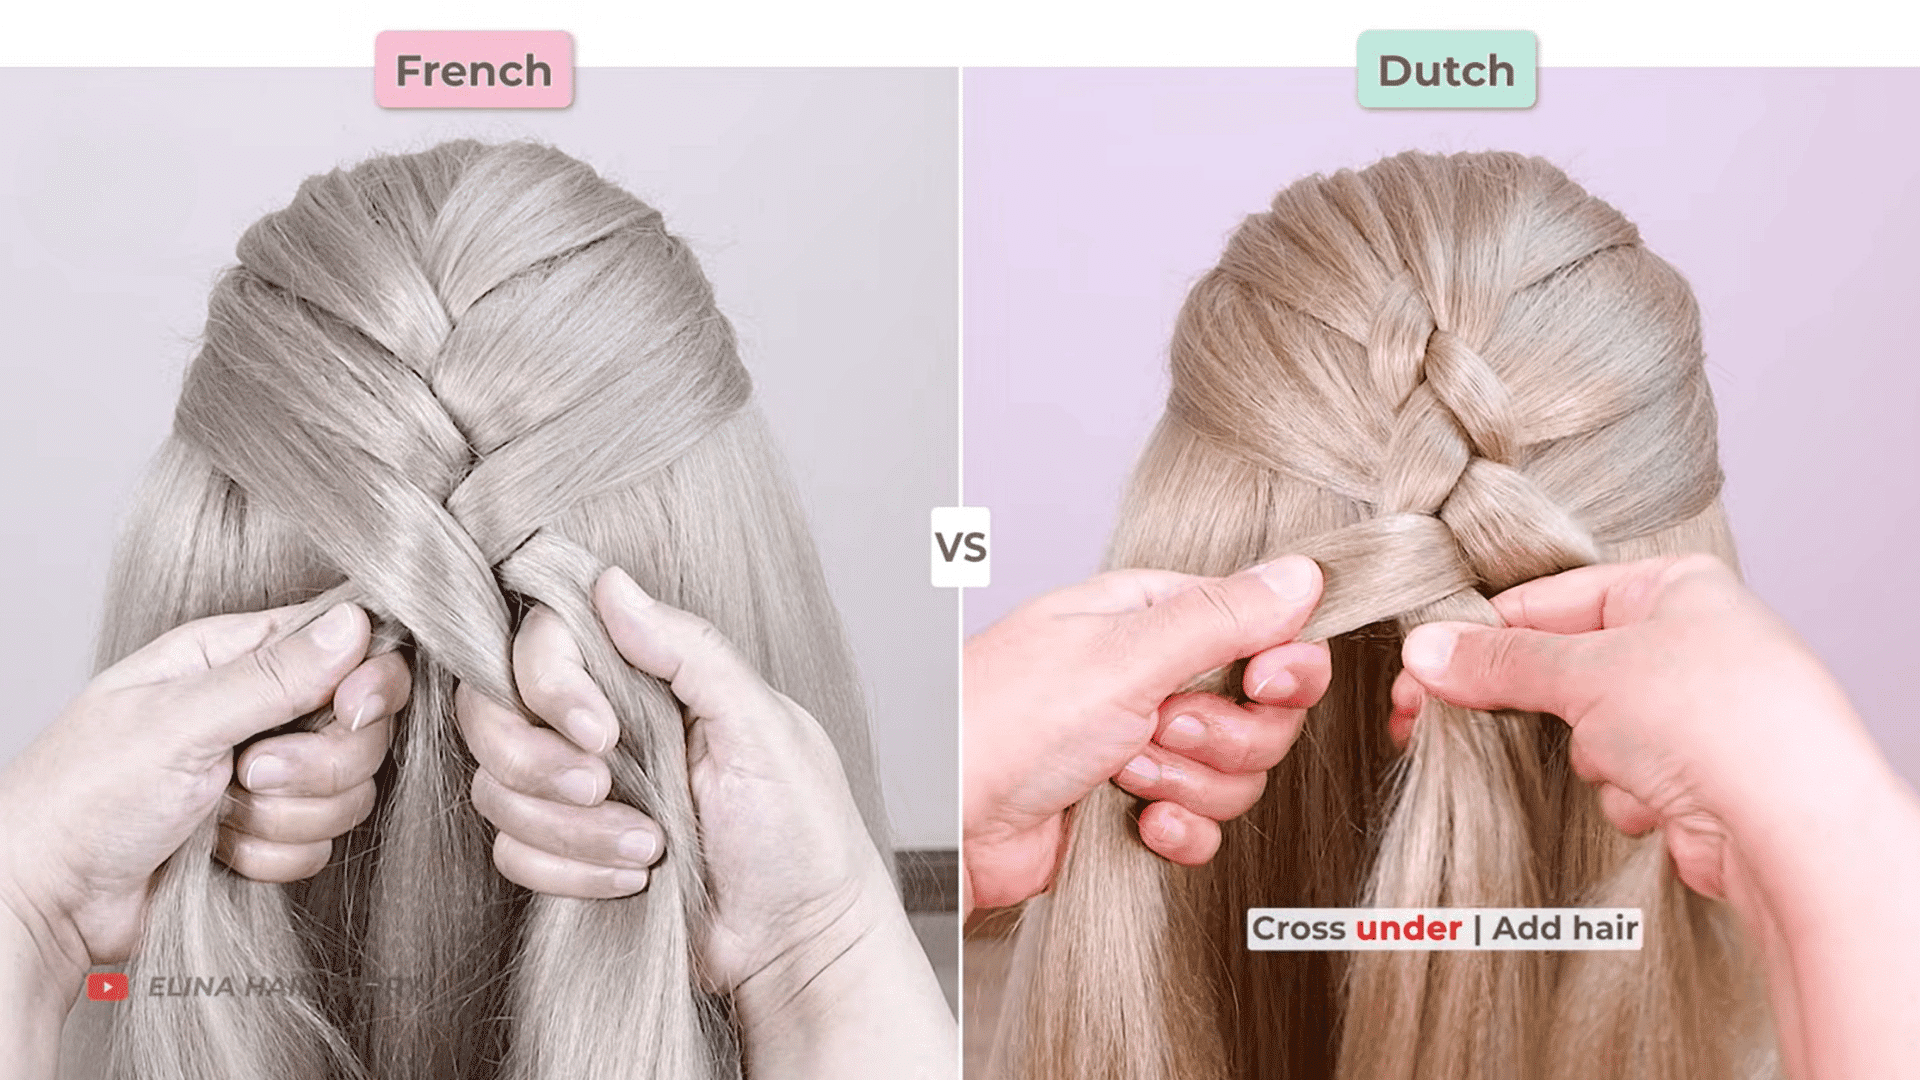
-
French Braid: Cross the right strand under the middle, then gather a horizontal section of hair from the same side and combine it with that strand. Repeat on the left side while maintaining the over-crossing pattern. Cross over, add hair, and repeat.
-
Dutch Braid: Keep crossing each outer strand under the middle and adding hair from the same side. Continue this pattern evenly down the head to create the braid’s raised structure. Follow the under-crossing pattern.
Step 5: Finish with A Three-Strand Braid 
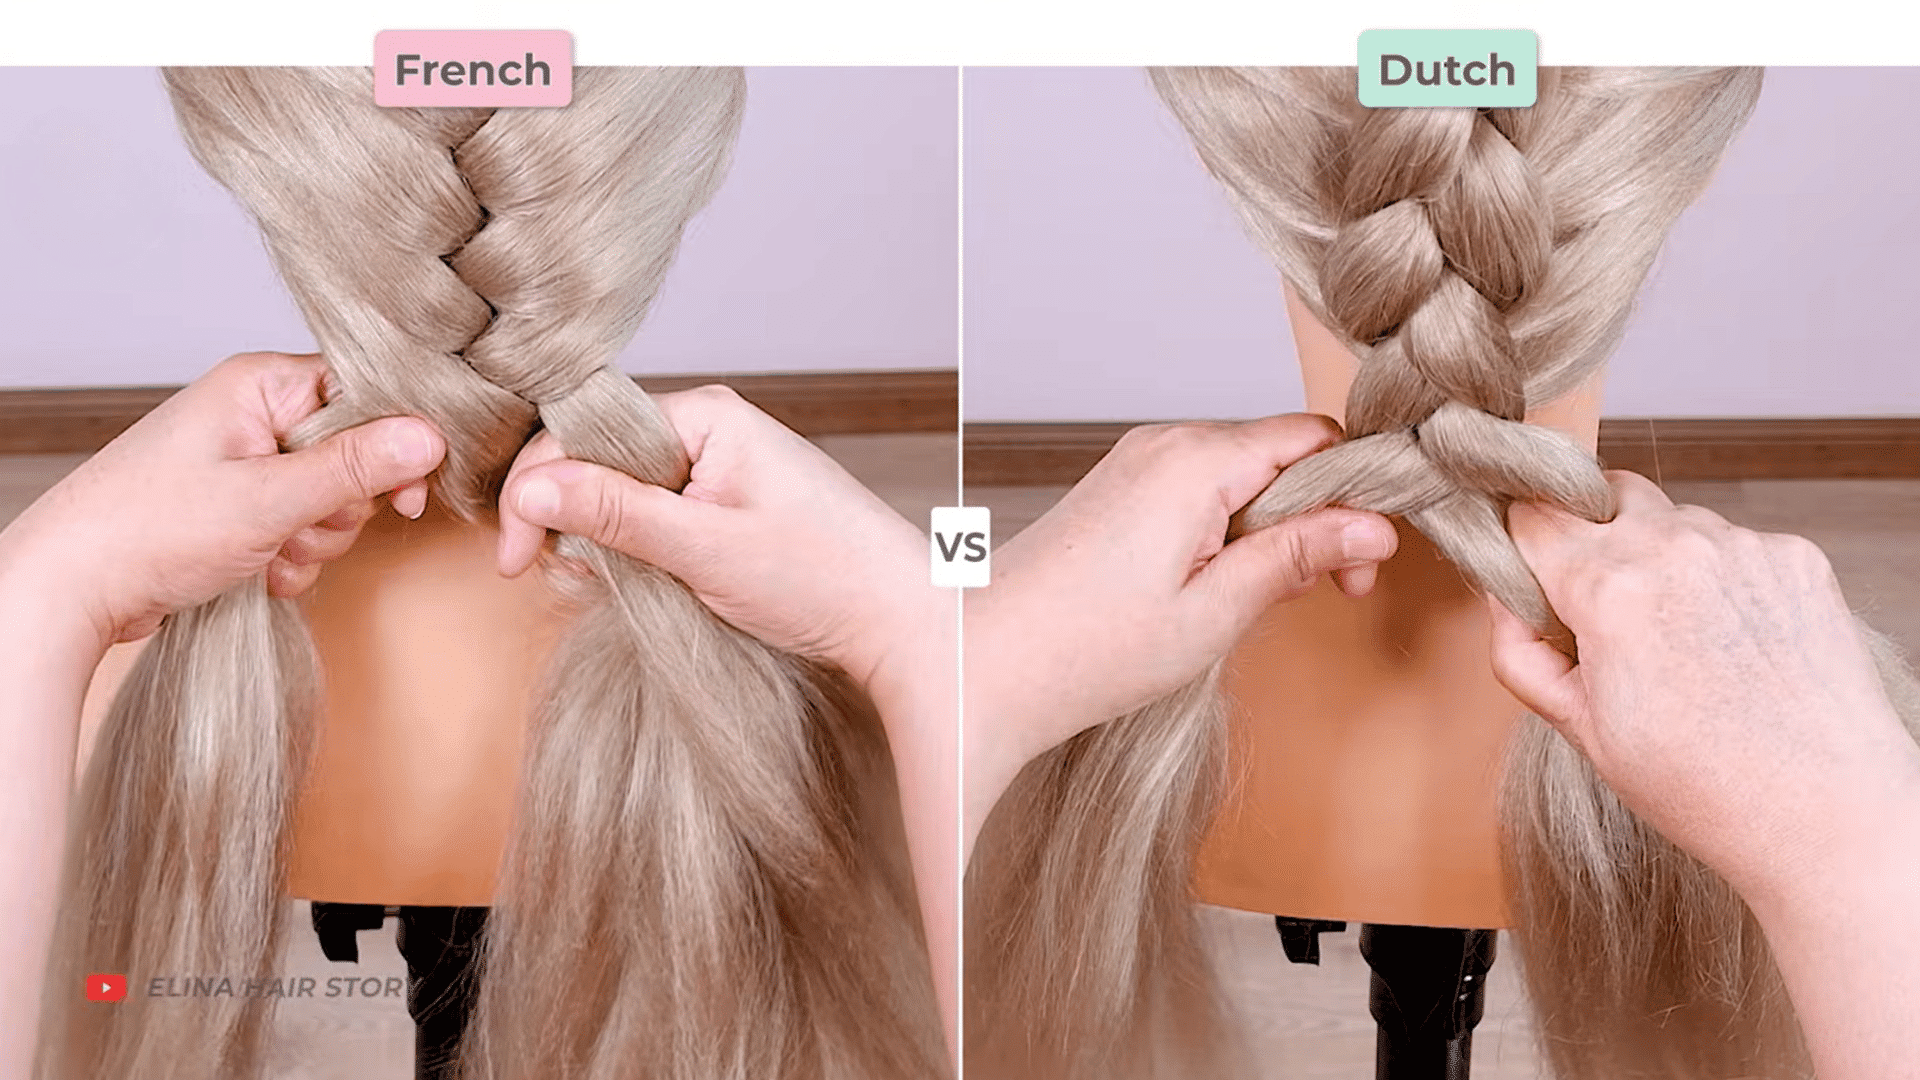
Once you reach the nape of the neck and run out of hair to add, continue braiding the remaining length. Secure the braid at the end with an elastic.
Step 6: Create More Volume if Desired 
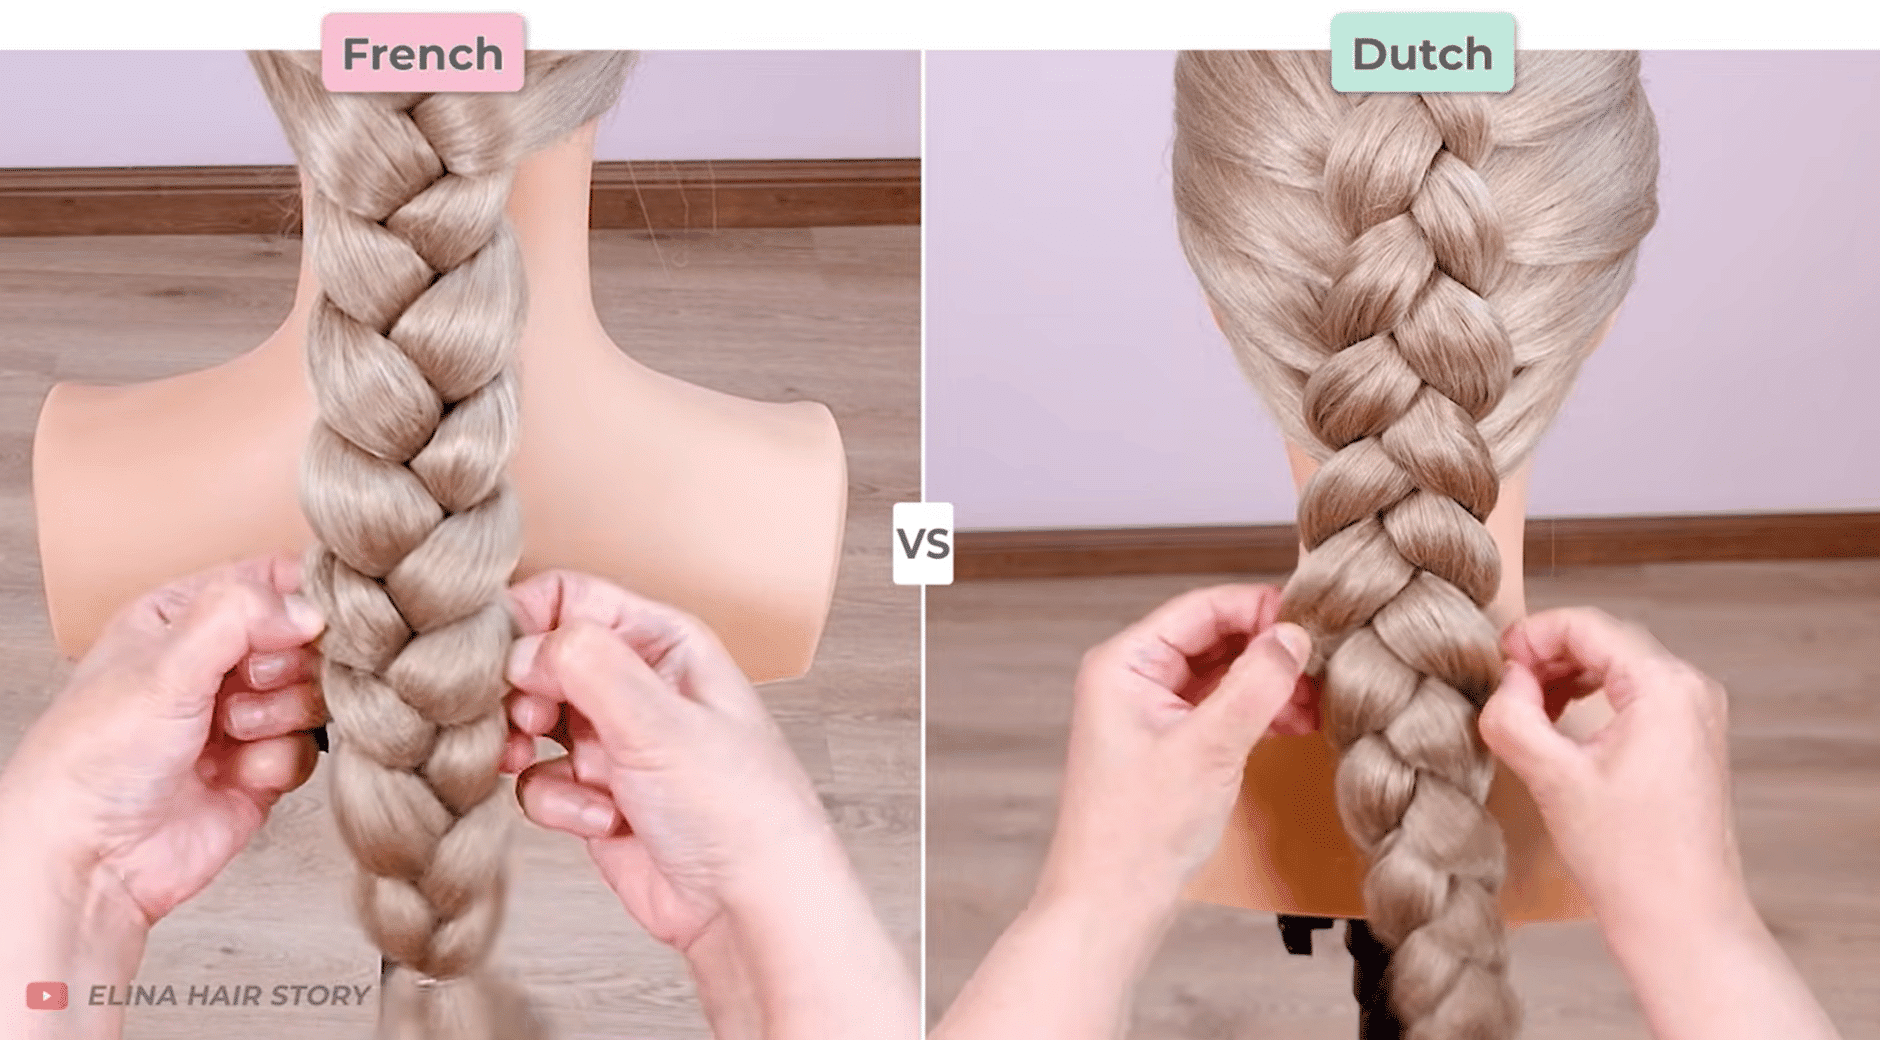
Gently pull on the outer edges of the braid to make it appear wider and fuller. This step is optional but can create a softer, more voluminous finished look.
This tutorial is based on a helpful video by Elina Hair Story. You can check out the original video on their YouTube channel here or watch it below.
Which Braid Should You Choose?
The right choice depends on the look you want and your braiding experience.
A French braid is a good option if you prefer a classic hairstyle that sits flat against the head. Its smooth appearance works well for school, work, workouts, and everyday wear. Many beginners find it easier to learn because the strands cross over the middle section.
A Dutch Braid is a better choice if you want more texture and volume. It can appear even more defined on naturally textured hair, including Irish Curls.
I have naturally fine hair, and I’ve found both braids hold better when you add a little texture first, instead of starting on freshly washed, slippery strands.
Final Thoughts
Whether you prefer the smooth, classic look of a French braid or the bold, raised finish of a Dutch braid, the best choice is the one that feels right for you.
I find that understanding the simple over-versus-under technique makes it much easier to tell these two styles apart and decide which one to try.
If you’re still learning, you can start with the braid that feels most comfortable and build your skills from there. With a little practice, we can turn either style into an everyday favorite or a polished look for special occasions.
Which braid do you prefer, French or Dutch? Share your experience, styling tips, or favorite look in the comments below!
Frequently Asked Questions
Can Dutch and French Braids Work on Short Hair?
Yes, hair that reaches the chin or longer can usually be braided. Styling cream, clips, or small elastics can help keep shorter layers secure and prevent loose pieces from slipping out.
Which Braid Lasts Longer Throughout the Day?
Dutch braids often stay defined longer because their raised structure holds its shape well. However, hair texture, activity level, and the styling products used can also affect how long either braid lasts.
Can You Sleep with a Dutch or French Braid?
Yes, both styles can help reduce tangles overnight. Use a soft hair tie and avoid braiding too tightly to minimize unnecessary tension and keep the style comfortable while you sleep.
Which Braid Looks Better on Thick Hair?
Dutch braids often highlight thick hair because their raised pattern shows more dimension and volume. French braids create a smoother, more blended look that can appear polished and understated.
Can You Turn One Braid Style Into the Other?
Not once the braid is finished. The crossing method determines the braid’s final structure, so switching from one style to the other requires starting the braid again with the opposite crossing technique.