I remember the first time I tried setting up a small spot for my morning coffee. I didn’t want anything fancy, just a place where everything stayed in one spot and made my routine easier.
If you feel the same, you’ll enjoy putting together your own DIY coffee bar. It solves the daily scramble for mugs, beans, and tools by giving you a setup that fits your space and your habits.
You don’t need a big kitchen or a long list of supplies, just a clear plan and a few easy steps.
I’ll walk you through simple ideas you can build with what you already have, so your DIY coffee bar feels easy from the start.
Things to Know Before You Start
Before you build your coffee bar, take a little time to look at your space and think about how you plan to use it each day.
Check the wall space, counter spot, or corner you want to use, and make sure you have easy access to an outlet for your coffee maker. Measure the area so your shelves, cart, or table fit without crowding the room.
Keep your storage needs in mind so you have room for mugs, beans, filters, and small tools. Think about how much time you want to spend on the project and choose materials you feel comfortable working with.
A simple plan helps your setup come together smoothly and keeps the whole process stress-free.
DIY Coffee Bar Ideas You Can Build
Here are simple projects you can set up with basic tools and items you already have, giving you clear coffee station ideas you can build without much time or cost.
1. Turn a Small Cart Into a Rolling Coffee Bar
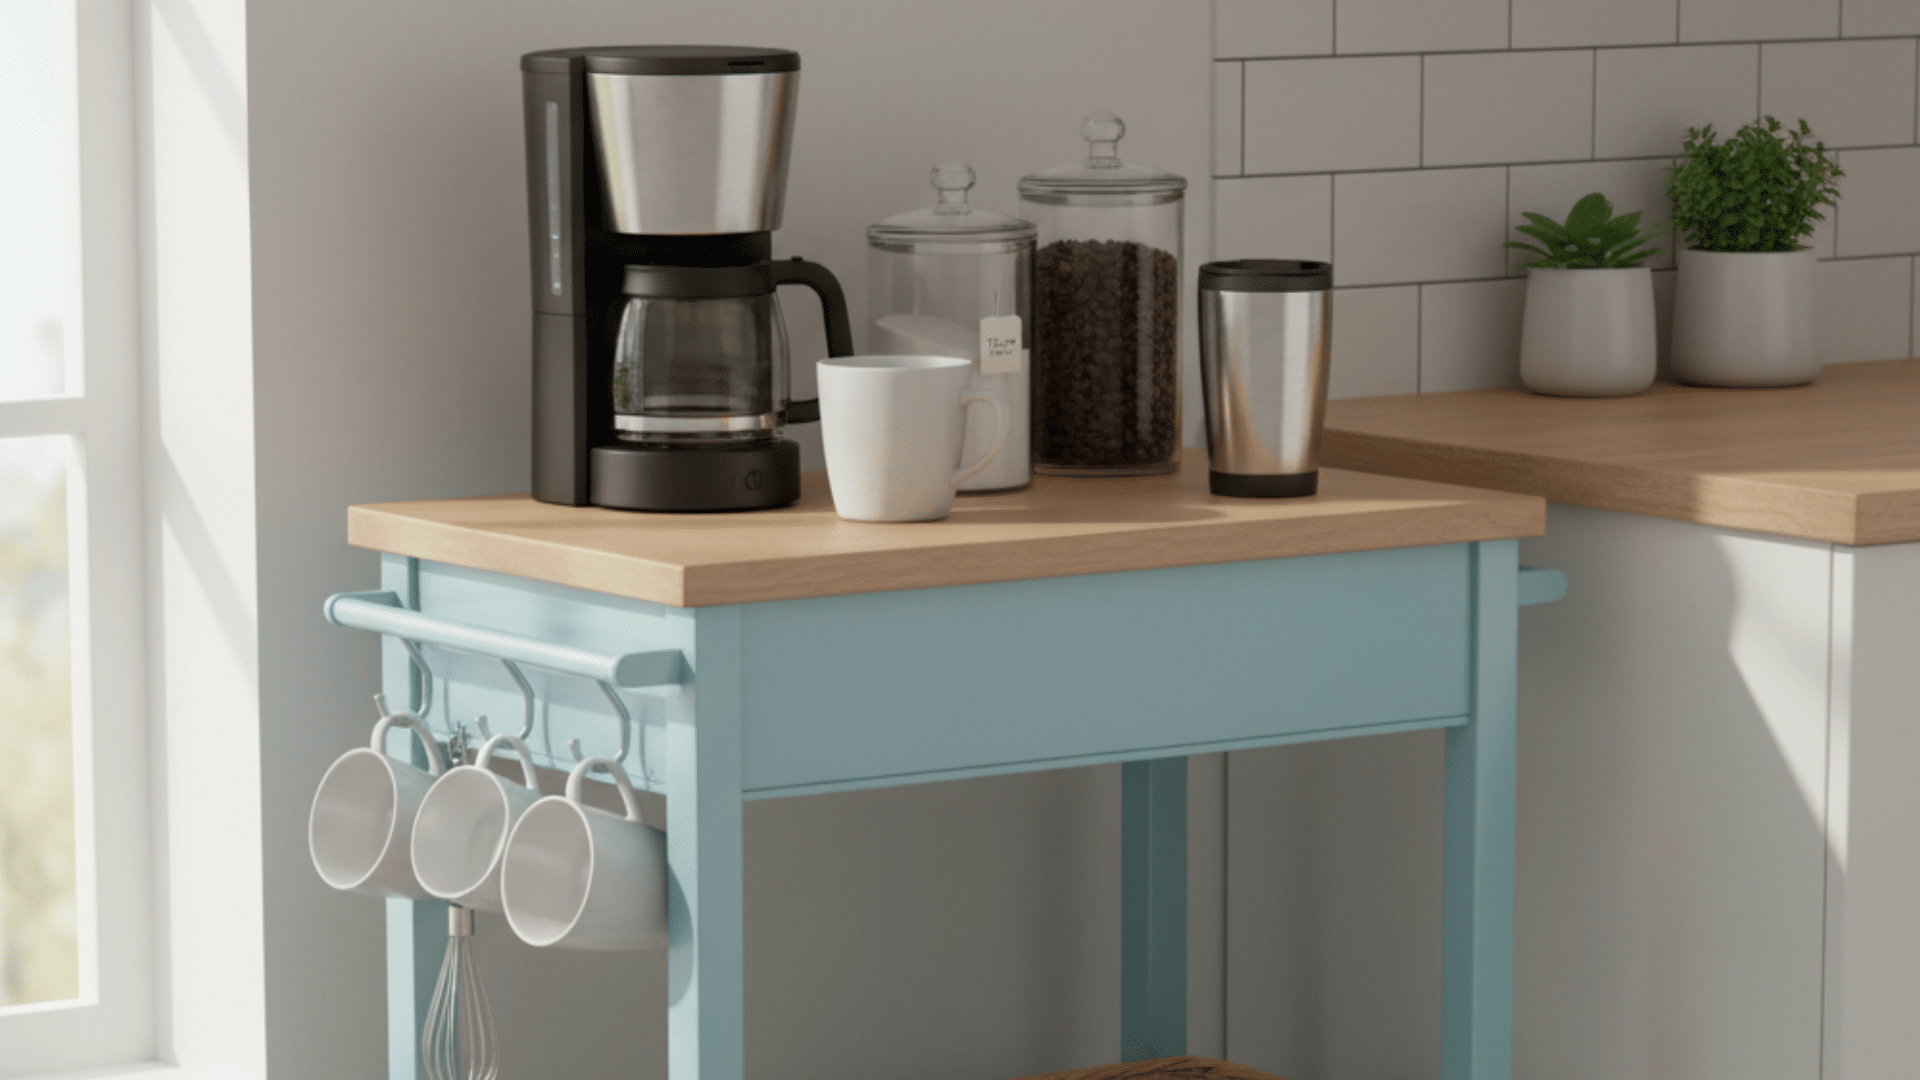
A compact rolling cart that functions as a mobile coffee station, offering convenience and flexibility.
How to Build It
- Find a small cart: Look for a cart with multiple levels to maximize storage. You can repurpose an old cart or buy a new one.
- Paint the cart: Choose a color that complements your decor and paint the cart for a fresh look.
- Add hooks: Attach hooks on the side of the cart to hold mugs.
- Organize with trays: Use trays to store coffee-making essentials such as sugar, syrups, and stirrers.
- Attach wheels: Install wheels on the bottom to make the cart mobile and easy to move around.
- Add baskets: Place baskets on lower shelves for storing coffee beans, filters, or extra mugs.
Space-Saving Tips
- Opt for a compact cart to keep counter space open.
- Use multiple tiers to hold different items, and tuck it away when not in use to free up space.
2. Build a Coffee Bar Using Floating Wood Shelves
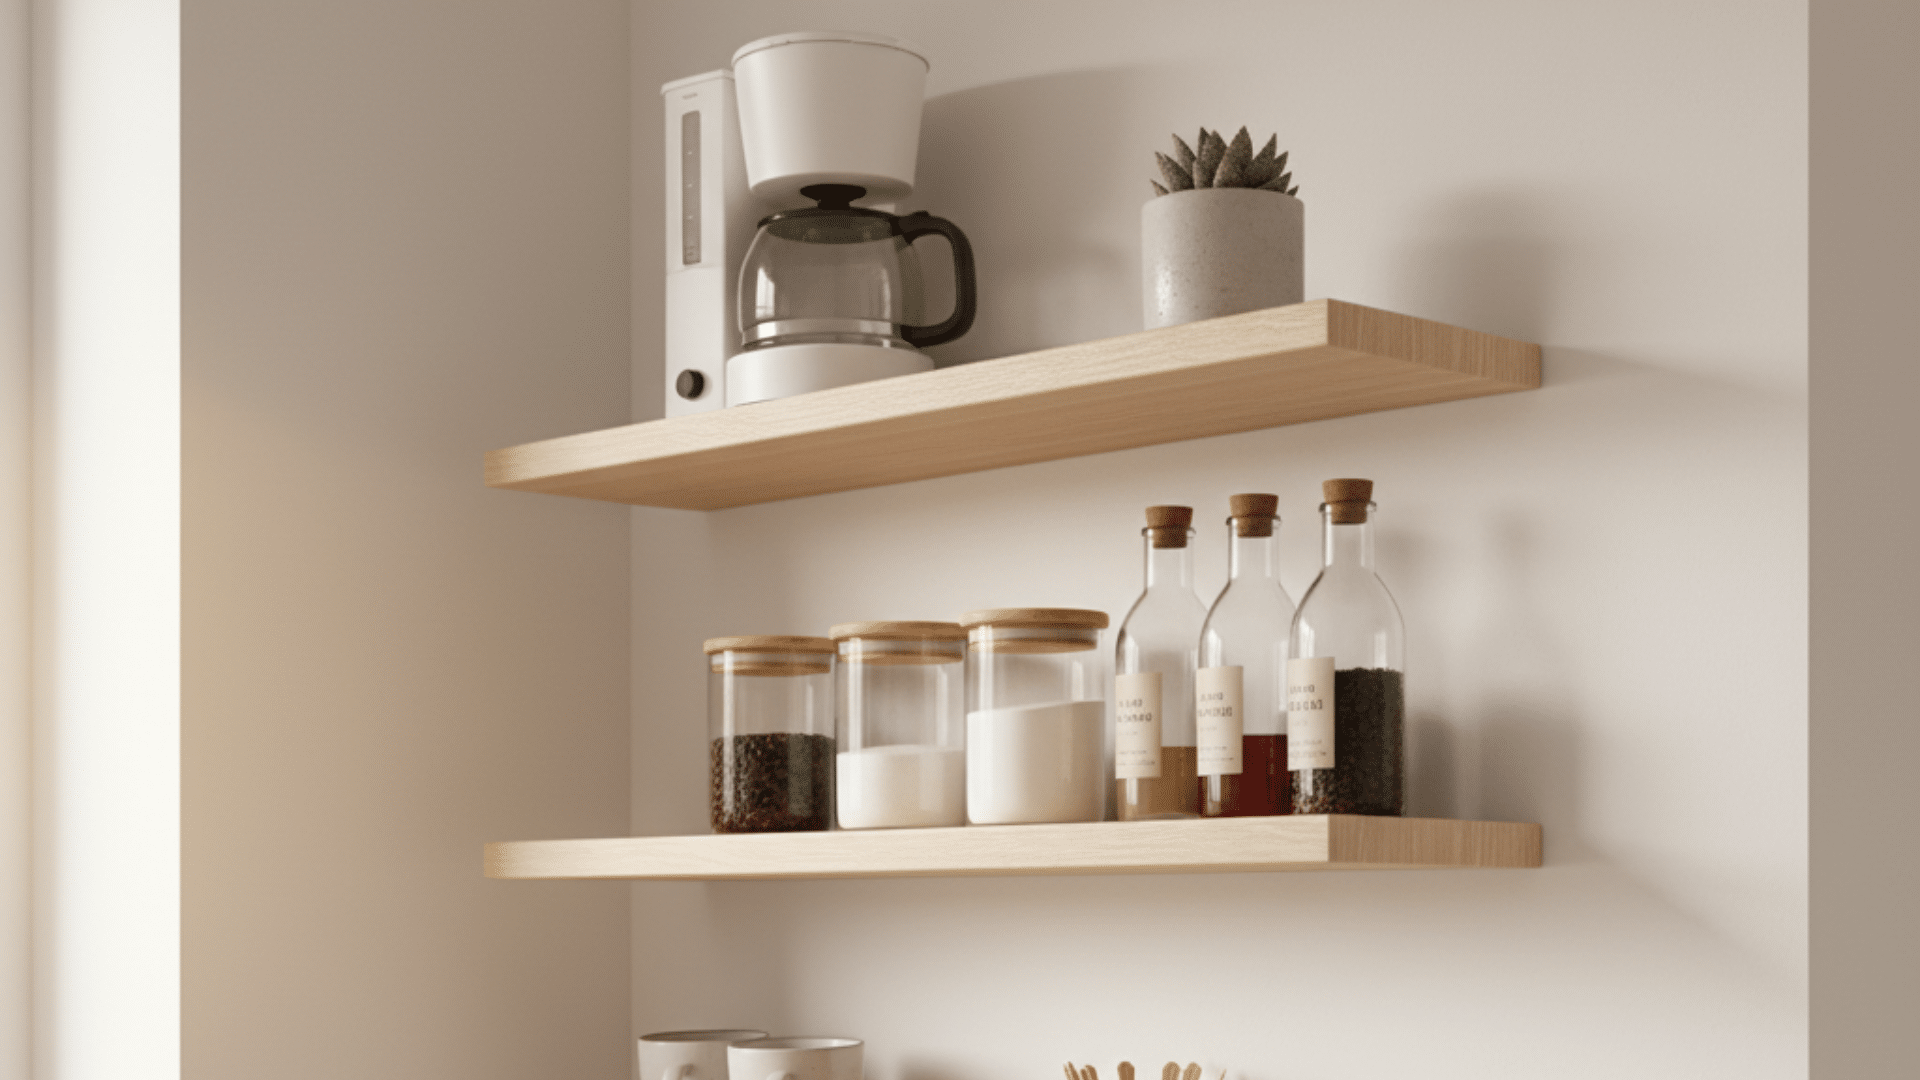
Floating shelves offer a minimalist and space-saving way to display coffee essentials without cluttering your space.
How to Build It
- Choose your location: Pick a wall space that’s easily accessible but doesn’t crowd your kitchen counter.
- Install the shelves: Use sturdy brackets to install floating shelves, ensuring they’re secure enough to hold your coffee essentials.
- Arrange your setup: Place your coffee maker, mugs, and jars of coffee beans or syrups on the shelves.
- Add small containers: Use glass jars or canisters to store sugar, stirrers, and other small items.
Space-Saving Tips
- Floating shelves keep your coffee station elevated, freeing up counter space.
- Consider adding a small shelf above your coffee maker for extra storage without crowding the area.
3. Convert an Old Dresser into a Coffee Station
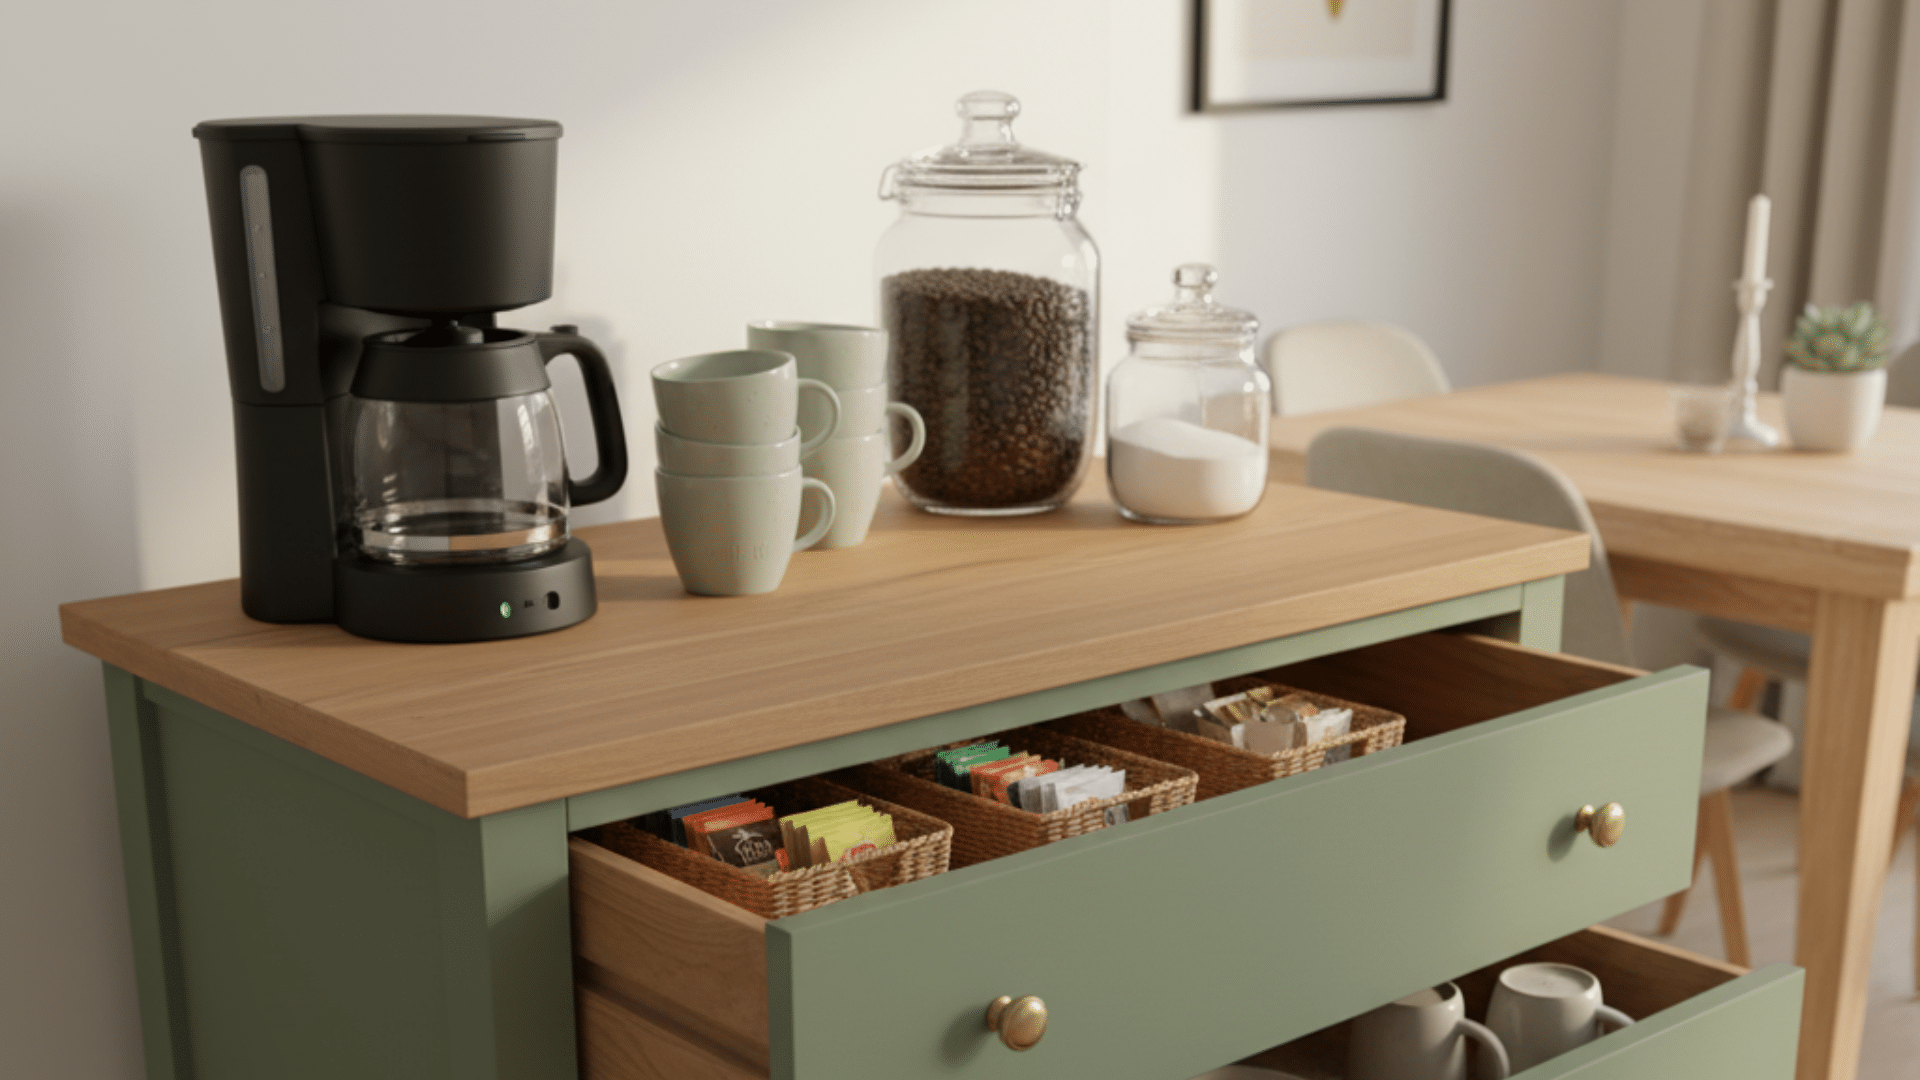
Repurpose an old dresser into a spacious, stylish coffee station that adds character to your home.
How to Build It
- Prep the dresser: Sand the surface to remove any old finishes, then clean it.
- Paint or stain: Apply your choice of paint or stain to match your room’s decor.
- Add new hardware: Replace old knobs with modern ones to elevate the look.
- Organize the drawers: Use the drawers for storing coffee filters, sweeteners, and extra mugs.
- Set up the top: Use the top for your coffee maker, mugs, and small decor pieces.
Space-Saving Tips
- The dresser provides ample storage for coffee essentials, allowing for a neat and organized setup.
- Repurposing a piece of furniture maximizes both space and functionality.
4. Upgrade an IKEA Cabinet Into a Built-In Coffee Bar
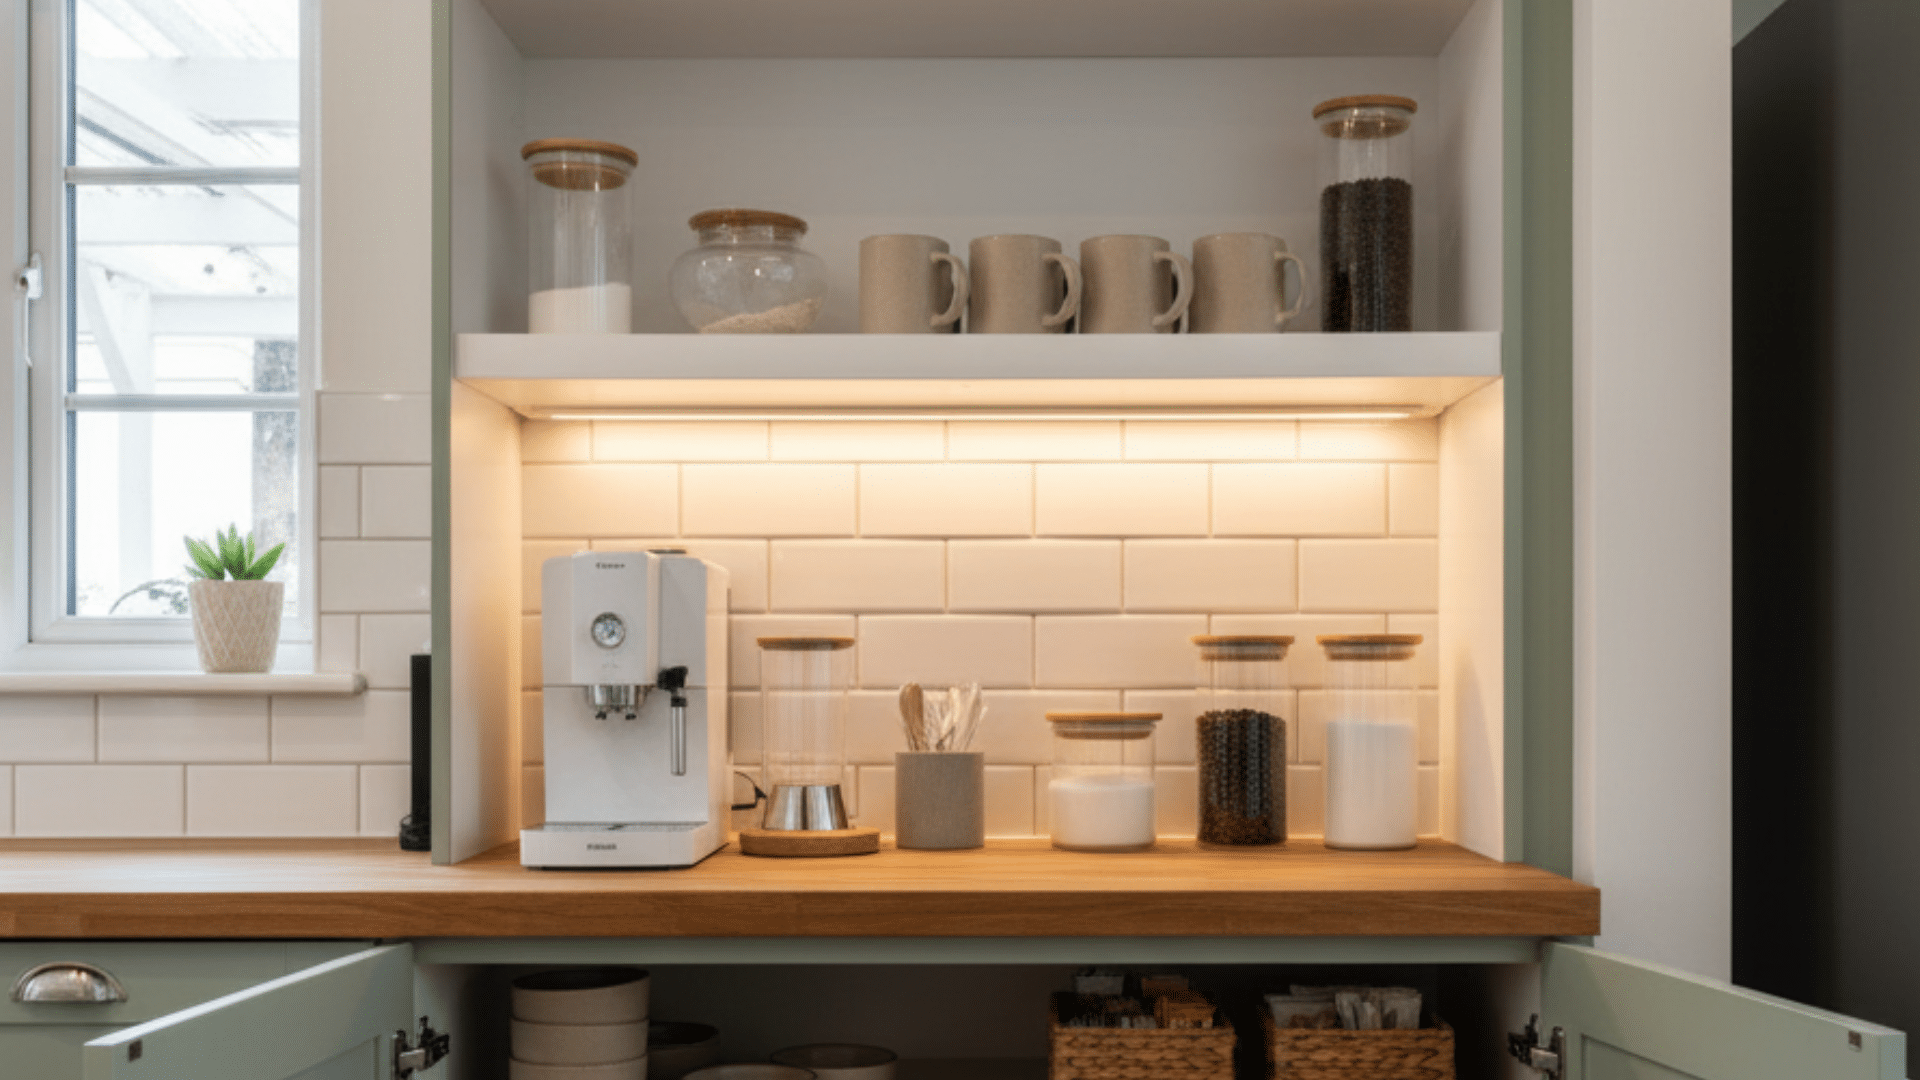
Turn an IKEA cabinet into a built-in coffee bar that looks custom while being easy to assemble.
How to Build It
- Choose the cabinet: Select an IKEA cabinet that fits your space and design aesthetic.
- Modify the cabinet: Remove the doors to create an open look and add a countertop surface.
- Install adjustable shelves: Place adjustable shelves inside to hold your coffee mugs, machines, and accessories.
- Add storage: Use bins or small baskets on the shelves to organize coffee-related items.
- Finish the look: Add finishing touches like a backsplash or small lights for a stylish appearance.
Space-Saving Tips
- This coffee bar is perfect for small kitchens or tight spaces because it utilizes vertical space.
- It’s easy to modify the cabinet to fit your needs, making it a great solution for renters.
5. Create a Coffee Bar Inside an Empty Closet Nook
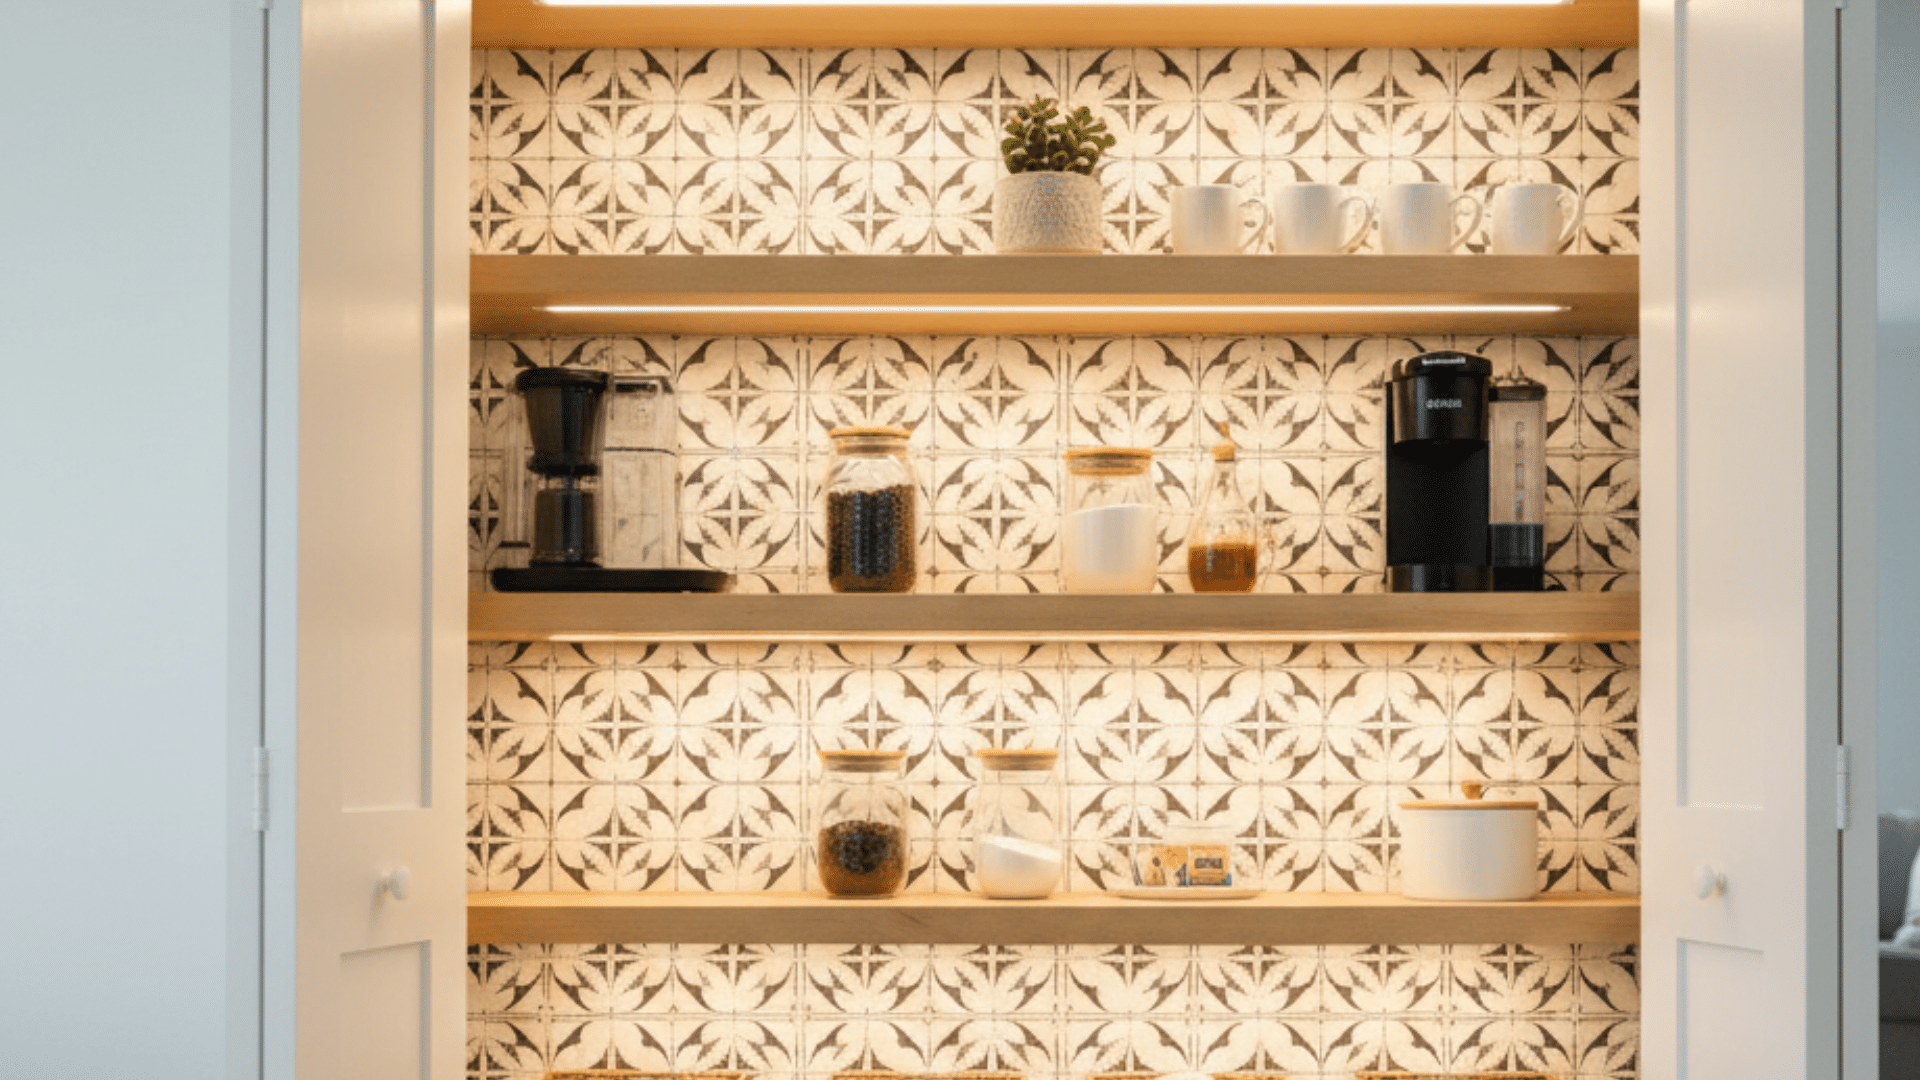
A hidden coffee station tucked inside an unused closet nook, perfect for small spaces.
How to Build It
- Clear the space: Empty the closet nook of any items and clean the area.
- Install shelves: Add floating shelves to hold coffee mugs, syrups, and a coffee maker.
- Add lighting: Install under-shelf lighting to brighten the space and create a cozy atmosphere.
- Use organizers: Place small containers or baskets to organize filters, beans, and sweeteners.
- Apply wallpaper: Choose a fun wallpaper or peel-and-stick tiles to add some style to the hidden nook.
Space-Saving Tips
- This setup maximizes a forgotten space, turning it into an efficient and hidden coffee station.
- Keeping everything tucked away when not in use helps maintain a tidy environment.
6. Make a Compact Countertop Coffee Bar for Small Kitchens
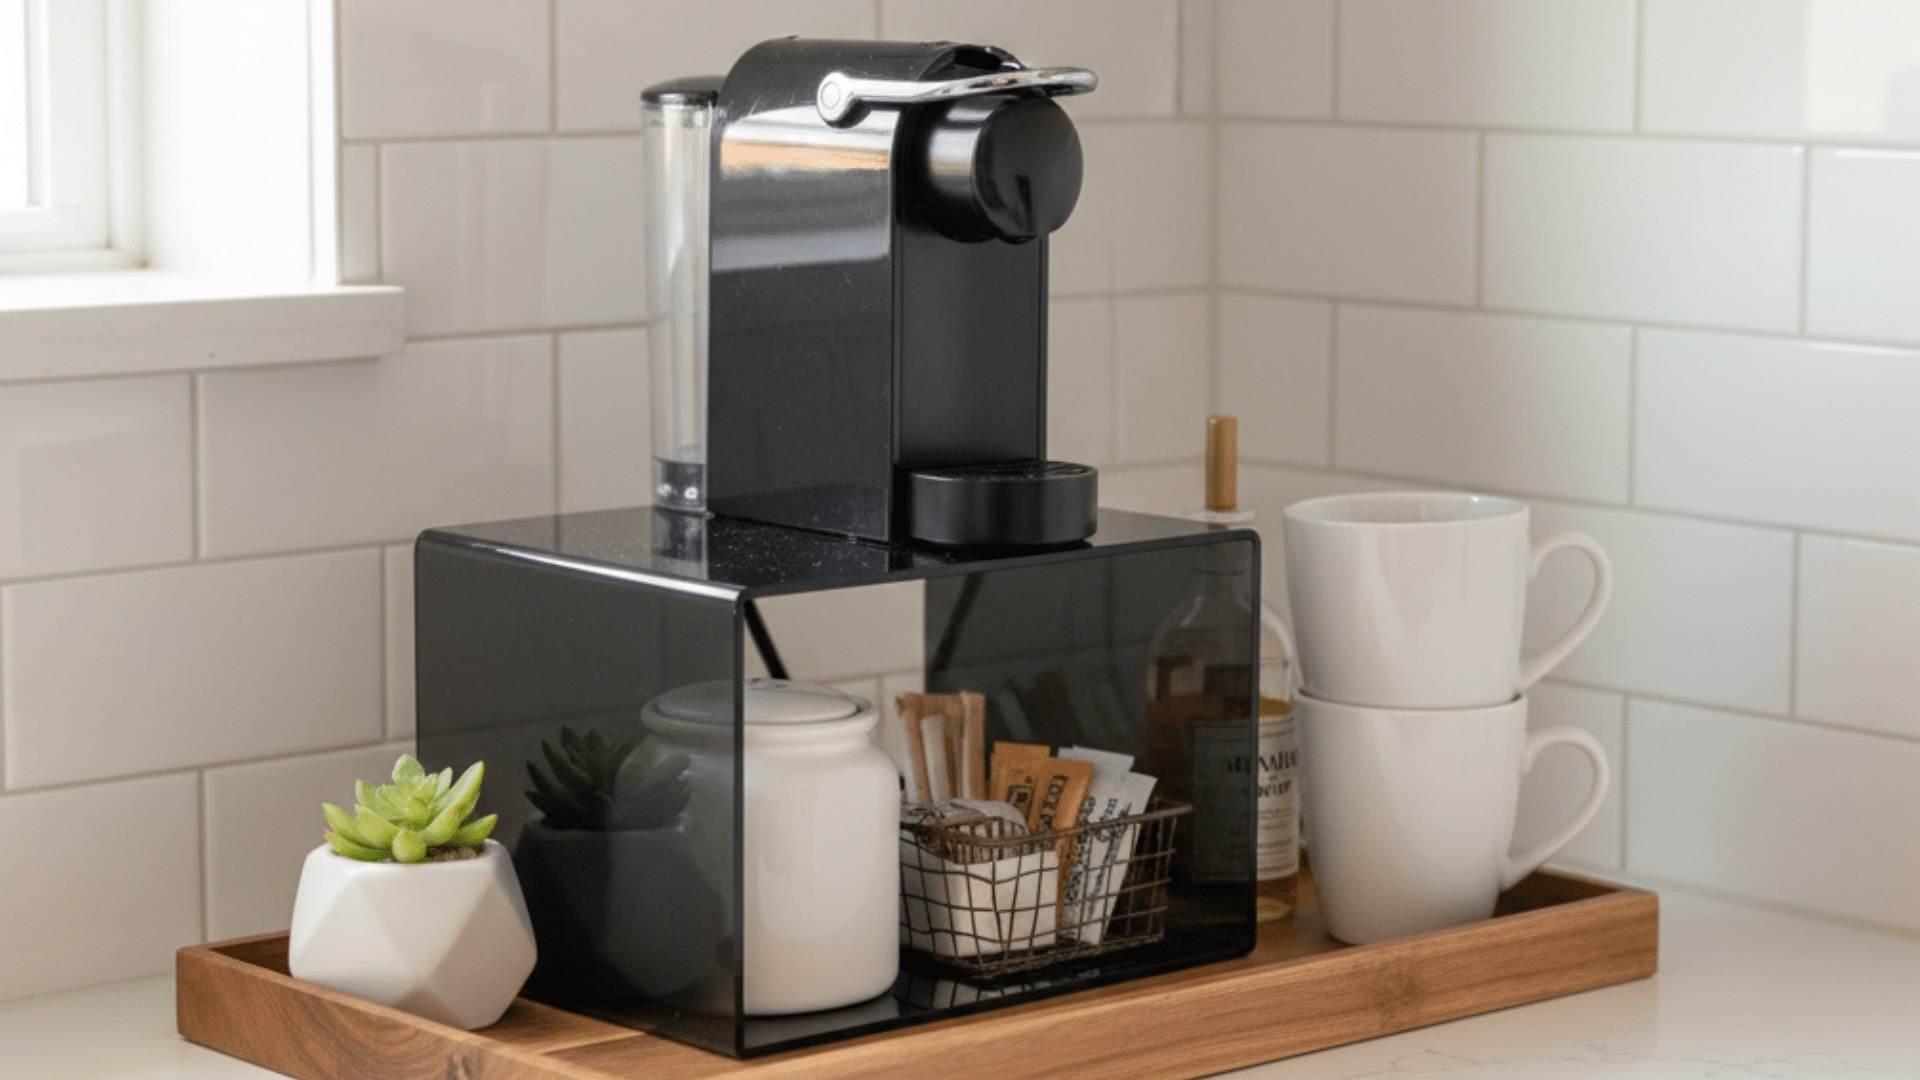
A compact and streamlined coffee bar for smaller kitchens where counter space is limited.
How to Build It
- Select a small tray: Choose a tray that fits your countertop, providing a dedicated space for your coffee station.
- Add a coffee maker: Place your coffee maker on the tray or a small riser to create height.
- Organize mugs and supplies: Use small containers or baskets to hold mugs, syrups, and sugar.
- Use a riser: Add a riser to keep items off the counter and maximize storage space underneath.
Space-Saving Tips
- Keep the coffee bar compact by only including essential items, avoiding overcrowding the countertop.
- A tray and riser setup allows you to keep everything organized and accessible without taking up too much space.
7. Turn a Hutch or China Cabinet Into a Coffee Bar
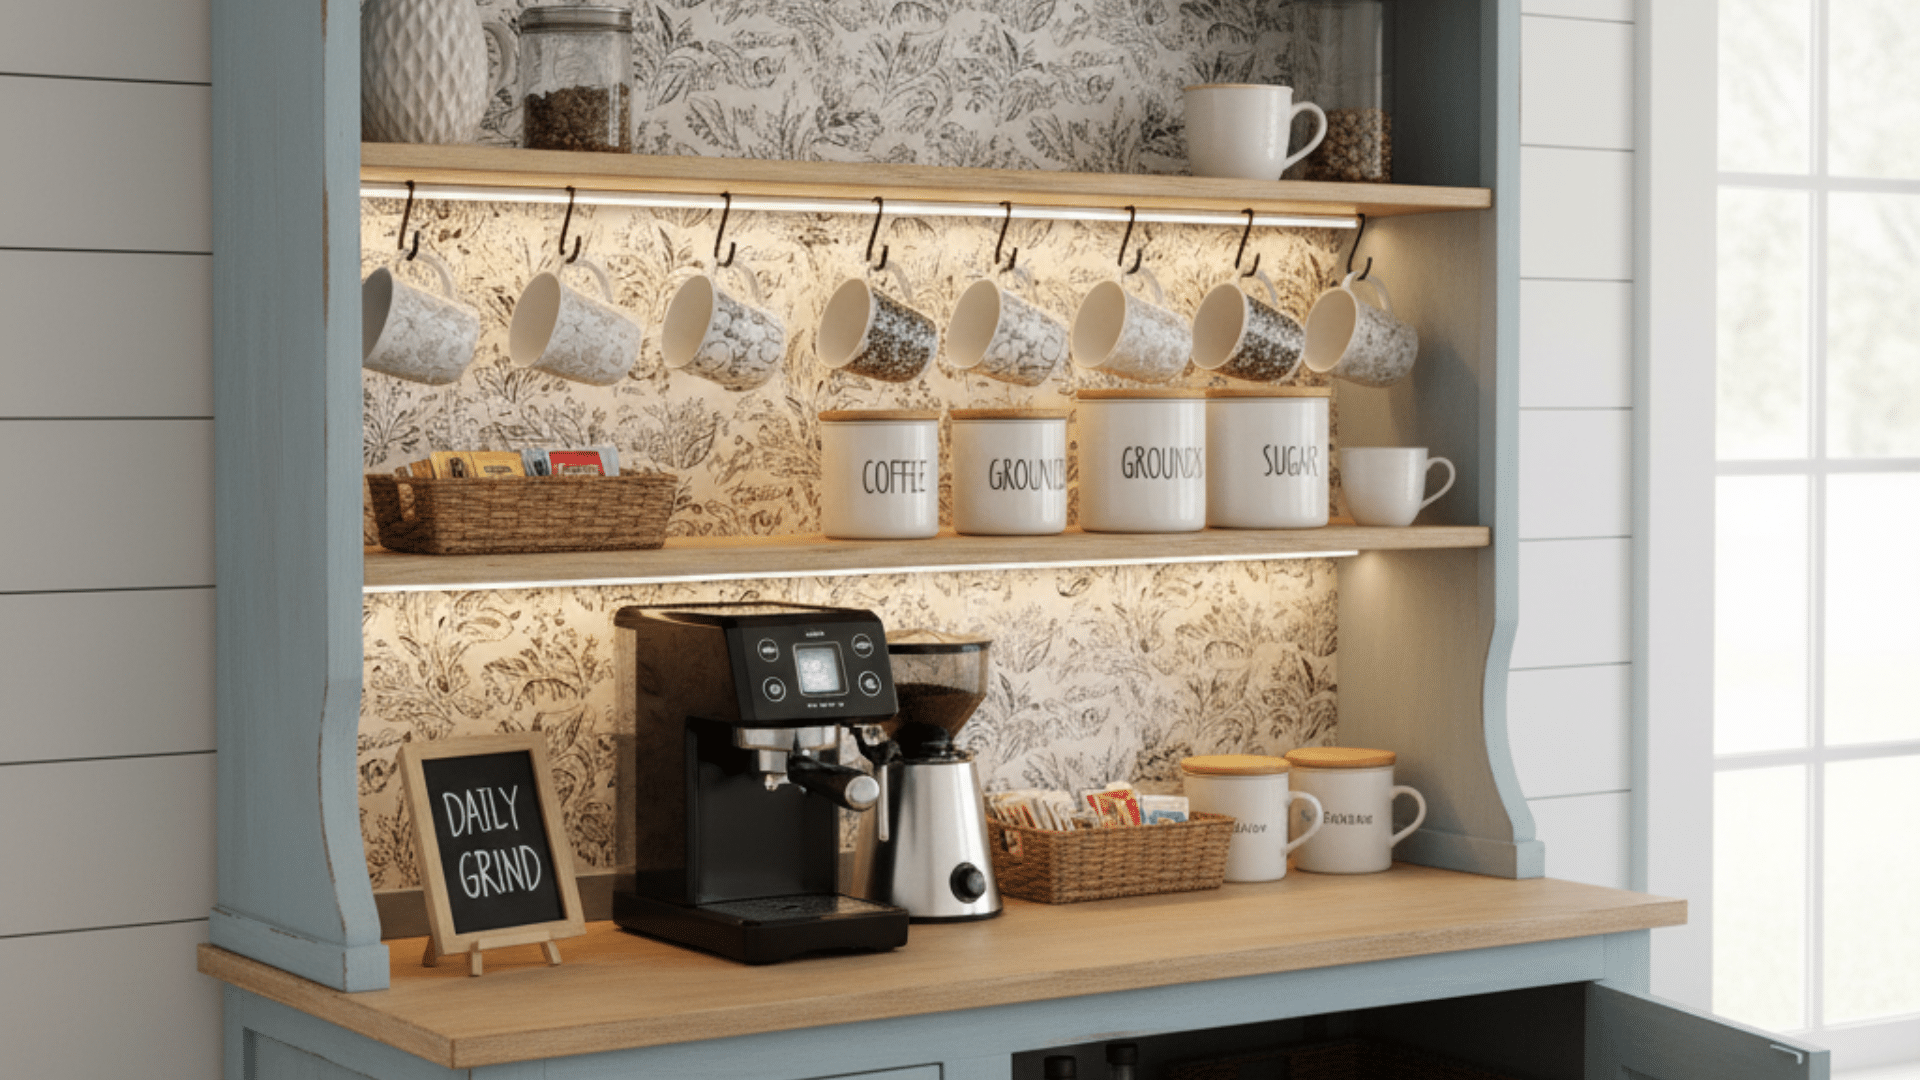
Repurpose an old hutch or china cabinet to create a charming and functional coffee bar.
How to Build It
- Remove the doors: Take off the cabinet doors for an open design that’s easy to access.
- Paint and finish: Sand and repaint the cabinet to fit your style, whether you prefer a rustic or modern look.
- Install lighting: Add string lights or LED strips to illuminate your coffee bar.
- Organize with shelves: Use the shelves to organize mugs, coffee beans, and accessories.
Space-Saving Tips
- The hutch offers plenty of storage for coffee supplies, and by removing doors, you open up the space.
- This project works especially well for farmhouse-style kitchens or vintage decor.
8. Build a Simple Coffee Bar Table with Plywood and Trim

A simple, custom-built coffee bar table that provides ample space for coffee essentials while being easy to build.
How to Build It
- Measure your space: Decide where you want the table to sit. Measure the width and depth so you know how big the tabletop should be. Write down the measurements before cutting anything.
- Cut the plywood: Use your measurements to mark the plywood. Cut the plywood using a circular saw or hand saw. Make sure the edges are straight so the trim sits flush later.
- Cut and attach the trim: Measure each edge of the plywood and cut the trim pieces to match. Apply wood glue along the edge, then press the trim into place.
Use finishing nails or a nail gun to secure the trim so it stays tight. - Sand the entire piece: Sand the top, edges, and trim until everything feels smooth. Start with medium-grit sandpaper and finish with fine-grit for a clean surface.
- Prime and paint (or stain): Apply a coat of primer if you’re painting. After it dries, add your paint color and let it dry fully.
If staining, wipe the stain on with a cloth, then seal it with a clear coat to protect the surface from spills. - Add legs or a base: Attach pre-made table legs, hairpin legs, or build a simple box base from 2×4s. Make sure everything is level before tightening screws.
- Add optional storage: If you want extra storage, install a shelf under the tabletop. Use leftover plywood or pick up a small board from the hardware store.
Add baskets or bins to hold coffee filters, beans, syrups, or extra mugs.
Space-Saving Tips
- This DIY coffee bar is perfect for larger spaces that need a dedicated coffee station.
- It’s easy to adjust the size and design based on your available space.
9. Build a Coffee Bar on a Wall-Mounted Pegboard
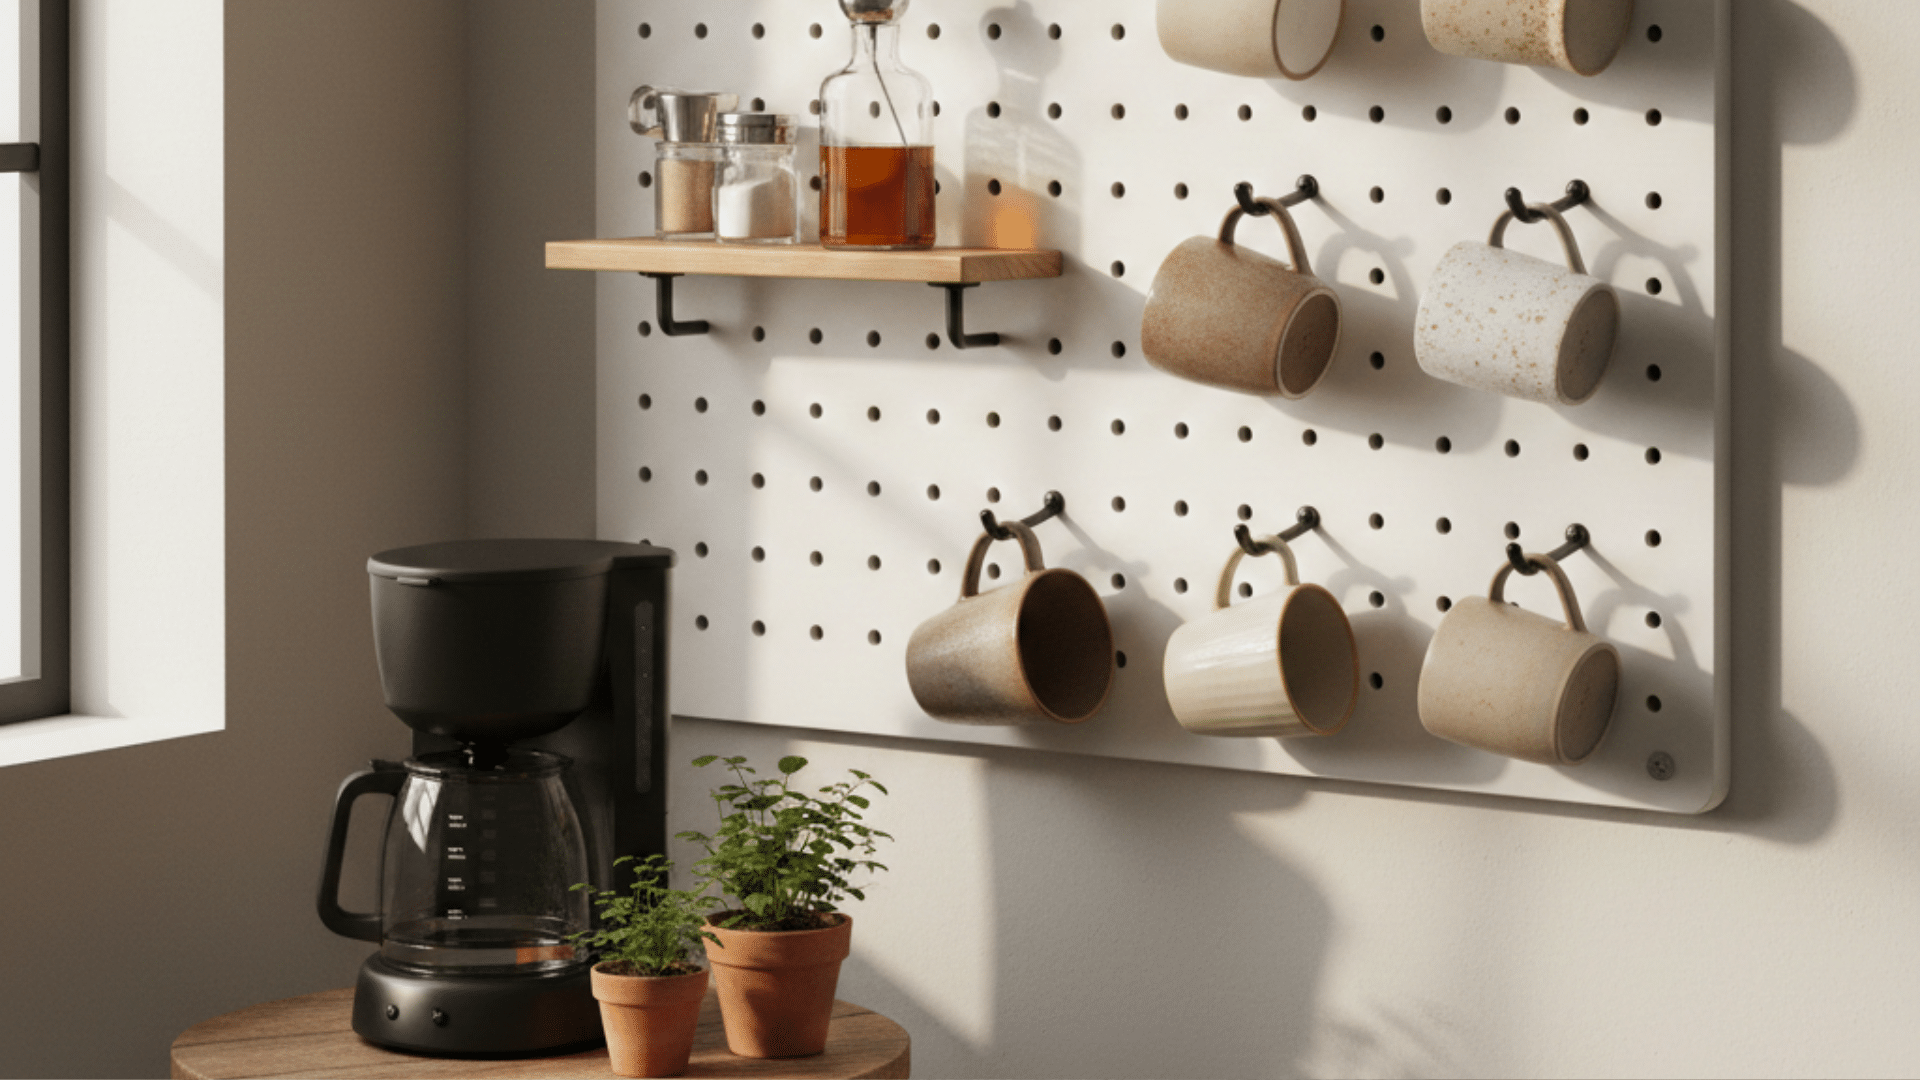
A pegboard coffee bar keeps everything organized and off the counter. It’s flexible, easy to customize, and great for small kitchens.
How to Build It
- Measure your wall area: Choose a wall that’s easy to reach. Measure the width and height to know what pegboard size you need.
- Install the pegboard: Use wood strips (furring strips) to create a small gap between the wall and the pegboard. Screw the strips into wall studs, then screw the pegboard onto the strips.
- Add hooks and shelves: Place hooks for mugs, spoons, and tools. Add small pegboard shelves for jars, syrups, or filters.
- Set up your coffee maker: Keep the coffee maker on a counter or a small table below the pegboard so everything stays in one zone.
- Label and organize: Use small bins for pods, beans, or sweeteners. Place everything where it’s easy to grab each morning.
Space-Saving Tips
- Vertical storage keeps your counters free.
- Rearrange hooks anytime to change your layout.
10. Turn a Ladder Shelf Into a Leaning Coffee Bar
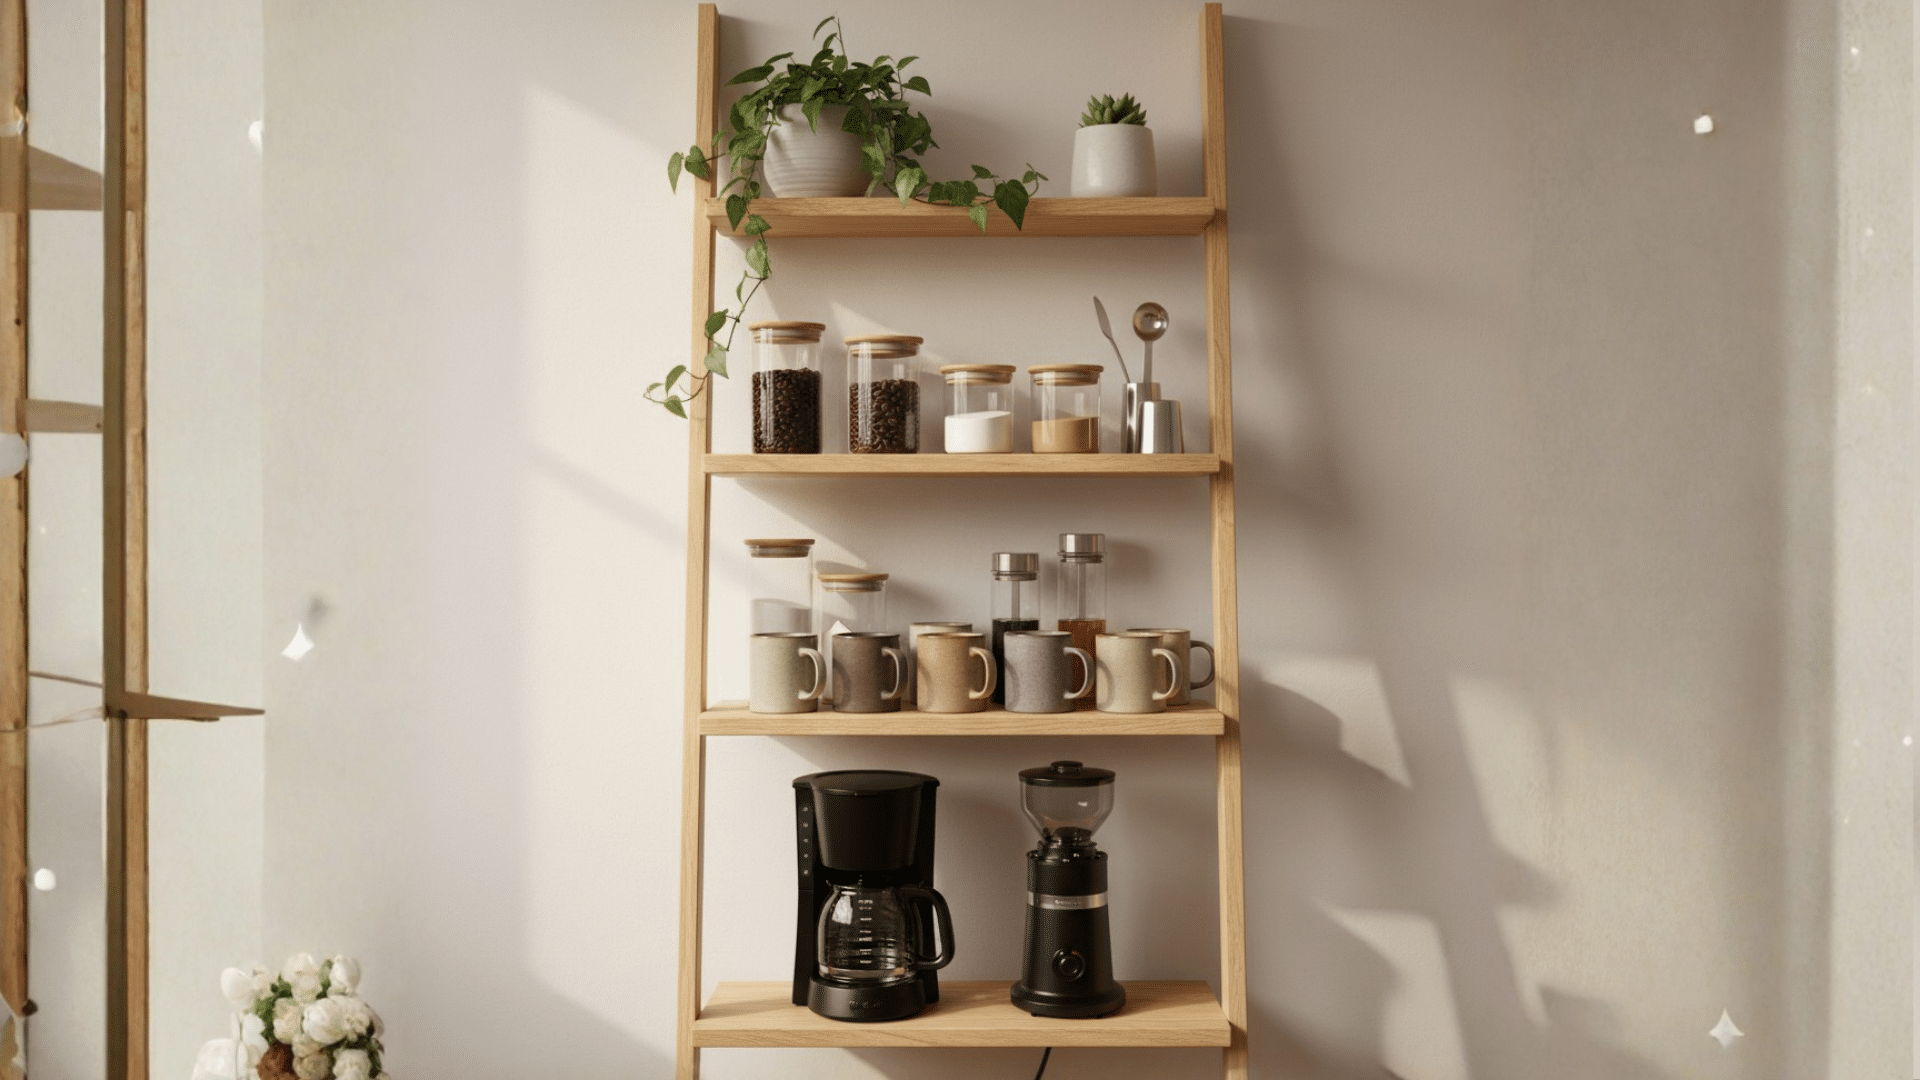
This idea uses a stylish leaning ladder shelf to create a tall, narrow coffee station that fits in tight corners.
How to Build It
- Pick a good ladder shelf: Choose a ladder-style shelf with wide lower shelves for your coffee maker and smaller upper shelves for supplies.
- Secure the shelf: Lean it against the wall and attach a small bracket at the top for safety.
- Set up your coffee maker: Place the machine on the widest lower shelf, close to an outlet.
- Organize each level: Use the middle shelves for mugs, syrups, and storage jars. Put decor or plants on the top shelves.
- Add bins for small items: Use small baskets on lower shelves to keep pods, spoons, and filters tidy.
Space-Saving Tips
- Ladder shelves take almost no floor space.
- Tall shelves use height instead of width.
11. Build a Coffee Bar on Top of a Mini Fridge

A mini-fridge coffee bar keeps creamers cold and gives you a compact station perfect for offices, dorms, or small apartments.
How to Build It
- Find a sturdy mini fridge: Make sure the top can safely hold your coffee maker. Most dorm-style fridges can handle small appliances.
- Add a board or tray on top: Place a wooden board or tray on the fridge to create a flat, secure surface.
- Set up your coffee maker: Place your machine on the tray and tuck the cord so it stays neat.
- Add storage beside the fridge: Use a small rolling cart or basket tower next to the fridge for mugs and supplies.
- Keep dairy inside: Store creamers, milk, or cold brews inside the fridge for quick access.
Space-Saving Tips
- Perfect for tight spots where a full cabinet doesn’t fit.
- Works in bedrooms, studios, or office corners.
12. Create a Corner Coffee Bar With a Triangle Shelf Stand
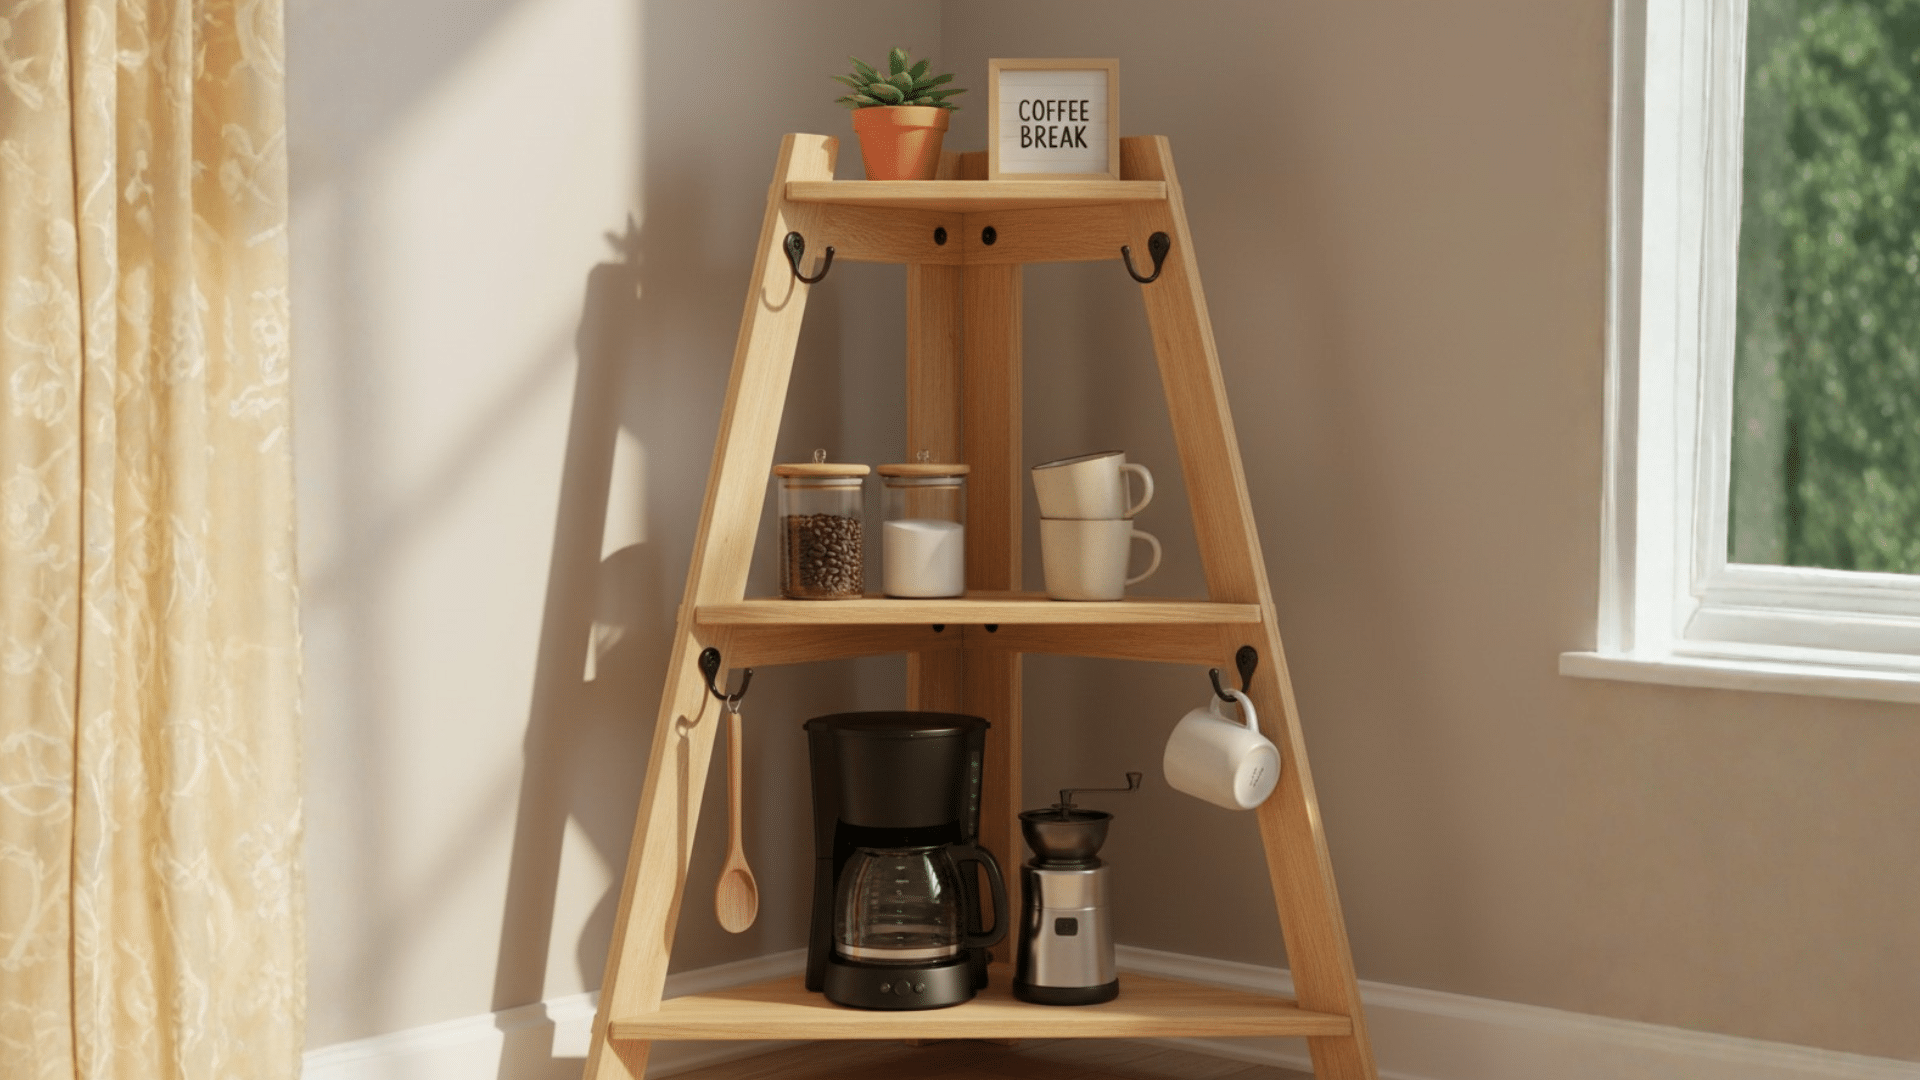
A triangle-shaped shelf stand fits neatly into an unused corner, giving you a dedicated coffee station without taking up much floor space. It’s great for small kitchens or dining areas.
How to Build It
- Measure your corner: Pick an open corner in your kitchen or living area. Measure the width from each wall so your triangle stand fits without blocking walkways.
- Cut the triangle shelves: Use plywood or pine boards. Cut 2–3 triangle shelves that match your corner measurements. Each shelf should be wide enough to hold mugs or jars.
- Build the frame: Use three equal-length wooden boards to create a tall, open triangle frame. Screw the boards together at the top and bottom so the shape stays stable.
- Attach the triangle shelves: Place each shelf inside the frame at your preferred height. Screw the shelves into the sides of the frame so they can support mugs, jars, and small tools.
- Sand and finish: Sand the entire piece and paint or stain it to match your space. Let it fully dry before setting it up.
- Set up your coffee gear: Place your coffee maker on the bottom shelf. Use the middle shelf for mugs and jars. Use the top shelf for decor or small containers.
Space-Saving Tips
- Triangle furniture fits where regular shelves don’t.
- Add a small hook on each side to hang a mug or spoon.
- Use a narrow design to keep the floor open and uncluttered.
13. Build a Coffee Bar Using Wooden Crates

Wooden crates stack into a simple, rustic coffee bar that adds charm while giving tons of flexible storage.
How to Build It
- Pick your crates: Find 3–6 wooden crates of the same size so they stack neatly.
- Sand and finish: Sand each crate. Paint, stain, or clear-coat them to protect the wood.
- Stack the crates: Create a layout you like, horizontal, vertical, or mixed. Secure crates with screws so they don’t shift.
- Add a top board: Place a flat board or piece of plywood on top to create a smooth surface for your coffee maker.
- Organize the inside: Use the inside of the crates to store mugs, jars, filters, and other items.
Space-Saving Tips
- Crates can be rearranged anytime.
- Works great for renters because nothing is permanent.
Mistakes to Avoid when DIYing a Coffee Bar
A few simple mistakes can make your coffee bar harder to use, so keep these points in mind while planning your setup.
- Putting your coffee bar in a spot without easy outlet access makes daily use harder and limits where machines and tools can sit.
- Adding too many items at once leads to clutter, leaving little room for mugs, supplies, and basic tools you use every day.
- Using shelves or furniture that can’t support the weight of machines or jars creates safety issues and increases the chance of damage.
- Skipping measurements before installing shelves or tables often leads to poor fit, uneven spacing, and a setup that feels cramped or awkward.
- Forgetting to plan storage for small items makes the station messy, since pods, filters, and spoons need clear, simple organization.
Final Thoughts
I hope you feel ready to put your setup together and make your routine a little smoother.
Each idea in this post focuses on simple builds that fit small spaces, keep things neat, and help you enjoy your morning without extra steps. The whole goal is to create a spot that works for you, stays organized, and feels easy to use every day.
A DIY coffee bar can do that, even in the smallest room. If you try one of these ideas, I’d love to hear which one you picked and how it worked for you.
When you’re ready, take a look at my other home guides for more simple projects you can try next.