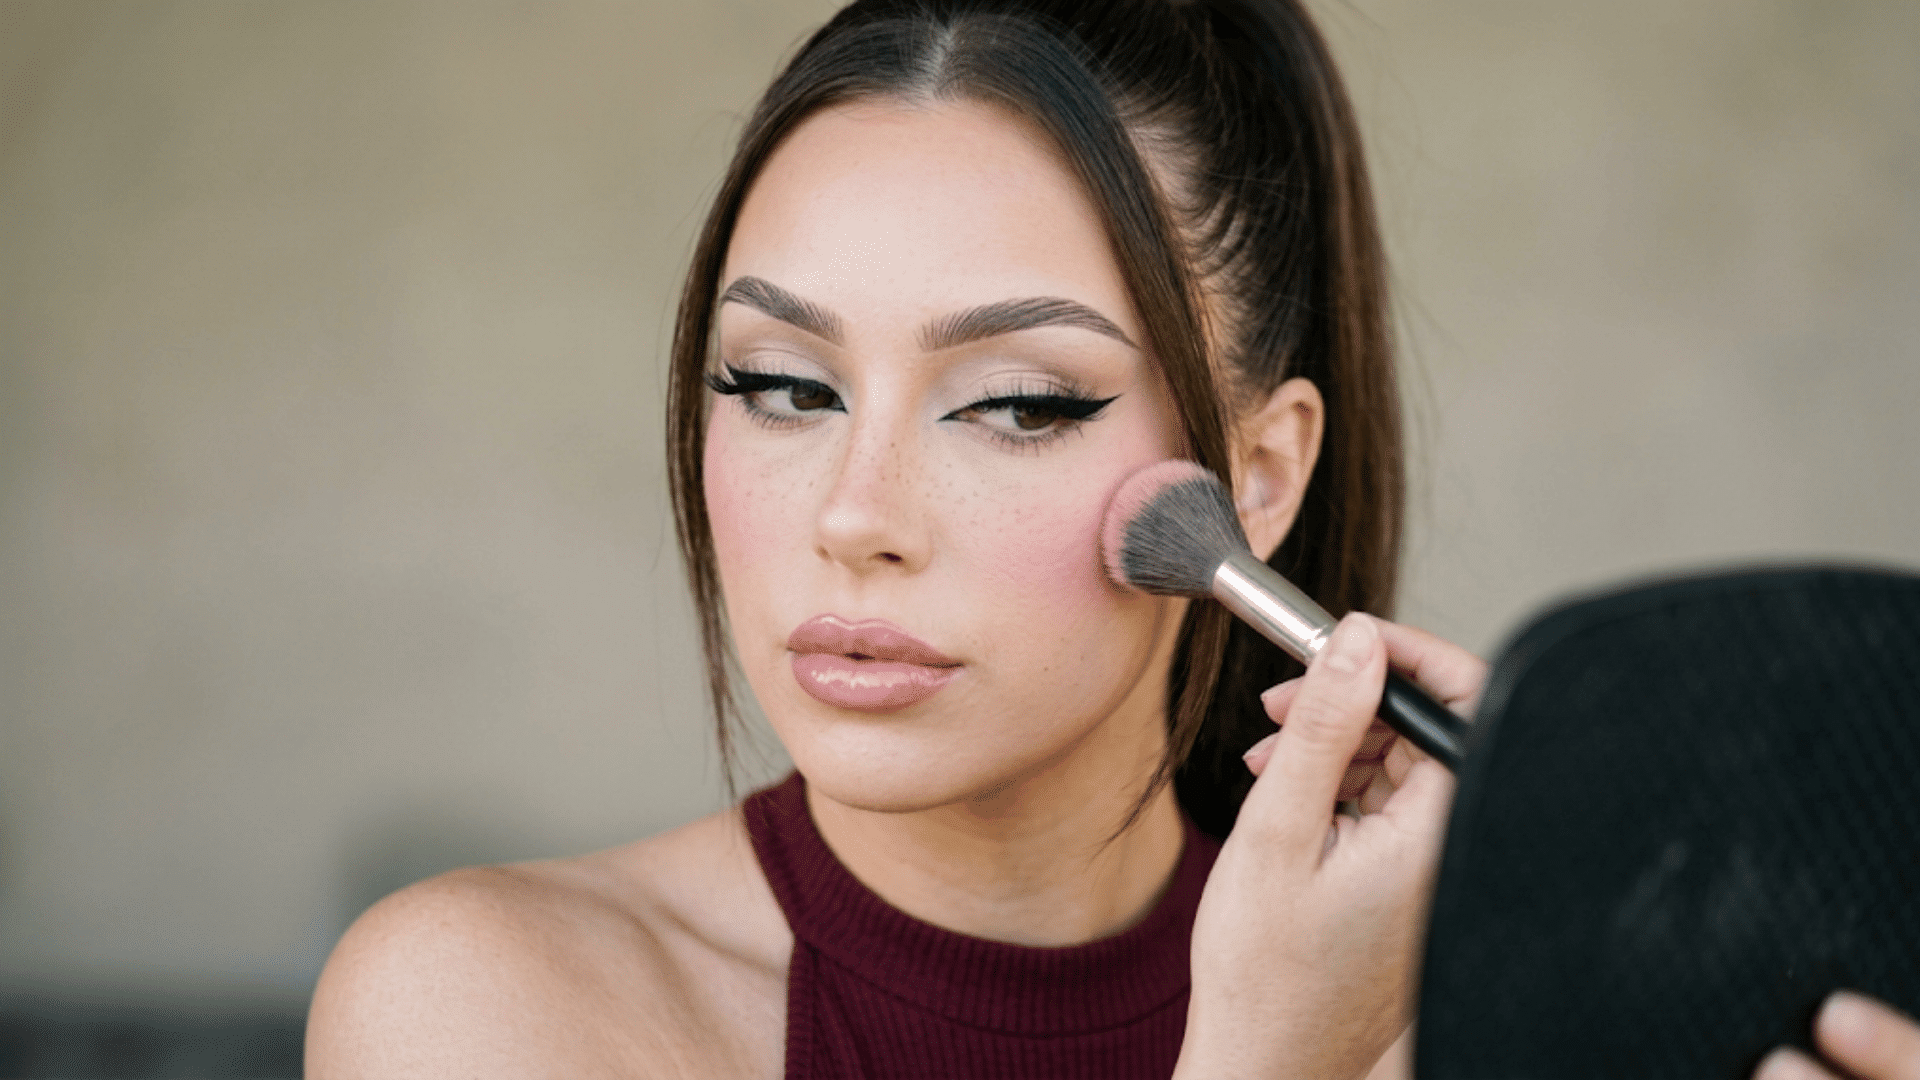
Ever apply blush hoping for a soft glow, only to end up with two bright patches that will not blend?
I’ve had that happen, and the blush itself is rarely the problem. The amount you use, where you place it, and how you blend it can completely change the result
Learning how to apply blush helps you add color without making your cheeks look heavy or uneven.
Right Blush Shade for Your Undertone
Your undertone decides which blush colors read as a natural flush instead of a stripe of color sitting on top of your skin.
Check the veins on the inside of your wrist in natural light: green veins point to a warm undertone, blue or purple veins point to cool, and a mix means you’re neutral.
|
Undertone / Skin Tone |
Best Blush Shades |
|---|---|
|
Warm Undertones |
Peach, coral, warm pink |
|
Cool Undertones |
Rose, berry, mauve |
|
Neutral Undertones |
Most blush shades |
|
Fair Skin |
Soft pink, light peach, pale rose |
|
Deeper Skin Tones |
Rich berry, deep coral, terracotta |
How to Apply Blush Step by Step?
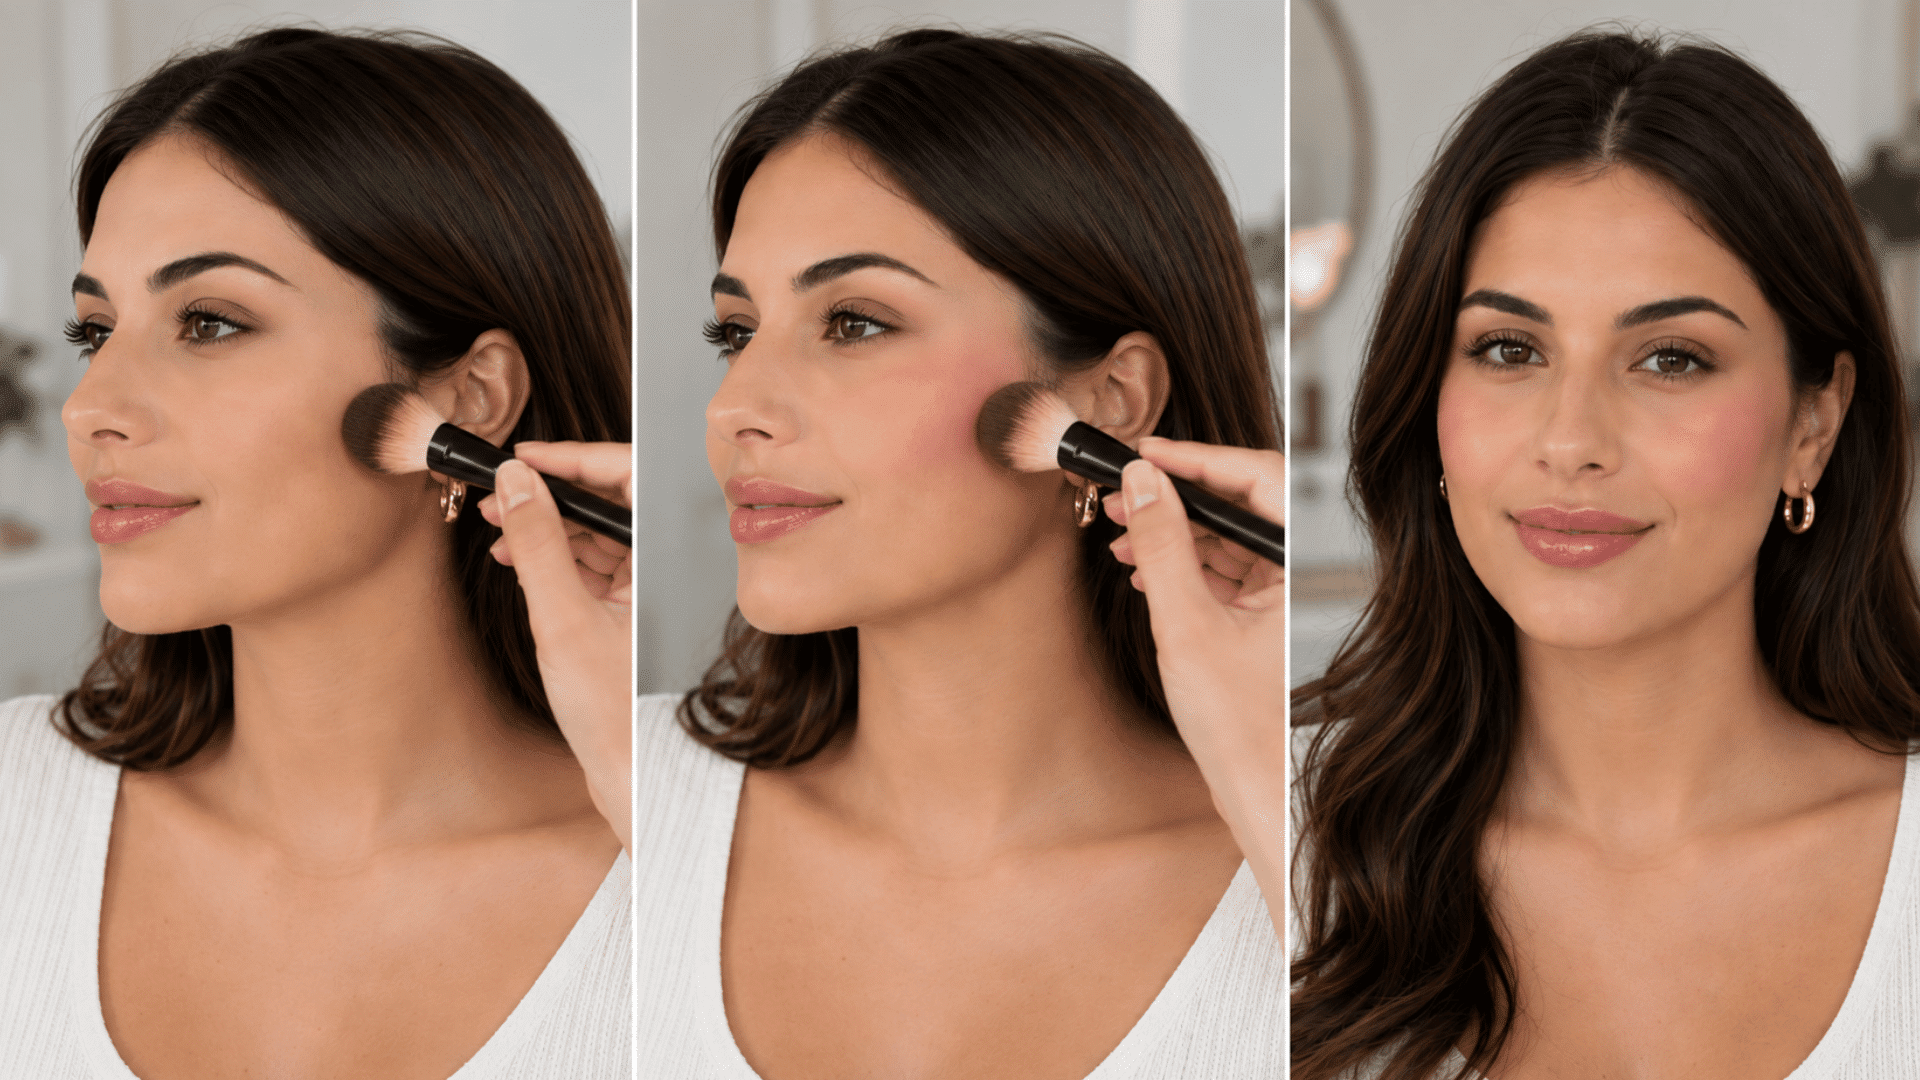
For natural-looking blush, start with a small amount on the upper cheeks and blend gently upward toward the temples.
Step 1. Prepare Your Skin and Makeup
Smooth out dry patches or creased foundation so the blush doesn’t cling unevenly.
Apply cream or liquid blush over unset foundation or BB cream.
A well-prepping skin before foundation underneath makes any blush formula sit smoother on top.
Step 2. Start With a Small Amount
Begin with less blush than you think you need because adding pigment is easier than removing it.
Tap excess powder from your brush before it reaches your face. For cream or liquid blush, place a small amount on the back of your hand first.
Pick it up with your fingers, sponge, or brush to control how much product reaches your cheeks.
Step 3. Look Straight Into the Mirror
Face the mirror with a relaxed expression, smile briefly to find your cheek apples, then relax before placing blush to prevent low placement.
Keep your head level and look straight ahead as you apply the first layer. Compare the height and angle on both cheeks before adding more color.
Working with a relaxed expression shows where the blush will actually sit once you finish your makeup.
Step 4. Find Your Starting Point
For a lifted look, begin on the upper cheek and work toward the temple. For a softer, rounder appearance, start slightly closer to the apples.
Place two fingers beside your nose, then apply blush beyond them to avoid placing it in the center.
This simple spacing method helps prevent the color from moving too close to your nose. Keep the strongest pigment where you want the placement to begin.
Step 5. Place and Blend the Color
Press or tap blush onto one small area before blending. This controls the shape and intensity while preventing the color from spreading too far.
Blend the edges upward and outward using light pressure. Avoid rubbing or dragging over foundation because it can disturb the base and leave patches.
Keep most of the pigment on the upper cheek, then soften the edges until no obvious border remains.
Step 6. Build Balance and Set
Alternate between cheeks as you build the color instead of applying several layers to one side first.
After one layer, step back and compare both cheeks from a normal distance. Add a small amount only where the color looks lighter or uneven.
Finish with a light mist, such as Urban Decay All Nighter Setting Spray, to help everything blend together and keep your makeup in place longer.
How to Apply Different Blush Formulas?
Each blush formula needs a slightly different tool and motion to blend smoothly without disturbing the makeup underneath.
- Powder Blush: Tap excess from NARS Powder Blush, then sweep upward over set skin for buildable color in multiple finishes.
- Cream Blush: A cream formula such as e.l.f. Putty Blush can be pressed onto the cheeks with fingers or a dense brush
- Stick Blush: A portable stick such as Milk Makeup Lip and Cheek can be transferred to a brush before application.
- Liquid Blush: Highly pigmented formulas like Rare Beauty Soft Pinch Liquid Blush should be applied one small dot at a time, then blend quickly with tapping motions.
Where to Apply Blush for Different Looks?
Choose blush placement for your preferred finish, adding warmth and definition while keeping natural makeup looks soft and balanced.
|
Desired look |
Blush placement |
|---|---|
|
Natural flush |
Upper apples, blended softly outward |
|
Lifted |
High on cheekbones toward temples |
|
Fuller cheeks |
Centered slightly forward on apples |
|
Sculpted |
Along cheekbones, just above contour |
|
Sun-kissed |
Across cheeks with a touch on nose |
Best Blush Placement for Your Face Shape
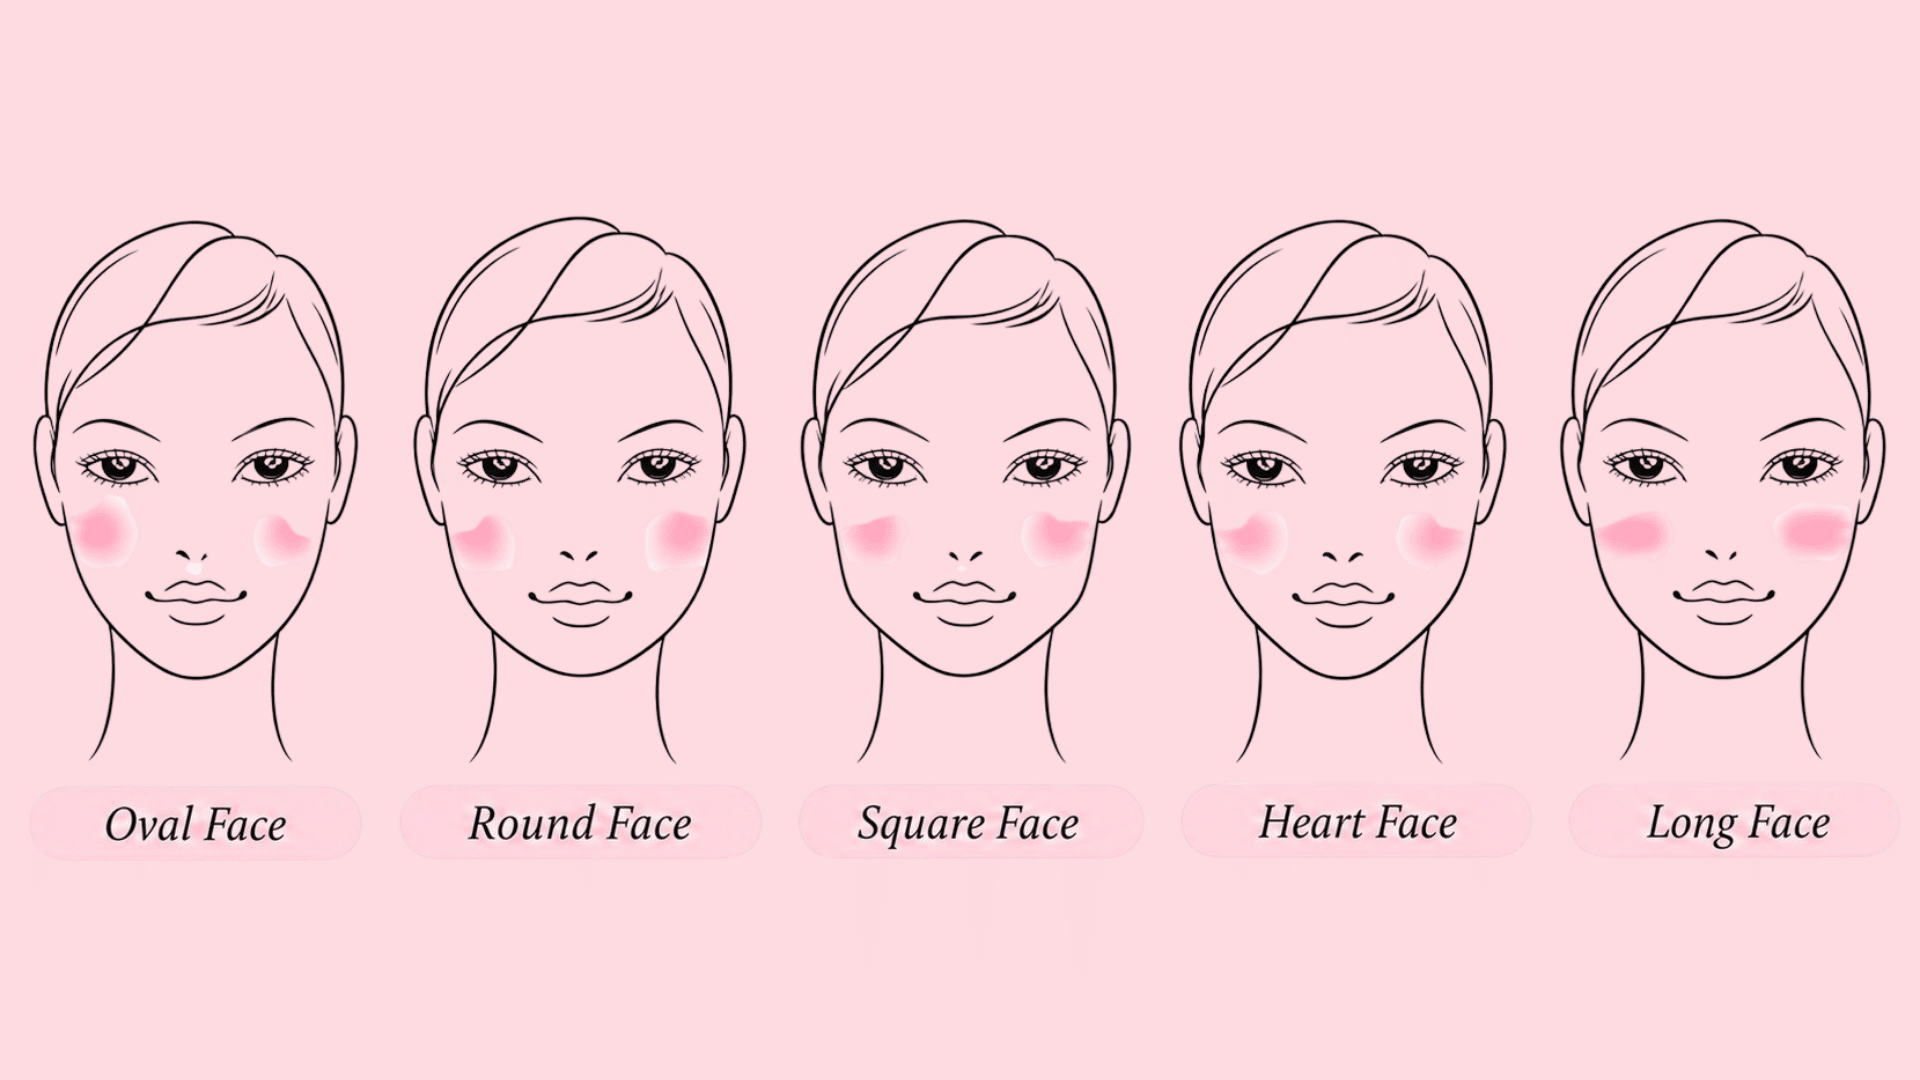
Use your face shape as a starting point, then adjust the placement to complement your individual features and preferred makeup style.
1. Round Face
Apply blush slightly above the apples of your cheeks, then blend it upward and outward toward your temples.
This angled placement creates a lifted appearance and adds gentle definition.
Avoid concentrating too much color in the center of your cheeks, as this may make your face appear rounder.
2. Long Face
Sweep blush horizontally across the apples of your cheeks, blending softly toward your ears.
This placement creates the appearance of width and helps balance a longer face.
Avoid blending the color too high toward your temples, as an upward application may make your face look even longer.
3. Oval Face
Start by applying blush to the apples of your cheeks, then blend it gently upward along your cheekbones.
This placement adds natural warmth while highlighting the balanced proportions of an oval face.
Keep the color soft and avoid applying it too close to your nose for a polished finish.
4. Square Face
Apply blush to the apples and outer areas of your cheeks using soft, circular motions. Blend the edges carefully to soften a defined jawline and angular facial features.
Avoid sharp diagonal lines, as a rounded, diffused application usually gives a square face a softer, more balanced appearance.
5. Heart-Shaped Face
Place blush slightly below the apples of your cheeks, then blend it outward toward your ears. This placement helps balance a wider forehead and a narrower chin.
Keep the color soft near the center of your face, and avoid blending too high, as this may draw extra attention to the forehead.
How to Make Your Blush Last Longer?
These simple layering and setting habits help blush remain smooth, balanced, and visible throughout the day.
- Build Thin Layers: Apply blush gradually, allowing each layer to blend before adding more color.
- Layer Cream and Powder: Apply cream blush first, then lightly dust matching powder over it.
- Set Around the Color: Press translucent powder around blush without covering or dulling its finish.
- Avoid Touching Your Cheeks: Keep hands away to prevent rubbing, transferring, or fading the color.
- Refresh Faded Areas: Add a little color where needed, then gently soften the edges.
Final Thoughts
Blush should feel personal and fun, giving you the freedom to create a look that feels right.
I usually start with a little blush, blend it gently, then compare apple and cheekbone placement in window light for soft, balanced results.
Which placement wins for your face? Share your favorite technique and blush formula in the comments so other readers can try it too.
Frequently Asked Questions
Can You Apply Blush Without Wearing Foundation?
Yes. Apply blush to moisturized, dry skin and build it gradually. Cream formulas create a skin-like finish, while powder often suits oilier skin.
Should Blush Match Your Lipstick?
It does not need to match exactly. Choose shades with similar undertones, such as warm peach blush with coral lipstick, for a coordinated look.
Can Lipstick Be Used as Blush?
Yes, creamy lipstick can work as blush. Dab a tiny amount onto your hand, then tap it onto your cheeks after confirming it is skin-safe.