If you’ve ever wanted to grow your own fresh greens but don’t have outdoor space, you’re in the right place.
Learning how to grow microgreens indoors is one of the simplest ways to bring healthy, flavorful food into your home.
I love how quick and easy it is; you can go from seed to harvest in just a week or two with very little effort. You don’t need fancy tools or a garden; just a small tray, some light, and a bit of care.
In this guide, I’ll show you everything you need to know, what supplies to use, how to plant, and how to keep your greens thriving right on your countertop.
Microgreens Basics for Indoor Growing
When I first started, I didn’t realize how different microgreens were from sprouts.
Sprouts grow completely in water and are eaten roots and all, while microgreens take things a step further; they grow in a thin layer of soil or another growing medium, and you only harvest the greens above the surface.
They’re tiny but full of flavor and color, and honestly, they grow faster than you’d expect.
The process is simple and pretty relaxing once you get into it: scatter the seeds densely in a shallow tray, keep them moist but not soaked, give them light after they sprout, and in about 7–14 days, you’ll be trimming your first batch of fresh greens.
Best Containers for Growing Microgreens Indoors
After some trial and error, I learned the container matters more than you’d think. Microgreens only need about one to two inches of depth, but must have good drainage so roots stay healthy.
You don’t need special gear; clean takeout boxes or pie tins work fine if they have holes for water to escape. Here’s what I’ve found works best:
| Container Type | Pros | Cons | Best Use |
|---|---|---|---|
| Plastic nursery trays (10×20) | Reusable, durable, and designed for even drainage | Need cleaning between each batch | Regular indoor growers |
| Takeout boxes or salad clamshells | Easy to find, compact, perfect for small spaces | Need holes added for drainage | Beginners or small-batch growing |
| Pie tins or baking sheets | Wide surface area, easy to clean | No built-in drainage, must be monitored | Short-term or trial grows |
| Biodegradable trays (fiber, paper, bamboo) | Compostable, good airflow, eco-friendly | Break down quickly with heavy watering | Single-use planting |
| Wood or metal trays | Sturdy and reusable | Can hold moisture or rust over time | Not ideal for long-term growing |
Always wash your trays with warm, soapy water after each harvest and let them dry completely before replanting. A clean, shallow, well-draining tray is the secret to fresh, healthy microgreens every time.
Step-by-Step: How to Grow Microgreens Indoors
Now that you’ve got your containers and materials ready, it’s time to plant.
This part walks you through every stage, from preparing your tray to harvesting your greens, so you know exactly what to do and when to do it.
Tools and Materials Required
- Seeds: Pick quick-growing varieties like radish, broccoli, pea, kale, or sunflower. Make sure they’re untreated and labeled safe for microgreens.
- Growing medium: Use coco coir, seed-starting mix, or fiber mats. These materials hold moisture well and allow air to reach the roots.
- Containers: Choose shallow trays or recycled food-safe containers with drainage holes. A second tray underneath helps catch extra water.
- Spray bottle: Keeps the surface evenly moist without disturbing the seeds.
- Watering tray: Useful for bottom-watering once sprouts appear to prevent mold and soggy soil.
- Light source: Place trays near a bright window or use a small LED grow light for steady growth year-round.
- Cleaning supplies: Mild soap, vinegar, or diluted bleach for sanitizing trays between batches.
Each of these helps you manage light, moisture, and hygiene, three key factors for strong, healthy microgreens grown indoors.
Step 1: Set Up Your Tray
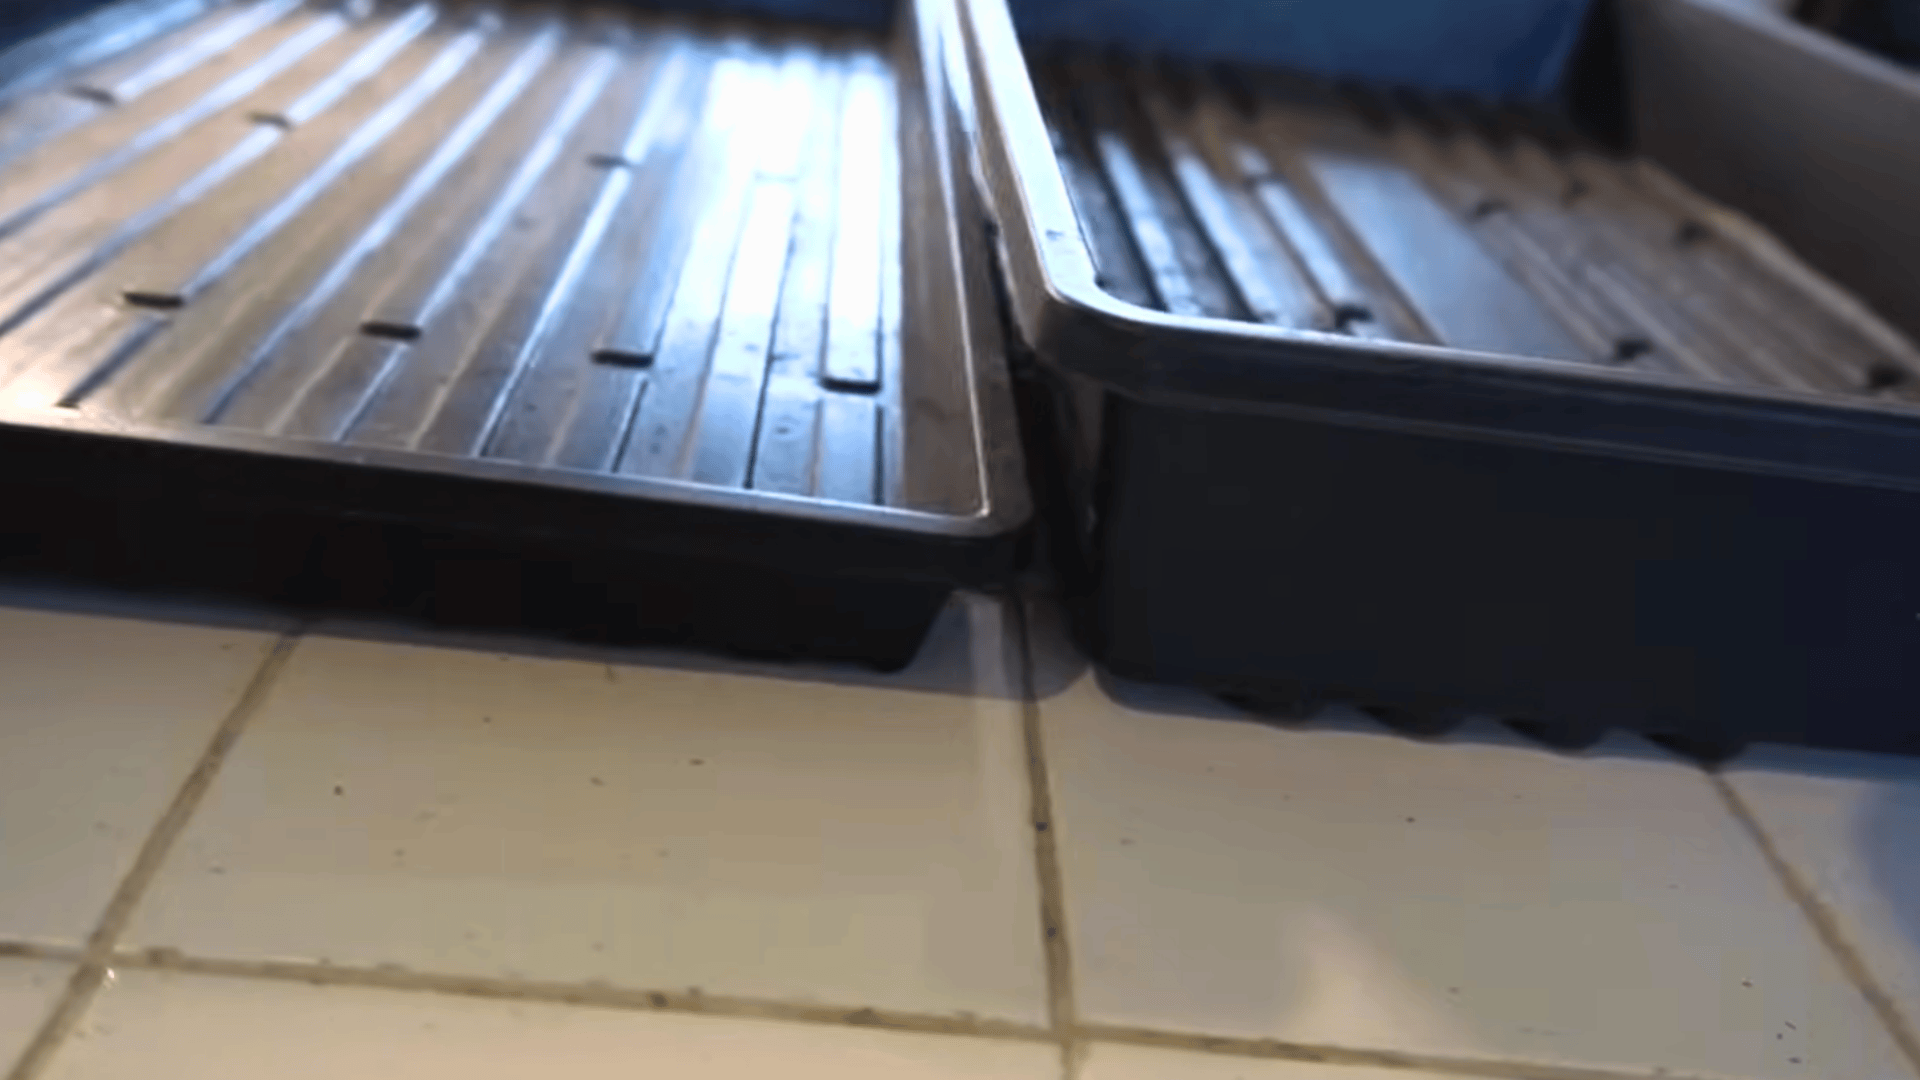
Use a shallow tray about one to two inches deep with drainage holes and a catch tray beneath it.
Fill it with a clean, high-quality potting mix or seed-starting blend; avoid compost or garden soil that may contain pathogens. Level the surface so your seeds spread evenly.
Tip: A shallow tray allows better airflow and makes harvesting easier later.
Step 2: Sow Seeds and Water Properly

Evenly scatter your seeds across the surface. Keep them close together but not overlapping, and stick to one seed type per tray for even growth. Lightly mist the top after sowing; don’t soak the soil.
Tip: Water after seeding, not before; this helps you spread seeds evenly and prevents clumping.
Step 3: Stack for Germination
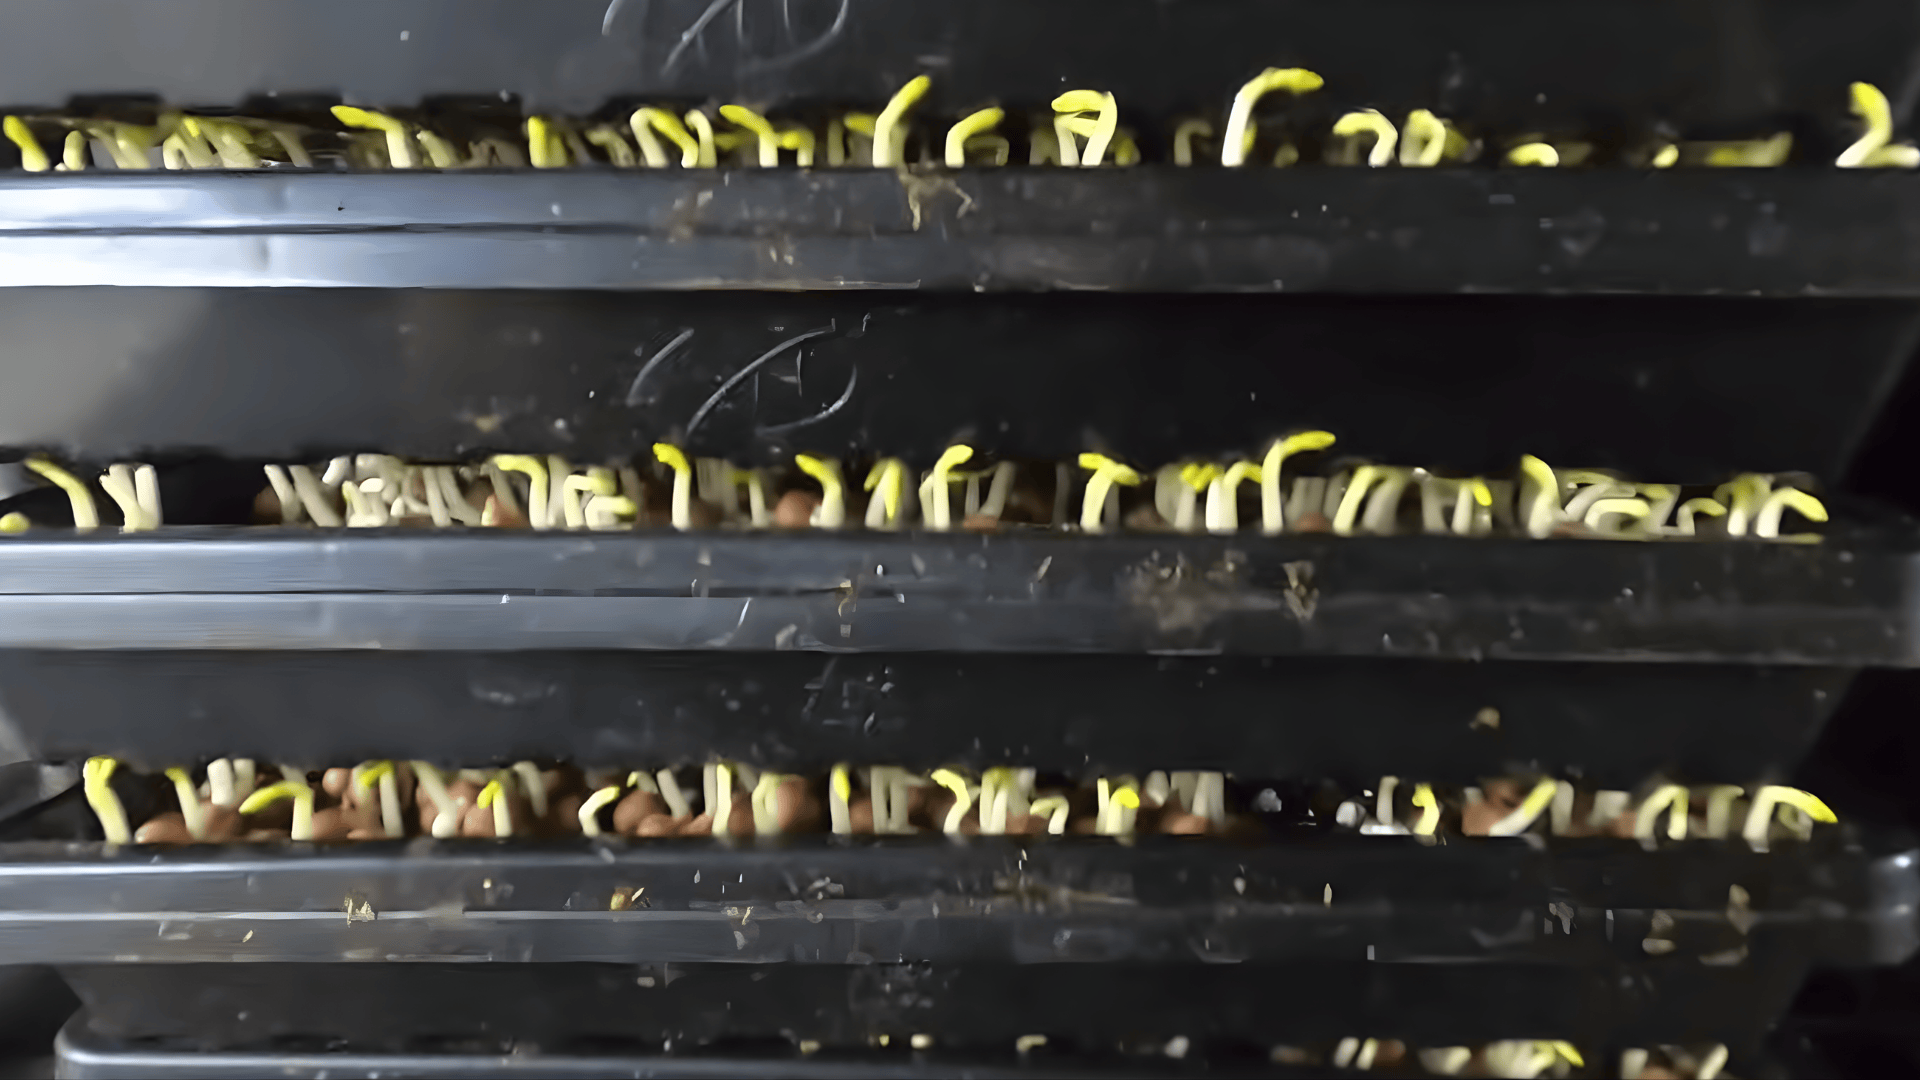
Cover the tray with another empty tray and stack up to five or six high. Place a small weight, like a paving stone, on top to help the roots anchor.
Keep the trays stacked for two to four days while the seeds sprout. Avoid lifting or watering during this period.
Tip: Skip blackout domes; stacking keeps humidity balanced and reduces mold risk.
Step 4: Provide Light and Gentle Care
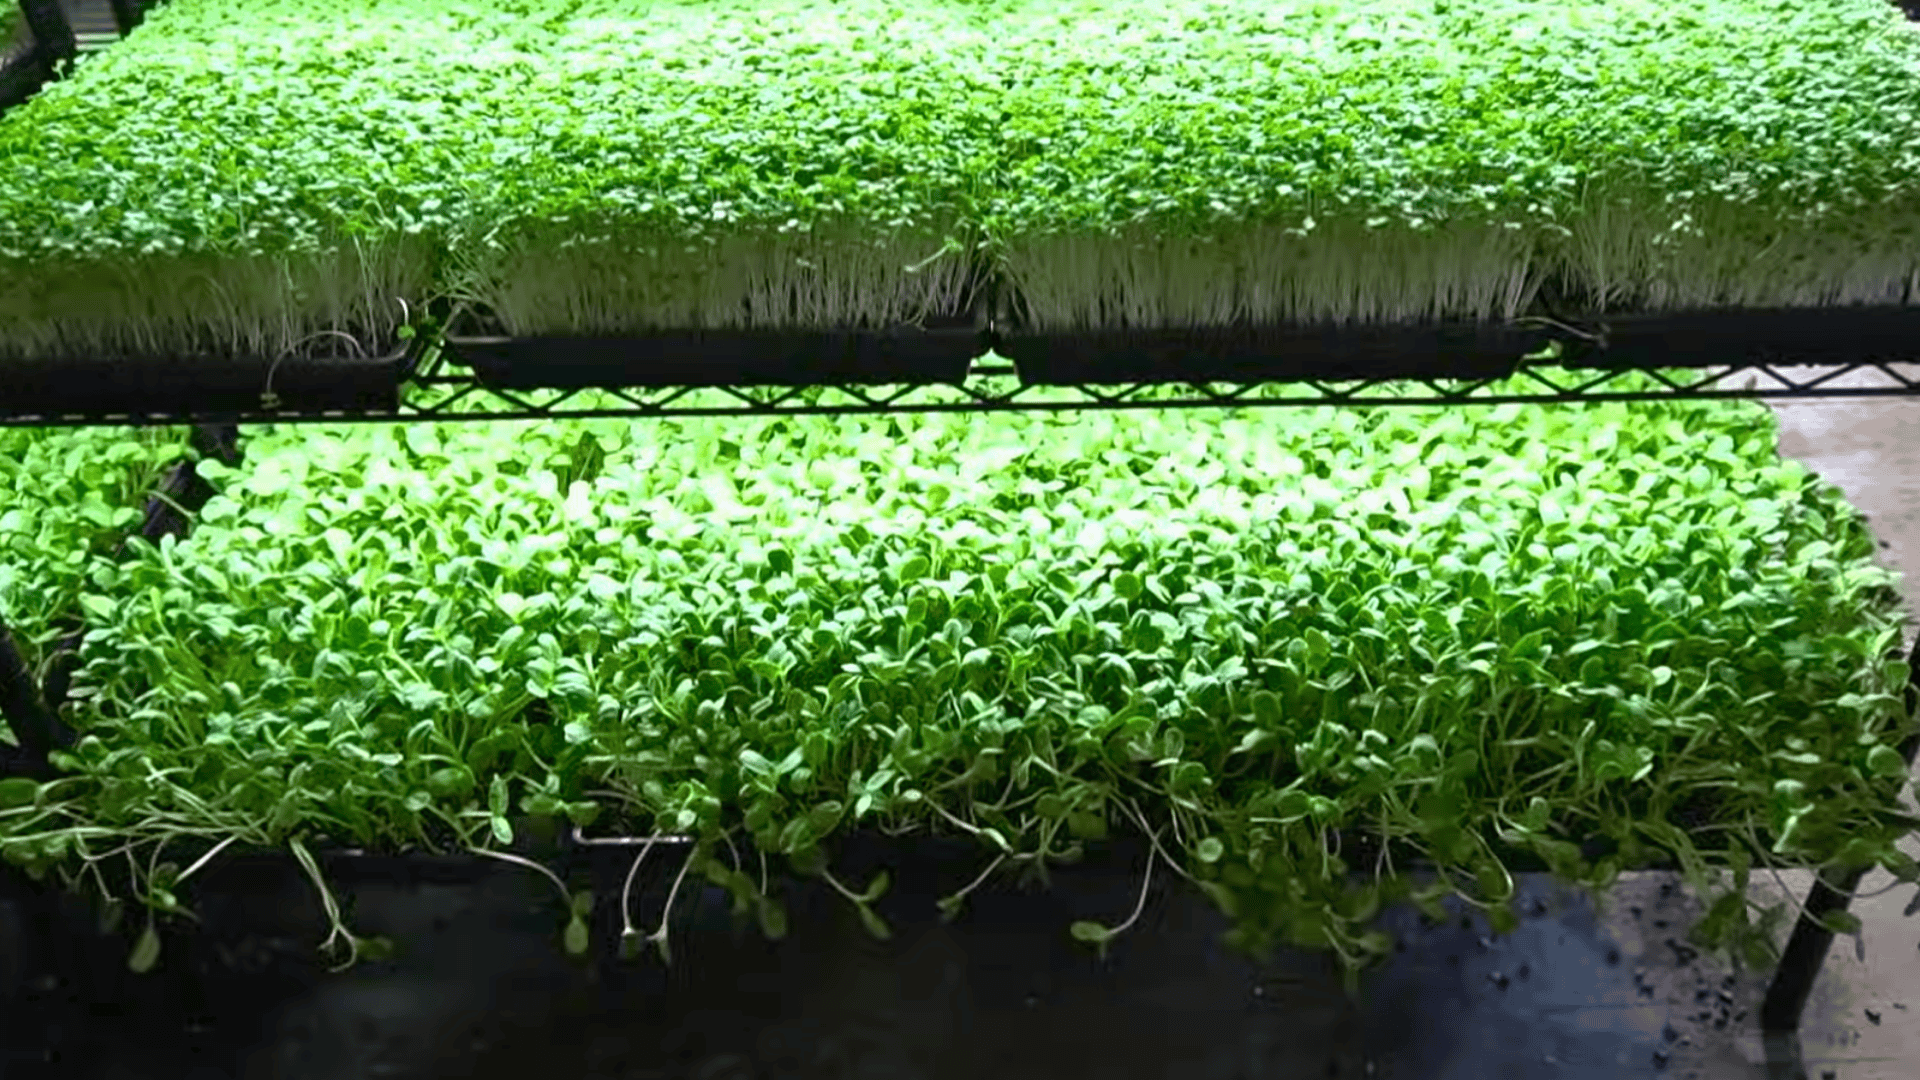
Once you see sprouts lifting the tray, move them under a bright window or a full-spectrum LED light. Give one top watering to moisten evenly, then water daily from below. Maintain good airflow to keep your greens mold-free.
Tip: If seedlings look tall and pale, move the light closer or increase light hours.
Step 5: Harvest and Store
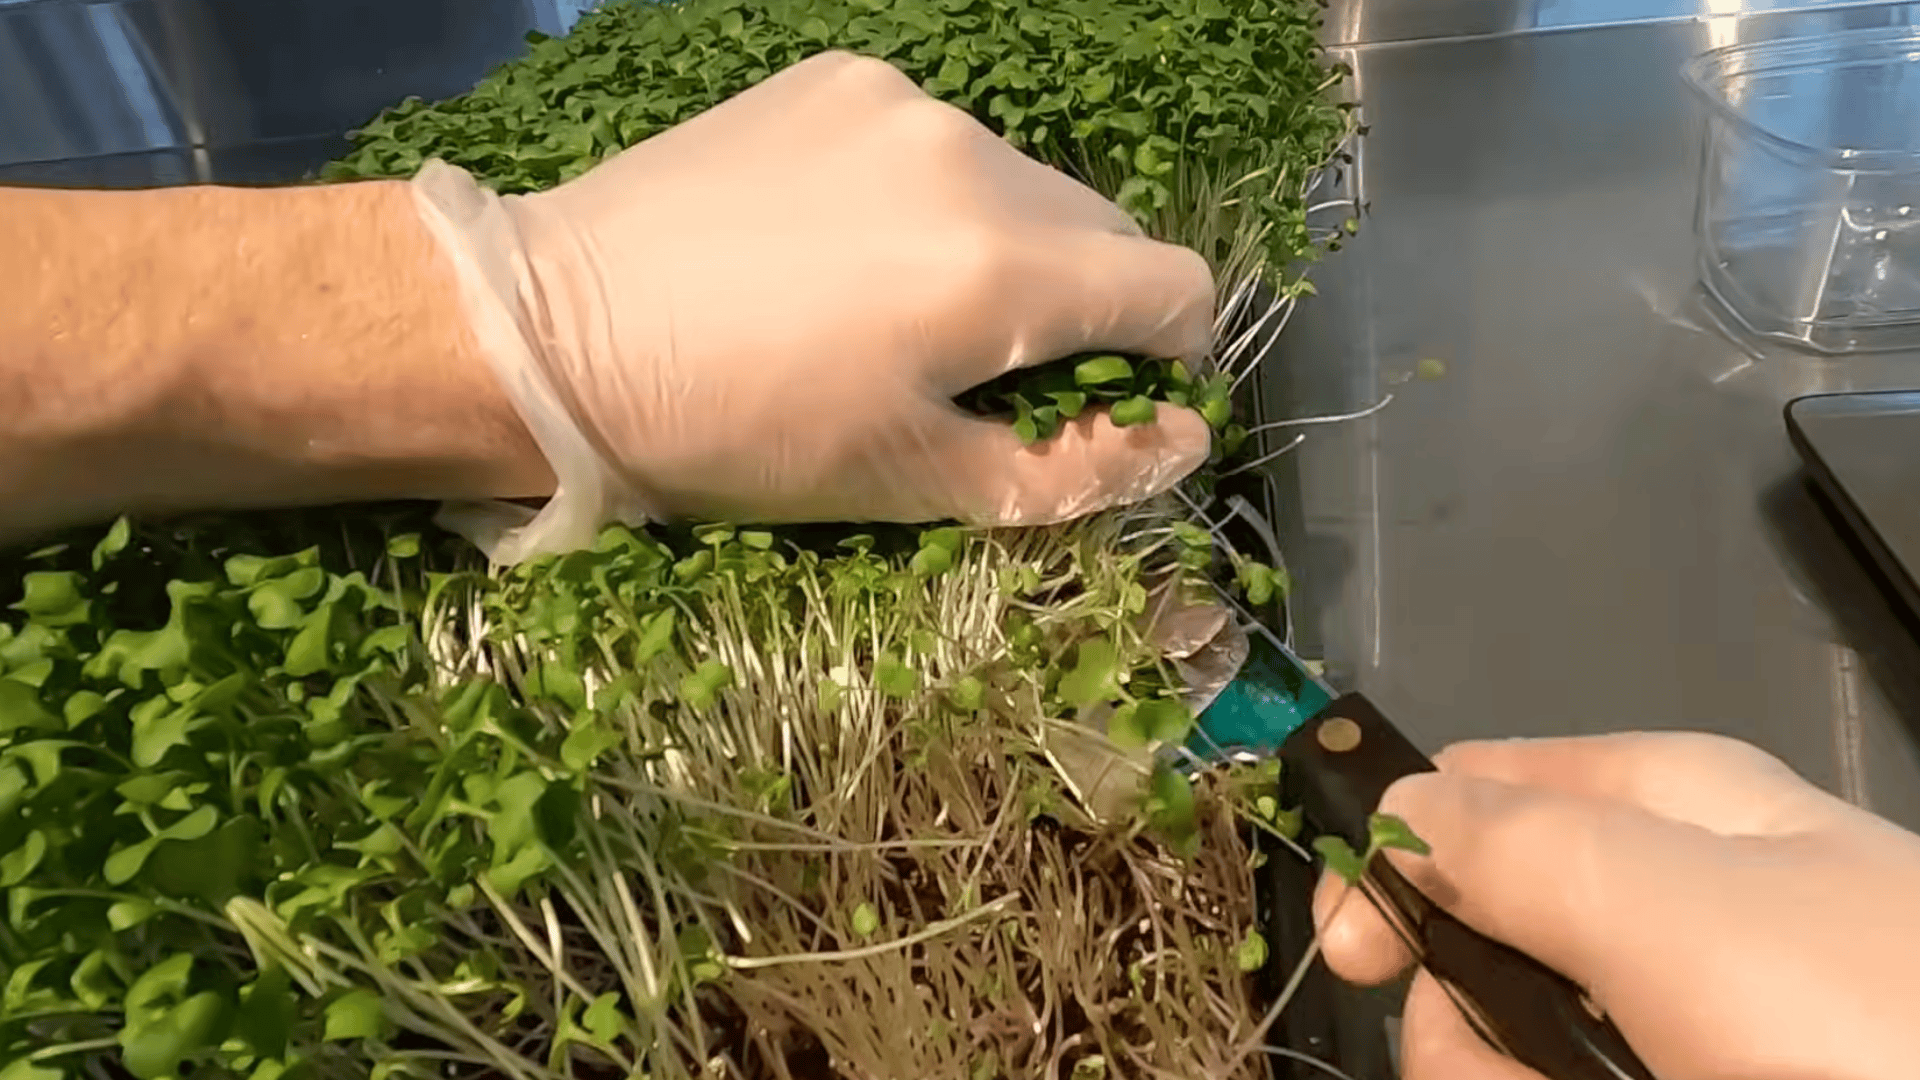
Microgreens are ready in 7–14 days, once the leaves open fully. Cut them just above the soil with a sharp knife for a clean cut. Keep them dry and store them in a sealed container in the fridge.
Follow these simple tips to keep your microgreens fresh, clean, and full of flavor:
- Harvest at the right time: Cut when leaves are open and plants are about two inches tall.
- Cut above the soil: Use clean scissors or a knife; avoid pulling roots.
- Handle gently: Trim slowly to prevent bruising and early spoilage.
- Keep them dry: Store unwashed in a sealed container in the fridge.
- Wash before eating: Rinse in cold water right before serving.
- Use fresh: Add to salads, wraps, or smoothies for quick flavor and nutrition.
Handled this way, your homegrown microgreens will stay fresh and vibrant for up to a week.
Here’s the detailed Overview of YouTube:Donny Greens
Light and Water Tips for Indoor Microgreens
I learned pretty quickly that light and water make or break your microgreens. Get these two right, and everything else falls into place.
- Give Enough Light: Microgreens need about 12–16 hours of light each day. Place trays near a bright window or use LED grow lights a few inches above the plants. Keep the lights close enough to encourage strong, upright growth without overheating the leaves.
- Use Bottom-Watering: Instead of watering from above, fill the lower tray with about half an inch of water and let the upper tray soak it up for 10–15 minutes. Once the surface feels evenly moist, empty any leftover water to prevent buildup.
Consistent light and careful watering keep your greens sturdy, fresh, and flavorful. Once you master these two basics, you’ll rarely have to deal with mold or weak plants again.
Best Microgreen Varieties to Grow Indoors
When I first started growing microgreens, I quickly realized some varieties are much easier than others. If you’re just beginning, stick with fast growers that sprout evenly and don’t need much fuss.
| Variety | Flavor & Texture | Days to Harvest | Best Uses |
|---|---|---|---|
| Radish | Spicy and crisp | 7–8 days | Adds kick to salads, sandwiches, and tacos |
| Broccoli | Mild and tender | 8–10 days | Great for bowls, wraps, or smoothies |
| Pea | Sweet and crunchy | 10–12 days | Ideal for stir-fries or fresh salads |
| Sunflower | Nutty with thick stems | 10–12 days | Perfect for topping grain bowls or wraps |
These varieties germinate quickly, grow evenly, and are forgiving for beginners, making them some of the easiest microgreens to grow indoors year-round.
Troubleshooting Issues with Indoor Microgreens
Even with practice, I still run into small hiccups here and there; it’s part of growing indoors. The good news? Most microgreen problems are easy to fix once you spot what’s going wrong.
- Mold: Improve airflow, water less often, and sanitize trays between each use.
- Leggy growth: Move trays closer to the light or increase light hours for stronger stems.
- Uneven germination: Adjust seed density and keep the germination period dark and humid.
- Rot: Avoid overwatering and drain any standing water after each soak.
A little attention to light, moisture, and cleanliness keeps your trays healthy and your microgreens thriving every time.
Final Thoughts
Learning how to grow microgreens indoors has been one of those small joys that feels instantly rewarding. With just a few trays, some light, and a bit of attention each day, you can have fresh greens right at home; no backyard needed.
From picking the right container to your first harvest, every step is simple once you try it. And the best part? Once you get the rhythm, you’ll never run out of crisp, healthy greens again.
I hope this guide gives you that gentle push to start your own little indoor garden. If you enjoyed this, take a peek at my other posts for more easy ways to grow, care for, and enjoy plants year-round.