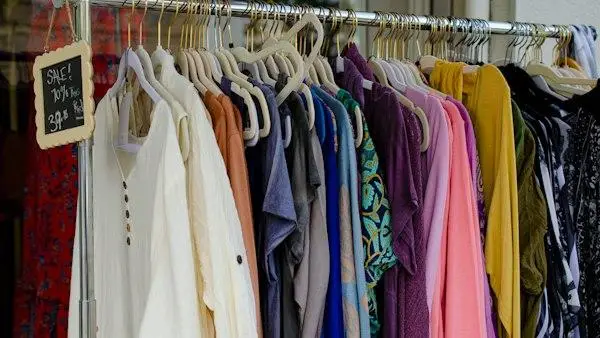
The rack by the bedroom window is full again: a camel wool coat from an estate sale, two silk scarves still folded in tissue, a tray of beaded earrings finished over a few winter evenings. Friends keep asking where each piece came from, and a couple of them have already paid for things straight off the hangers. That’s the point where a small online boutique starts to make sense: a few pieces released at a time, and a list of regular buyers who hear about each new batch first.
If you build the store on Shopify, the email app is the one choice to make early, because it’s how those regulars find out about each drop. Before you pick one, the comparison table in a review of the best email marketing for shopify lists each app’s free plan and starting price, so you can shortlist the ones a one-person store can start on. Then check that the app you choose puts a sign-up form on your store and can send one message to the whole list when new pieces go live. If the app is running before your first drop, friends who have already bought from you can add their address to the list from the shop’s front page.
Edit the rack and measure what stays
Start by weeding out your closet. Keep what’s in good condition and what fits the look friends already associate with you, whether that’s seventies suede, plain linen or bold costume jewelry. Anything with a stuck zipper, a missing button or a stain that won’t lift goes in a separate bag for mending or donation.
While you edit, decide what kind of shop you’re running. DreamHost’s guide to starting an online boutique sets out 11 steps, and two of the earliest are naming the customer you’re dressing and choosing where your stock comes from, whether you make it by hand or resell it. Vintage resale means selling what you find at estate sales and thrift stores, so each piece is one of a kind. With a handmade line of earrings or bags, you can make a style that sold out again for the next batch.
Measure every piece as you go, laid flat, with the bust, waist and length written on a tag pinned to the hanger. Nobody can try on a vintage blouse online, so they’ll hold your numbers up against a top from their own wardrobe.

Shoot everything the same way
Choose one spot near a window and use it for every shot: the same plain wall or sheet behind the piece, the same hanger or dress form, the same time of day. Light from a side window brings out the texture of knits and suede, and your phone camera will do the job.
On a store page, shoppers see a grid of thumbnails and compare them side by side. Nielsen Norman Group’s research on product photos in listing pages notes that these photos count most when shoppers choose by appearance, as with clothing, furniture and makeup. Three of its tips fit a one-person boutique well. Keep the background, angle, lighting and scale the same from photo to photo, so a shopper can scan the page and compare pieces quickly. Add extra views, such as the back of a garment or a close-up of the fabric. Earrings and rings are easier to judge in context, shown on a hand, where the buyer sees their size.
For each piece, take a front shot, a back shot, a close-up of the label or weave, and one photo of any wear, such as a faint mark near a hem. Earrings and bags get a picture on a person, next to a sleeve or a wrist. Mention the mark in the description as well, with its size in inches, so buyers aren’t surprised.
Your drop day email
Pick a drop day, say the first Sunday of the month, and keep it, so regulars know when to watch for your email. The email that morning shows three or four of the strongest photos from the batch, a line on each piece with its measurements, and one link to the new collection. To give subscribers first pick, send it an hour before you post the drop anywhere else.
If friends already buy off your rack, you have enough to open: start with a first drop of a handful of measured, photographed pieces, and don’t wait until you’ve stocked a whole shop.