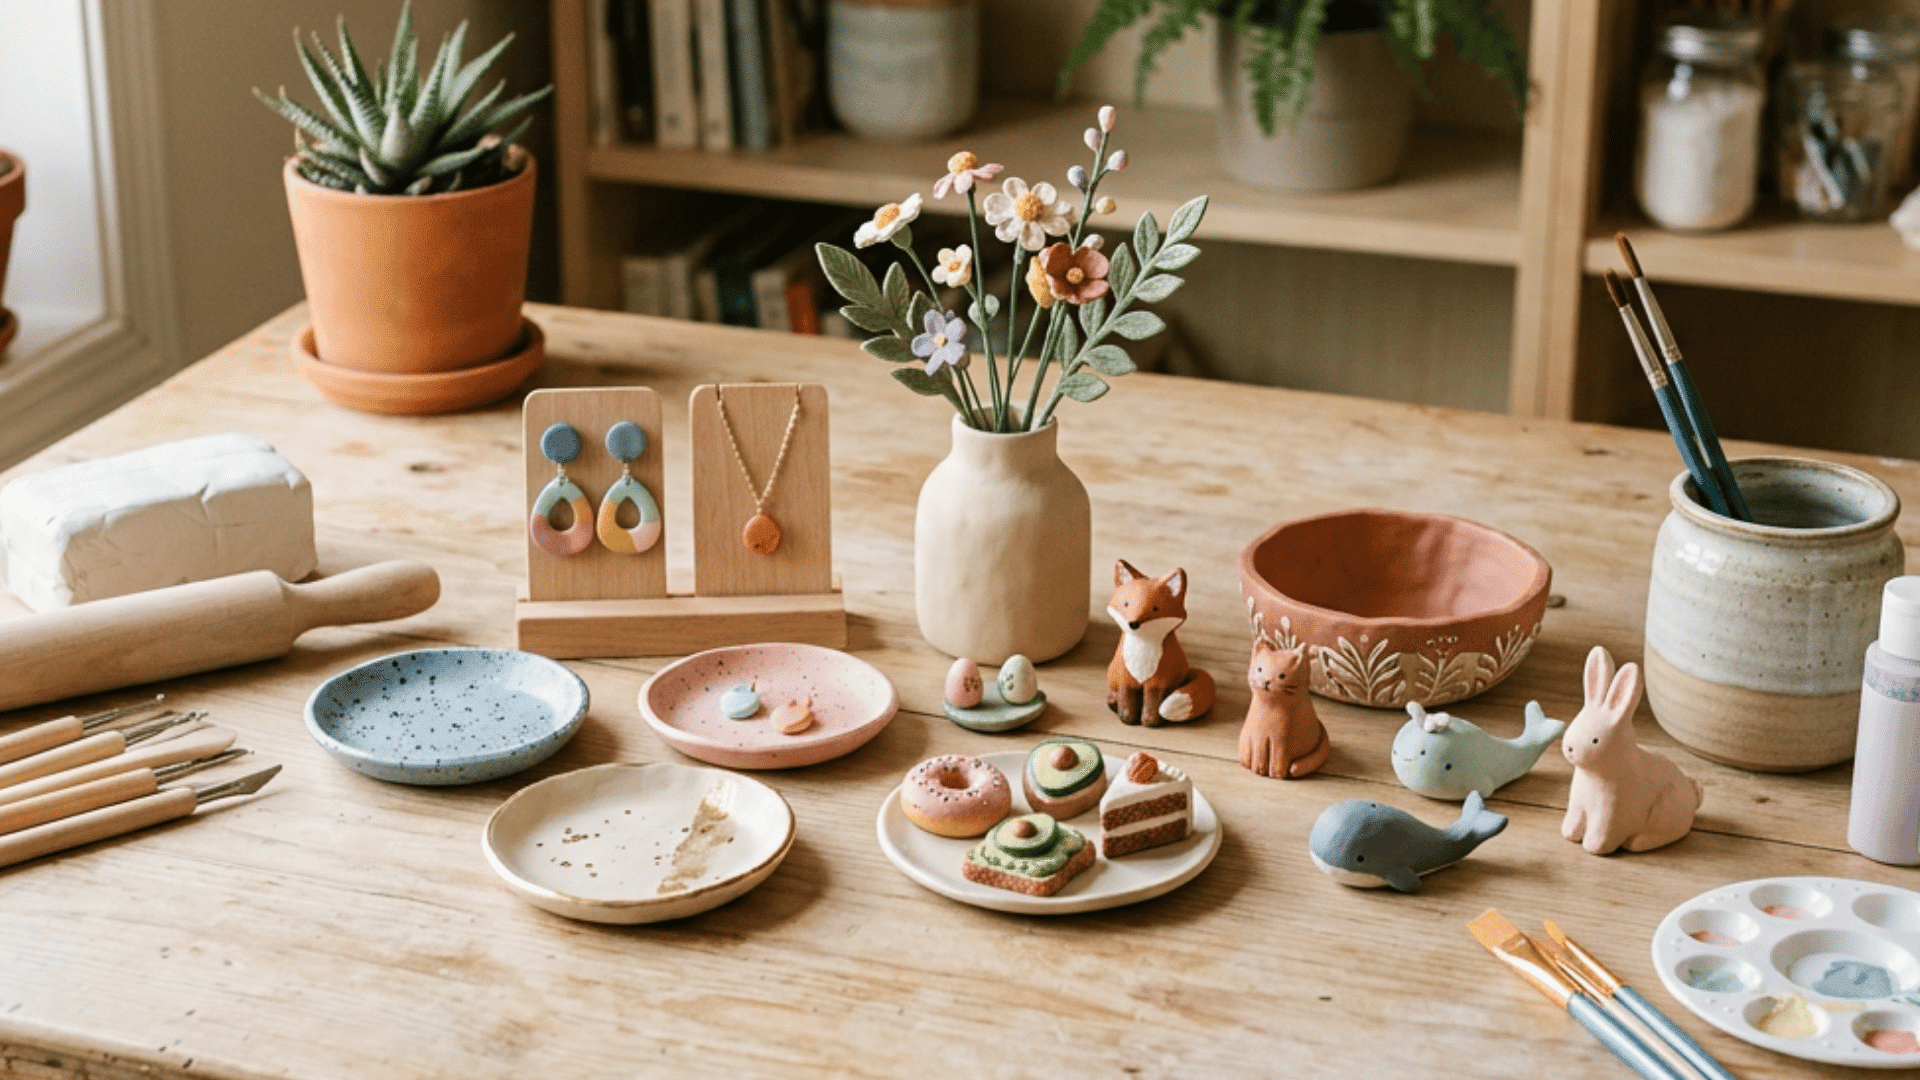
Give me a block of clay, and I’ll probably spend hours turning it into tiny decorations, cute accessories, or something completely unexpected.
That’s what I love about crafting: you can start with something incredibly simple and make it feel entirely your own.
Searching for air-dry clay ideas can quickly lead to all kinds of fun and creative projects without the need for fancy equipment or a pottery studio.
From practical pieces and personalized gifts to playful decorations, there’s plenty of room to experiment with shapes, colors, and textures. I’ve gathered some simple projects that can inspire your next relaxing craft session right at home.
Key Takeaways
|
Basic Supplies Needed for Air-Dry Clay Projects
Air-dry clay crafts need only a few essential supplies to shape, decorate, and finish your creations.
- Air-Dry Clay
- Clay Shaping Tools
- Rolling Pin
- Craft Knife
- Paints and Brushes
- Texture Stamps
- Sandpaper
- Protective Sealant
Air-Dry Clay Ideas to Try at Home
Air-dry clay makes it easy to create handmade crafts without special equipment. These simple ideas are perfect for beginners.
1. Clay Trinket Dishes
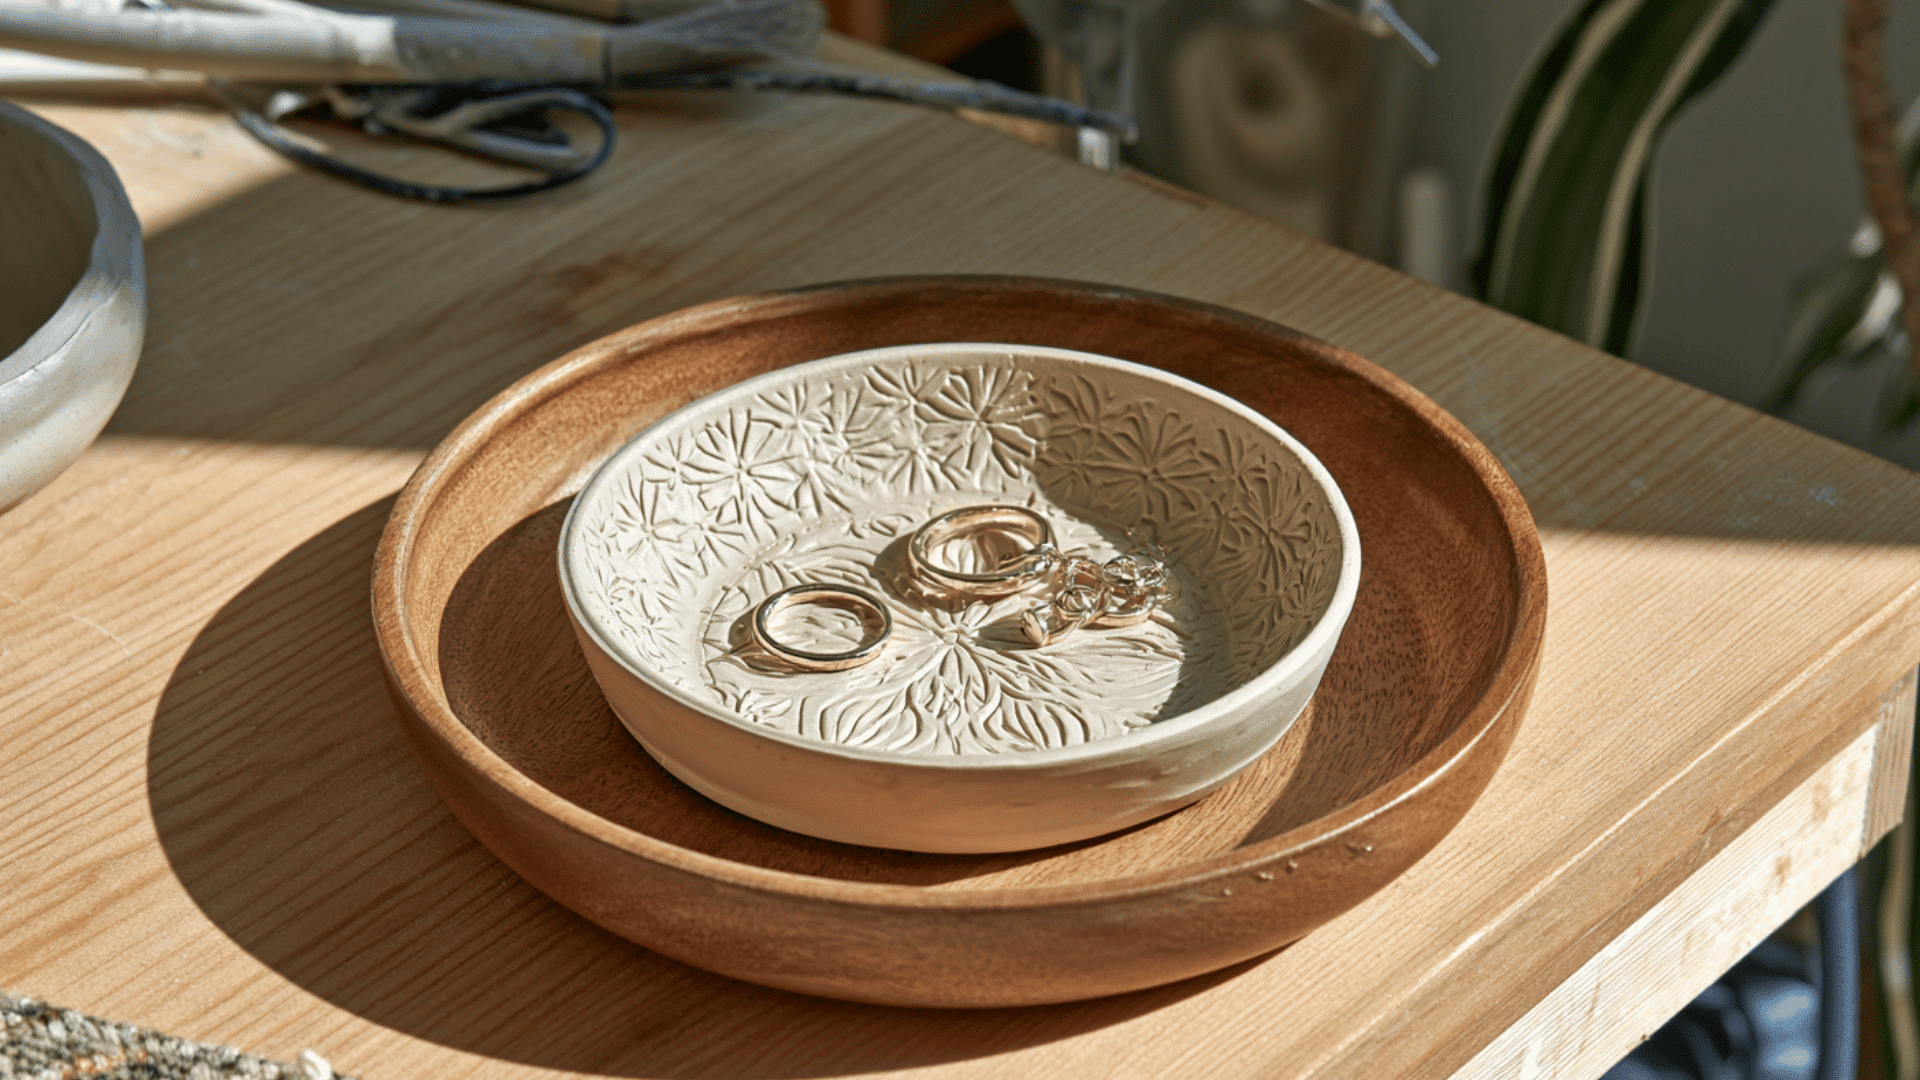
Clay trinket dishes are simple to create and perfect for storing rings, earrings, keys, and other small items.
Customize them with colors, patterns, initials, or textures to make them unique.
Shape the clay into a shallow dish, add personal details, allow it to dry completely, and finish with paint or sealant for a polished look.
2. Air-Dry Clay Jewelry
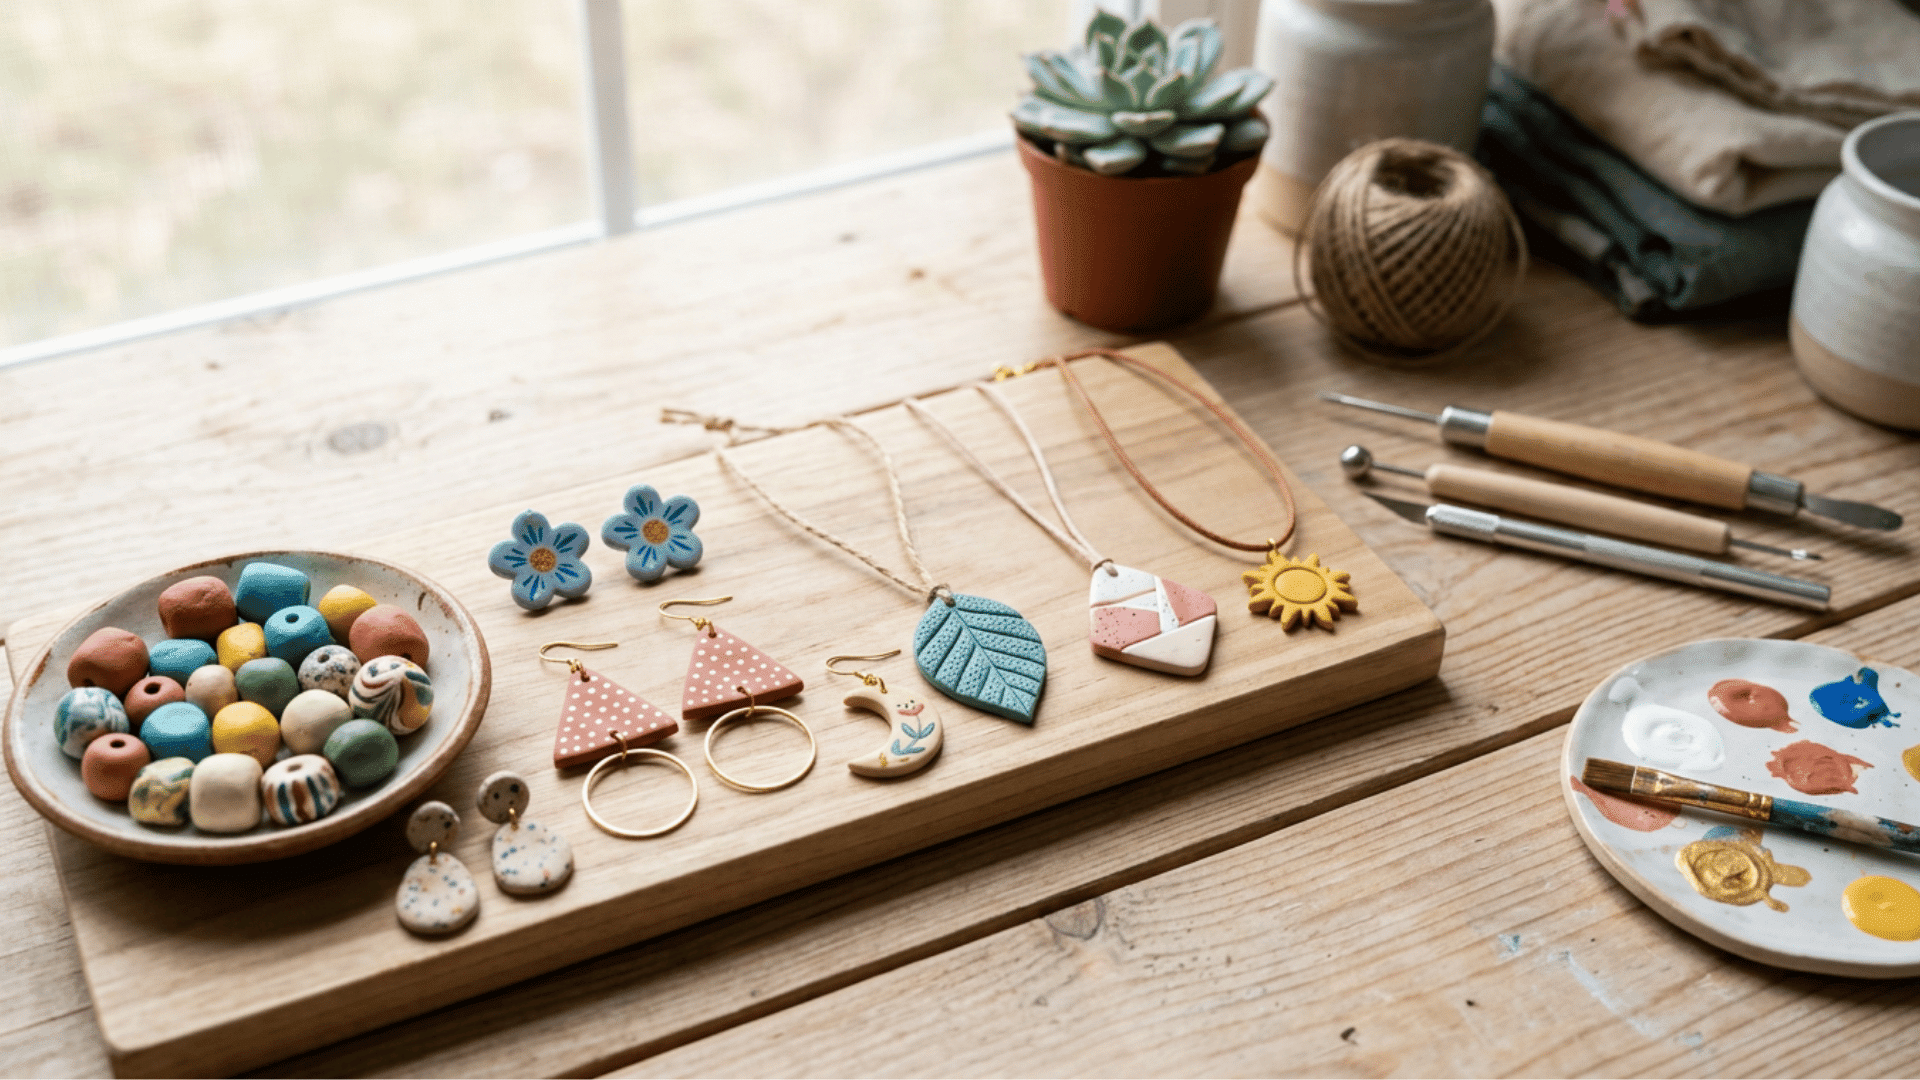
Air-dry clay jewelry is easy to make and a fun way to create personalized accessories like earrings, pendants, or bracelets.
You can customize pieces with colors, patterns, and textures.
Shape the clay into your desired design, add details, let it dry completely, and finish with paint or sealant for a polished look.
3. Clay Keychains
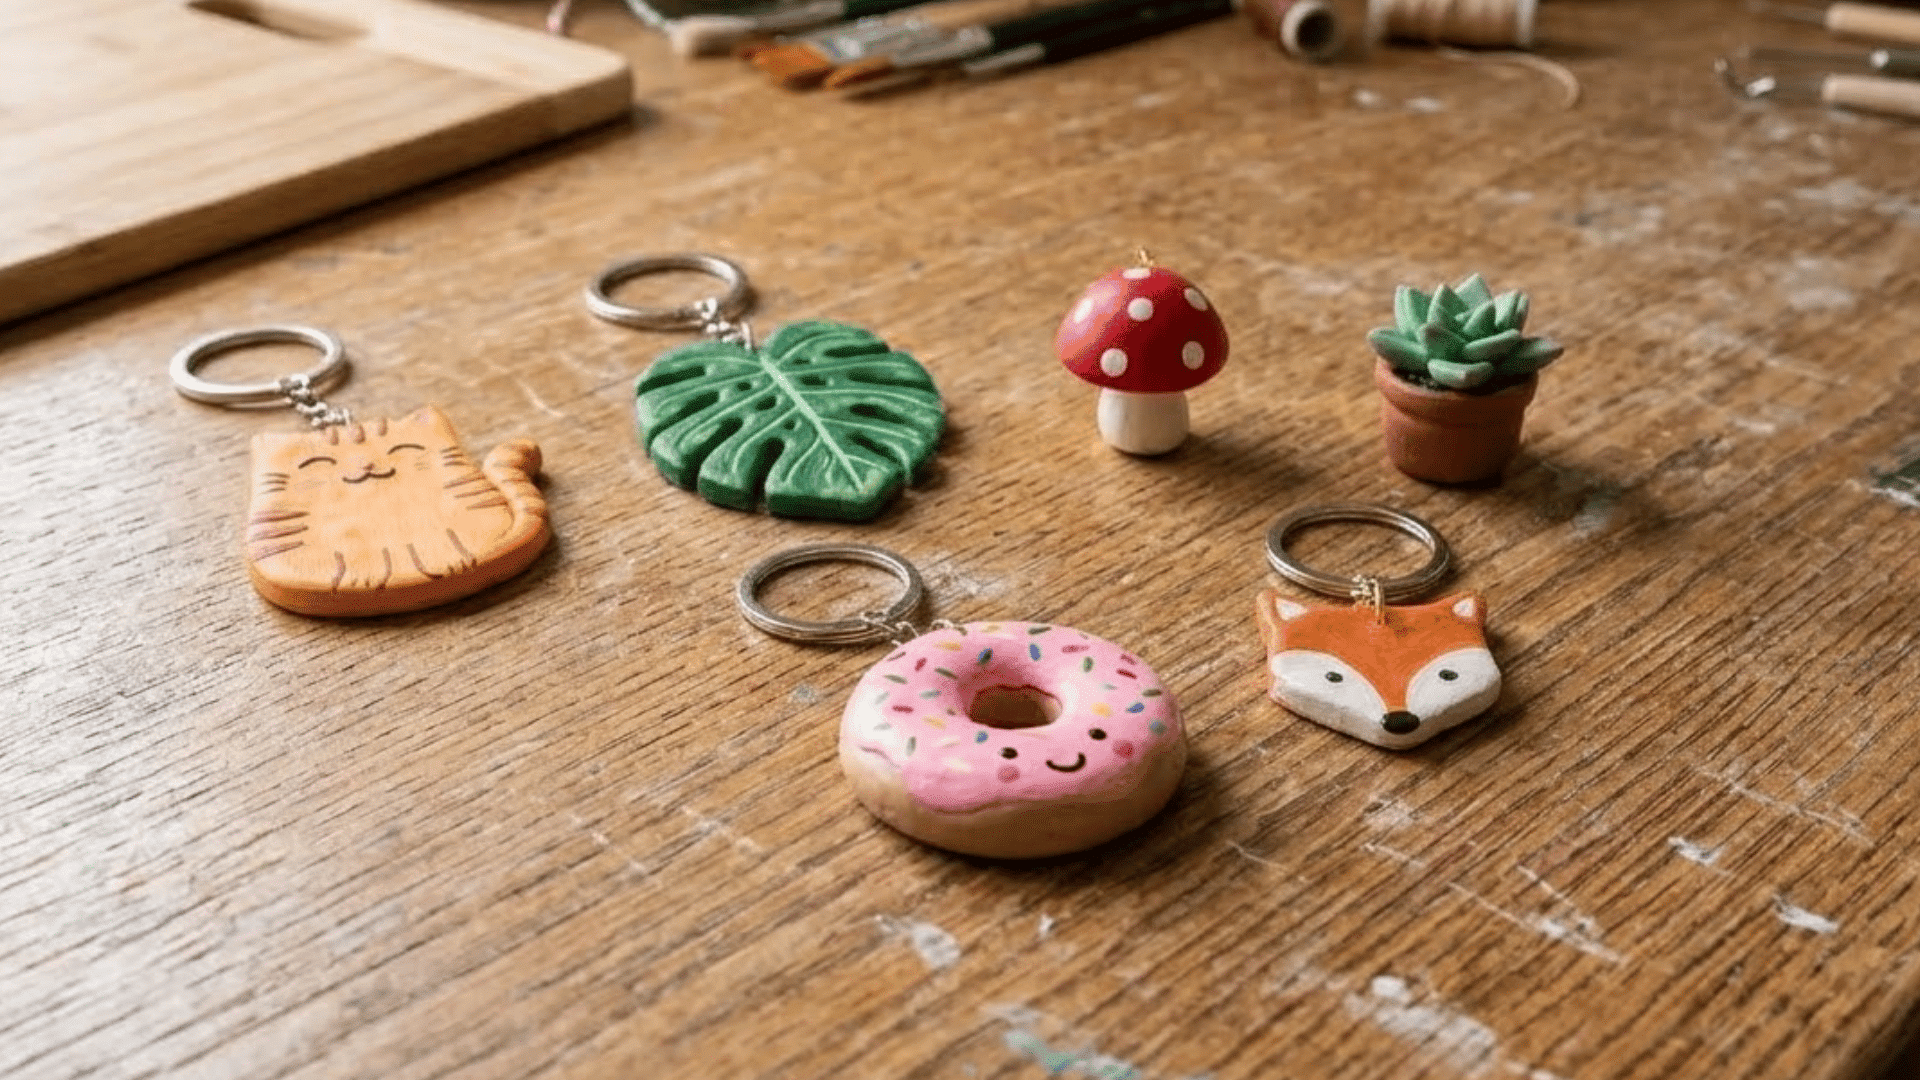
Clay keychains are easy to make and add a handmade touch to bags, keys, or gifts.
You can personalize them with colors, shapes, initials, or fun patterns.
Shape the clay into your preferred design, add small details, create a hole for the keyring, let it dry completely, and attach the keychain hardware.
4. Mini Clay Food Sculptures
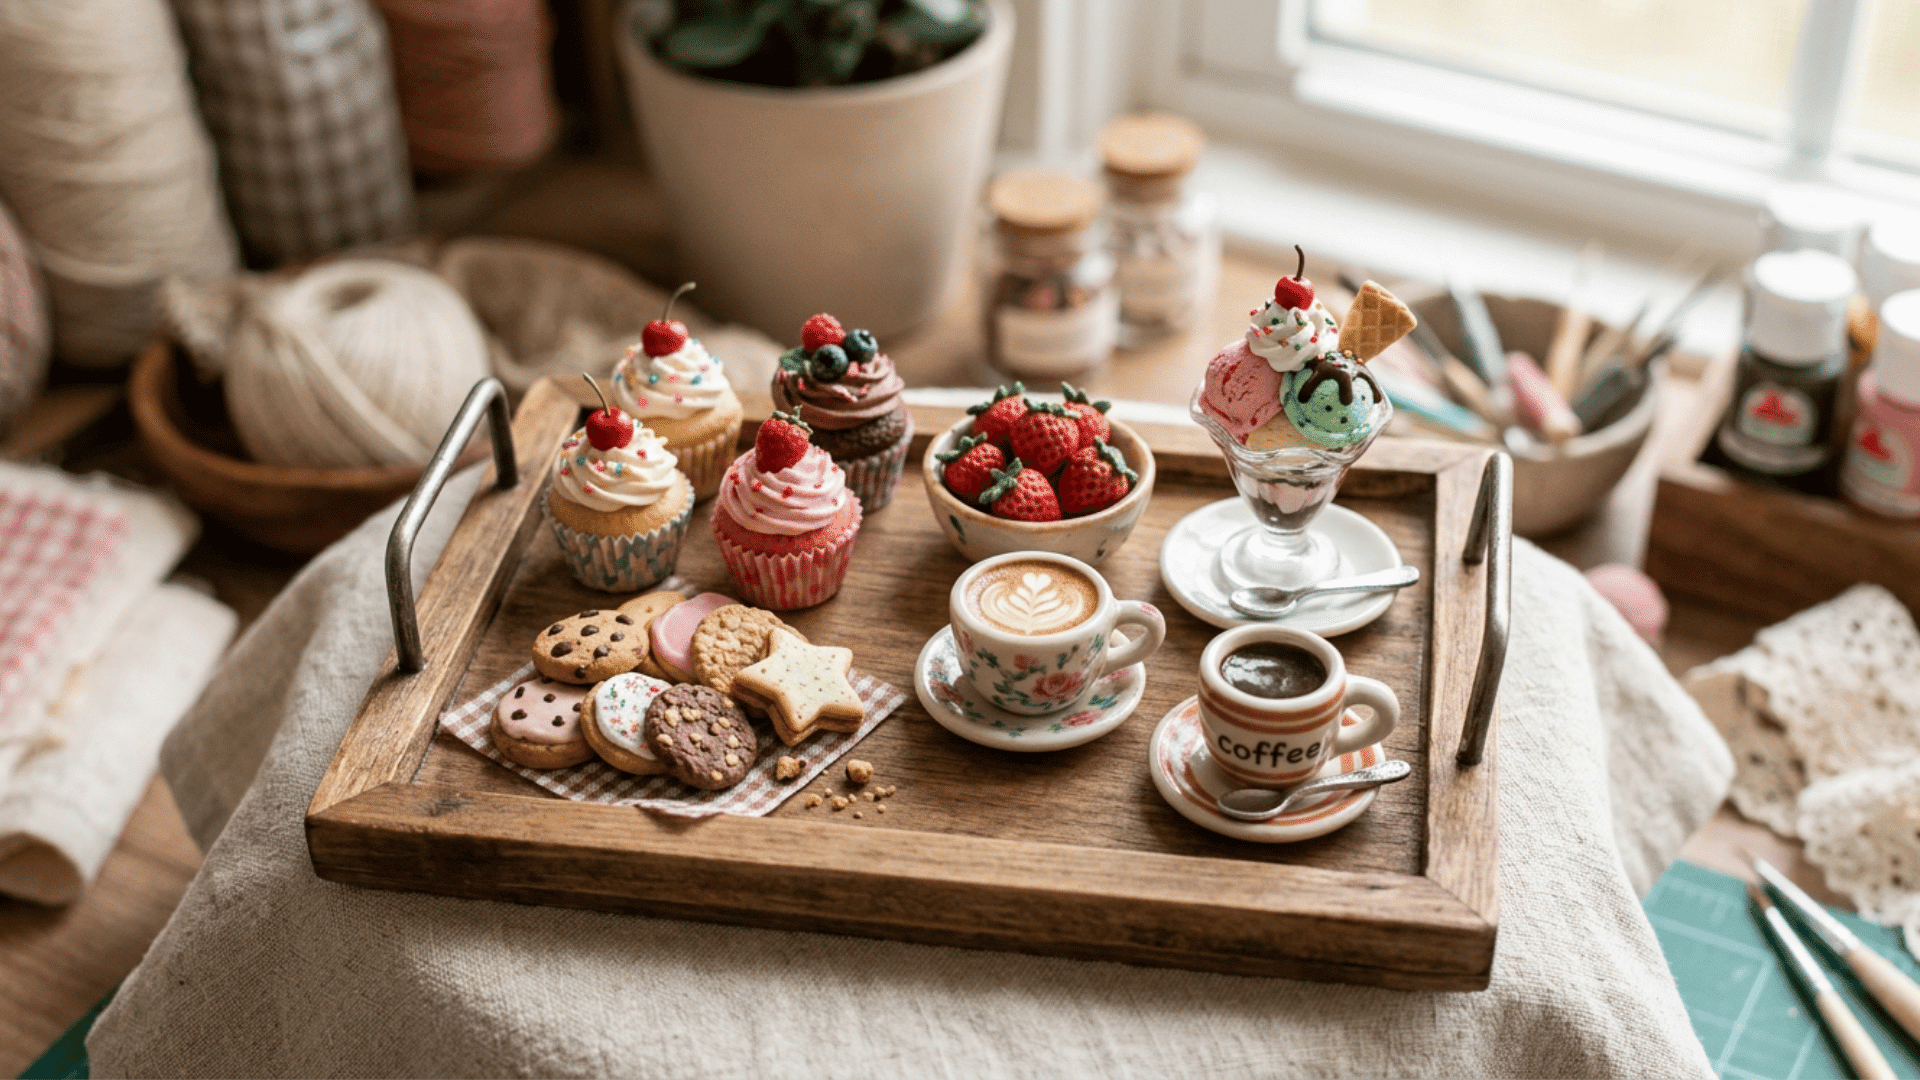
Mini clay food sculptures are fun to make and perfect for creating cute decorative pieces, charms, or craft displays.
You can personalize them with different colors, shapes, and realistic details.
Mold the clay into small food designs, add textures and tiny details, let them dry completely, and paint or seal them for a finished look.
5. Clay Plant Markers
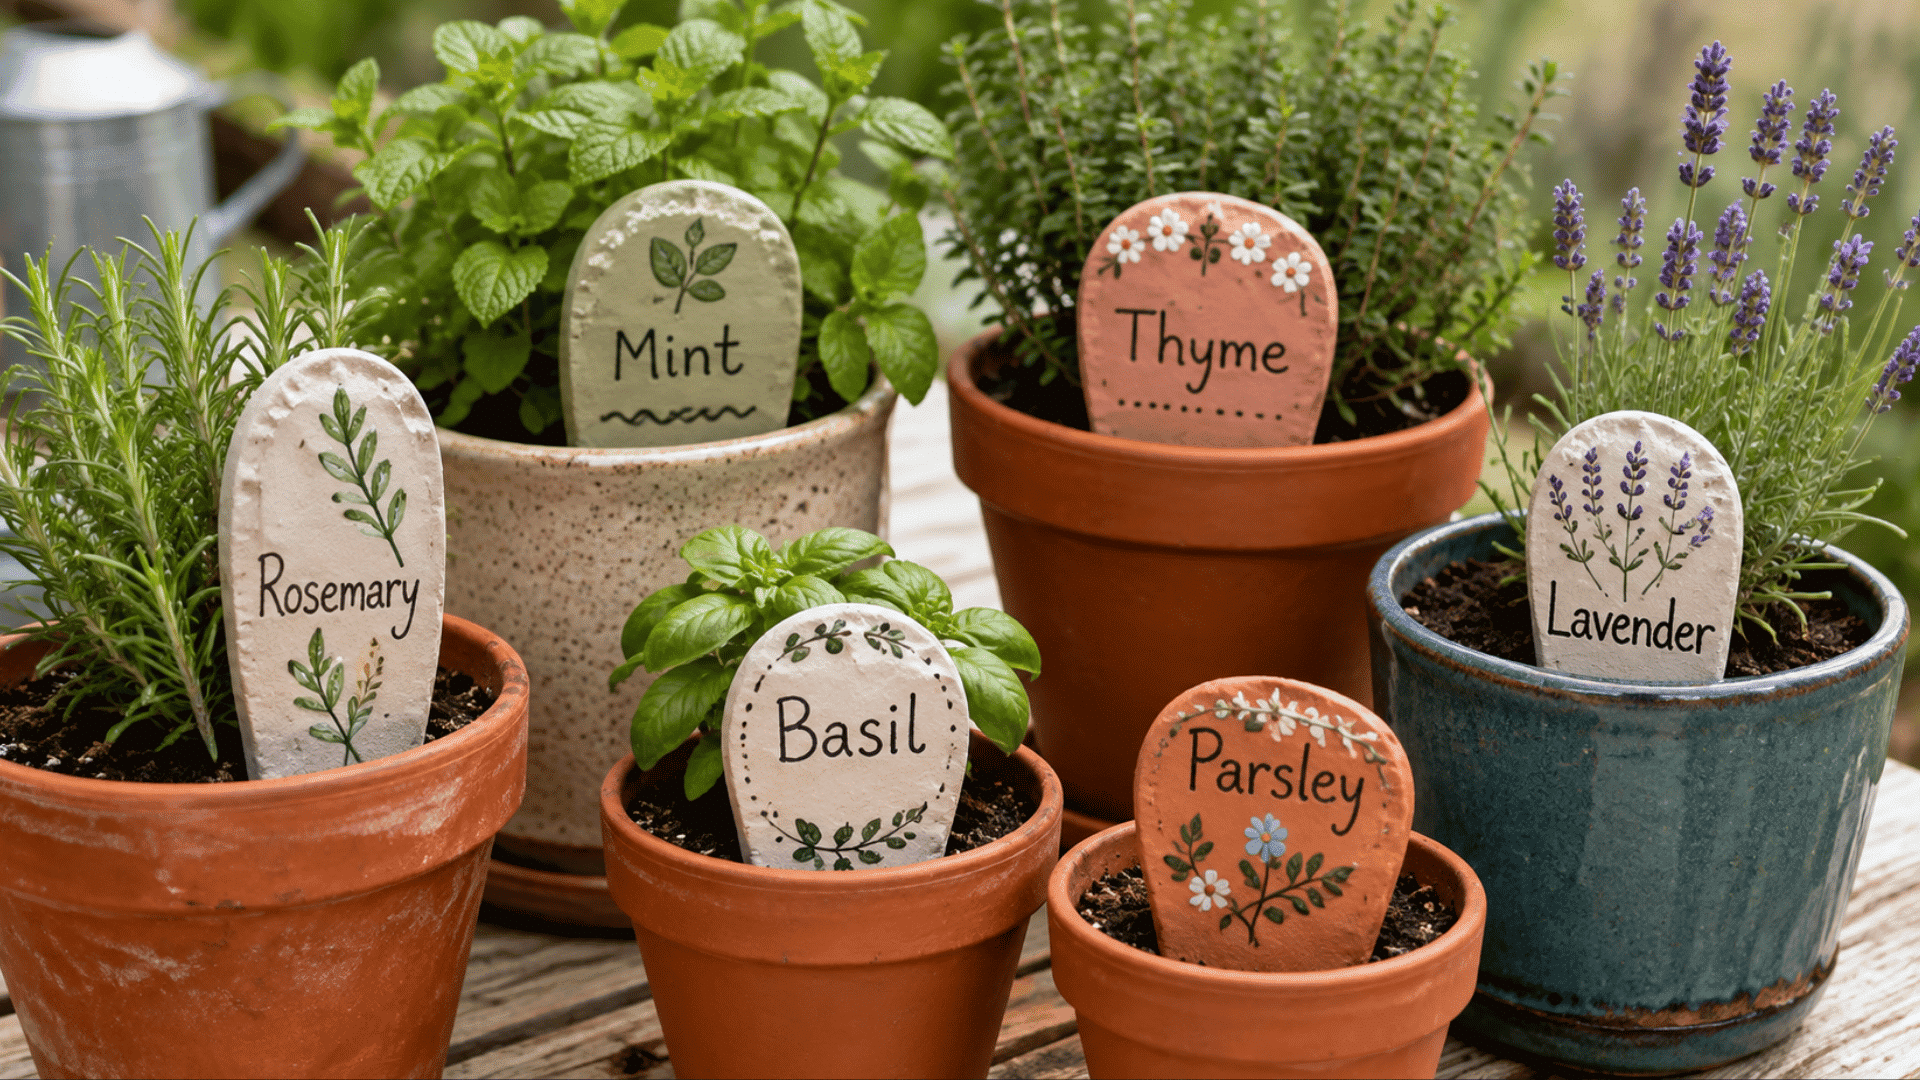
Clay plant markers are easy to make and useful for labeling herbs, flowers, and garden plants.
You can personalize them with plant names, colors, patterns, or decorative textures.
Shape the clay into marker pieces, add labels or designs, let them dry completely, and finish with paint or sealant for a long-lasting garden accessory.
6. Handmade Clay Magnets
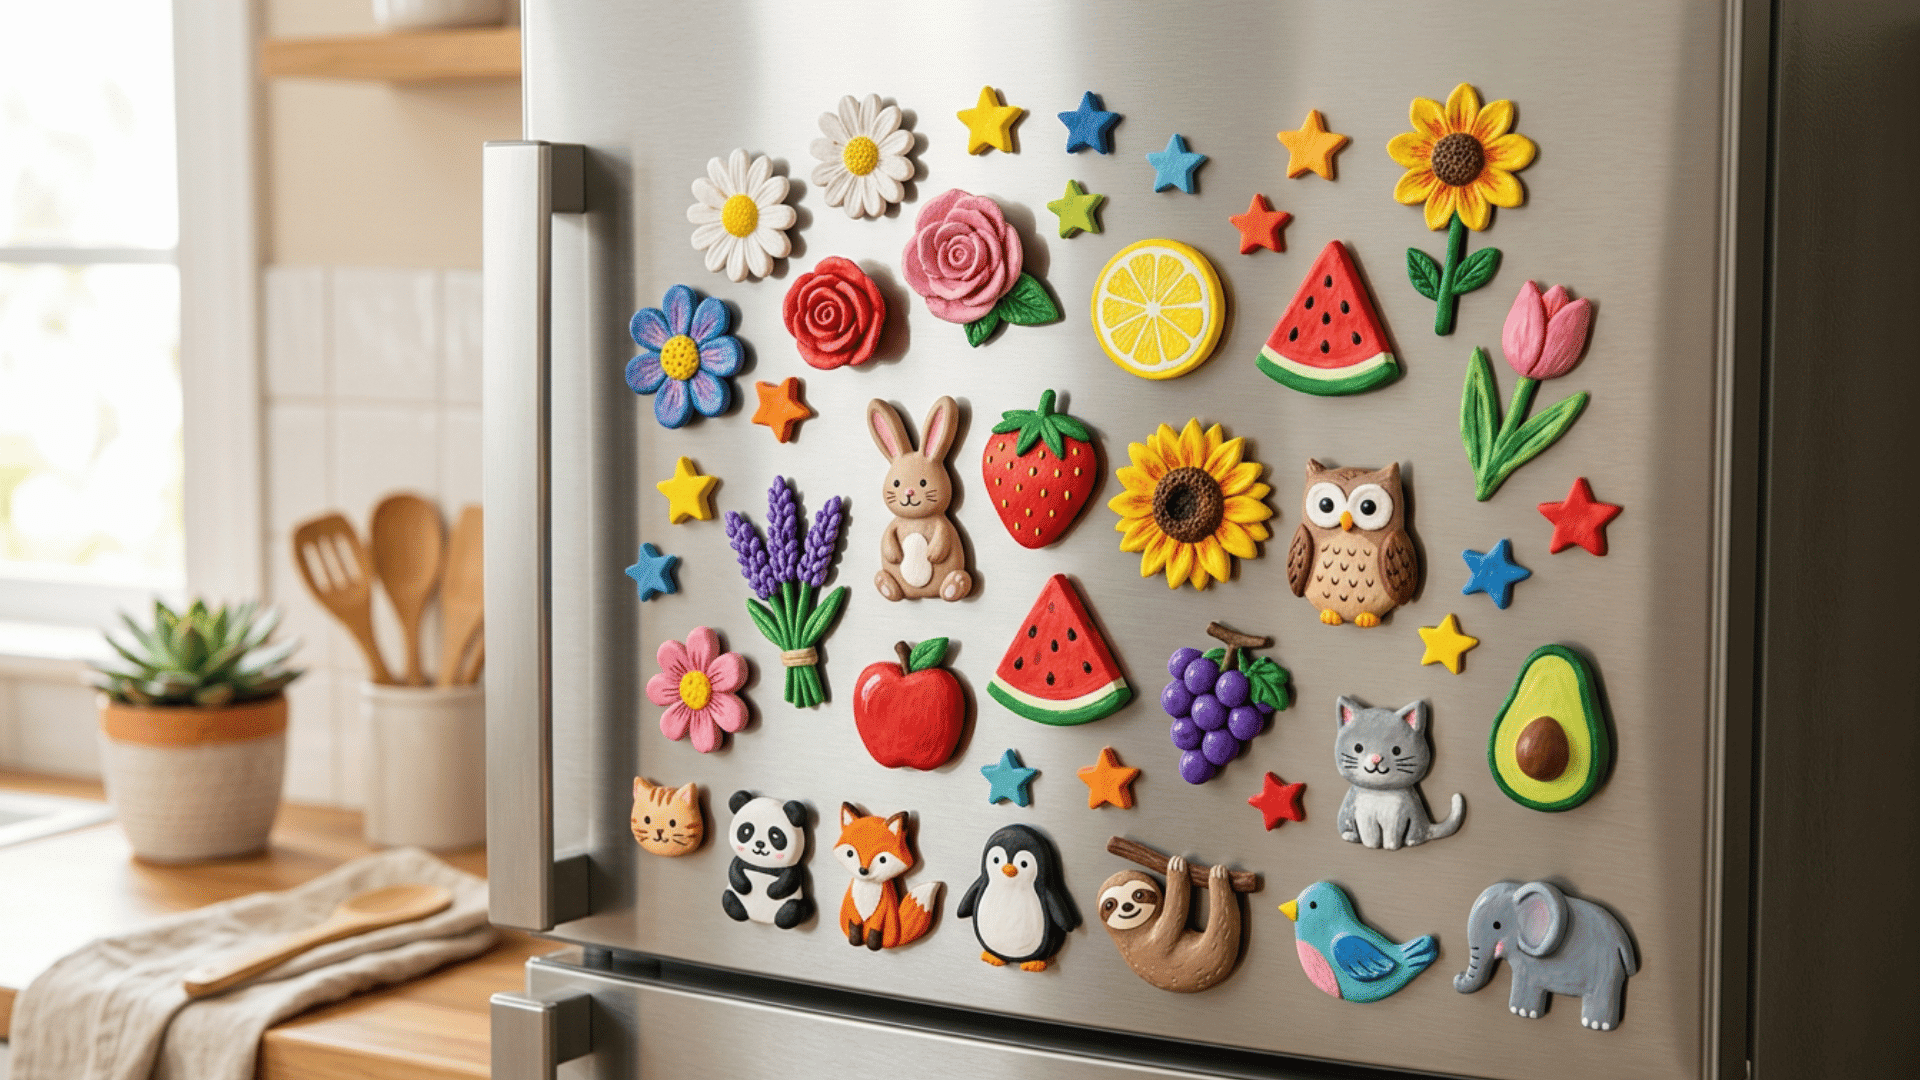
Handmade clay magnets are simple to make and add a personal touch to refrigerators, boards, or gifts.
You can customize them with colors, shapes, patterns, or small designs.
Mold the clay into your preferred style, add details, let it dry completely, and attach a magnet to the back for a finished decorative piece.
7. Clay Coasters
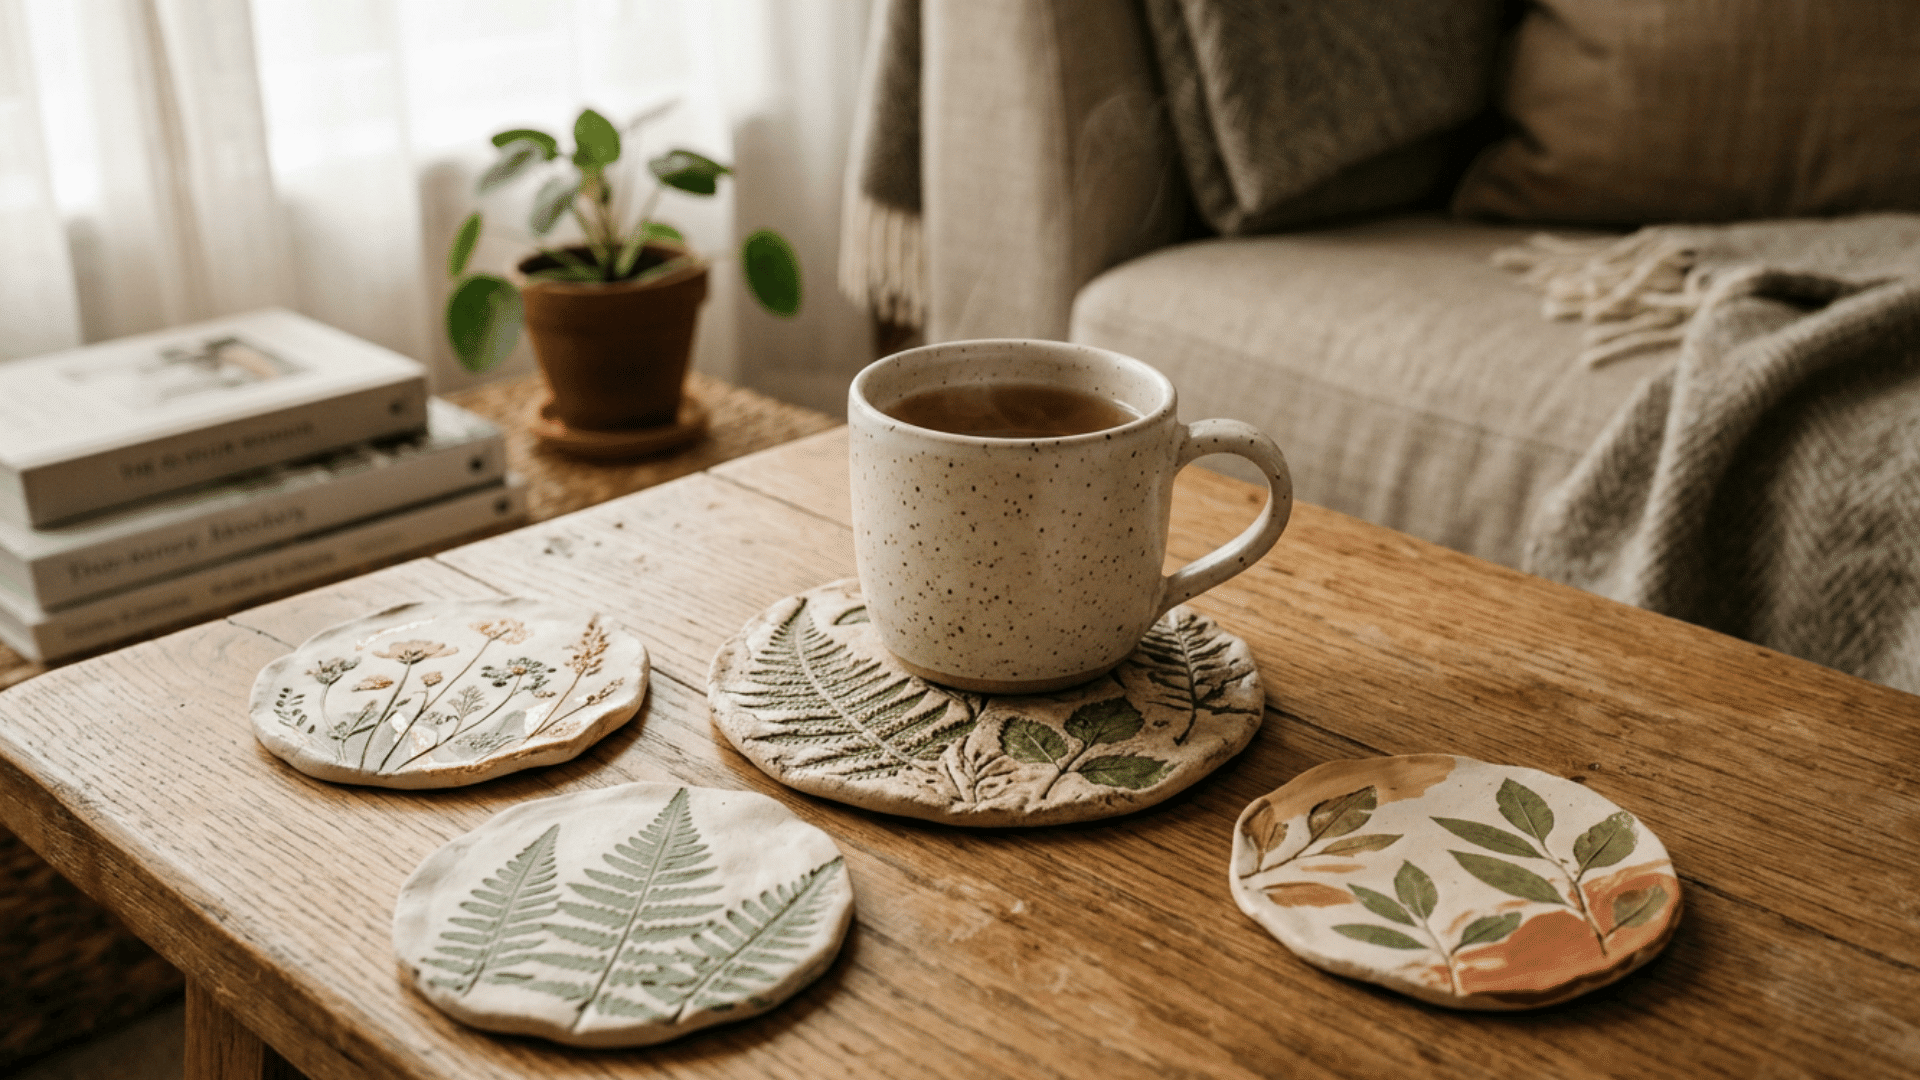
Clay coasters are easy to make and help protect tables from cups and mugs.
You can personalize them with colors, patterns, stamps, or textures.
Roll the clay evenly, cut it into coaster shapes, add designs, smooth the surface, let it dry completely, and seal it for durability.
8. Clay Candle Holders
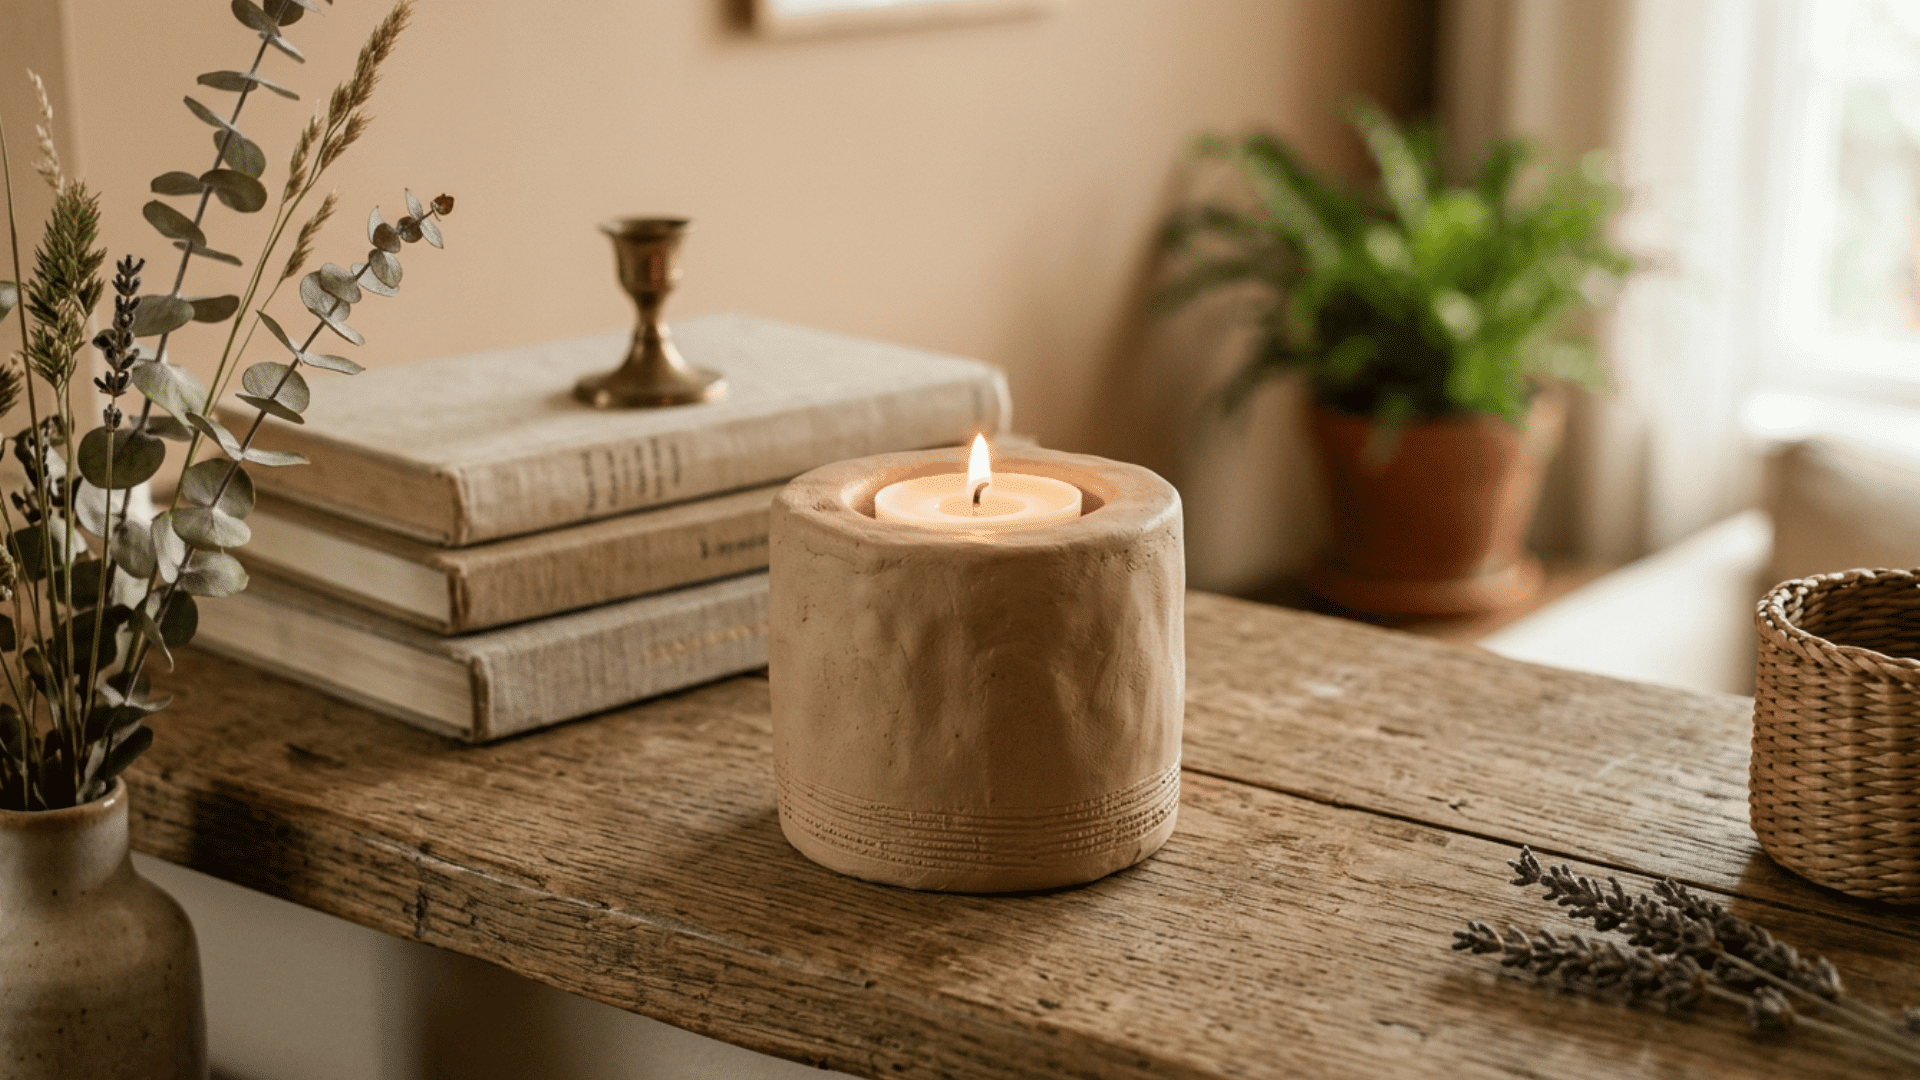
Clay candle holders are easy to make and add a handmade touch to home decor.
You can personalize them with colors, patterns, textures, or unique shapes.
Shape the clay into a holder, create space for the candle, add decorative details, let it dry completely, and finish with paint or sealant for a polished look.
9. Clay Photo Holders
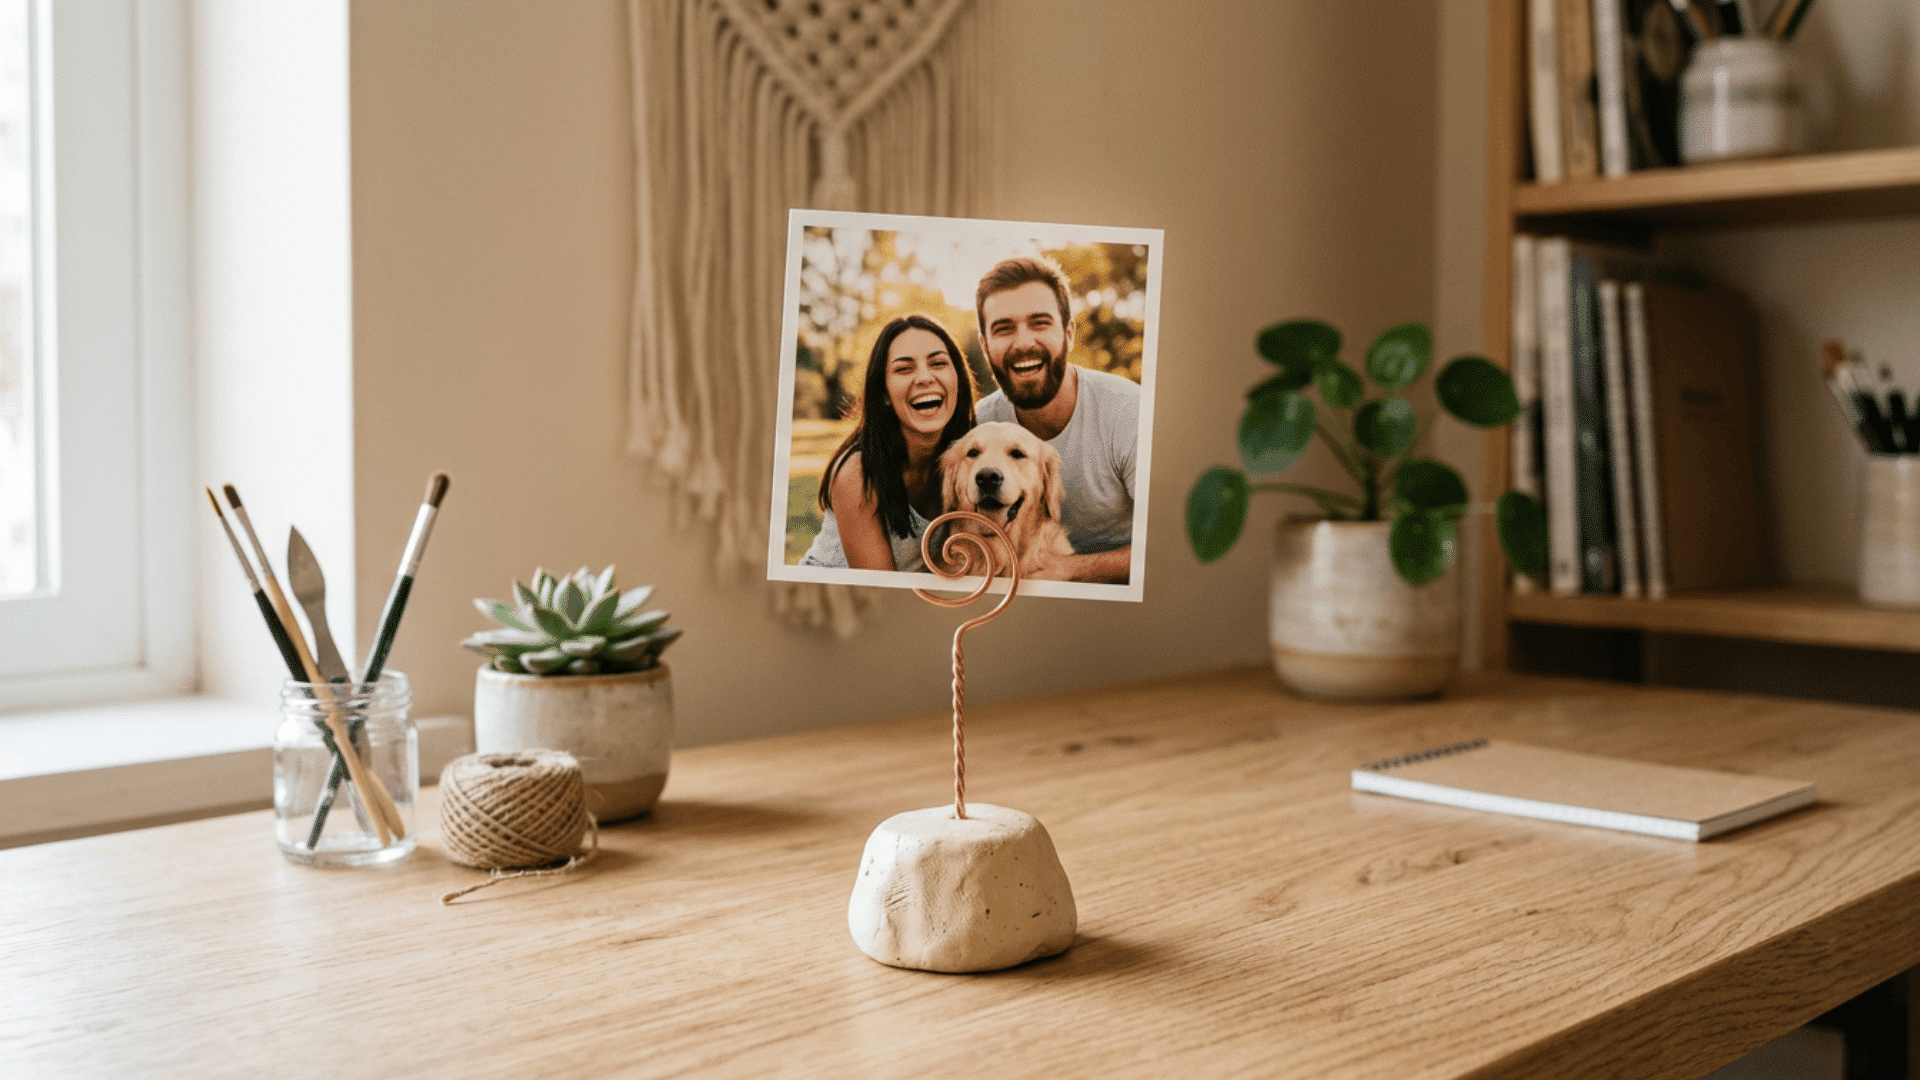
Clay photo holders are easy to make and a creative way to display favorite pictures, notes, or cards.
You can personalize them with colors, shapes, patterns, or textures.
Shape the clay base, add a slot for photos, decorate the surface, let it dry completely, and paint or seal for a finished look.
10. Clay Animal Figures
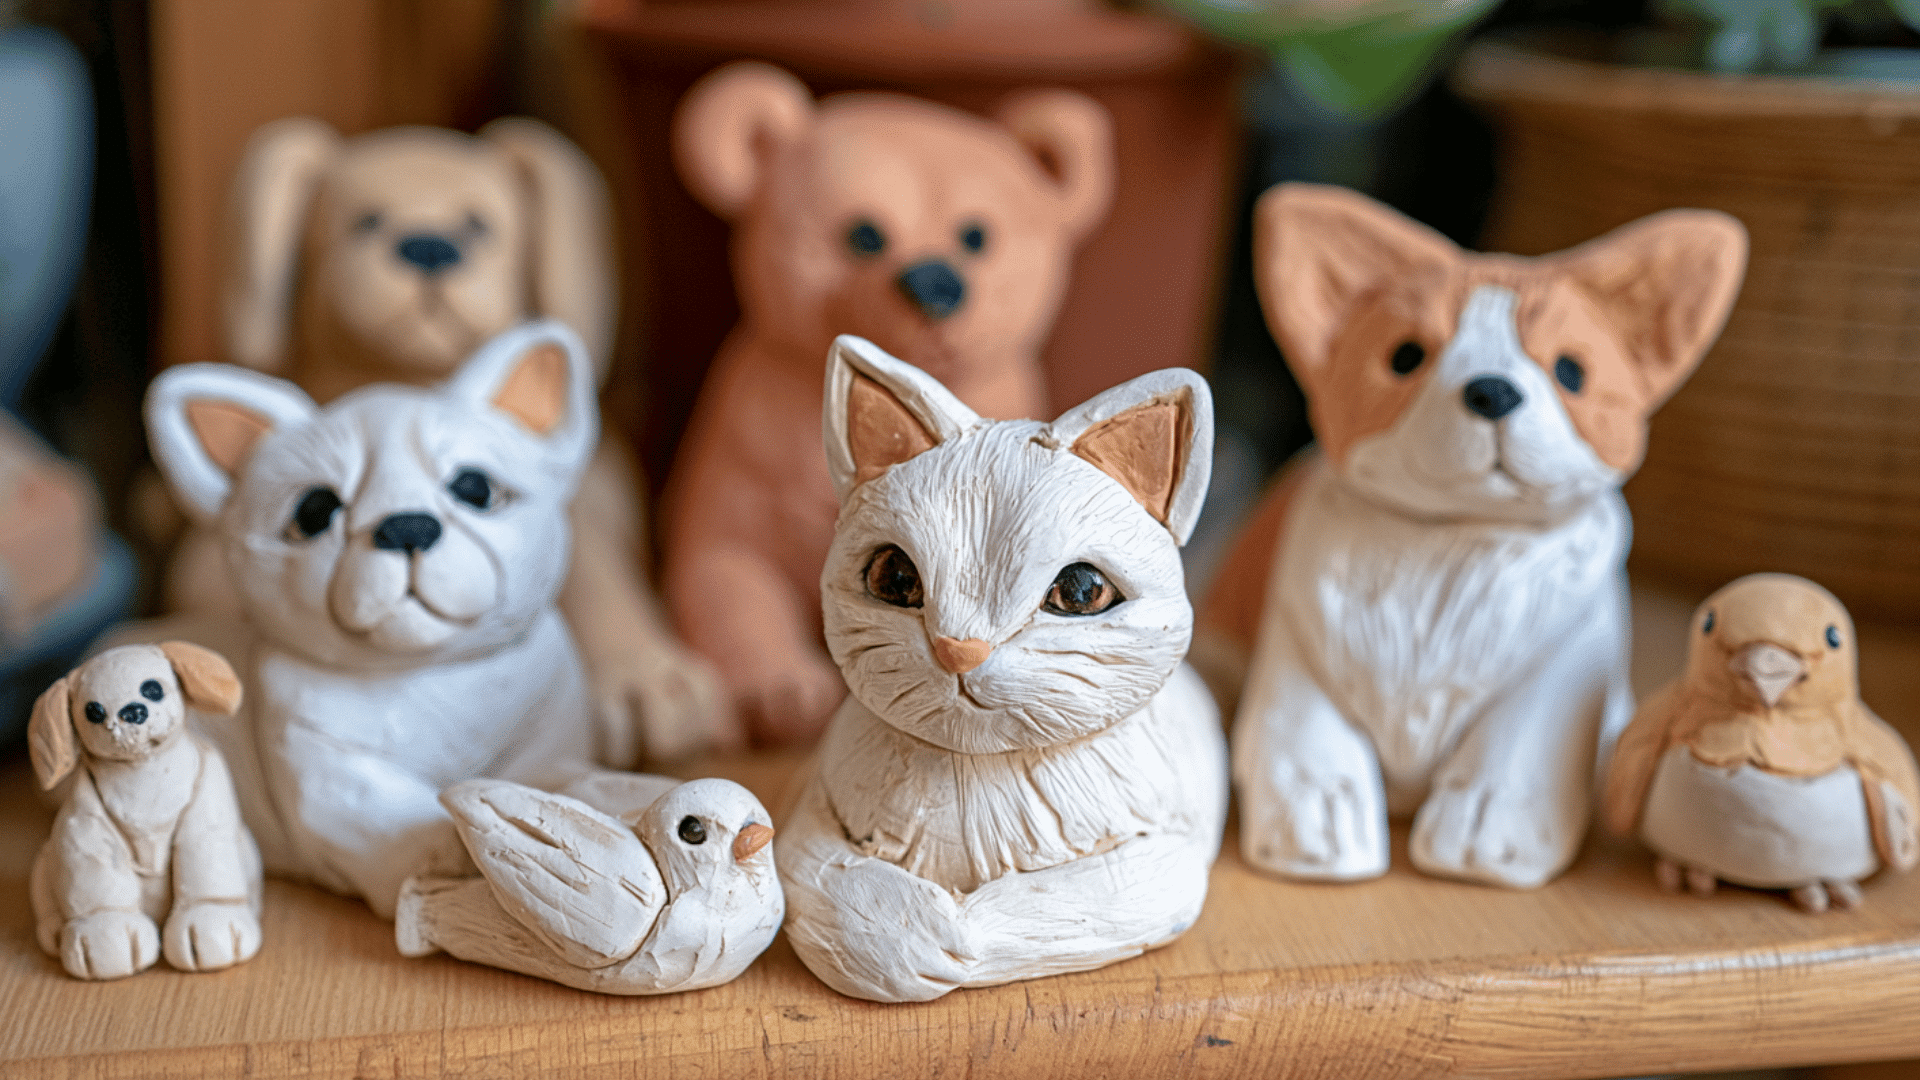
Clay animal figures are fun to make and perfect for creating cute decorations, toys, or handmade gifts.
You can personalize them with different colors, shapes, and realistic details.
Shape the clay into animal forms, add features like eyes and textures, let them dry completely, and finish with paint or sealant to make them last longer.
11. Clay Wall Decor
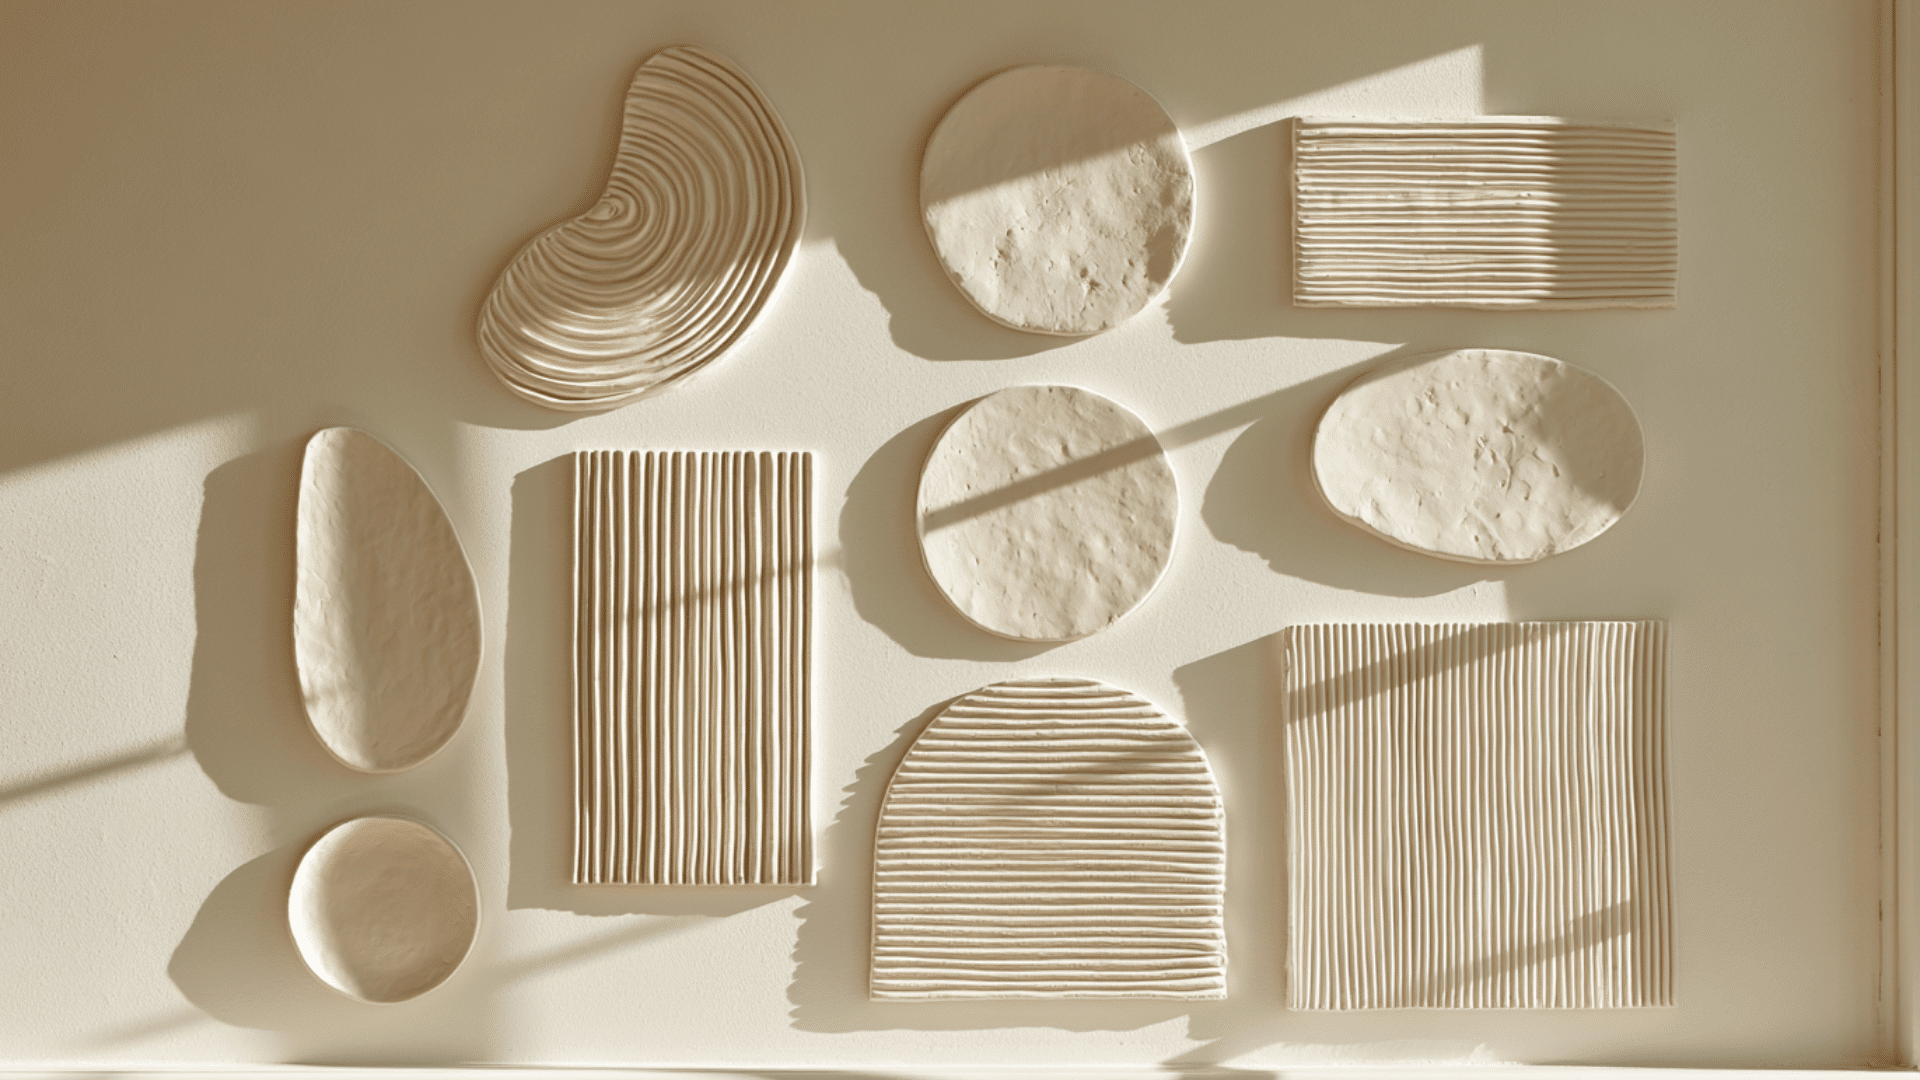
Clay wall decor is easy to make and adds a handmade touch to any room.
You can customize it with colors, patterns, textures, or creative designs.
Roll and shape the clay into decorative pieces, add imprints or details, create a hanging space, let it dry completely, and finish with paint or sealant for a polished look.
12. Clay Mini Vases
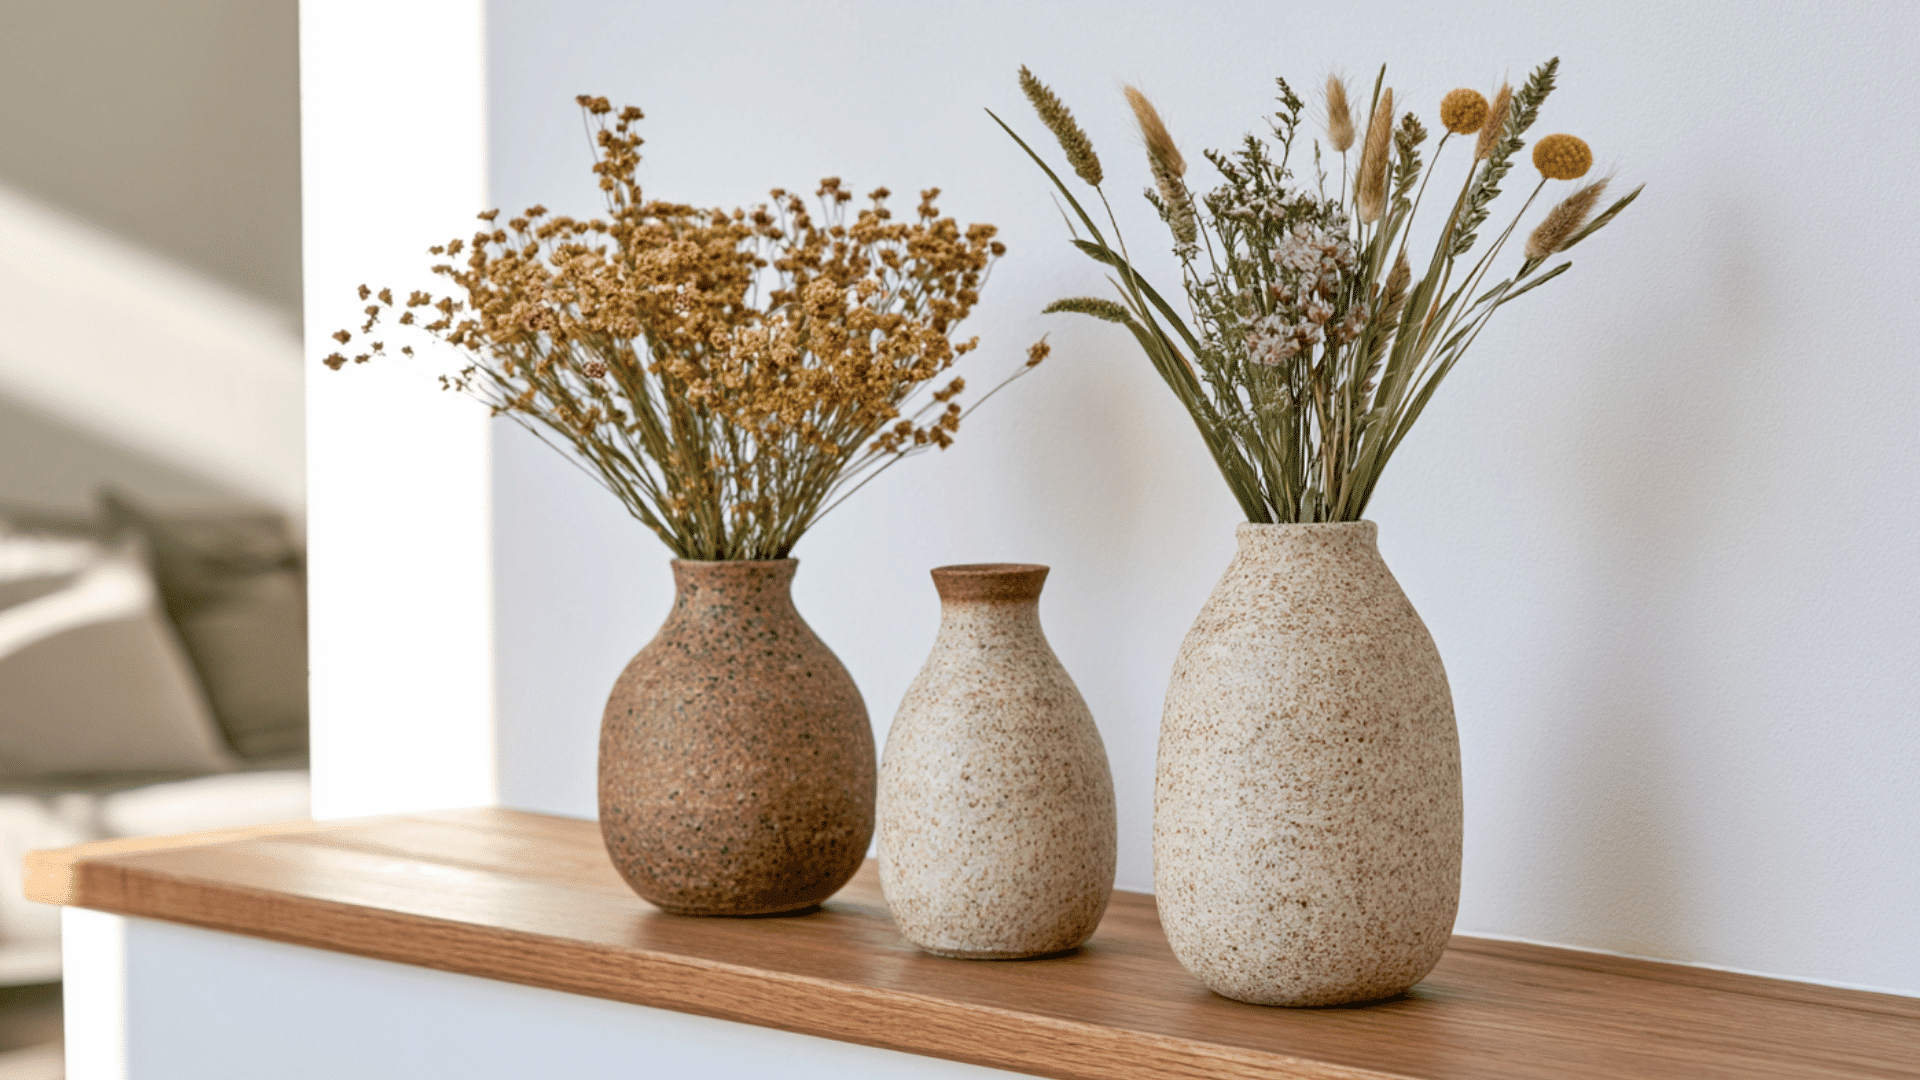
Clay mini vases are easy to make and create charming decorations for shelves, tables, or small flower arrangements.
You can customize them with colors, patterns, textures, or simple designs.
Shape the clay into a vase form, create an opening for flowers, add decorative details, let it dry completely, and finish with paint or sealant.
13. Clay Incense Holders
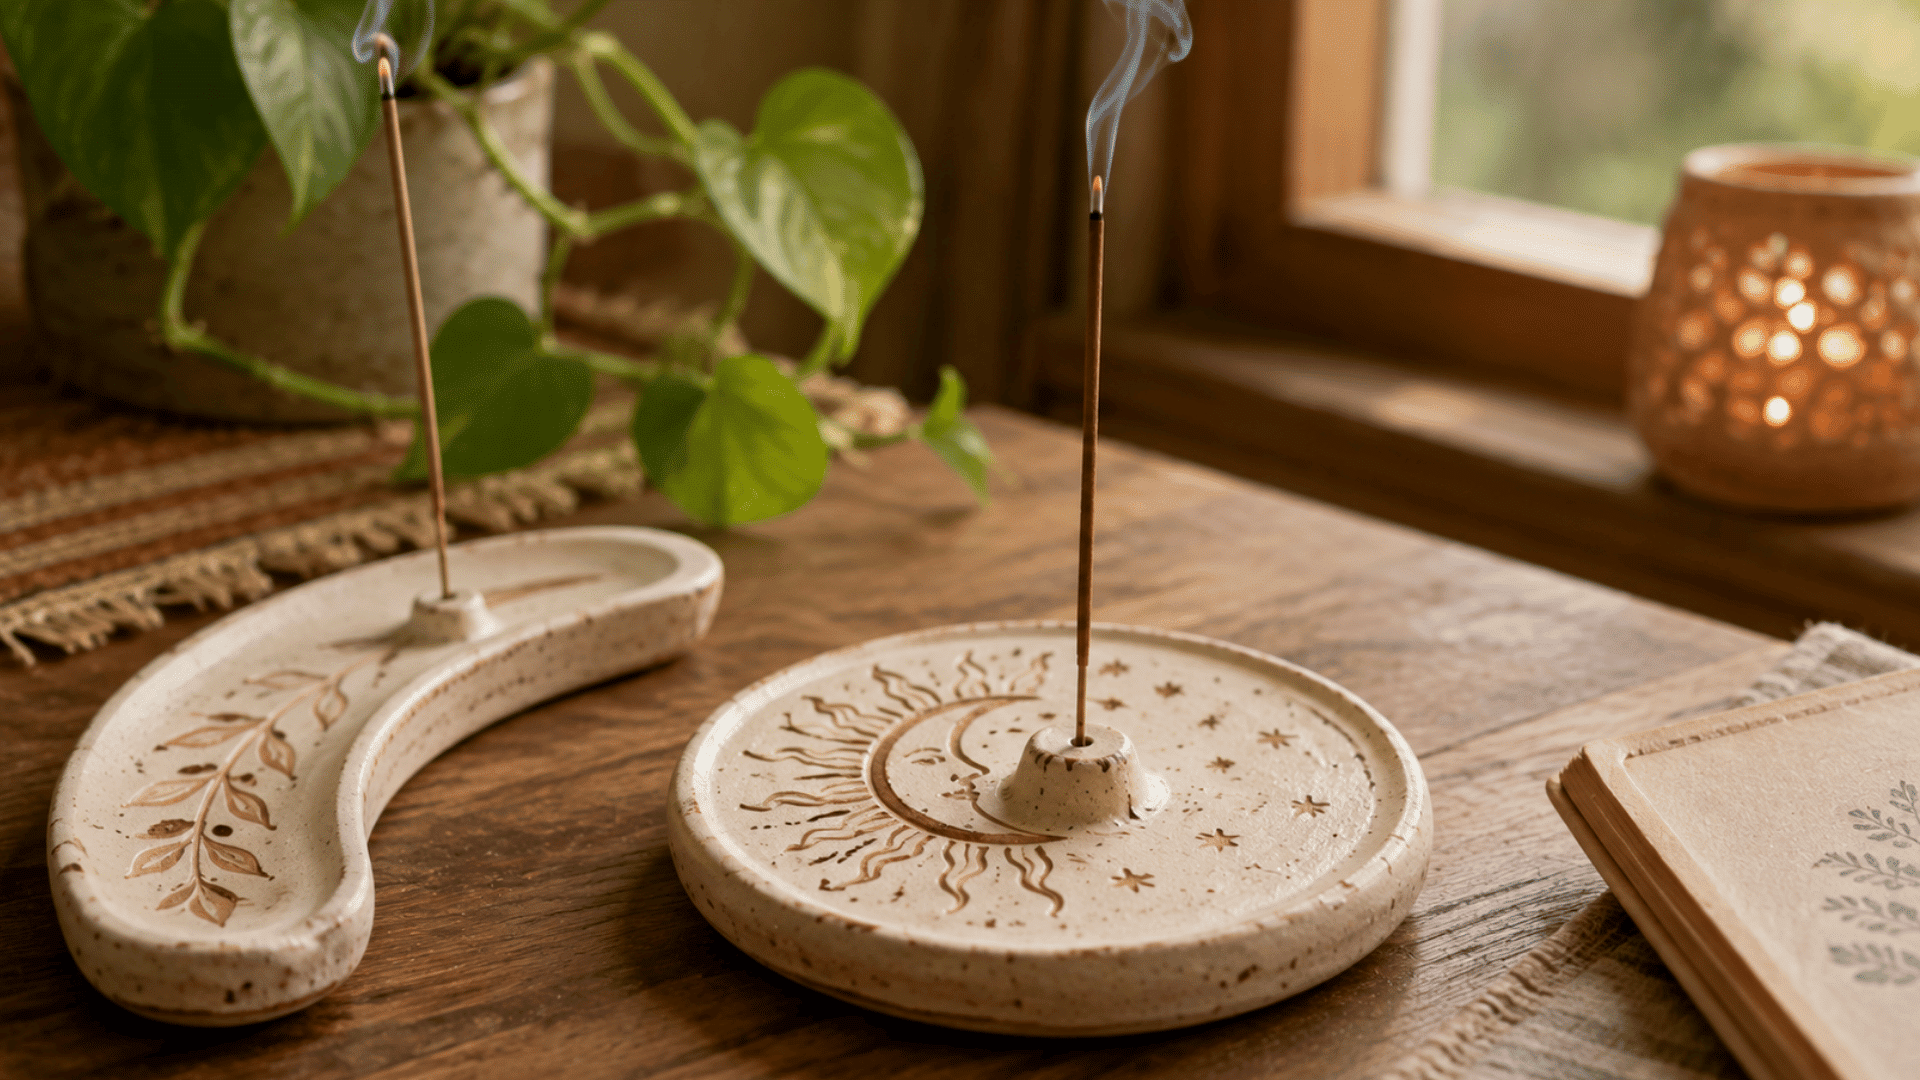
Clay incense holders are easy to make and add a handmade touch to meditation spaces or home decor.
You can customize them with colors, patterns, textures, or unique shapes.
Shape the clay into a holder, create a hole for incense sticks, add decorative details, let it dry completely, and finish with paint or sealant.
14. Clay Bookmarks
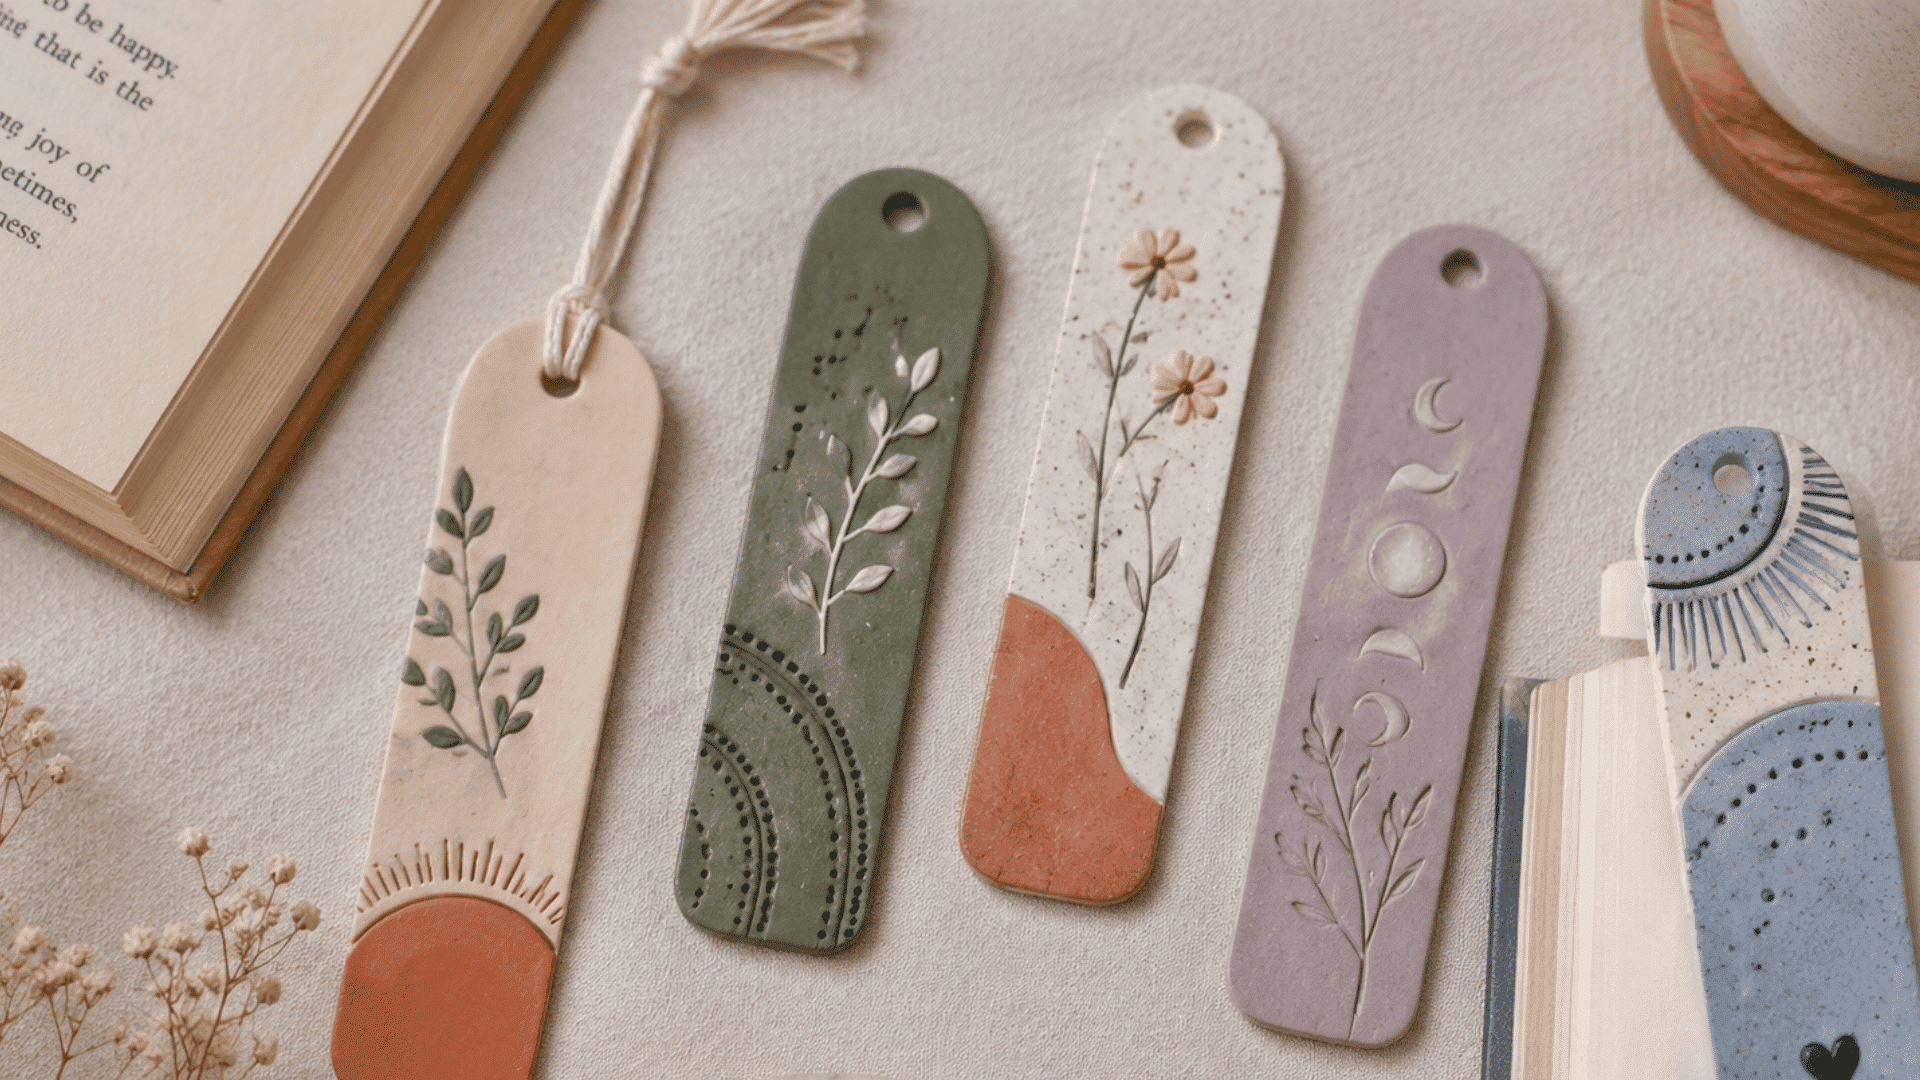
Clay bookmarks are simple to make and add a creative touch to your favorite books or gifts.
You can decorate them with colors, patterns, stamps, or textured designs.
Roll and cut the clay into bookmark shapes, add details or initials, create a small hole if needed, let it dry fully, and finish with paint or a protective coat.
15. Clay Ring Cones
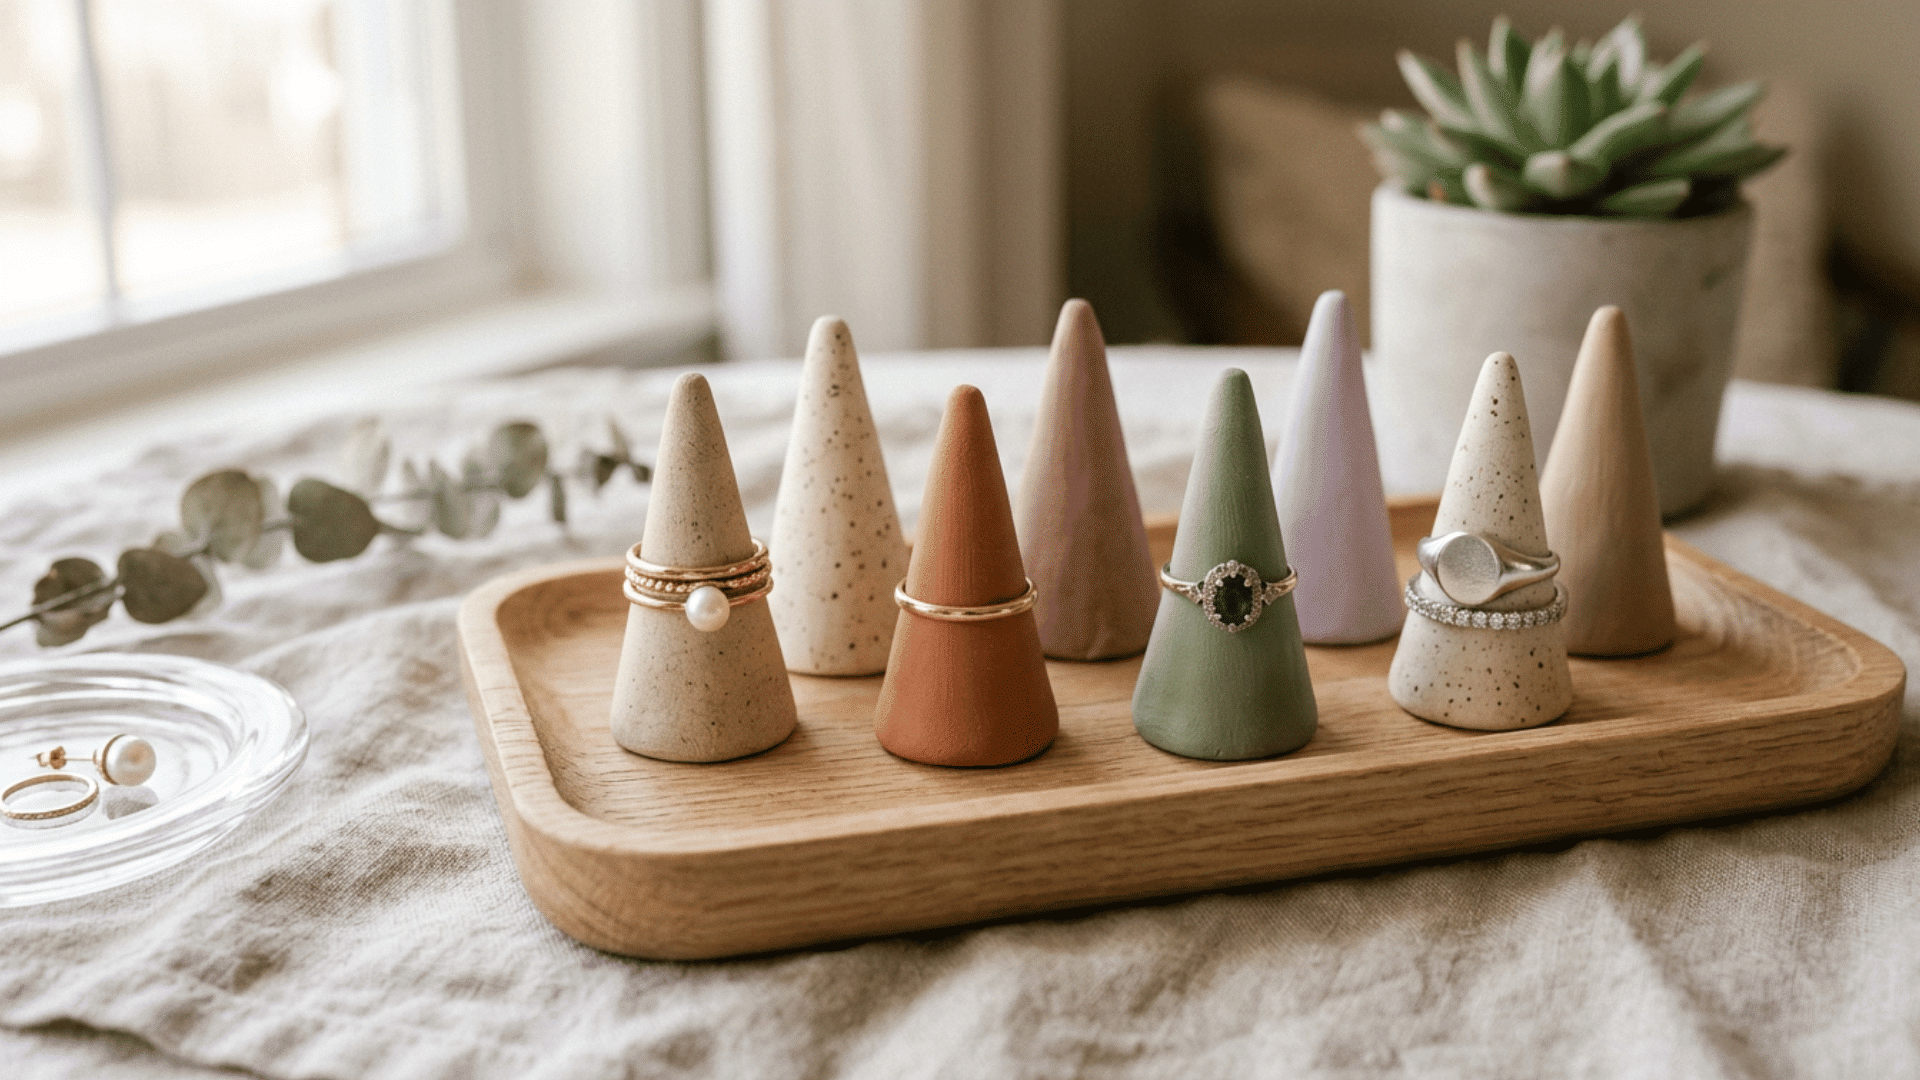
Clay ring cones are easy to make and provide a stylish way to store and display rings.
You can create them with different colors, patterns, textures, or shapes to match your space.
Shape the clay into a cone form, smooth the surface, add decorative details, let it dry completely, and finish with paint or sealant.
16. Clay Desk Accessories
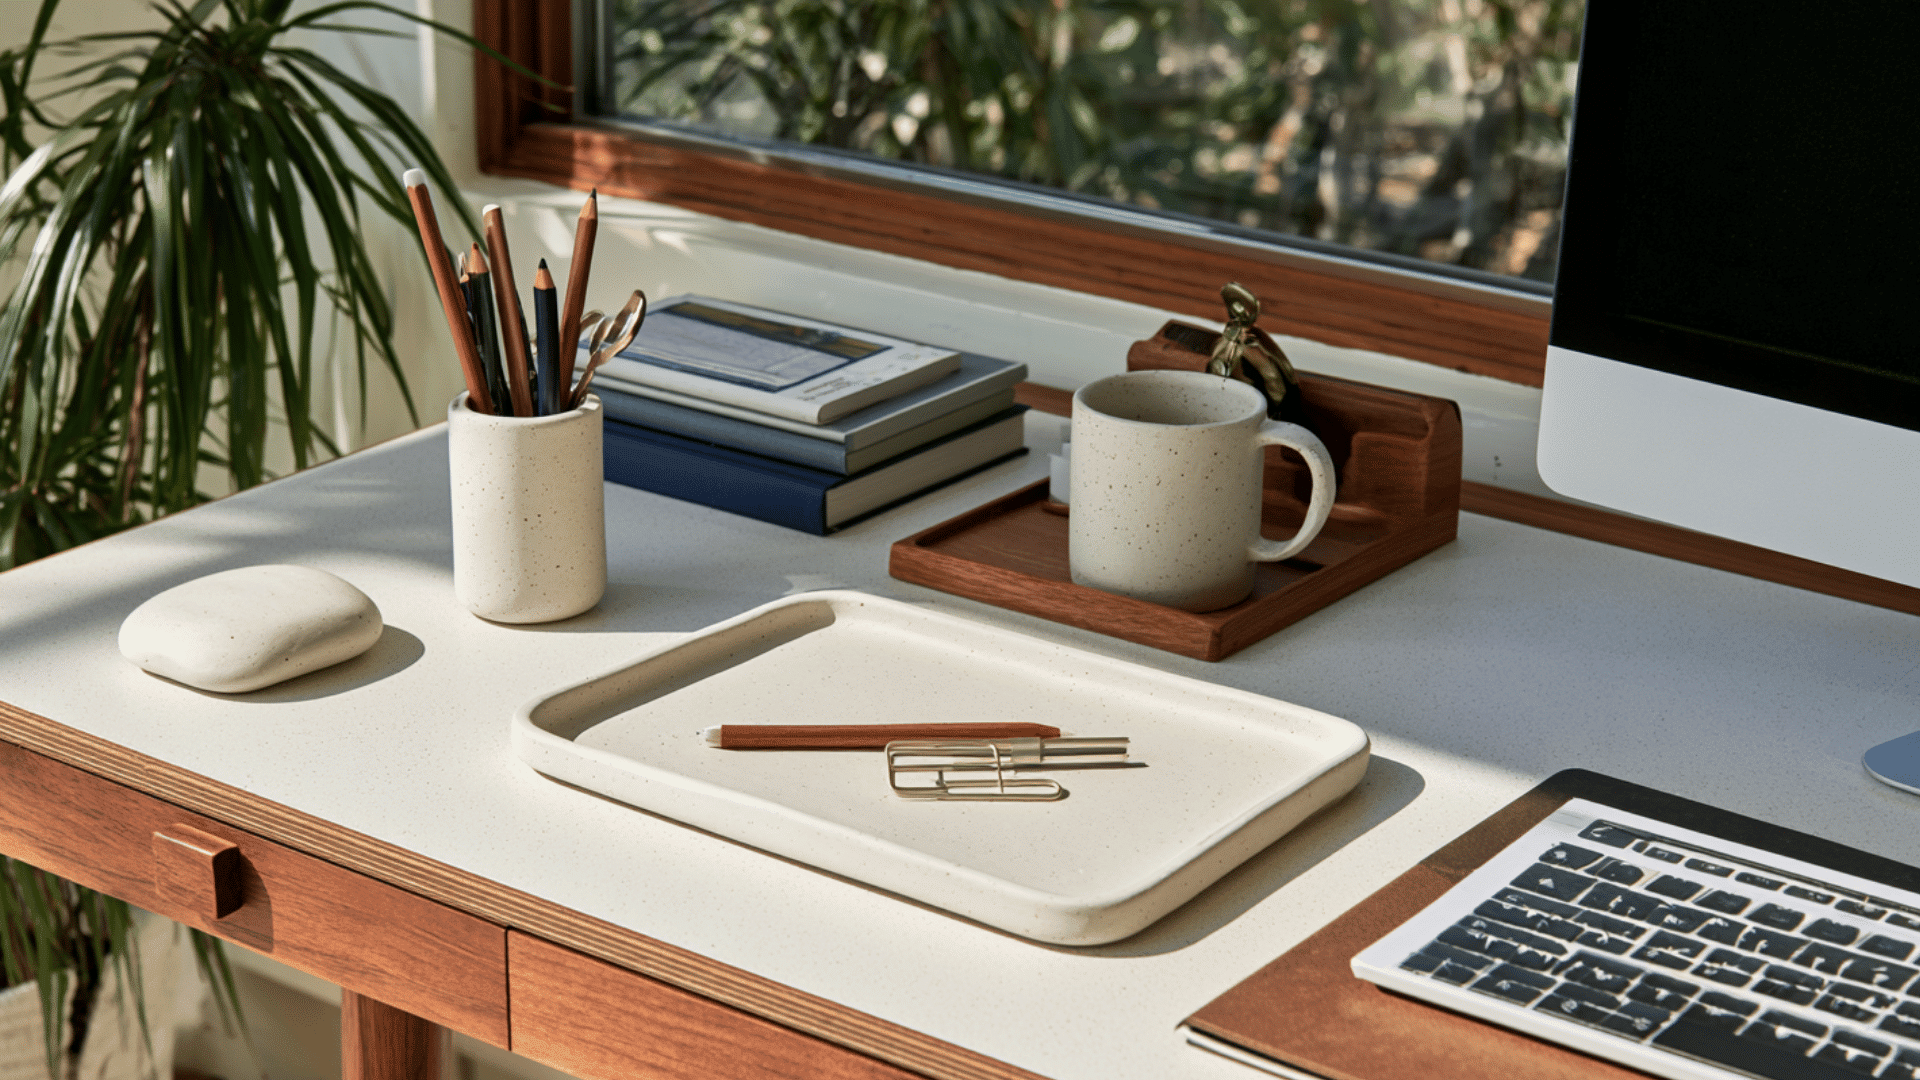
Clay desk accessories are simple to make and add a handmade touch to your workspace.
You can make items like pen holders, trays, or paper clip holders using different shapes and designs.
Shape the clay into useful forms, add textures or decorative details, let it dry completely, and finish with paint or sealant for a neat look.
17. Clay Flower Decorations
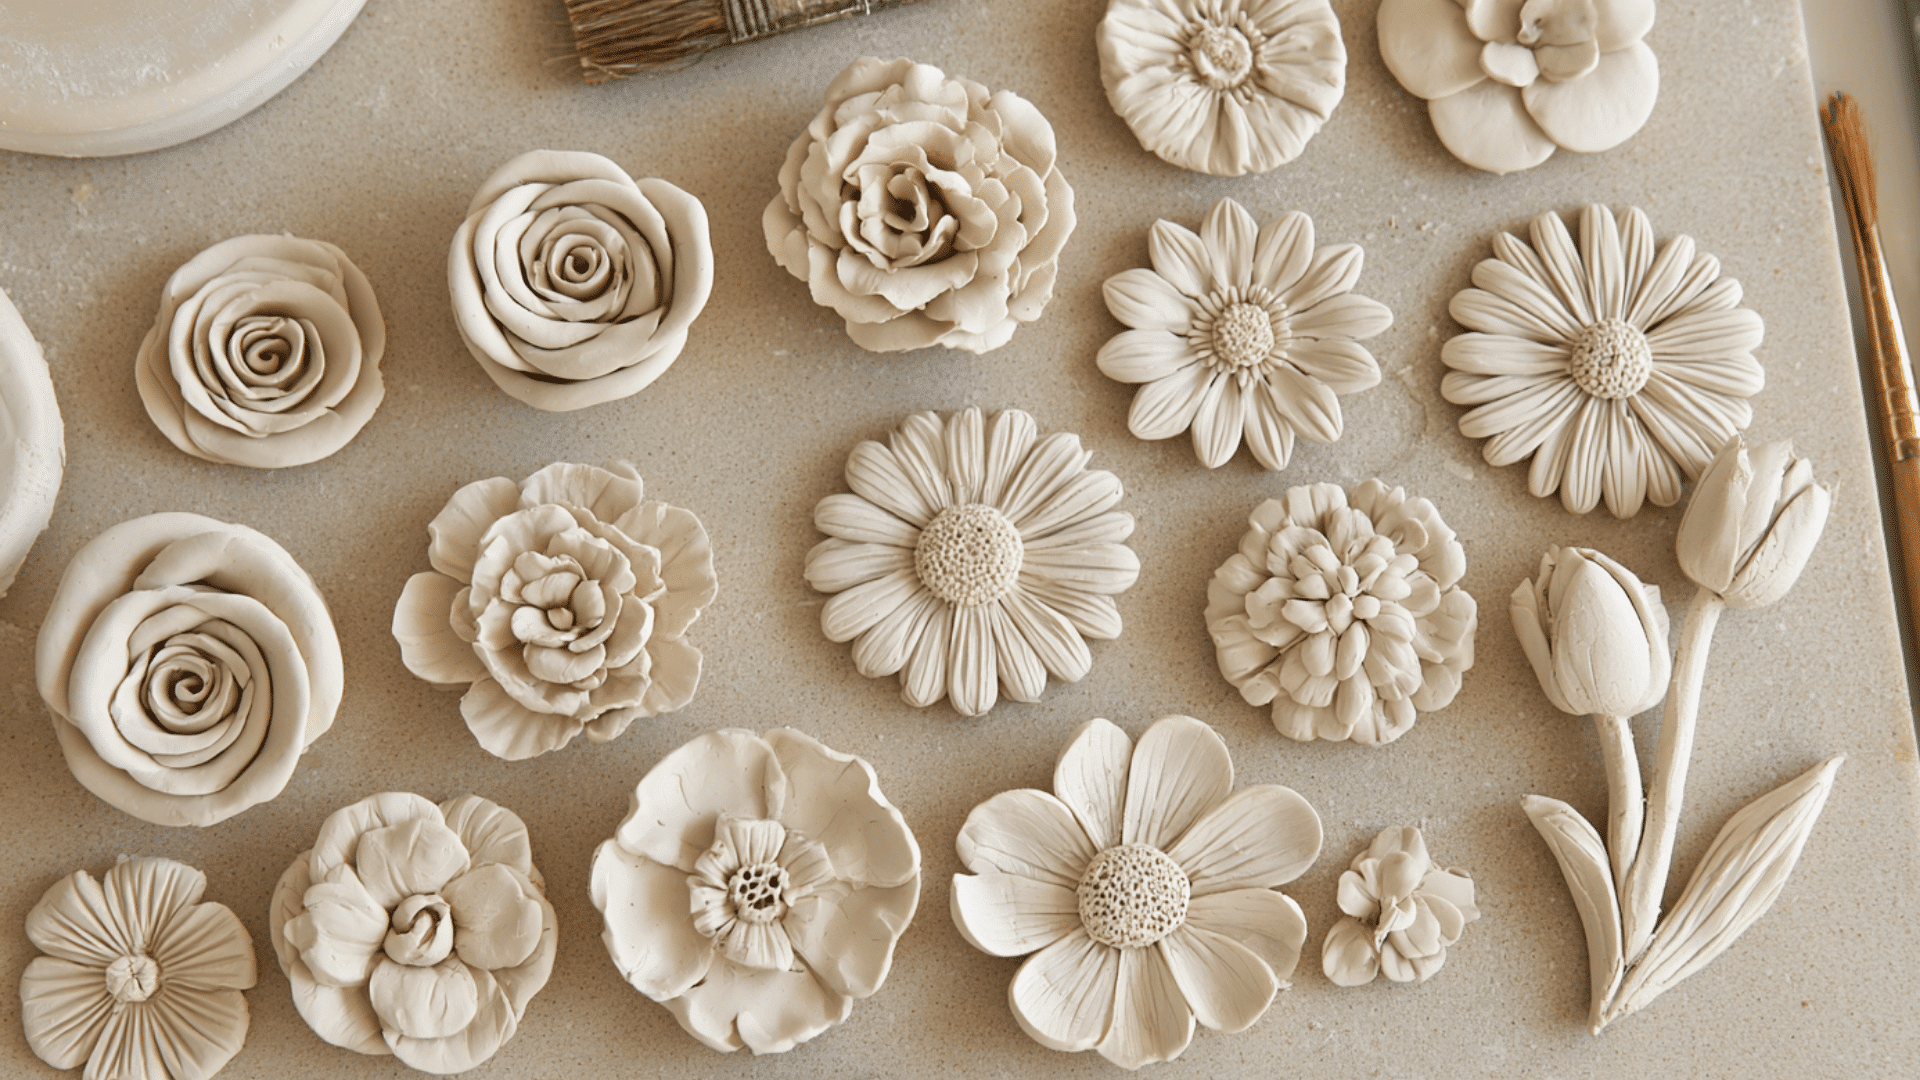
Clay flower decorations are fun to make and add a handmade touch to home decor, gifts, or craft displays.
You can create different flower styles using various colors, shapes, and textures.
Shape the clay into petals and leaves, arrange the pieces into flower designs, add fine details, let them dry completely, and finish with paint or sealant.
18. Personalized Clay Gifts
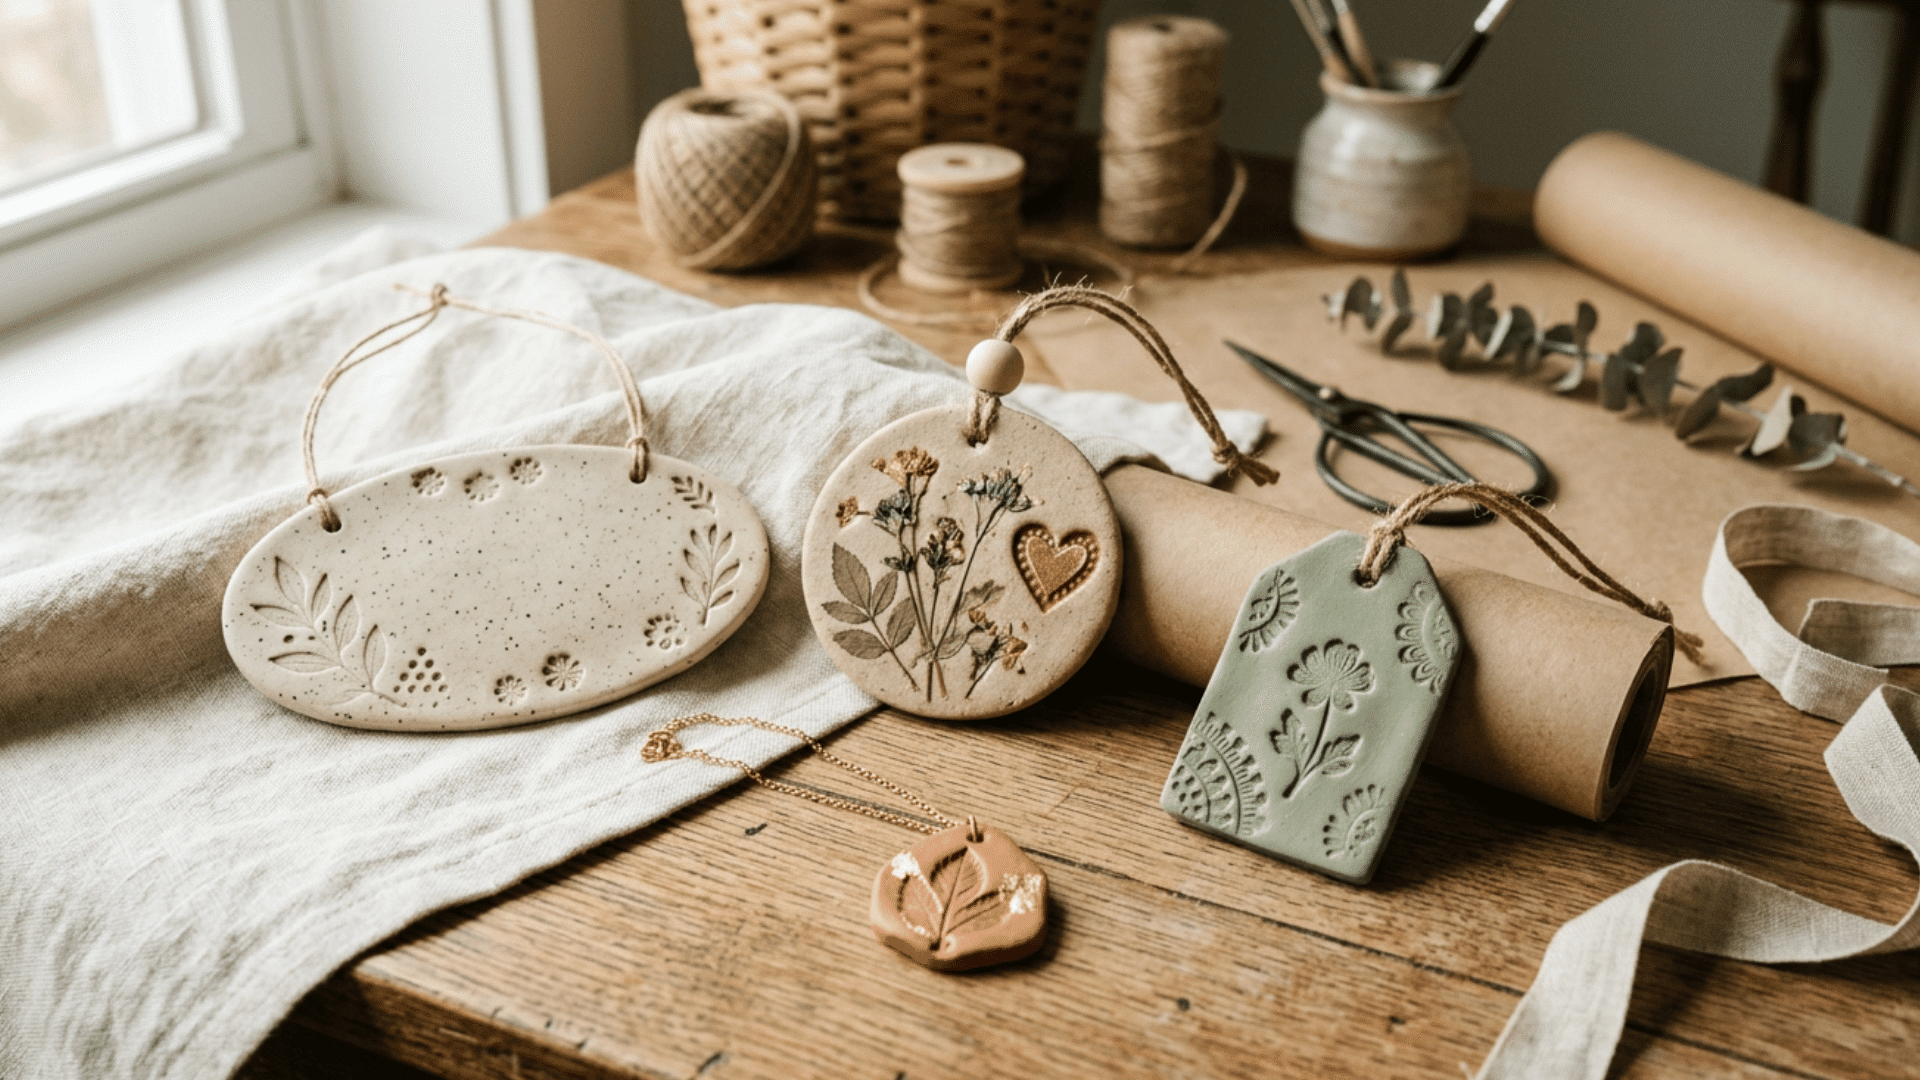
Personalized clay gifts are thoughtful handmade creations for friends, family, or special occasions.
You can customize name plates, ornaments, tags, or decorative pieces with unique colors, patterns, and details.
Shape the clay into your chosen design, add names or meaningful touches, let it dry completely, and finish with paint or sealant for a lasting keepsake.
19. Seasonal Clay Decorations
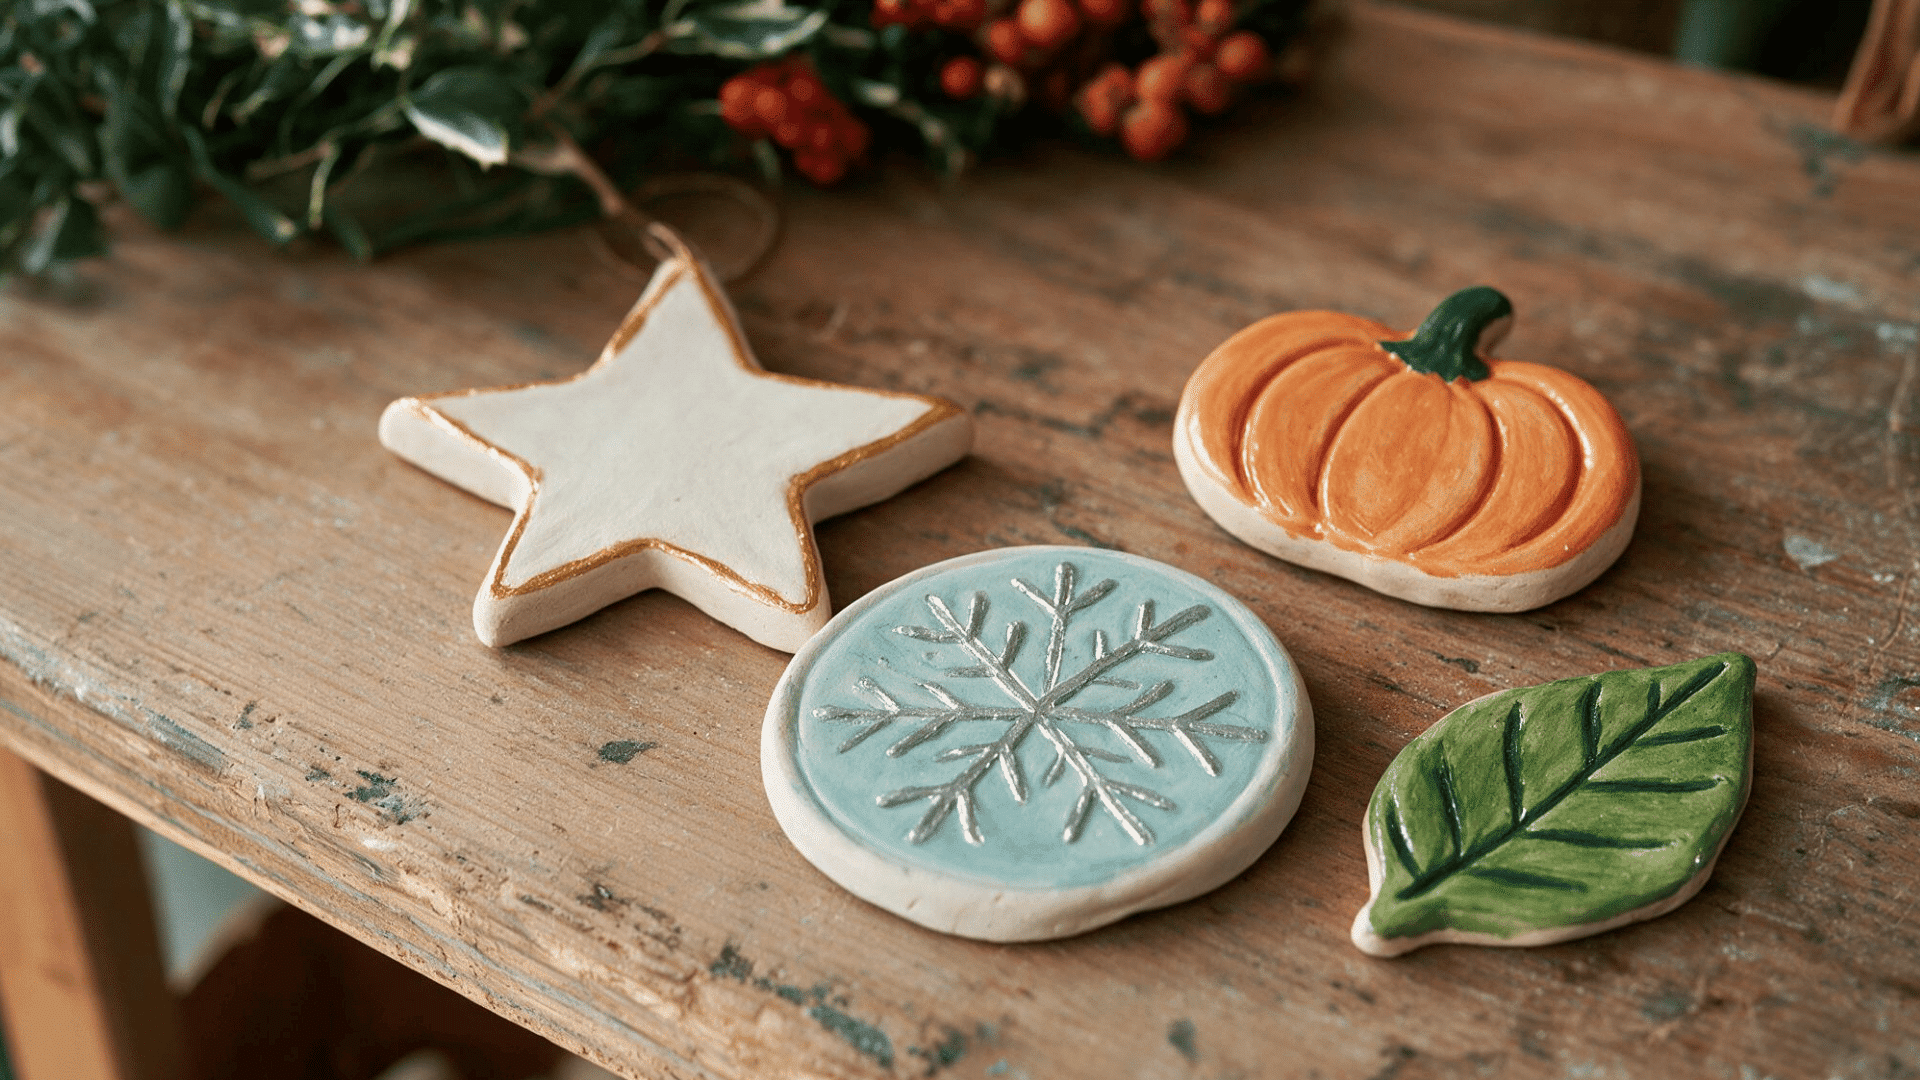
Seasonal clay decorations are fun to make and add a festive touch to your home during holidays or special occasions.
You can create ornaments, wall hangings, or small decor pieces with seasonal shapes and designs.
Shape the clay into your desired forms, add patterns or textures, let it dry completely, and finish with paint or sealant.
20. Clay Charms
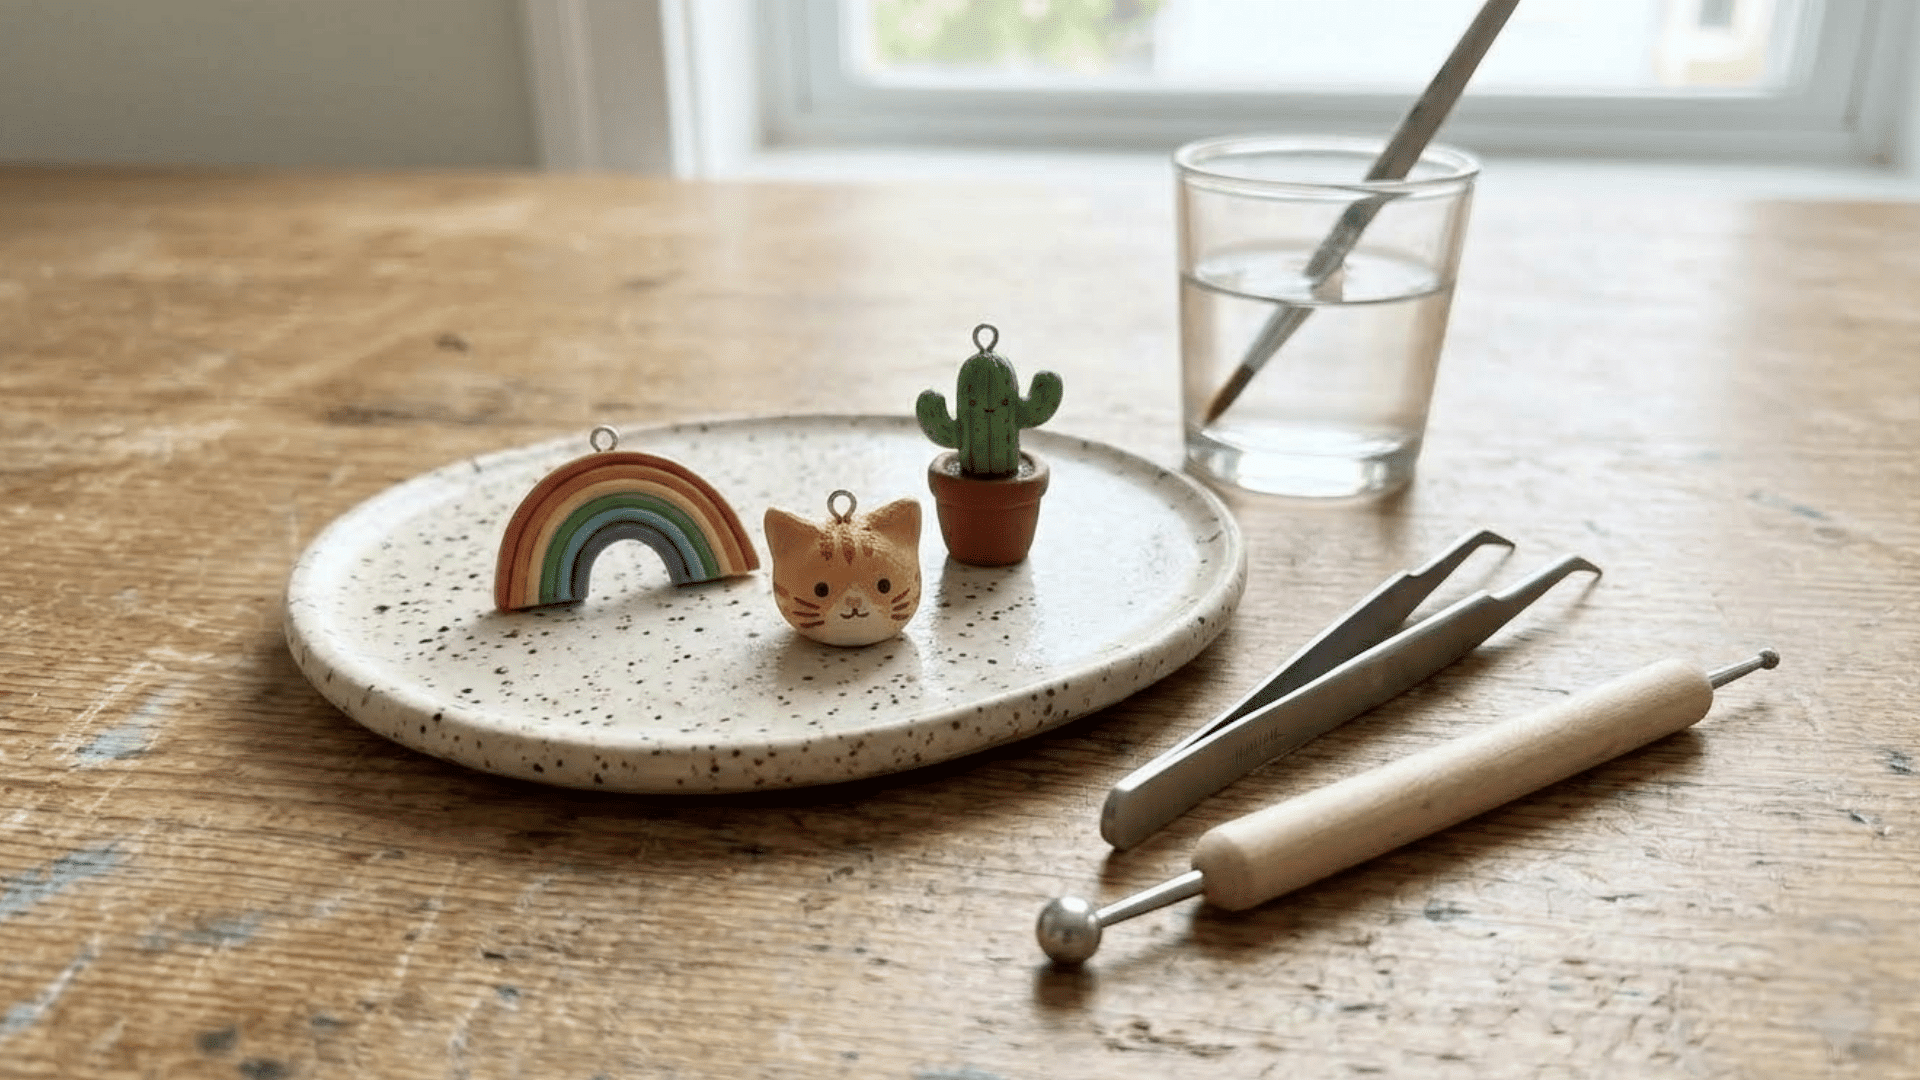
Clay charms are simple to create and perfect for decorating bracelets, keychains, bags, or craft projects.
You can design them with different shapes, colors, textures, or tiny details.
Mold the clay into your chosen charm style, add patterns or small features, make a hole for attaching, let it dry completely, and finish with paint or sealant.
21. Clay Name Plates
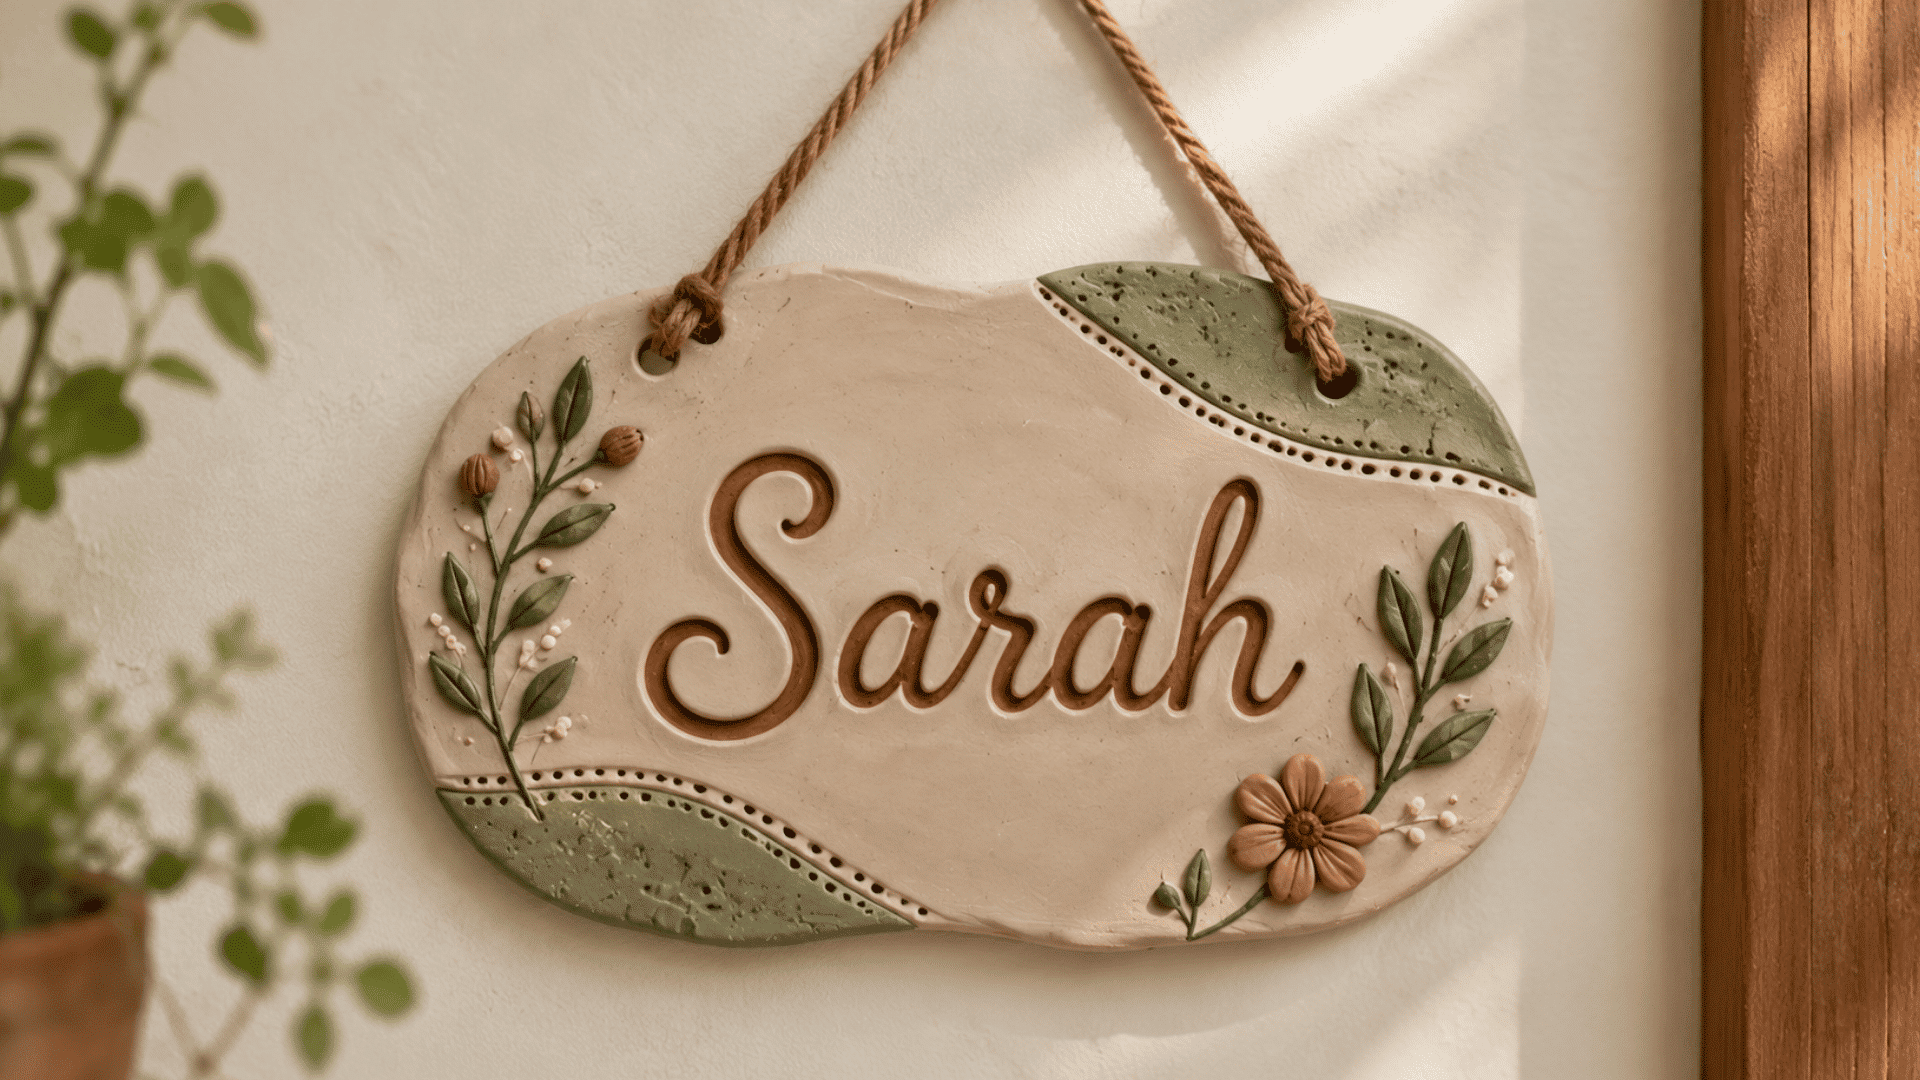
Clay name plates are easy to make and add a handmade touch to doors, rooms, or workspaces.
You can create them with different colors, textures, patterns, and lettering styles.
Roll and shape the clay into a flat base, add names or decorative details, create hanging space, let it dry completely, and finish with paint or sealant.
22. Clay Phone Stands
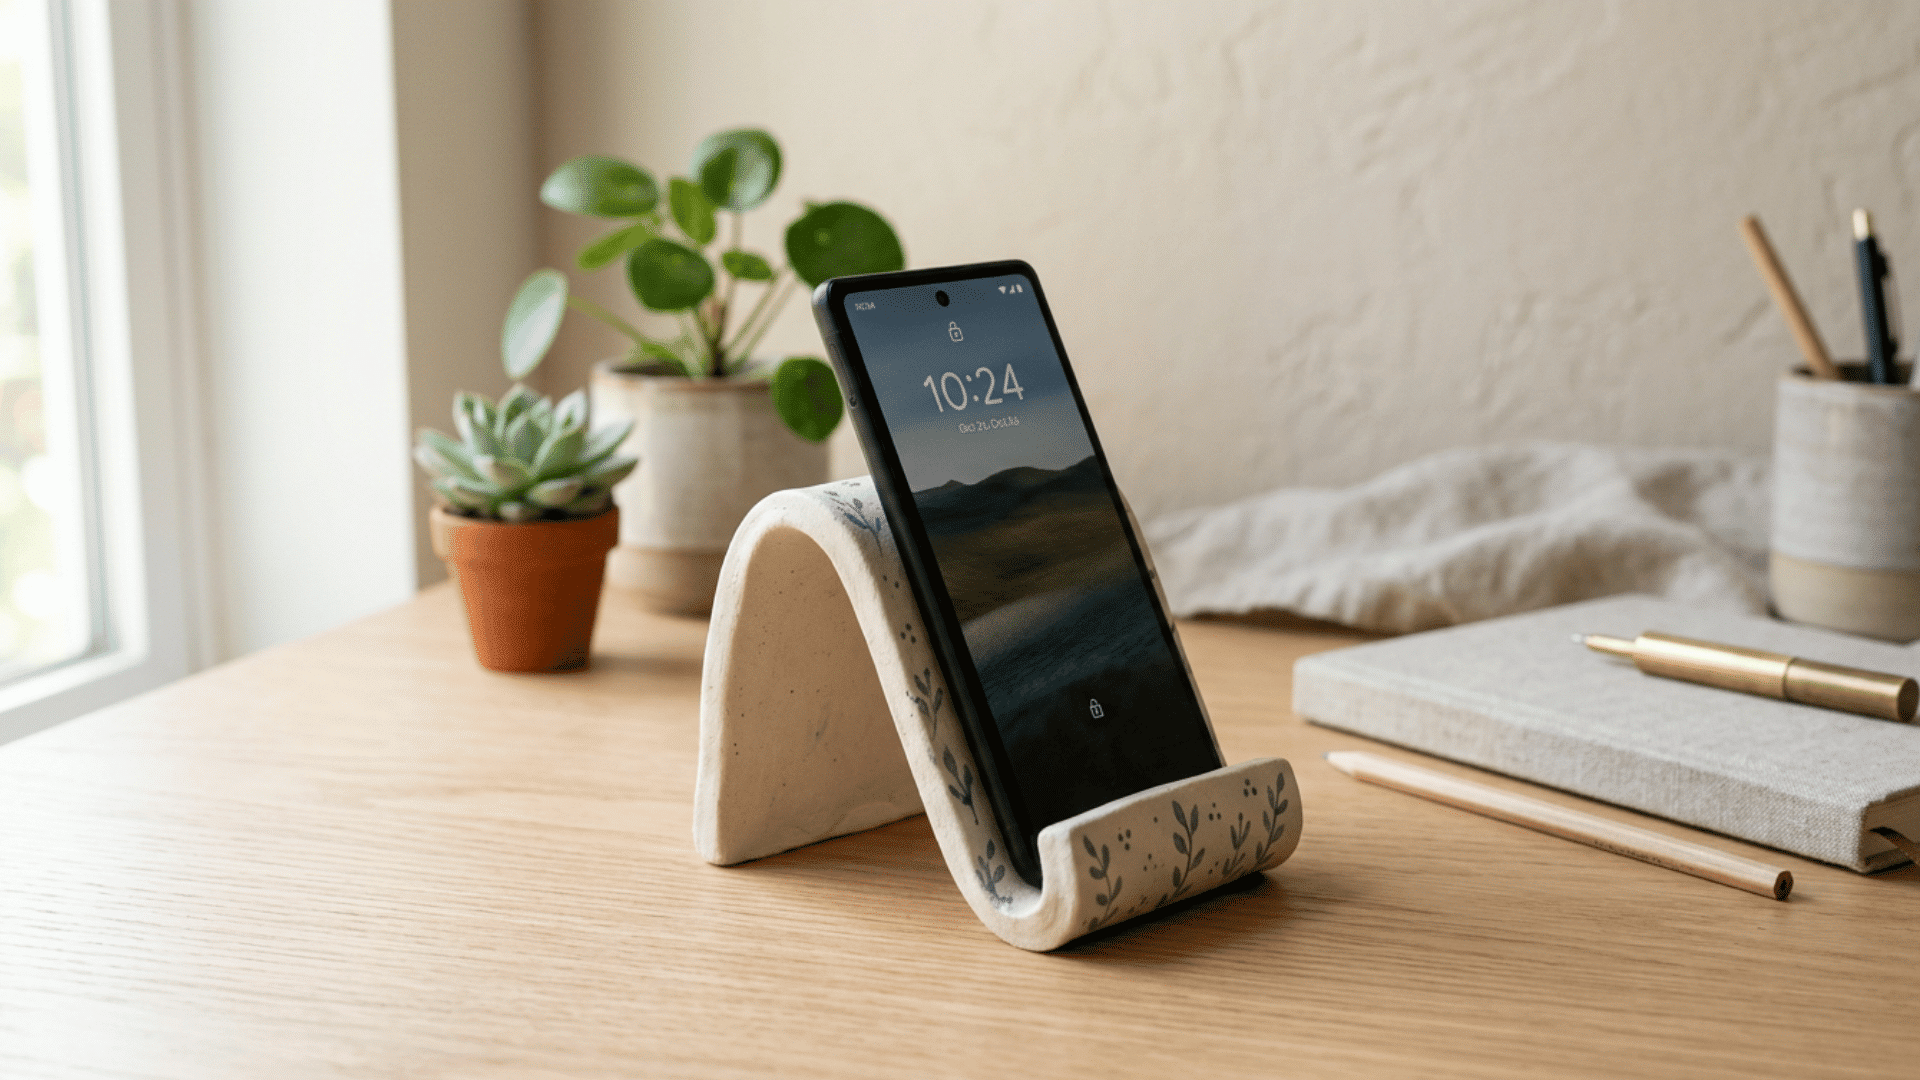
Air-dry clay phone stands are useful handmade accessories for desks, study areas, or bedside tables.
You can create them with different shapes, colors, and patterns.
Shape the clay into a sturdy stand, create a slot to hold the phone, smooth the surface, let it dry completely, and finish with paint or sealant for a functional piece.
23. Clay Bowls
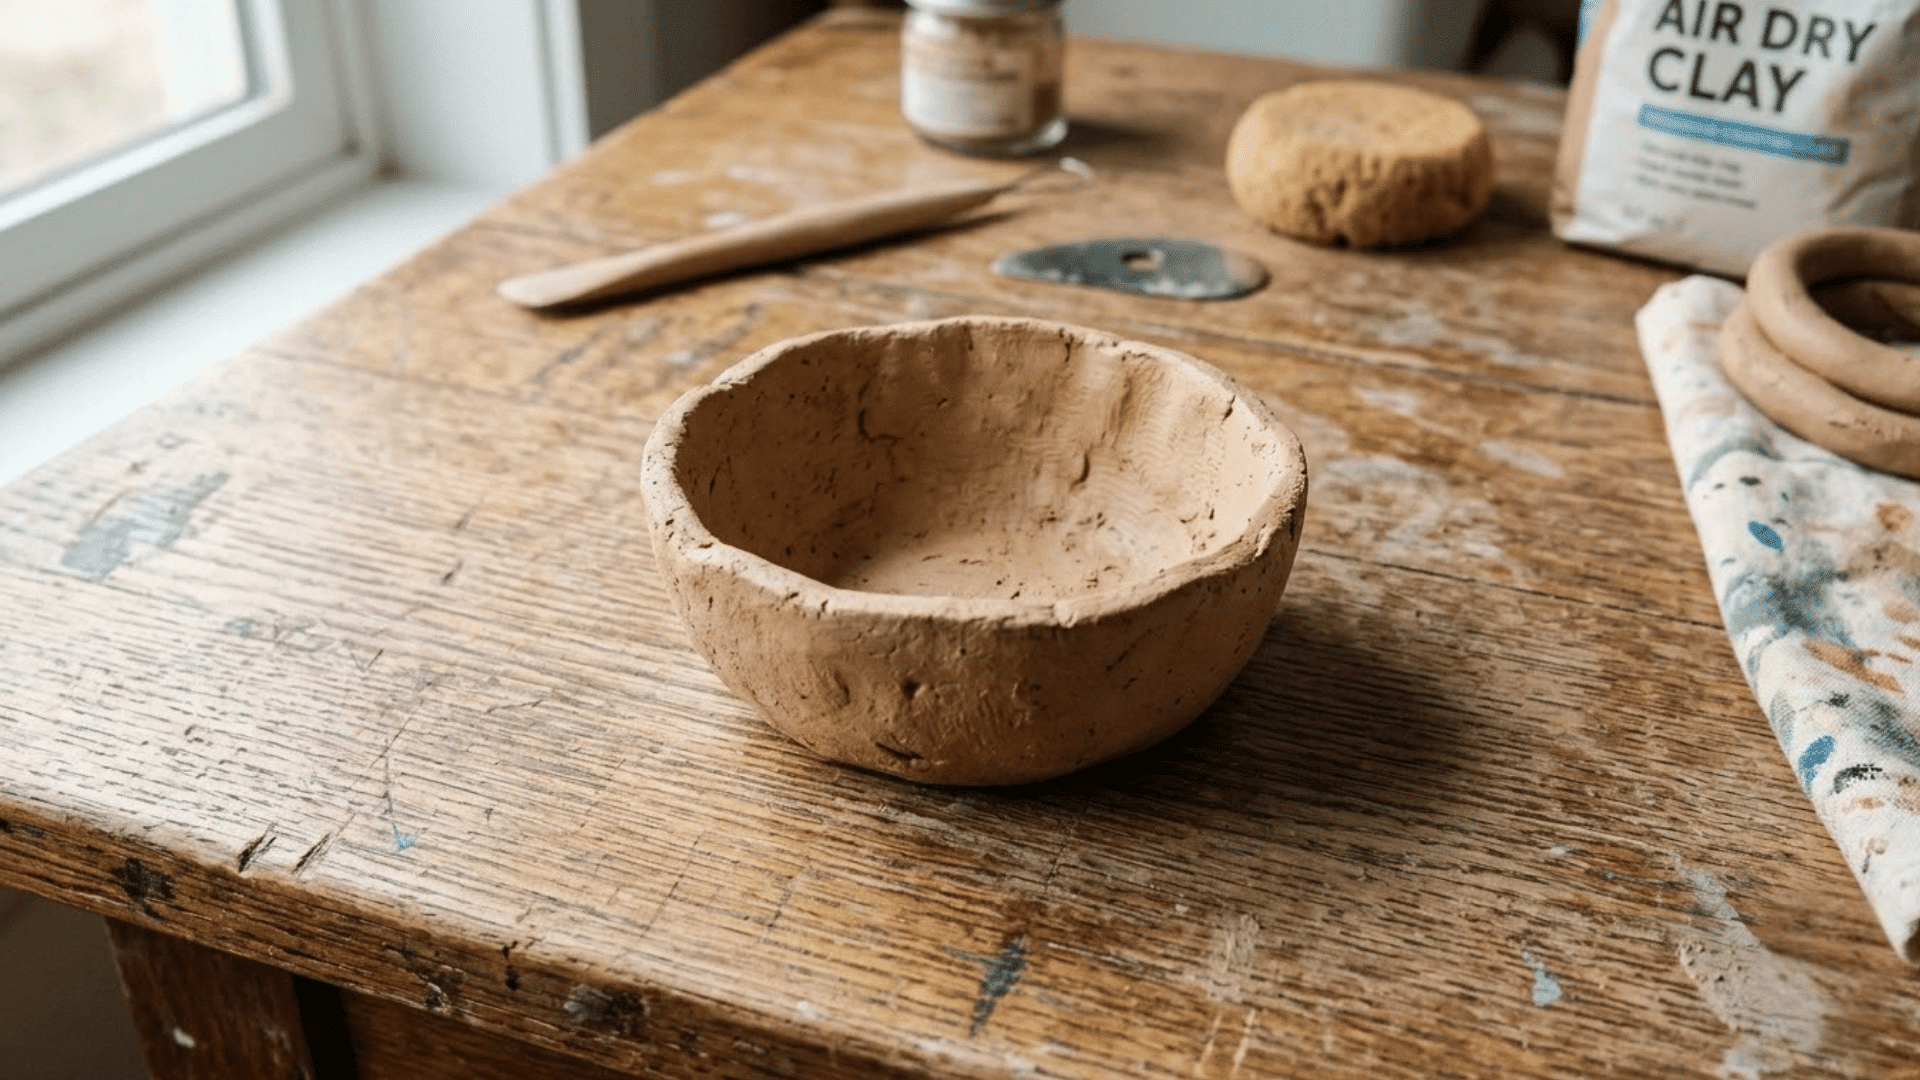
Clay bowls are easy to make and useful for holding small items, snacks, or decorative pieces around the home.
You can create different styles with colors, patterns, textures, or simple designs.
Shape the clay into a bowl form, smooth the edges, add decorative details, let it dry completely, and finish with paint or sealant for a polished look.
24. Clay Mirror Frames
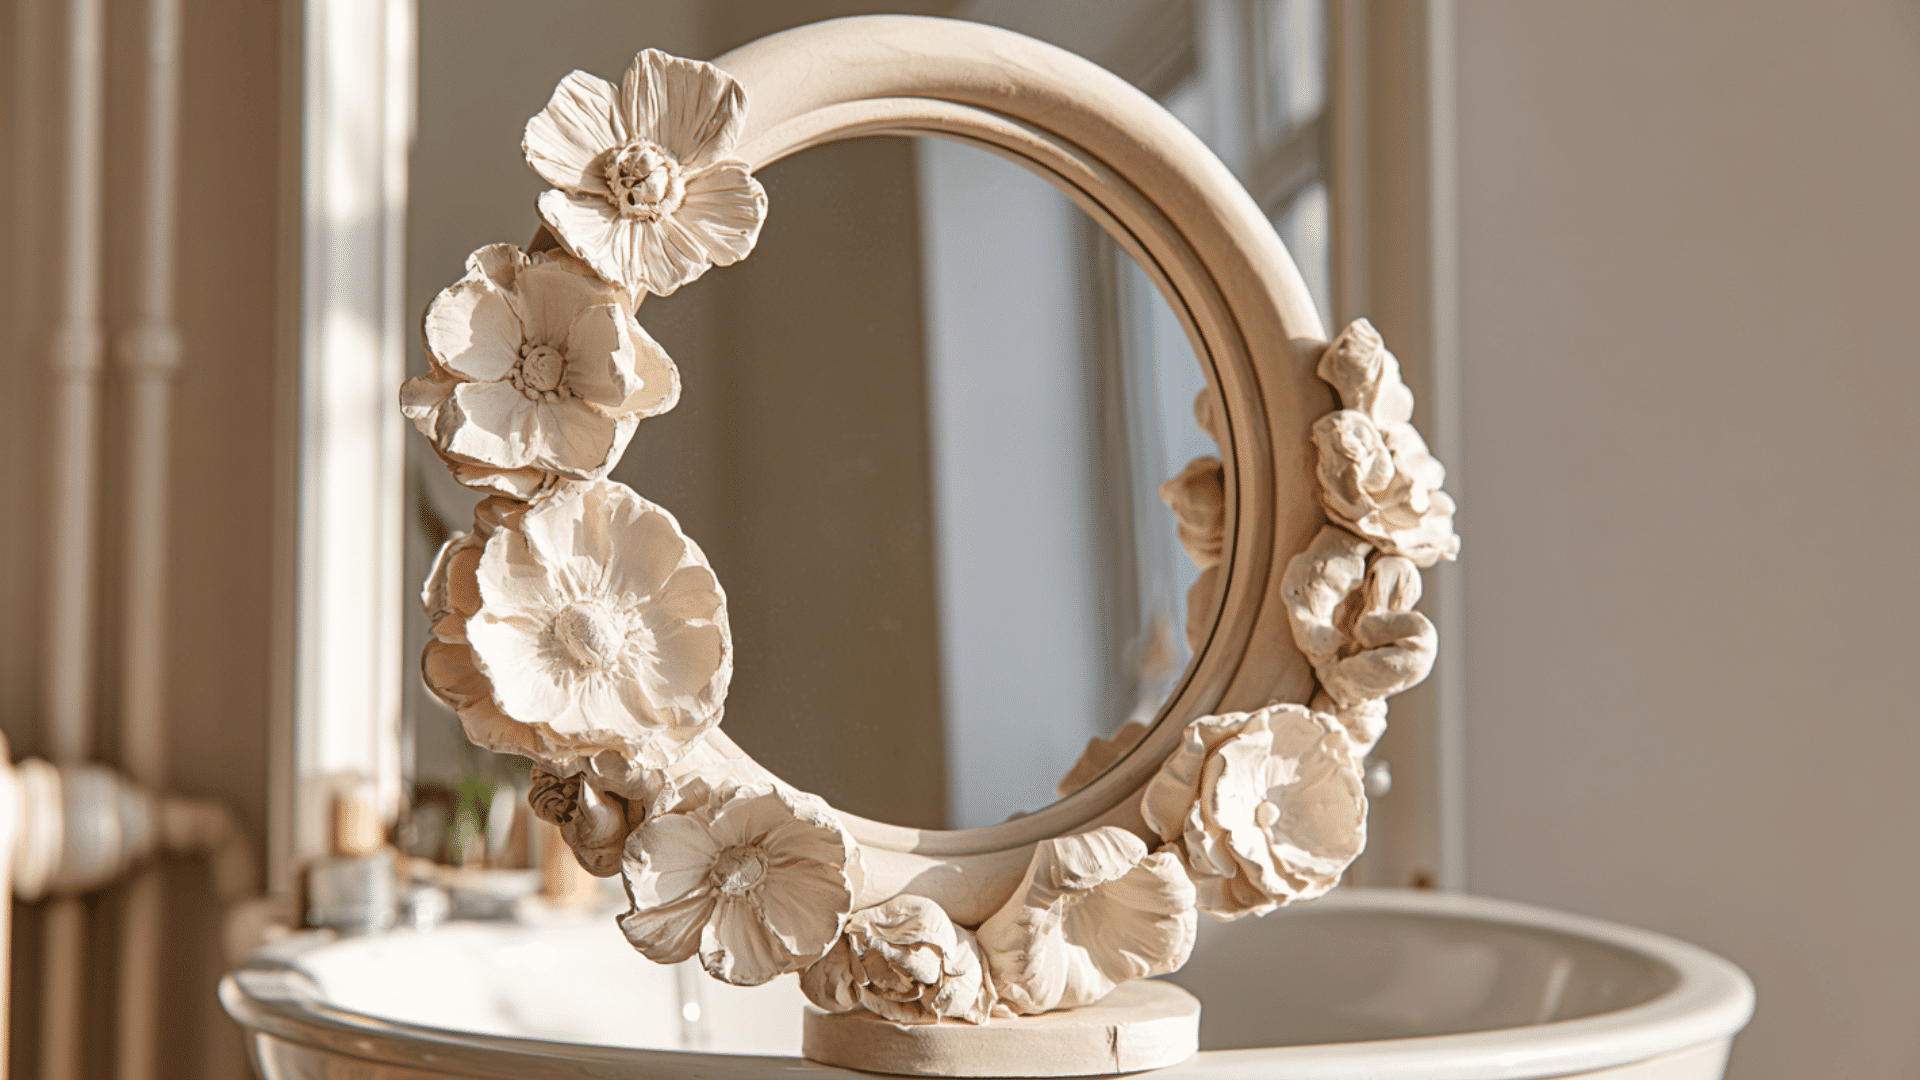
Clay mirror frames are a creative way to add a handmade touch to home decor.
You can design them with different textures, patterns, colors, or decorative elements.
Shape the clay around the mirror edge, add details or imprints, let it dry completely, and finish with paint or sealant to create a stylish frame.
25. Clay Sculptures
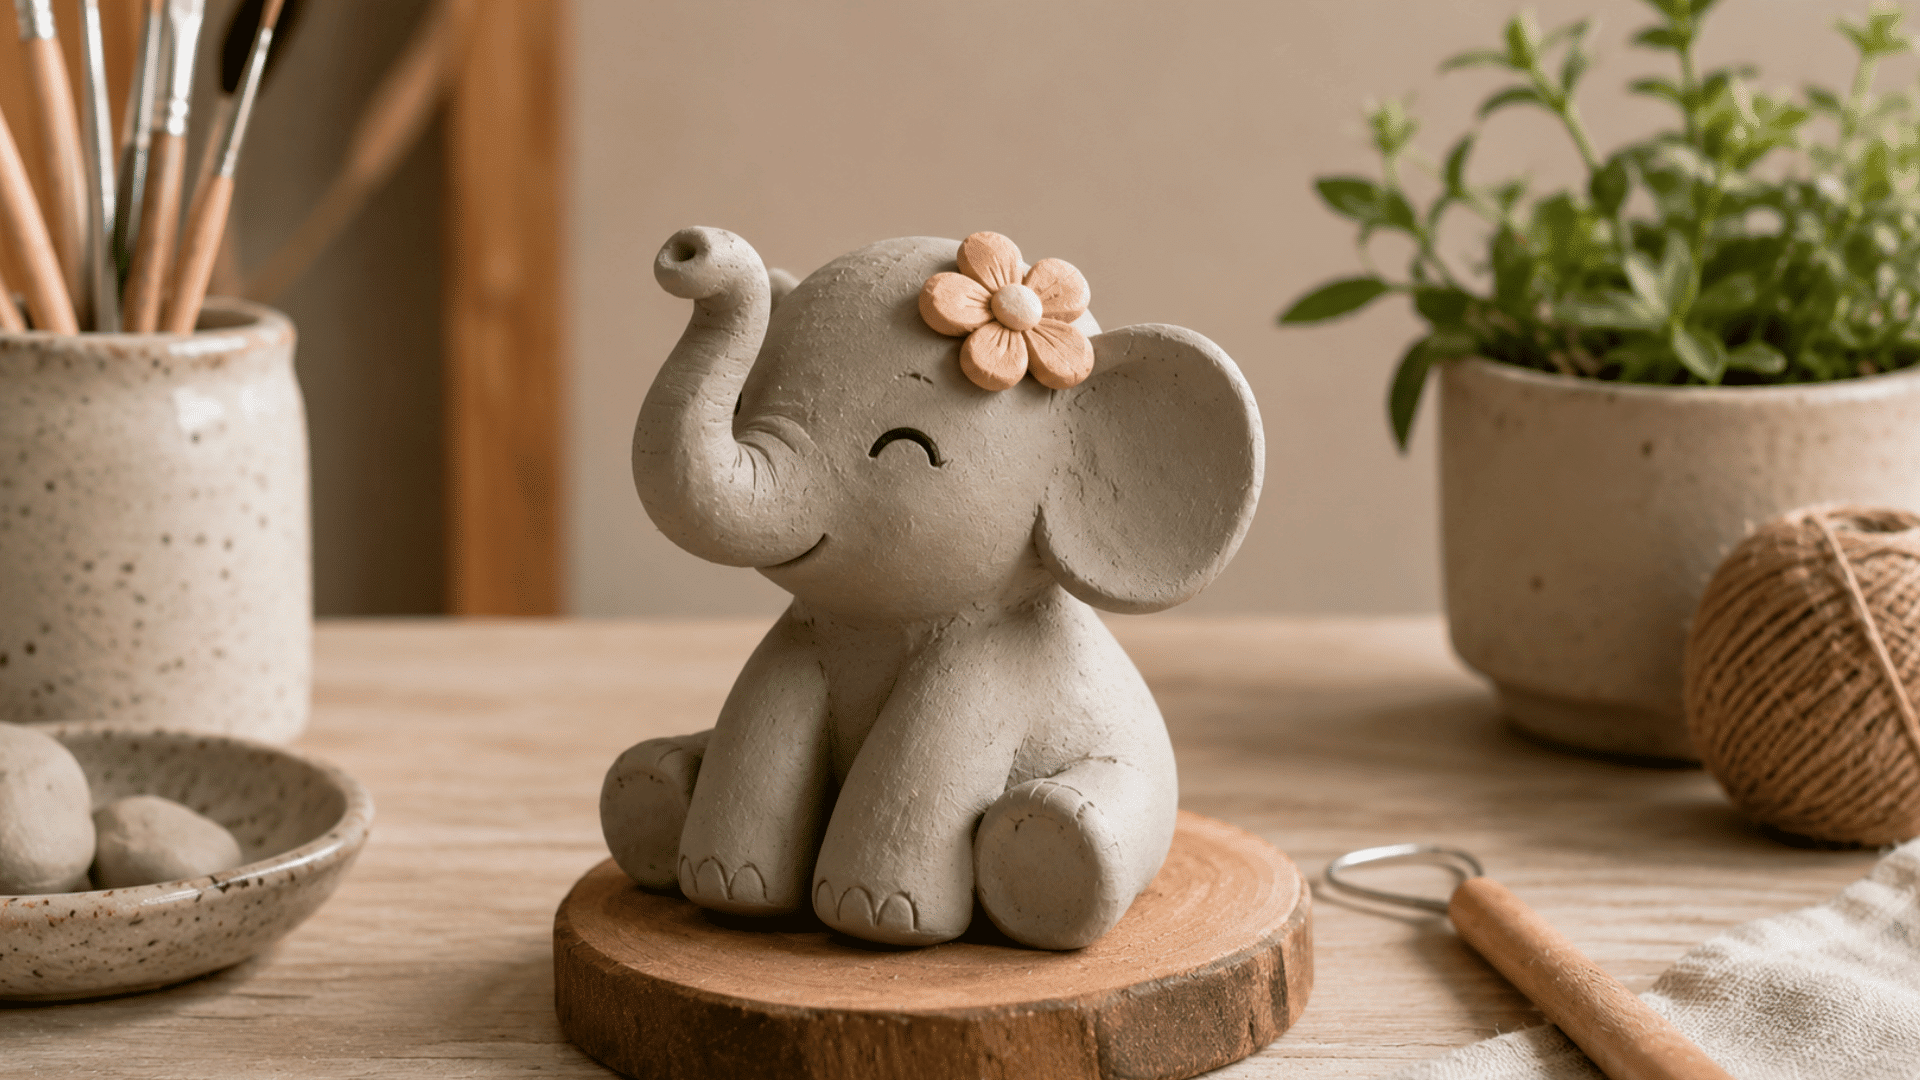
Clay sculptures are fun to make and allow you to create decorative pieces with unique shapes and artistic details.
You can experiment with different forms, textures, colors, and designs.
Shape the clay into your desired sculpture, add fine details and patterns, let it dry completely, and finish with paint or sealant to complete the artwork.
More Creative Things to Make With Air-Dry Clay
There are plenty of other ways to turn air-dry clay into practical and decorative pieces. These creative projects are great for adding handmade details to your home, workspace, or personal keepsake collection.
-
Clay Toothbrush Holders: Clay toothbrush holders provide a simple way to organize toothbrushes while adding a personalized decorative detail to the bathroom.
-
Clay Cable Organizers: Clay cable organizers help keep charging cords and small wires in place while making desks and workspaces look tidier.
-
Clay Business Card Holders: Clay business card holders keep cards neatly displayed while adding a creative handmade accent to a desk or workspace.
-
Clay Paint Palette: Clay paint palettes provide small sections for mixing colors and can be customized with different shapes, textures, and decorative details.
-
Clay Tic-Tac-Toe Set: A clay tic-tac-toe set turns a classic game into a fun handmade project with personalized boards and playing pieces.
-
Clay Chess Pieces: Clay chess pieces let you create a customized chess set using different shapes, colors, and details for each playing piece.
-
Clay Wind Chimes: Clay wind chimes combine hanging handmade pieces to create decorative movement and a charming accent for indoor or covered outdoor spaces.
-
Clay Wall Hooks: Clay wall hooks add decorative details around sturdy hooks, creating practical spots for hanging keys, jewelry, or other lightweight items.
-
Clay Pen Holders: Clay pen holders keep pens, pencils, and small stationery organized while adding a handmade decorative element to your desk.
-
Clay Pet Paw Print Keepsakes:Clay pet paw print keepsakes capture your pet’s paw impression to create a meaningful decoration or personalized memory piece.
Air-Dry Clay vs Other Popular Clay Types
Different clay types offer unique features, so choosing the right one depends on your project, skill level, and desired finish.
| Clay Type | Drying Method | Best For | Key Features |
|---|---|---|---|
| Air Dry Clay | Dries naturally when exposed to air | Beginners, crafts, home decor, small sculptures | Easy to use, no kiln needed, lightweight, and suitable for simple projects |
| Polymer Clay | Baked in an oven | Jewelry, charms, detailed miniatures | Durable finish, holds fine details, and available in many colors |
| Ceramic Clay | Requires kiln firing | Pottery, bowls, functional pieces | Strong and long-lasting but needs special tools and equipment |
| Modeling Clay | Usually stays soft and reusable | Practice, sculpting, kids’ activities | Flexible, easy to reshape, but does not create permanent pieces |
| Epoxy Clay | Hardens after mixing components | Repairs, detailed crafts, strong sculptures | Creates a firm finish and works well for durable projects |
Tips for Successful Air-Dry Clay Crafts
A few simple tips can make air-dry clay projects easier and help your finished pieces look neat.
- Prepare the Clay Properly: Knead the clay before shaping to make it soft, smooth, and easier to work with.
- Keep the Thickness Even: Avoid making pieces too thick, as uneven areas can crack as they dry.
- Smooth the Surface: Use a little water or clay tools to remove rough edges and create a clean finish.
- Dry Slowly and Completely: Allow enough drying time in a well-ventilated area to prevent cracks and damage.
- Paint and Seal After Drying: Add colors once the clay is fully hardened, then use a sealant for a lasting finish.
Why Does Air-Dry Clay Crack?
Air-dry clay cracks when it loses moisture too quickly, dries unevenly, or has sections with different thicknesses. These conditions create stress as the clay shrinks and hardens.
Thicker areas usually dry more slowly than thin sections, which can cause the surface to crack as moisture escapes. Using too much water while shaping can also weaken the clay and increase the risk of damage.
To prevent cracks, keep your project evenly thick and use only a small amount of water. Smooth rough edges before drying, and place the finished piece in a well-ventilated area where it can dry slowly and evenly.
Common Mistakes to Avoid
Air-dry clay projects are easy to make, but a few common mistakes can affect the final result. Knowing what to avoid can help your clay pieces dry properly.
| Mistake | How to Avoid or Fix It |
|---|---|
| Adding too much water | Use water sparingly and let sticky clay firm up |
| Uneven thickness | Keep the clay evenly thick while shaping |
| Painting wet clay | Let the clay dry completely before painting |
| Leaving clay uncovered | Store unused clay in an airtight container |
| Handling clay while drying | Leave the piece undisturbed until fully dry |
Conclusion
Air-dry clay gives you plenty of room to create, experiment, and turn simple ideas into something uniquely yours. If you make tiny charms, colorful jewelry, decorative bowls, or handmade gifts, each project can reflect your own style.
I’d suggest starting with one of the easier ideas and getting comfortable with shaping and decorating before trying more detailed designs.
You don’t need complicated tools or advanced skills to make something you’ll be proud to display or gift.
The best part is seeing a simple piece of clay transform into something special.
Which air-dry clay idea are you excited to try? Share your favorite in the comments below!
Frequently Asked Questions
How to Permanently Harden Air-Dry Clay?
Let air-dry clay dry completely, then apply a protective sealant or varnish to strengthen the surface and improve durability.
Does Air-Dry Clay Need Baking?
No, air-dry clay hardens naturally when exposed to air.
How Long Does Air-Dry Clay Take to Dry?
Drying time depends on the size and thickness of the project. Small pieces usually dry faster than larger sculptures.